How to Use a Ball Valve With Drain: Step-By-Step Guide for Easy Maintenance
Using a Ball Valve with a Drain: A Step-by-Step Guide for Easy Maintenance
To effectively use a ball valve with a drain for maintenance or winterization, follow these steps. First, ensure safety by locking out the system and relieving any pressure. Confirm the valve’s orientation and attach the appropriate drain fittings. Open the drain slowly to vent or collect trapped fluid, and flush if necessary. Once done, close and securely plug the drain. Inspect for leaks, lubricate or replace seals if needed, and document your actions. For further details, including safety checks and troubleshooting, continue reading.
Can You Use a Ball Valve with a Drain and How It Helps
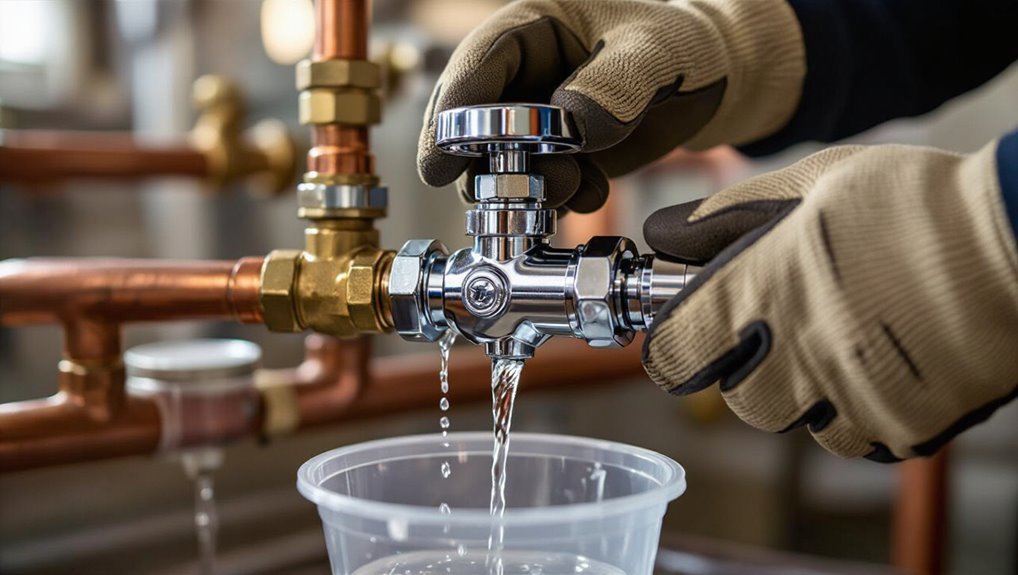
A ball valve with an integrated drain provides a simple way to isolate and evacuate trapped fluid for maintenance, winterization, or system testing.
It is particularly useful where periodic draining or pressure relief is required without disturbing the main shutoff.
Selection is appropriate for irrigation lines, HVAC service ports, and outdoor plumbing exposed to freezing or routine servicing.
Direct short answer: purpose and benefit
Install a ball valve with a drain to shut off flow and purge trapped liquid quickly and safely.
It provides an immediate isolation point and a convenient drain port for maintenance, winterizing, or sampling.
Knowing how to use a ball valve with a drain reduces downtime, minimizes spill risk, and speeds inspections.
Benefits include safer depressurization, easier flushing, and simplified system servicing.
When to choose a ball valve with drain
Consider a ball valve with a drain when systems require rapid isolation plus a controlled means to relieve trapped fluid or vent air. It is particularly useful for seasonal shutdowns, sampling, maintenance, or where downstream lines must be depressurized without disturbing the main process.
It enables safe, efficient draining, prevents freezing, permits sampling, and simplifies repairs.
- Seasonal shutdowns
- Sampling points
- Maintenance access
- Freeze protection
- Controlled depressurization
Basic Understanding What Is a Ball Valve with Drain
A ball valve with a drain combines a standard quarter-turn ball mechanism with an integrated blow-off/drain port and associated fittings that allow controlled emptying or sampling.
They are manufactured in common materials such as brass, stainless steel, and PVC, and are available in several configurations including threaded, flanged, and sweat ends.
Typical applications include plumbing and irrigation systems, HVAC lines, and boiler or pressure-system maintenance where rapid draining or purging is required.
Components and how the drain (blow-off/drain port) works
Ball valves with drains combine the core components of a standard ball valve—body, ball, stem, seats, and handle—with an additional drain (blow-off) port and valve or plug that allows trapped fluid to be safely released.
The drain port connects to the cavity behind the ball, operated separately to vent or flush residual fluid. Seals prevent leaks; a removable plug enables maintenance and inspection.
Common types and materials (brass, stainless steel, PVC)
Materials and construction determine a drain-equipped ball valve’s suitability for specific fluids, pressures, and environments. Brass offers corrosion resistance and machinability; stainless steel gives strength and chemical resistance; PVC provides lightweight, chemical-inert options for low-pressure systems.
| Material | Strength | Typical feature |
|---|---|---|
| Brass | Moderate | Good machinability |
| Stainless steel | High | Chemical resistant |
| PVC | Low | Lightweight and inert |
Typical applications (plumbing, irrigation, HVAC, boilers)
Different service environments and material choices shape where a ball valve with a drain is most effective. It serves systems needing periodic draining, isolation, and winterization, minimizing contamination and simplifying maintenance.
Typical sectors include residential and commercial plumbing, landscape irrigation, HVAC hydronic loops, boiler feed and condensate lines, and industrial process piping.
- Plumbing systems
- Irrigation networks
- HVAC hydronic loops
- Boiler feed/condensate
- Industrial process lines
Safety Preparations Before You Work
Before beginning work on a ball valve with drain, the technician verifies required tools and materials are on hand and in good condition.
Appropriate personal protective equipment is selected and a concise safety checklist is reviewed.
The system is checked for pressure, temperature, and fluid type to guarantee safe isolation and handling.
Required tools and materials
A concise kit of hand tools, protective gear, and sealing supplies guarantees the valve installation and drain procedure proceeds safely and efficiently.
The technician should gather appropriate wrenches, thread sealant, and replacement parts before starting. Organized materials reduce delays and contamination risks.
- Adjustable wrench set
- Pipe cutter or tubing saw
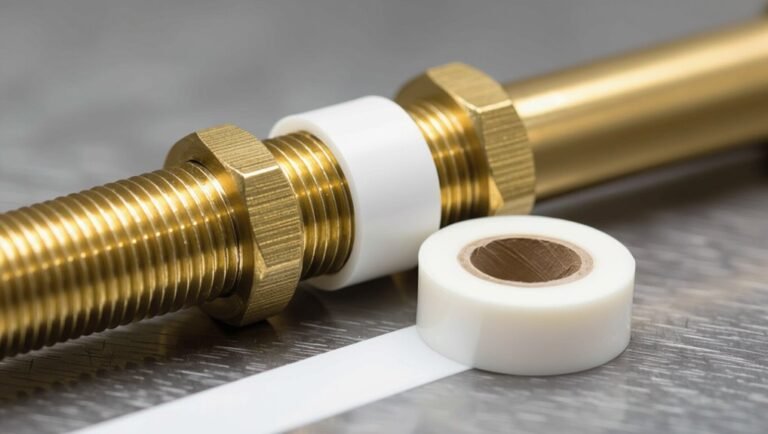
- PTFE tape and thread sealant
- Replacement ball valve drain cap
- Clean rags and solvent
Personal protective equipment and safety checklist
Don protective gloves, eye protection, and suitable footwear before handling the valve to minimize exposure to pressurized fluids, sharp edges, and chemical residues.
Inspect PPE for damage, confirm ventilation, and have spill containment ready.
Verify lockout/tagout procedures are in place and accessible.
Keep a communication plan and first-aid kit nearby.
- Gloves
- Safety glasses
- Protective footwear
- Lockout/tagout tags
- Spill kit
System checks: pressure, temperature, and fluid type
System checks guarantee conditions are safe and compatible: verify system pressure against valve and drain ratings, confirm fluid temperature stays within material limits, and identify the fluid type (water, oil, chemical, steam) to anticipate hazards and flushing requirements.
Document measured values, compare to equipment limits, and note corrosivity, viscosity, and contamination.
Isolate and depressurize before draining. Use compatible seals and disposal methods.
Step-by-Step Guide to Install and Use a Ball Valve with Drain
The procedure begins with shutting off the main supply and relieving system pressure to guarantee a safe working environment.
Next, the installer confirms valve orientation, identifies the drain port, and fits the valve using appropriate fittings, thread sealant, and correct torque.
Finally, the drain line or plug is connected and the assembly is tested for leaks and smooth open/close operation.
Step 1 Shut off the main supply and relieve system pressure
Before any work begins, shut off the main supply and relieve pressure to guarantee a safe, dry environment for installing or operating the ball valve with drain.
Confirm isolation, vent trapped pressure, and wear protection before proceeding.
- Locate main shutoff valve
- Close supply slowly
- Open downstream taps to vent
- Use pressure gauge to confirm zero
- Don personal protective equipment
Step 2 Verify valve orientation and identify the drain port
When installing a ball valve with a drain, confirm the valve’s flow direction and locate the drain port to ascertain correct operation and safe draining.
Inspect body markings or arrow indicators for inlet/outlet.
Orient the handle for accessible operation and make certain the drain port faces a safe, downward or serviceable direction.
Verify port size and cap type for compatible drainage accessories before proceeding.
Step 3 Install or replace the valve: fittings, thread sealant, torque tips
With the drain port oriented and handle positioned for access, proceed to install or replace the ball valve using the correct fittings and thread sealant.
Select compatible fittings, clean threads, apply appropriate sealant (PTFE tape or pipe dope) sparingly, and hand-start threads to avoid cross-threading.
Tighten to manufacturer torque specifications using wrenches on flats, not the valve body, then inspect for alignment before pressurizing.
Step 4 Connect drain line or install a plug/drain fitting
Attach either a drain line or a suitable plug to the valve’s drain port to complete the installation and enable controlled draining.
Use compatible fittings, thread sealant or tape as required, and tighten to recommended torque.
Route the drain line to a safe discharge point with proper support and slope.
For a plug, verify sealing surface and tighten securely.
Document connection type and orientation.
Step 5 Test for leaks and proper operation (open/close cycles)
Begin by pressurizing the system slowly and visually inspecting the valve body, joints, and drain connection for any signs of leakage.
Then cycle the handle through several full open and closed strokes to confirm smooth operation, proper seating, and that the drain port seals or drains as planned.
Observe for drips, listen for hissing, check torque and alignment, and retighten fittings if minor seepage appears.
Step 6 Use the drain for maintenance: draining, flushing, winterizing
Use the drain port to evacuate, flush, and protect the piping system during routine maintenance or seasonal shutdowns.
The operator opens the drain valve slowly to relieve pressure, collects or diverts discharged fluid, then flushes lines with clean water or recommended solution until clear.
For winterizing, drain completely and add antifreeze or follow system-specific procedures to prevent freeze damage.
Step 7 Re-pressurize and final inspection
Slowly restore system pressure while observing the valve, fittings, and any drain connections for leaks or abnormal behavior.
Once pressurized, cycle the valve open and closed to confirm smooth operation and seating.
Recheck all joints with a suitable leak-detection method.
Tighten or re-seat components if necessary.
Document conditions and any corrective actions.
Return system to normal service only after verification.
Common Use Cases and Procedures
Common applications for a ball valve with drain include removing trapped water from low spots in pipelines and performing seasonal winterization of irrigation systems.
They are also used for boiler or system blowdown to remove sediment and for emergency isolation with safe venting of pressurized sections.
Each use requires following appropriate procedures to guarantee complete draining and personnel safety.
Draining low spots in pipelines
When pipelines run low or change slope, water and sediment collect in low spots and must be removed to prevent corrosion, freezing, or flow restriction.
Installing ball valves with integrated drains at these locations allows controlled evacuation of trapped fluid and debris without shutting down the entire line.
Operators open the drain, flush with clean water, inspect expelled material, then close and secure the valve for continued service.
Seasonal winterization of irrigation systems
Prepare irrigation systems for winter by using ball valves with drains to remove standing water from lines, valves, and low points to prevent freeze damage and sediment buildup.
Technicians isolate zones, open drain ports, and verify complete drainage at low spots and risers.
After flushing, they cap or blow out remaining moisture, label drained valves, and document actions for spring reassembly.
Boiler/system blowdown and sediment removal
After winterization tasks such as isolating zones and draining low points, attention often shifts to boiler and closed‑system maintenance where blowdown and sediment removal protect heat transfer efficiency and prevent corrosion.
Technicians use ball valves with drains to perform controlled blowdowns, purging settled sludge and reducing dissolved solids. Routine short and bottom blowdowns, followed by inspection and flushing, maintain system longevity and performance.
Emergency isolation and safe venting
Isolate and vent systems quickly yet safely by using ball valves with integrated drains to stop flow and relieve trapped pressure before personnel enter or equipment is worked on.
In emergencies, operators close the main valve, open the drain to depressurize, verify zero pressure, and lock out to prevent accidental re-pressurization.
- Close main ball valve
- Open drain slowly
- Confirm pressure gauge reads zero
- Apply lockout/tagout
- Communicate clearance to team
Troubleshooting and Common Problems
Troubleshooting focuses on identifying and resolving common issues such as leaks at the drain port or valve body, including diagnostic checks and appropriate seal or fitting replacements.
Attention is given to stuck or hard-to-turn handles, with causes like worn packing, debris, or improper lubrication and corresponding remedies.
The section also covers cleaning corrosion, mineral buildup, and clogged drain ports, plus correcting incorrect installations to restore reliable operation.
Leaks at the drain port or valve body diagnosis and fixes
Begin by inspecting the drain port and valve body to pinpoint the leak source, noting whether fluid appears at the drain plug, around body seams, or from threaded connections.
Tighten the drain plug or replace its gasket if leaking.
For body seam or threaded leaks, retorque bolts, replace seals or PTFE tape, and, if corrosion or crack is present, replace the valve to guarantee reliable, safe operation.
Stuck or hard-to-turn valve handles causes and remedies
Check the handle for stiffness or binding to determine whether the resistance originates from buildup, mechanical damage, or internal pressure.
Apply penetrating lubricant to the stem and operate gently to free seized parts. Verify the valve is depressurized and drained before forcing operation.
Inspect for bent or broken handles, worn stem bearings, or tight packing; replace damaged components or adjust packing nut to restore smooth action.
Corrosion, mineral buildup, and clogged drain ports cleaning steps
Corrosion, mineral deposits, and clogged drain ports restrict flow and impair ball‑valve operation, so they should be addressed promptly to restore function.
Isolate and depressurize the line, remove the drain cap, and inspect ports.
Use a soft brush, mild descaling solution, and plastic picks to clean deposits.
Rinse thoroughly, lubricate seals with compatible grease, reassemble, and test for leaks and smooth operation.
Incorrect installation issues and how to correct them
After cleaning and reassembling a ball valve, improper installation can still undermine performance. Common errors such as wrong orientation, incorrect seat compression, or misaligned drain fittings often mimic symptoms attributed to deposits.
Inspect orientation markings, verify stem and ball alignment, adjust gland nut for proper seat compression, and guarantee drain port seals and fittings seat squarely.
Retest under pressure and correct leaks immediately.
Best Practices, Tips, and Maintenance Schedule
The following section outlines practical best practices and a concise maintenance schedule for ball valves with drains, covering a routine inspection checklist and recommended lubrication and exercise cycles.
It also explains criteria for repair versus replacement and offers compatibility tips regarding fluids, temperature, and pressure ratings.
These points equip maintenance personnel to maximize valve reliability and safety.
Routine inspection checklist
Establish a concise routine inspection checklist that specifies what to examine on a ball valve with drain, how often to inspect, and acceptable condition thresholds; include visual checks for leaks and corrosion, operational tests for smooth opening and closing, verification of drain function and sealing, and documentation of findings and corrective actions.
- Inspect body and fittings for corrosion or cracks.
- Check for external leaks at joints.
- Operate valve through full travel for smoothness.
- Test drain activation and reseal integrity.
- Record date, condition, and required repairs.
Lubrication, exercise cycles, and frequency recommendations
Following the inspection checklist, attention turns to lubrication and exercise cycles to preserve ball valve function and drain reliability.
Apply manufacturer-recommended lubricant to stem and seats sparingly; avoid petroleum-based products on incompatible seals.
Operate valve through full travel monthly in low-use systems, weekly for critical lines.
After exercising, cycle drain to verify flow.
Document actions and adjust frequency based on service conditions and leak history.
When to replace vs repair
When should a valve be repaired instead of replaced depends on condition, safety risk, and lifecycle cost.
Repair is preferred for minor leaks, worn seats, or stem packing when seals and components are serviceable and parts are available.
Replacement is warranted for severe corrosion, irreparable body damage, frequent failures, or when downtime and long-term reliability favor a new valve.
Assess cost, safety, and expected service life.
Compatibility tips (fluids, temperature, pressure ratings)
Because ball valves must reliably isolate and control flow across diverse systems, compatibility with the conveyed fluid, operating temperature range, and pressure rating should be verified before selection or installation. Materials, seals, and drainage ports must match chemistry and temperature; pressure class must exceed system peaks. Consult manufacturer charts and test samples.
| Fluid type | Temp range | Pressure class |
|---|---|---|
| Water | -20–120°C | PN10–PN25 |
| Oil | -10–150°C | PN16–PN40 |
| Corrosive | -50–200°C | PN16–PN63 |
Mistakes to Avoid
Common errors include improper valve orientation or unsupported piping that stresses connections, and over-tightening fittings which can deform seats and seals.
Failure to relieve system pressure before using the drain risks sudden discharge, and selecting incompatible materials can lead to corrosion or seal failure at operating temperatures.
Addressing these points prevents leaks, component damage, and safety hazards.
Improper orientation or unsupported piping
Installers must assure the ball valve and attached drain are oriented and supported correctly to prevent stress on the valve body and piping joints.
Incorrect orientation or unsupported piping can cause misalignment, leaks, premature wear, and actuator binding.
Support brackets, pipe hangers, and proper alignment reduce mechanical loads.
Inspect installations for sagging, torque on fittings, and vibration to assure reliable operation and longevity.
Over-tightening fittings and damaging seals
A technician’s instinct to tighten fittings firmly can easily cross into over-tightening, which compresses or shears soft seals and deforms metal seatings, leading to leaks and shortened valve life.
Excess torque can crack threads, warp flanges, and prevent proper seating. Use manufacturer torque specs, calibrated tools, and proper gasket selection; tighten incrementally and inspect for seal integrity before pressurizing the system.
Ignoring pressure relief before draining
Why would anyone skip pressure relief before draining? Ignoring pressure relief risks sudden fluid expulsion, component damage, and personal injury.
Properly venting system pressure prevents pressurized spray, seal blowout, and misreading of downstream conditions.
Technicians should isolate, slowly vent using designated ports, verify zero pressure with gauges, then open the drain.
Skipping this step compromises safety and equipment integrity.
Using wrong materials for your fluid/temperature
Material compatibility and temperature ratings are critical when selecting valves and drain fittings, because using components that are not rated for the specific fluid or operating temperature can lead to accelerated wear, swelling, cracking, or catastrophic failure.
The wrong seals, body materials or coatings cause leaks, contamination, or seizing.
Verify chemical compatibility charts, temperature limits and consult manufacturers to prevent premature valve/drain system failure.
Buying and Selection Guide
When selecting a ball valve with a drain, attention should focus on key specifications such as size, pressure class, construction material, and end connection type.
Recommended accessories like compatible drain fittings, protective caps, and strainers should be identified to guarantee proper installation and maintenance.
Buyers must weigh upfront cost against expected longevity and maintenance needs to choose the best value for the application.
Key specs to check: size, pressure class, material, end connections
Before purchasing a ball valve with a drain, the buyer should verify four critical specifications—size, pressure class, material, and end connections—because each determines compatibility, safety margin, and longevity in the planned system. Inspect nominal diameter, maximum working pressure, corrosion resistance (brass, stainless, PVC), and connection type (threaded, welded, flanged) to guarantee safe, durable operation.
| Spec | Purpose |
|---|---|
| Size | Flow match |
| Pressure | Safety margin |
| Material | Compatibility |
Recommended accessories: drain fittings, caps, strainers
After confirming size, pressure class, material, and end connections, attention turns to the accessories that complete a ball valve with a drain: drain fittings, caps, and strainers.
Select fittings matching thread/type and material, choose caps for leak-proof closure, and prefer strainers sized for flow and debris.
Consider serviceability and corrosion resistance.
- Threaded drain fittings
- Compression fittings
- Protective caps
- Y-strainers
- Mesh strainers
Cost vs longevity considerations
Balance between upfront cost and expected service life determines true value when selecting a ball valve with a drain.
Consider material, pressure rating, and maintenance needs: stainless steel and brass cost more but resist corrosion and last longer; plastic is cheaper but may require earlier replacement.
Factor warranty, frequency of use, and total lifecycle cost rather than initial price alone.
Quick Reference Checklist Using a Ball Valve with Drain
A concise checklist helps guarantee safe, effective use of a ball valve with drain by covering pre-use inspections and required tools.
It should list step-by-step actions for shutting off flow, operating the drain, and verifying complete drainage.
A separate maintenance checklist notes cleaning, seal inspection, and reassembly steps to prevent leaks and corrosion.
Pre-use checklist
Before each use, the operator should confirm the valve assembly, drain port, and associated fittings are clean, intact, and correctly oriented for the designated flow direction.
A concise pre-use checklist guarantees safe operation and prevents leaks or contamination.
- Verify valve handle operation and secure mounting
- Inspect drain port cap and threads
- Check seals and gaskets for wear
- Confirm correct flow orientation markings
- Verify nearby vents/drains are clear
Step-by-step action checklist for draining and maintenance
Follow the numbered checklist below to safely drain and perform routine maintenance on a ball valve with drain, ensuring each step is completed in sequence and verified before proceeding.
Verify isolation, depressurize system, open drain, collect fluid, inspect valve, replace seals, lubricate stem, test operation, and document actions.
- Verify isolation and lockout
- Depressurize and vent
- Open drain and collect
- Inspect and service components
- Test, record, restore system
Conclusion
A ball valve with a drain provides a practical, reliable solution for isolating and draining sections of piping for maintenance, repairs, or winterization. By understanding its operation, following safety precautions, and adhering to installation and maintenance steps, users can minimize downtime and prevent leaks. Regular inspection, proper selection, and avoidance of common mistakes prolong valve life and performance. When used correctly, the drain feature simplifies routine tasks and enhances system reliability.