Fix a Leaking Shower Drain Pipe: Quick DIY Repair Guide
Quick DIY Guide to Fix a Leaking Shower Drain Pipe
If you’re dealing with a leaking shower drain pipe, follow these steps to quickly address the issue and minimize damage:
- Stop Water Flow: Turn off the water supply to prevent further leakage.
- Catch Runoff: Place a bucket or towel under the drain to catch any excess water.
- Dry the Area: Use towels to dry the surrounding area and limit damage.
Key Inspection Points:
- Drain Cover: Check for loose screws.
- Flange: Look for cracks or corrosion.
- Tailpiece and Slip Joints: Ensure they are secure.
- Tighten Nuts: Secure any loose connections.
- Replace Washers or Gaskets: Swap out worn components.
- Reseal the Flange: Use plumber’s putty or silicone for a tight seal.
Testing:
– Run water for a short duration and check below for any stains indicating leaks.
Additional Actions:
- Patch small defects in the pan.
- Consider replacing a delaminated pan if necessary.
For detailed diagnostics, tools needed, and advice on when to call a professional, follow the full guide.
Immediate Triage : Stop the Leak Now
Shut off the water supply to the shower and isolate the area to prevent further damage while evaluating the leak. The individual secures towels and buckets to catch residual water, removes standing water, and ventilates the space.
They inspect visible joints, the drain flange, and surrounding grout for obvious breaches, noting wet spots and staining patterns to trace the source. Temporary containment—sealant tape or a rubber patch—may be applied to slow seepage pending repair.
Photographs document conditions for later reference. If water tracks behind walls or ceilings, the person suspends DIY work and schedules a professional assessment to prevent structural or mold issues.
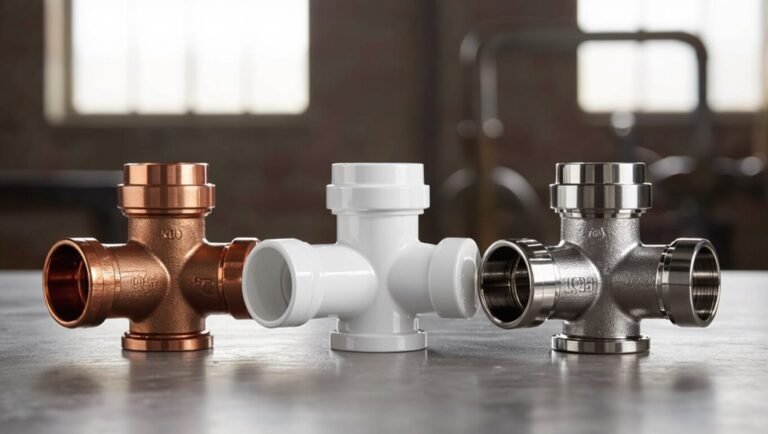
Tools & Parts for Shower Drain Leaks
A concise list of the required tools and parts helps guarantee a timely and effective repair.
Common items include adjustable wrenches, plumber’s putty, pipe sealant, replacement seals and gaskets sized for the specific drain, and a new tailpiece if corrosion is present.
Selecting correct replacement seals and gaskets is critical because improper fit or material can allow continued leakage.
Required Tools And Parts
For repairing a leaking shower drain, gathering the right tools and replacement parts beforehand guarantees the job proceeds efficiently and without unnecessary trips to the hardware store. The necessary items enable safe access, accurate diagnosis, and secure repairs.
Essential tools include a basin wrench or adjustable wrench for nuts, slip-joint pliers for gripping, a screwdriver set for trim and screws, and a plumber’s putty knife to remove old sealant. Replacement parts should match the drain type and pipe material.
Protective gear and a bucket for catching water are recommended to keep the work area clean and safe.
- Basin or adjustable wrench
- Slip-joint pliers
- Screwdriver set
- Plumber’s putty knife
Replacement Seals And Gaskets
After gathering the basic tools, attention turns to the replacement seals and gaskets that stop leaks at the shower drain. Common options include rubber O-rings, flat rubber gaskets, neoprene washers, and silicone sealing rings sized to the drain assembly. Selection depends on drain model, material compatibility, and contact surfaces; PVC drains require different compounds than metal. Quality seals resist compression set and chemical breakdown.
Always match inner and outer diameters, thickness, and bead profiles. Spare kits often include multiple sizes. Properly seated seals and a light application of plumber’s grease guarantee a watertight fit and longer service life.
Determine If the Leak Is From the Drain or Trap
A visual inspection around the shower drain can reveal loose fittings, cracked seals, or mineral buildup that point to a drain leak.
If no issues are visible at the flange or strainer, attention shifts to the P-trap beneath the shower for signs of corrosion, loose joints, or water stains.
Systematic checking of both locations helps isolate the source before any repairs begin.
Inspect Around The Drain
How can one tell whether water is escaping from the drain flange or farther down at the trap? One inspects the immediate drain area for visible seepage, stains, or pooling. Carefully dry the area, run a short water test, and watch for fresh moisture. Note sound and smell for clues.
- Remove the stopper, dry flange and surrounding tile.
- Run a small stream and observe for water appearing at flange seams.
- Feel beneath accessible pan or access panel for dampness near the drain base.
- Mark exact leak locations and timing to distinguish flange weepage from deeper leaks.
Check The P-Trap
If no moisture appears around the flange during the short test, attention should shift to the P-trap and piping below the shower.
The inspector should remove the access panel or crawl beneath the floor to visually examine joints, slip nuts, and the trap seal for drips or corrosion.
Place a dry paper towel around connections, run water, and observe for fresh wetting.
Tighten loose slip nuts carefully; replace deteriorated washers or the entire trap if cracks or persistent leakage appear.
After repairs, retest for leaks and guarantee proper alignment and slope toward the drain to prevent future backups.
Remove the Drain Cover and Inspect the Problem
Before any repairs begin, the drain cover must be removed so the underlying components can be examined.
The individual loosens screws or pries up a snap-in cover, then clears hair and debris.
Visual inspection follows to locate cracks, loose connections, or rust without touching the flange seal itself.
- Remove screws or lift the cover carefully.
- Clear visible debris with gloves and a flashlight.
- Inspect the drain body, surrounding tile, and pipe joint for moisture or damage.
- Note findings and photograph areas requiring repair before reassembling or proceeding to flange work.
Fix a Leaking Drain Flange (Re‑seal or Replace)
Begin work on the drain flange by confirming the source of the leak identified during inspection and deciding whether to reseal the existing flange or replace it completely.
If the flange is corroded, cracked, or warped, replacement is safest; loosen mounting screws, detach the flange, clean the pipe collar, and install a new flange sized to the drain body, using plumber’s putty or silicone as manufacturer recommends.
For resealing, remove old sealant, dry surfaces, apply fresh silicone or plumber’s putty evenly, and re-seat the flange.
Tighten screws evenly to avoid distortion, test with water, and recheck for leaks after curing.
Repair a Leaking Tailpiece or Slip Joint (Washers, Nuts, Alignment)
When a shower leak traces to the tailpiece or slip joint, the usual culprits are worn washers, loose nuts, or misaligned pipes; addressing these fixes restores a watertight connection without replacing major drain components.
- Inspect: dry the area, run water, identify drip source at the slip nut, washer, or tailpiece seam.
- Disassemble: loosen slip nuts with pliers, remove tailpiece, note washer type and orientation.
- Replace: fit new rubber or nylon washers and hand-tighten nuts; avoid overtightening that can deform seals.
- Align and test: realign pipes for proper seating, tighten snugly, run water to confirm no leak.
Shower Pan Leaks: Patch vs Replace
After confirming the leak is not at the tailpiece or slip joint, attention shifts to the shower pan, where failures can allow water into subfloor and framing.
Assessment focuses on extent: localized cracks, punctures, or seam separation versus widespread delamination, sagging, or chronic leakage.
Small, accessible defects may be patched with appropriate materials—epoxy, polymer-modified mortar, or waterproofing membrane—followed by testing.
Replacement becomes prudent when damage compromises load-bearing substrate, vapor barrier, or waterproof membrane continuity.
Replacement requires removing flooring, installing new pan or liner, and ensuring proper slope and flange sealing.
Decisions weigh cost, longevity, and risk of concealed structural damage.
Troubleshooting, Common Mistakes, and When to Call a Plumber
How should a homeowner systematically isolate a shower pan leak versus a drain or fitting failure? A methodical approach reduces wasted effort: test the pan, inspect visible fittings, and recreate the leak under controlled conditions. If water appears only when the drain is full, suspect drain or trap connections; if water spreads across the subfloor, suspect the pan.
- Inspect under-sink access panels and ceiling below for leak patterns.
- Run a bucket test: pour water around the pan perimeter, then over the drain.
- Tighten and reseal accessible fittings; retest.
- Call a plumber if leaks persist, mold appears, or structural damage exists.
Conclusion
When a shower drain leaks, the homeowner acts like a first responder: stop the flow, diagnose, and apply the simplest durable fix possible. Basic tools, new gaskets or a reseated flange often restore watertight integrity; pan issues demand more decisive repair or replacement. Careful inspection avoids repeated failures—rush jobs are like bandaging a broken bone. If uncertainty or persistent leaking remains, calling a licensed plumber prevents greater damage and higher costs.