Quick DIY Guide: How to Fix a Broken Pipe Fast and Cheap
Quick Fix for a Broken Pipe: A Step-by-Step Guide
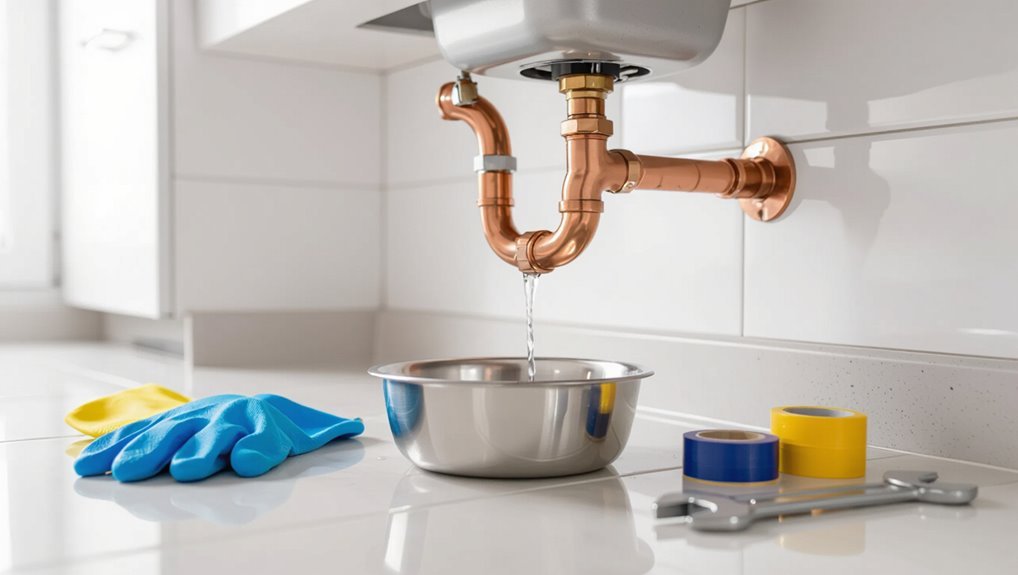
If you’re dealing with a broken pipe and need a fast, affordable solution, here’s how to stop the leak and minimize damage until you can make a permanent repair:
1. Shut Off Water Supply: Immediately turn off the main water valve or the nearest valve to stop the flow of water. If there’s pooled water, cut off power to nearby electrical outlets to prevent hazards.
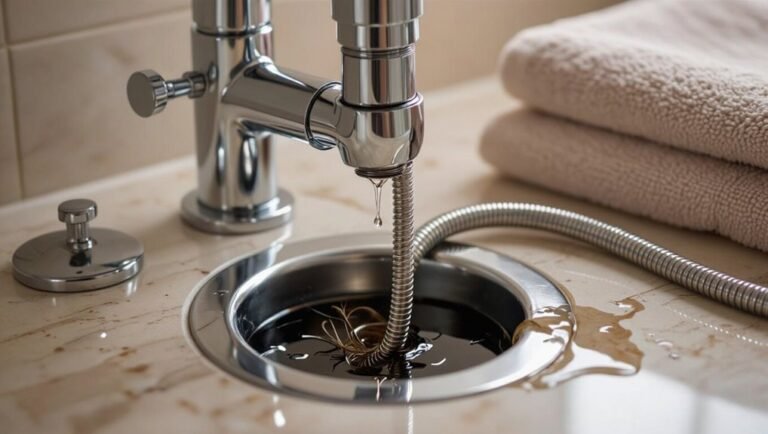
2. Drain and Dry: Drain any remaining water from the affected section and thoroughly dry the area to prepare for repairs.
3. Clean the Pipe Surface: Ensure the surface around the leak is clean for better adhesion of repair materials.
4. Choose Your Repair Method:
- Small Leaks: Use epoxy putty to seal pinholes.
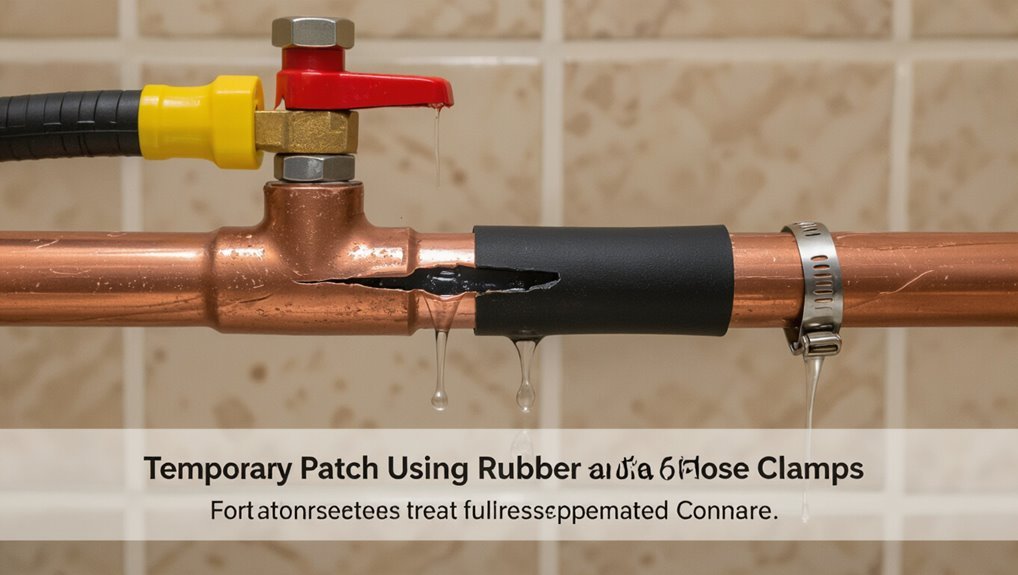
- Larger Leaks: Apply silicone self-fusing tape or a rubber patch secured with a hose clamp for a more robust fix.
5. Document the Damage: Take photos of the damage for your records and to share with professionals if needed.
6. Monitor the Repair: Keep an eye on the area to ensure your temporary fix holds until you can arrange for a permanent solution.
Following these steps will help you handle a broken pipe quickly and effectively while minimizing damage and costs. If the problem persists or is beyond your ability, don’t hesitate to call a professional plumber.
Emergency Checklist: Stop the Leak Now and Stay Safe
When a pipe breaks, immediate action focuses on stopping the flow and protecting occupants and property: shut off the main water valve, turn off electrical circuits in the affected area if water is pooling near outlets or appliances, and move people and valuables away from the leak.
The responder should assess hazards, ventilate to reduce humidity, and contain spreading water with towels, buckets, or mops.
Elevate furniture on blocks and disconnect soaked electronics after power is off.
Photograph damage for insurance.
Wear gloves and boots to prevent contamination.
Note water source and duration.
Prepare for professional repair steps without attempting complex plumbing work.
Immediate Triage: DIY Now or Call a Plumber?
A quick assessment of leak severity guides whether a homeowner can act or needs professional help.
After shutting off the water, simple temporary repairs—like pipe clamps, rubber and hose clamps, or epoxy putty—can limit damage until a plumber arrives.
If the leak is large, under high pressure, or in a hard-to-reach location, calling a licensed plumber is the safer choice.
Assess Leak Severity
How severe is the leak and how quickly must it be stopped? The observer evaluates flow rate, location, and damage risk: steady streams, bursts, or hidden drips behind walls demand urgent professional attention; small visible drips on exposed pipes may be manageable short-term with DIY patches.
Consider water pooling, structural soaking, electrical proximity, and mold signs—these escalate priority. Assess access difficulty and whether temporary containment is feasible without specialized tools.
If uncertainty exists about pipe material, joint failure, or systemic pressure issues, prioritize calling a plumber. Document observations and take photos for repair planning and insurance.
Shut Off Water
Following the initial assessment, immediate action centers on stopping the water to limit damage and determine whether a homeowner can manage a temporary fix or must call a professional.
Locate and close the nearest shutoff valve—fixture, branch, or main—then verify flow has ceased by opening a faucet.
If no local valve exists or the leak continues, shut the main supply and drain lines to reduce pressure.
Consider electricity risk; cut power to affected areas if water approaches outlets.
If isolation is impossible, leakage is heavy, or structural risk exists, contact a licensed plumber immediately rather than attempting extended DIY.
Temporary Repair Options
Decide quickly whether a temporary, DIY stopgap is safe and sufficient or if a professional is required. The homeowner assesses leak size, pressure, location, and materials.
Small pinholes on accessible metallic or PVC pipes may accept epoxy putty, rubber patch with hose clamps, or self-fusing silicone tape for hours to days.
Large ruptures, hidden joints, sewer lines, or persistent high-pressure leaks demand shutting water and calling a plumber.
Temporary fixes must be monitored; they reduce flow but do not replace proper repairs. Document the condition, note applied materials and time, and schedule permanent replacement promptly to avoid escalation.
Essential Emergency Plumbing Kit (Tools & Cheap Materials)
A compact emergency plumbing kit can make the difference between a manageable stopgap and a household disaster.
It should include essential tools—adjustable wrench, pipe cutter, slip-joint pliers, plumber’s tape—and affordable repair materials like epoxy putty, rubber repair tape, and hose clamps.
Clear organization and familiarity with each item speed repairs and reduce the chance of further damage.
Essential Tools Kit
Several basic tools and inexpensive materials can turn a panicked homeowner into an effective stopgap plumber during a burst-pipe emergency.
A compact adjustable wrench, slip-joint pliers, and pipe cutter allow quick disassembly and clean cuts.
A roll of plumber’s tape (PTFE), a putty knife, and a wire brush prepare surfaces for seals.
A Utility knife and sandpaper trim and smooth edges; a flashlight and headlamp provide hands-free lighting.
A small propane torch suits soldered copper repairs if the user is experienced.
Gloves, safety glasses, and a mop or bucket control mess.
Organized in a tote, these items enable fast, practical action.
Cheap Repair Materials
With the basic toolkit assembled, attention turns to inexpensive materials that will actually stop leaks long enough for professional repair.
The kit includes rubber repair tape, silicone tape, epoxy putty, hose clamps, and self-fusing repair tape. Rubber repair tape wraps over wet pipes; silicone tape bonds with tension and resists heat. Epoxy putty molds into gaps and cures to a hard seal for small holes. Hose clamps secure patches or temporary couplers. A roll of plumber’s tape and a few rubber washers complete the set.
These items prioritize speed, affordability, and compatibility until a licensed plumber restores the system.
Shut Off the Main and Isolate the Broken Pipe
Locate and turn off the building’s main shutoff valve before proceeding to isolate the damaged section of pipe; this guarantees further water flow, limits pressure in the system, and reduces the chance of secondary damage. The worker verifies isolation points, notes valve locations, and prepares tools to access the break. Temporary barriers or clamps are applied to the targeted run; nearby fixtures remain closed to confirm isolation. Inspection ensures the correct segment is exposed and safe to work on. The following quick reference aids decision-making:
| Action | Purpose | Notes |
|---|---|---|
| Shut main | Stop supply | Confirm closed |
| Close branch | Isolate area | Test fixtures |
| Apply clamp | Contain leak | Match pipe size |
| Mark segment | Guide repair | Measure length |
Relieve Pressure and Drain the Affected Section
Before cutting or disassembling the isolated run, the worker relieves residual pressure and drains the affected section to prevent spray and reduce trapped water.
Valves downstream are opened and faucets served by the segment are run until flow stops.
A drain or hose is attached to low points and fittings to direct remaining water into a bucket or floor drain.
For closed systems, the worker loosens a union or cap slightly to release trapped air and liquid, then retightens.
Work gloves and eye protection are used.
Confirming the line is empty reduces mess and makes cutting, soldering, or replacing fittings safer and cleaner.
Minimize Water Damage While You Repair the Pipe
First, the homeowner should shut off the main water supply to stop additional flooding.
Next, they should move or cover furniture, electronics, and valuables to prevent water damage.
Rapid action reduces repair scope and secondary problems like mold.
Turn Off Main Water
Shut off the main water supply promptly to stop flooding and limit damage while the pipe is being repaired.
Locate the property’s main shutoff—commonly near the water meter, garage, or exterior foundation—and close the valve firmly.
Use the correct tool for a stubborn gate or ball valve; turn clockwise until it stops.
After shutting off, open a low faucet to drain remaining pressure and confirm flow has stopped at affected fixtures.
Notify household members before shutting water again.
Keep the shutoff accessible and mark its position for future emergencies.
If unsure which valve, consult the utility or a plumber.
Protect Belongings Quickly
How can belongings be shielded quickly to limit water damage while the pipe is being repaired? A person should move items away from the leak, elevate valuables on furniture or blocks, and cover possessions with plastic sheeting or garbage bags. Electronics must be unplugged and relocated. Porous items that cannot be moved should be dried promptly or discarded. Document damage with photos. Use buckets and towels to catch drips and protect floors. Communicate with household members to avoid reintroducing risks.
| Item | Action | Priority |
|---|---|---|
| Electronics | Unplug, relocate | High |
| Furniture | Elevate | High |
| Rugs | Remove or dry | Medium |
| Clothing | Bag up | Medium |
| Documents | Plastic cover | High |
Quick Temporary Patches: When and How to Use Them
Often used as immediate stopgaps, quick temporary patches allow a leaking or burst pipe to be controlled long enough to shut off water, assess damage, and arrange permanent repairs. They suit minor cracks, pinhole leaks, or joints leaking under low pressure.
Selection depends on pipe material and access: epoxy putty, self-fusing silicone tape, or clamp-style solutions work differently and have limited lifespans. Clean and dry the area, follow product cure times, and monitor for reoccurrence.
Use patches only as interim measures; label the repair, notify occupants, and schedule a qualified plumber to evaluate corrosion, pressure issues, or structural concerns.
Rubber Patch + Hose Clamp: Fast Step-by-Step
When a short-term fix is needed for a small leak and access is limited, a rubber patch secured with a hose clamp offers a quick, reliable option.
First, shut water off and dry the area.
Cut a rubber piece (from inner tube or gasket) larger than the hole.
Center the patch over the leak and wrap it smoothly, removing folds.
Position a stainless steel hose clamp over the patch and tighten incrementally until the leak stops; avoid over-tightening which can damage pipe or rubber.
Check for residual seepage, re-tighten slightly if needed, then monitor until a permanent repair is possible.
Self-Fusing Silicone Tape: Best Use and Technique
Self-fusing silicone tape is recommended for small, pressurized leaks and temporary repairs where the pipe surface is clean and dry.
The tape should be stretched and overlapped tightly at least 50% per wrap, covering beyond the damaged area to form a watertight bond.
Proper tension and successive layers guarantee a durable seal until a permanent repair can be made.
When To Use
A compact roll of silicone tape is best applied for temporary sealing, insulating, or bundling tasks where access is limited and a conforming, waterproof wrap is required; it excels on curved fittings, hose repairs, and electrical splices under moderate pressure or vibration. Use when a quick, tool-free solution is needed, when clamps or replacement parts are unavailable, or to buy time until permanent repairs can be made. Not suited for long-term pressurized mainline fixes. Inspect frequently and replace if degradation appears.
| Recommended | Not Recommended |
|---|---|
| Hose pinhole repair | High-pressure mainline |
| Outdoor temporary seal | Structural leak repair |
| Electrical splice protection | Permanent plumbing fix |
| Emergency patching | Long-term solution |
Wrapping Technique
After a quick temporary seal has been chosen, attention turns to the wrapping technique that makes self-fusing silicone tape effective. The installer cleans and dries the pipe, stretches the tape to activate adhesion, and overlaps each wrap by about half the width.
Tension is steady to form a smooth, uniform bond that resists pressure and vibration. Ends are pressed firmly to prevent unrolling. Short runs, joints, and small leaks suit this method best; it is not a permanent fix for large ruptures. Monitor the repair and replace with proper fittings when possible.
- Clean and dry pipe first
- Stretch and overlap ~50%
- Apply steady tension and press ends
Epoxy Putty for Leaking Joints: Mix and Apply
For small leaks at threaded or slightly damaged joints, epoxy putty offers a quick, permanent repair when mixed and applied correctly.
The area must be cleaned and dried; remove rust, scale, and residual moisture for adhesion. Cut or knead equal portions of the two-part putty until color is uniform, then shape into a pad.
Press firmly onto the leak, working putty into threads or hairline gaps and smoothing overlaps to seal. Allow recommended cure time before restoring pressure.
Once cured, the repair resists water and can be sanded or painted. Epoxy works best on sound pipe substrates and small defects only.
Make a Quick Metal Clamp From Scrap and Hose Clamps
When a temporary clamp is needed, the repairer selects scrap metal of sufficient thickness to resist bending under pressure.
Hose clamps are prepared by removing excess band length and checking the screw mechanism for smooth operation.
The scrap strip is positioned over the leak, secured with the hose clamps, and any gaps are sealed to restore pressure containment.
Choose Scrap Metal Thickness
In selecting scrap metal for a quick clamp, thickness determines strength, bendability, and how well hose clamps will secure the repair. A balance is needed: thin metal conforms easily but may deform under pressure; thick metal resists collapse but is harder to shape and may prevent clamp teeth from biting.
Choose a gauge that matches pipe diameter and expected pressure, aiming for a snug wrap without sharp edges. Consider corrosion and existing metal type. Cut and smooth edges before fitting. Test fit with minimal tightening to confirm compression and alignment, adjusting thickness choice if distortion occurs.
- Thin (easy to bend, low strength)
- Medium (best compromise)
- Thick (high strength, hard to shape)
Prepare Hose Clamps
Several sizes of hose clamps should be prepared and inspected before forming the quick metal clamp from scrap. The worker selects clamps that fit pipe diameter, checks screw threads for damage, and verifies bands flex without cracking. A scrap metal strip will bridge the break; clamps secure the strip. Align edges, choose clamp positions to distribute pressure, and test fit before final tightening. Corroded clamps are discarded. Tools ready: screwdriver, pliers, and cutting file. Observe safety gloves and eye protection. The table below summarizes common clamp choices and notes for selection.
| Clamp Size | Use Case | Inspection Tip |
|---|---|---|
| Small | 1/2″ pipes | Check thread smoothness |
| Medium | 3/4″–1″ | Verify band flexibility |
| Large | >1″ | Verify screw engagement |
Secure And Seal Clamp
Tighten the prepared hose clamps evenly around the pipe so the scrap metal strip seats firmly over the rupture and the band threads remain aligned for final adjustment.
The repairer checks that edges of the metal patch overlap the leak by at least half an inch.
Each clamp is alternately tightened a quarter turn to prevent distortion, stopping when the patch no longer shifts by hand.
Sealing compound or epoxy is applied around the patch edges and allowed to cure per product instructions.
Final inspection includes pressure testing at low flow, monitoring for seepage, and re-tightening if necessary.
- Alternate tightening sequence
- Overlap and coverage
- Sealant and test
Wrap and Reinforce a Leaking Joint With Plumber’s Tape
When a small leak appears at a threaded or slightly damaged joint, wrapping the connection with plumber’s (thread-seal) tape provides a quick, effective reinforcement that can stop weeping without replacing the fitting.
The worker shuts off water, dries the joint, and inspects threads for debris or corrosion. They wrap PTFE tape clockwise around male threads three to five tight turns, overlapping slightly and keeping tape thin at the end to avoid bunching.
After hand-tightening the fitting, a wrench finishes the connection without over-torquing. The repair suits minor thread leaks and serves as a temporary, reliable measure until permanent replacement.
Patch a Pinhole in Copper or PEX (Temporary)
After addressing small thread leaks with tape, attention turns to pinhole leaks in copper or PEX, which require a different, temporary approach.
A quick patch stops water until a permanent repair is possible.
Shut off water, dry the area, and clean with emery cloth.
Use epoxy putty or a rubber patch with hose clamps; press firmly and allow cure time per instructions.
Monitor frequently and replace when feasible.
Temporary patches are for emergency use only.
- Epoxy putty: mold, press, cure
- Rubber patch + clamps: wrap, tighten securely
- Inspect regularly and plan permanent fix
Solder a Copper Pipe Leak Safely and Fast
Before soldering a copper leak, the person equips eye protection, gloves, and a respirator to minimize burn and fume risks.
The pipe is cleaned and fluxed so the joint is free of corrosion and oils for reliable heat transfer.
A controlled torch technique and correct solder type are used to heat evenly and form a solid, leak-free seal.
Safety Gear First
Always wear appropriate safety gear: heat-resistant gloves, safety glasses with side protection, and a long-sleeved shirt to guard against flux splatter and hot solder.
A flame and molten metal hazards demand respect; a respirator may be needed in confined spaces where fumes accumulate.
Protective footwear prevents burns from falling solder, and remove jewelry to avoid heat conduction.
Keep a fire extinguisher and a bucket of water or sand nearby.
Work with adequate ventilation and clear escape routes.
- Heat-resistant gloves and safety glasses
- Respirator for poor ventilation
- Fire extinguisher and clear workspace
Prepare Pipe Surface
Clean, dry metal is essential for a reliable solder joint, so the soldering area must be stripped of corrosion, old solder, and any coatings down to bright copper.
The technician uses an emery cloth or brass brush to remove oxidation, then verifies cleanliness by wiping with a lint-free cloth.
Flux is applied sparingly to the cleaned surfaces to promote wetting and prevent reoxidation; excess flux is avoided.
Fittings are test-fitted to confirm full seating and correct alignment.
All debris, dust, and oil are removed before heating.
Proper surface preparation reduces cold joints, leaks, and rework.
Apply Proper Soldering Technique
Heat the joint evenly while maintaining steady control of the torch flame and solder feed. The technician cleans, fluxes, and preheats the fitting until flux sizzles; then applies solder to the heated seam, allowing capillary action to draw it through.
Cooling is passive; the joint must not be disturbed. Safety precautions include shielding surrounding materials and ventilating the area.
Inspect the bead for complete coverage and absence of gaps; wipe excess flux. If a leak persists, cut out and rebush the section, then repeat soldering with proper fit-up.
- Even heating and correct solder flow
- Proper flux and fit-up
- Post-solder inspection
Cut Out and Replace a Short Pipe Section (Cheap)
To repair a short damaged section of copper or PVC pipe without replacing the entire run, the homeowner cuts out the compromised piece and installs a matching length of pipe with compatible couplings or slip fittings, taking care to isolate water, measure precisely, and deburr the cut ends before joining.
After cutting, the removed segment length is verified against replacement, and fittings chosen match material and diameter. Clean mating surfaces, apply flux or primer where required, then assemble per manufacturer’s instructions. Allow curing or cool solder fully before restoring water, and check thoroughly for leaks under normal pressure.
Install a Slip Coupling Without Special Tools
After cutting and preparing the pipe ends, a slip coupling offers a quick repair option that requires only basic hand tools.
The installer slides the coupling over one end, aligns both pipes, then slides it to cover the joint fully.
Compression or threaded variants tighten with an adjustable wrench; lubricated O‑rings or simple seals seat by hand.
Confirm alignment and test for leaks at low pressure before restoring full flow. Tighten incrementally to avoid overtightening.
Clean the area and monitor the repair for several hours.
- slide coupling into position
- tighten evenly with wrench
- test slowly for leaks
Join PEX With Crimp or Push-Fit Connectors
When connecting PEX, crimp rings and push‑fit fittings provide two reliable, low‑skill options: crimping uses a copper or stainless ring compressed with a dedicated tool to form a permanent seal, while push‑fit fittings rely on internal O‑rings and metal teeth to secure and seal the pipe without special tools.
For crimp joints, cut square, slide ring and fitting fully, then compress evenly and check with a go/no‑go gauge.
For push‑fit, confirm pipe is deburred and fully inserted to the depth mark.
Both methods suit repairs: crimp is cost‑effective and permanent; push‑fit is forgiving and reusable for temporary or final fixes.
Use Push-Fit (SharkBite) Fittings for Speedy Repairs
Push-fit (SharkBite) fittings offer fast, reliable connections without soldering, crimping, or special tools, making them a practical choice for emergency and retrofit repairs.
They work with copper, PEX, and CPVC, provide a secure seal with an internal O-ring and metal teeth, and can often be used in tight spaces.
Installation is straightforward: cut pipe square, deburr and clean the end, mark insertion depth, and push the fitting on until it seats.
Benefits Of Push-Fit
For quick pipe repairs in homes and businesses, push-fit (SharkBite) fittings offer a fast, reliable alternative to soldering or threaded connections. They require no special tools, cure time, or open flame, reducing disruption and safety risk. Compatibility with copper, PEX, and CPVC simplifies inventory and selection for varied systems.
Removability supports temporary fixes or future adjustments without damaging existing piping. Overall, push-fit fittings streamline emergency repairs and routine maintenance while maintaining code-compliant performance when used per manufacturer guidelines.
- Rapid installation with minimal tools
- Multi-material compatibility
- Reusable and non-destructive for alterations
Installation Step Overview
Having outlined the advantages of push-fit fittings, the next focus is a concise overview of the installation steps for a quick repair. The process is straightforward: shut off water, cut and deburr the pipe, mark insertion depth, and push the fitting firmly until it seats. Test for leaks and restore service. Tools needed are minimal and the sequence minimizes downtime.
| Step | Action | Tip |
|---|---|---|
| 1 | Shut off water | Verify supply off |
| 2 | Cut & deburr | Square cut |
| 3 | Mark depth | Use depth gauge |
| 4 | Insert & test | Check for leaks |
Repair PVC/CPVC With Solvent Cement (Step-by-Step)
Begin by shutting off the water supply and draining the line to prevent leaks during the repair. The damaged PVC/CPVC section is cut squarely; edges are deburred and cleaned with a solvent cleaner. Primer is applied where required, then solvent cement is brushed evenly on pipe and fitting. Pieces are joined with a quarter-turn twist and held briefly to set. Allow cure time per manufacturer before restoring water.
- Cut and clean the pipe ends precisely
- Apply primer then cement uniformly
- Join, hold, and respect cure time before pressurizing
Fix Threaded Leaks on Galvanized or Brass Pipes
The technician locates the threaded leak by inspecting joints and feeling for dampness or corrosion.
They select an appropriate sealant—thread tape for brass or a pipe dope rated for galvanized steel—based on metal type and pressure requirements.
Finally, the joint is tightened to specification and rechecked for leaks after the sealant cures.
Identify Threaded Leak Location
When diagnosing a threaded leak on galvanized or brass pipes, inspect the joint area closely for visible signs of seepage, corrosion, or mineral buildup that indicate the exact leak point.
Note wetness patterns after drying the area and observing for new damp spots.
Use a clean cloth to wipe joints, then watch while the system is pressurized briefly.
Listen for hissing and feel for drafts with a gloved hand.
Mark the precise thread or coupling showing failure before disassembly.
Record whether corrosion is external or between fittings to guide repair decisions.
- Wipe, dry, observe
- Pressure test briefly
- Mark leak location
Choose Appropriate Sealant
For threaded leaks on galvanized or brass pipes, select a sealant that matches the metal, thread type, and service conditions to guarantee a durable, leak-free joint.
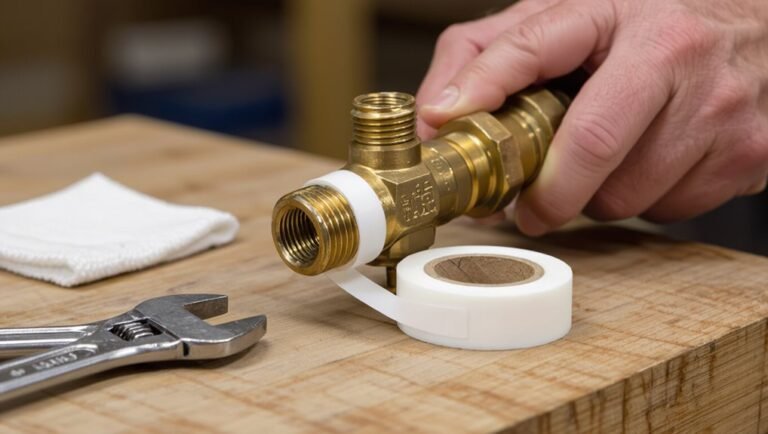
Use PTFE tape rated for metal fittings when threads are standard tapered NPT; wrap clockwise three to five turns, avoiding overlap into the bore.
For straight threads or where vibration, higher temperatures, or chemical exposure exist, choose a compatible pipe dope formulated for galvanized or brass and rated for the fluid.
Make certain surfaces are clean, dry, and free of old sealant.
Allow curing per manufacturer instructions before restoring service to make certain integrity.
Tighten And Inspect Joint
After sealant application and curing, attention shifts to tightening and inspecting the joint to confirm a leak-free connection.
The installer uses a proper-sized wrench on galvanized or brass fittings, applying firm, steady torque until snug; avoid over-tightening, which can crack brass or strip threads.
Once tightened, the joint is wiped clean and visually inspected for gaps, uneven sealant, or damaged threads.
A slow-pressure test follows: restore water briefly while observing for drips.
If any seepage appears, relieve pressure, reapply sealant to threads, and repeat tightening and testing until the joint holds.
- Use correct wrench and steady torque
- Visually inspect threads and sealant
- Perform slow-pressure leak test
Fix Leaks Under Sinks Without Removing the Cabinet
Beneath most bathroom and kitchen sinks, limited space and cabinetry complicate access to leaky joints, but many common leaks can be diagnosed and repaired without removing the cabinet.
First, dry the area and use a flashlight to locate drips: check supply lines, tailpieces, trap slip nuts, and faucet connections.
Tighten loose slip nuts with channel-lock pliers; replace deteriorated rubber washers or O-rings.
For hairline cracks or slow leaks, apply plumber’s epoxy or a self-fusing silicone tape as a temporary fix.
Replace corroded sections with push-fit (SharkBite) fittings through the cabinet opening for a durable, quick repair.
Stop a Burst Pipe Behind a Wall Without Removing Drywall
When a pipe bursts behind drywall, quick containment and targeted access can stop water flow and limit damage without tearing out large sections of the wall.
A homeowner locates the leak by listening and feeling for moisture, then shuts the main water valve.
Small access holes placed near the pipe reveal the break; temporary clamps, rubber patches and hose clamps or a repair sleeve control the flow.
Drywall edges are cut minimally to allow a proper repair.
After confirming no further seepage, the patch is secured and the wall repaired.
Professional help is advised for complex or hidden fittings.
- Locate and isolate leak
- Make minimal access hole
- Apply clamp/patch and verify dry
Handle Frozen Pipes and Thaw Them Safely
The article then addresses how to prevent pipes from freezing by insulating vulnerable runs and maintaining steady heat in cold weather.
It outlines safe thawing methods—such as applying gentle heat with a hair dryer or heat lamp and gradually warming the pipe while monitoring for leaks.
It also explains signs that require a professional plumber, including persistent ice, inaccessible piping, or evidence of cracks or leaks.
Prevent Pipes From Freezing
During cold snaps, homeowners must take steps to prevent pipes from freezing, since frozen pipes can burst and cause extensive water damage. The text advises insulating exposed pipes, maintaining steady indoor temperatures, and allowing faucets to drip slightly to relieve pressure.
Crawlspaces, attics, and exterior walls require particular attention; sealing drafts and adding pipe insulation reduces risk. Regular maintenance includes checking for gaps where cold air enters and winterizing outdoor spigots.
Awareness of vulnerable locations and early preparation minimizes emergency repairs.
- Insulate exposed and vulnerable pipe runs
- Seal drafts and maintain consistent heating
- Winterize outdoor faucets and valves
Safe Thawing Methods
If insulation, sealed gaps, and steady heat fail to prevent a freeze, it becomes necessary to thaw pipes safely to avoid bursts and water damage.
First, open faucets to relieve pressure and allow melted water to escape.
Apply gentle, direct heat along the frozen section: use a hair dryer, heat gun on low, or electric heat tape; avoid open flames.
Warm the pipe gradually from the faucet toward the frozen area.
Monitor for leaks as ice melts.
Keep the surrounding area clear and insulate exposed sections afterward.
Maintain safe electrical practices and never use combustible heating methods near pipes.
When To Call Professionals
When should a homeowner call a professional plumber to handle frozen pipes? A professional is necessary when risks exceed DIY capacity: visible pipe bulging, signs of leakage, or inaccessible frozen sections.
Trained plumbers diagnose hidden damage, safely thaw pipes, and perform targeted repairs to prevent bursts. They use specialized tools and can isolate sections, restore water, and advise insulation improvements.
Homeowners should call immediately if heating failure, multiple frozen lines, or uncertainty about pipe location exists. Delaying increases rupture risk and repair costs. Timely professional intervention preserves structural integrity and limits water damage.
- Visible bulging or leaks
- Multiple or inaccessible freezes
- Heating failure or uncertainty
Test Your Repair: Pressure Checks and Leak Tests
A pressure check and leak test confirm the integrity of a repaired pipe before restoring service.
The technician isolates the section, slowly restores system pressure to the recommended test value, and watches gauges for drops.
Visual inspection follows: joints, fittings, and patches are examined for weeping or moisture.
For low-pressure systems, compressed air with a soap solution highlights bubbles at fault points; for water lines, a controlled refill and short observation period suffice.
Any pressure loss or visible seepage mandates resealing or reinforcement.
Only after stable pressure and dry fittings should normal use resume.
Dry and Disinfect the Affected Area Quickly
After confirming the repair holds, the technician must dry and disinfect the affected area promptly to prevent mold, corrosion, and bacterial growth.
Surfaces are wiped with absorbent towels, moisture meters verify dryness, and fans or dehumidifiers accelerate evaporation.
Hard surfaces receive a suitable disinfectant; porous materials are assessed for salvageability and cleaned or removed if contaminated.
Protective gloves and eye protection are used.
Ventilation is maintained until odors dissipate.
Records note products used and drying time for warranty or future inspection.
- Use towels, fans, and a moisture meter.
- Apply EPA-registered disinfectant to hard surfaces.
- Remove unsalvageable porous materials.
Salvage Fittings and Pipe Pieces to Save Money
By salvaging undamaged fittings and short lengths of pipe, technicians can reduce material costs and speed repairs without compromising system integrity. A quick assessment identifies reusable couplings, elbows, and threaded pieces; cleaned, inspected parts often meet safety standards. Proper labeling and storage prevent mismatches. Reused sections cut waste and lower project expense while minimizing downtime. Compatibility checks and pressure testing confirm reliability before reinstallation. Salvage strategies suit temporary fixes and permanent repairs when parts show no corrosion, cracks, or deformation.
| Part type | Inspection tip | Typical reuse limit |
|---|---|---|
| Copper elbow | No pinholes | 2 uses |
| PVC coupling | Clean threads | 1 use |
| Brass nut | Thread integrity | 3 uses |
Estimate Cost and Time for Each DIY Repair Method
When comparing DIY repair methods, clear estimates of cost and time help homeowners choose the most practical option. A concise comparison lists typical materials, tool needs, average labor time, and realistic price ranges. Estimates should account for contingency parts and minor mistakes. Simpler fixes take less time but may suit only surface damage; more involved methods require skill and longer work windows.
- Patch kits: low cost ($5–$25), 15–45 minutes, minimal tools.
- Compression fittings: moderate cost ($10–$40), 30–90 minutes, basic plumbing tools.
- Replace section: higher cost ($20–$100+), 1–4 hours, soldering or solvent tools.
Choose Temporary Patch vs Permanent Repair (Decision Guide)
Having compared cost, time, and skill requirements for common DIY fixes, the homeowner must decide whether a temporary patch or a permanent repair best fits the situation.
A temporary patch suits immediate containment: quick to apply, low-cost, minimal tools, and useful when awaiting parts, professional help, or when the leak is minor and access is difficult.
A permanent repair is justified for recurring leaks, high-pressure lines, or when long-term reliability matters; it requires more time, correct materials, and sometimes professional skill.
Prioritize safety, water shutoff, and whether future access or resale value favors permanence over a short-term fix.
Common DIY Mistakes That Make Leaks Worse
Attempting quick fixes without evaluating the cause often turns a simple leak into a larger problem.
The writer observes common errors that escalate damage: using inappropriate materials, omitting proper surface preparation, and ignoring underlying corrosion or pressure issues.
Temporary patches applied where a permanent fix is needed can fail and spread damage.
Tightening fittings without isolating the supply risks flooding.
Skipping inspection of nearby joints misses secondary leaks.
Incorrect adhesives or tapes degrade under heat or water.
Leaving a patched area unchecked allows deterioration.
The following list highlights typical mistakes to avoid.
- Using wrong patch materials
- Skipping surface prep
- Ignoring root causes
Work Safely With Electricity Near Wet Areas
Near water, electricity becomes a serious hazard that requires deliberate precautions and respect for basic safety rules.
Workers should cut power at the breaker before touching damp walls or fixtures, verify circuits are dead with a noncontact tester, and lock breakers to prevent accidental re-energizing.
Use ground-fault circuit interrupter (GFCI) outlets or portable GFCI protection for any tools.
Wear rubber-soled shoes and insulated gloves when necessary.
Keep extension cords and power tools elevated and dry.
If wiring is corroded, wet, or inaccessible, stop work and consult a qualified electrician to avoid shock, fire, or code violations.
When to Call a Plumber (Red Flags You Shouldn’t DIY)
Recognize when a plumbing problem exceeds basic DIY skills: persistent leaks, sewage backup, loss of water pressure throughout the house, gas-smelling water or strong sewer odors, repeated clogging after snaking, visible pipe corrosion or bulging, and water spreading from hidden places (ceilings, behind cabinets) all signal the need for a licensed plumber.
A professional assessment prevents escalation, health risks, structural damage, and code violations. Call immediately if uncertainty exists about shutoff effectiveness, gas involvement, or mold growth.
Document conditions for later reference, but do not attempt invasive repairs beyond isolating water and power.
- Structural or hidden water spread
- Sewage or gas odors
- Recurrent failures after DIY fixes
Document Damage and Repairs for Insurance Claims
After shutting off affected utilities and stabilizing the scene, homeowners should document all visible damage and interim repairs thoroughly for insurance purposes. Photographs, timestamps, notes of locations and affected items, and receipts for materials create a clear record. Neutral descriptions and preserved evidence support claims and speed settlements. Maintain copies, back up digital files, and provide organized summaries to adjusters. Avoid speculation about causes; report observations. Prompt, methodical documentation reduces dispute and emotional strain after loss.
| Image | Note | Receipt |
|---|---|---|
| broken pipe | laundry room, 2/12 | $12, hose clamp |
| soaked floor | warped plank | $0, photo only |
Prevent Future Pipe Breaks on a Budget
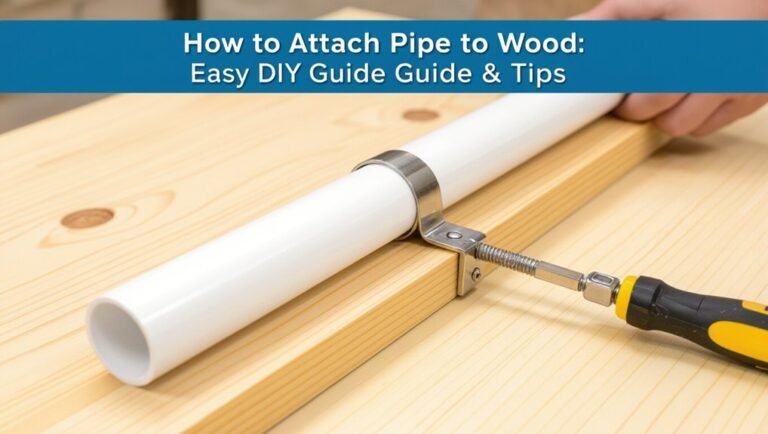
When working to reduce the risk of future pipe breaks on a limited budget, homeowners should prioritize low-cost, high-impact measures: insulating exposed pipes, securing loose piping to prevent strain, and maintaining consistent indoor temperatures during cold weather.
The focus remains on preventive maintenance, routine inspections for leaks or corrosion, and addressing minor issues before they escalate. Simple adjustments cut risk without major expense. Recommended actions include checking for drips, replacing worn connectors, and improving cabinet ventilation to avoid stagnant cold pockets.
- Inspect joints and fittings regularly
- Tighten or replace loose supports
- Clear debris around pipes
Cheap Pipe Insulation Methods for Winter Protection
Preventive steps like insulating exposed pipes are among the most cost-effective defenses against winter breaks, and several budget-friendly methods provide reliable protection.
Foam pipe sleeves slip over pipes easily; they are inexpensive, simple to cut to length, and resist moisture. Fiberglass wrap with vapor barrier suits irregular shapes and tight spaces, offering higher R-value where needed.
For short-term or emergency use, rubber-backed foam tape or self-sealing insulation tape adheres quickly and seals joints. In unheated areas, adding a layer of bubble wrap or old towels under a protective wrap adds insulation cheaply.
Secure all seams with duct tape and check annually.
Build a Simple Emergency Plumbing Kit for Home
A basic emergency plumbing kit lets a homeowner respond quickly to common leaks and minor breaks until a professional arrives, reducing water damage and temporary loss of service.
It should contain compact, reliable tools and consumables for immediate containment, temporary sealing, and safe shutoff. Selection prioritizes ease of use, durability, and compatibility with household pipes.
Store items in a marked, waterproof container near the main shutoff and check monthly for expiry or damage. Training on shutoff location and basic use reduces panic. Include clear labels and brief written steps for emergency actions.
- Adjustable wrench, slip-joint pliers, and pipe cutter
- Rubber repair tape, epoxy putty, and hose clamps
- Portable bucket, work gloves, and flashlight
Quick Troubleshooting: What to Try If the Leak Returns
What should be checked first if a temporary repair starts leaking again? The homeowner inspects the patch, pipe alignment, and water pressure. Tighten clamps, reapply sealant, and dry surfaces before resealing. If corrosion, cracks, or joint failure appear, isolate water and replace the segment. Monitor for recurring pressure spikes or nearby valve faults. Call a pro when visible metal fatigue, hidden damage, or recurring leaks persist.
| Symptom | Immediate action | Next step |
|---|---|---|
| Drip at patch | Tighten/reseal | Replace patch area |
| Joint leak | Check alignment | Replace fitting |
| Pressure surge | Check valve | Call plumber |
Conclusion
They stopped the drip, they wiped the flood, they held the damage at bay; they turned the valve, they wrapped the joint, they patched the breach with steady hands. They kept safety first, they kept costs low, they kept calm in the chaos. They learned to insulate, they learned to prepare, they learned to call help when needed. They saved the home, they saved time, they saved peace of mind—resilient, resourceful, ready.