How to Find Where a Pipe Is Frozen: Quick DIY Detection Tips
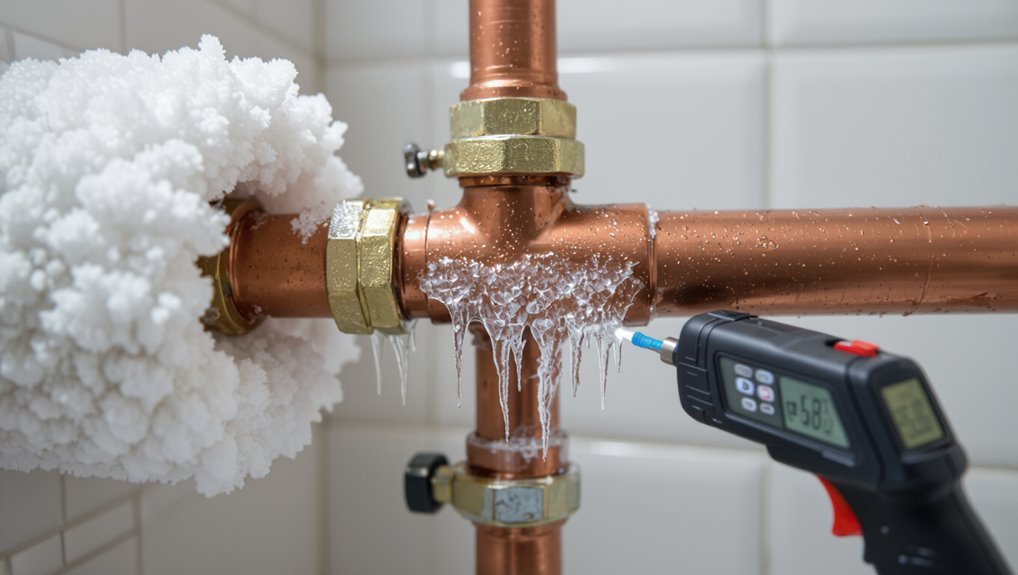
To find where a pipe is frozen, start by checking faucets for any sudden loss of water flow or sputtering, which can help you pinpoint the affected line. Inspect exposed pipes for signs of frost, condensation, bulging, or hairline cracks, and compare their temperature to adjacent sections by feeling for cold spots. Additionally, tap on fittings and listen for any unusual sounds that might indicate temperature changes. Using a noncontact infrared thermometer or thermal camera can help you identify abrupt temperature drops along the pipes, especially in areas like exterior walls, attics, crawlspaces, and basements. For further assistance, look into simple thawing tips and prevention methods.
Key Takeaways:
- Check faucets for loss of flow or sputtering.
- Inspect exposed pipes for frost and temperature differences.
- Use a thermometer or thermal camera to locate cold spots.
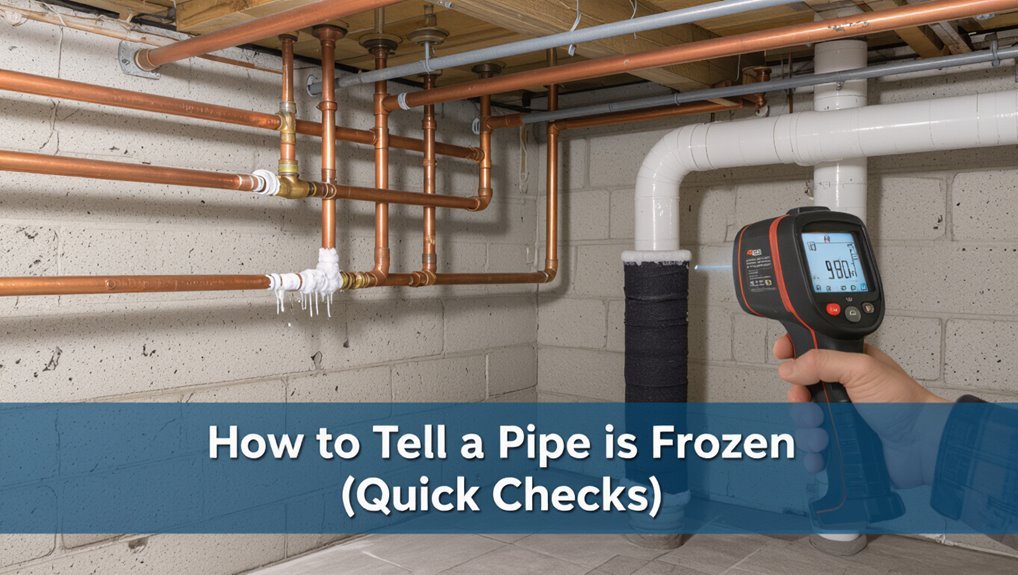
How To Tell A Pipe Is Frozen (Quick Checks)
Inspectors look for abrupt loss of water flow, frost or condensation on exposed pipes, and unusually cold fittings as immediate indicators of a freeze. They listen for reduced or sputtering faucets and check multiple fixtures to localize the problem.
Visible bulging, hairline cracks, or wet spots suggest rupture. Exterior walls, attics, crawlspaces, basements, and utility closets receive focused inspection where pipes run uninsulated.
Thermal imaging or a noncontact infrared thermometer helps identify cold sections without invasive measures. Signs of recent thawing—drips, pooling, or water stains—confirm intermittent freezing.
Documentation of location and conditions guides subsequent repair planning.
Immediate Steps To Protect Plumbing During A Freeze
When freezing temperatures are expected, the quickest protective measures focus on reducing heat loss and preventing pressure buildup: open cabinet doors to expose plumbing to warmer indoor air, allow a trickle of cold and hot water through vulnerable faucets, and shut off and drain outdoor hoses and irrigation lines.
Close valves isolating seldom-used systems, insulate exposed pipes with foam sleeves or heat tape rated for plumbing, and seal gaps around exterior walls, vents, and foundation penetrations to block drafts.
Maintain steady home heat, monitor vulnerable areas periodically, and keep a shutoff tool accessible to stop flow quickly if a leak is discovered.
Quick Fixes To Access And Thaw A Frozen Spot
The guide directs attention to the coldest section of a pipe as the likely frozen spot. It recommends accessing that area and applying gentle, controlled heat to thaw the obstruction.
Once thawed, the procedure includes restoring safe water flow and checking for leaks.
Locate The Coldest Section
By feeling along exposed runs and checking for cold spots near fittings, shutoffs, or external walls, one can pinpoint the coldest section of a frozen pipe to target for thawing.
The inspector compares temperature changes, listens for hollow versus solid tones, and notes visible frost, swelling, or condensation changes.
Access points are prioritized where pipes enter unheated spaces.
Once identified, the area is cleared of insulation and obstacles, documentation is made for repair needs, and precautions are set to protect nearby materials.
Focus remains on locating the core freeze before any warming begins.
- Examine fittings and joints first.
- Trace toward unheated cavities.
- Mark the coldest pinpoint for action.
Apply Gentle Heat
Having located the coldest section and cleared access, the inspector applies gentle heat to thaw the spot without stressing the pipe.
Small, controlled sources—hair dryer, heat gun on low, or infrared heat lamp—are used, keeping the device moving to prevent localized overheating.
Heat is concentrated on the frozen area, not fittings or insulation, while metal pipes are monitored for temperature.
Friction tape or a towel can moderate heat transfer.
Open faucets to allow melted water to flow and relieve pressure.
The inspector avoids open flames, high heat, and rapid temperature changes that risk cracking or joint failure.
Restore Safe Water Flow
Restore safe water flow by clearing access and creating a controlled thaw path that directs melted water away from vulnerable areas.
A person should open nearby faucets to relieve pressure, remove insulation or obstacles to expose the frozen section, and place a shallow pan or towels to capture runoff.
Controlled thawing prevents leaks from spreading and aids inspection once flow resumes.
- Open upstream and downstream valves slightly to reduce pressure and check for gradual flow.
- Remove coverings and clear a dry workspace to monitor thaw progress and damage.
- Channel runoff to a drain; inspect seals and joints after thawing.
Signs At Fixtures That Indicate A Frozen Supply Line
At a fixture, unusual behavior often signals a frozen supply line: faucets that sputter or produce only a trickle, drains that refuse to draw water, or sudden cold spots on exposed pipes and fittings.
Other clear indicators include faucets that remain ice-cold despite system heat, unexpected pressure loss localized to one fixture, and valves that feel unusually stiff.
Toilet tanks that fail to refill and showerheads that emit intermittent bursts also point to upstream ice.
Visual frost, condensation turned to ice, or visible pipe bulging near the affected fixture strengthens the diagnosis, guiding targeted inspection and safe thawing measures.
How Slow Drips Help Locate Partial Freezes
After identifying fixture symptoms of a freeze, attention often turns to slow drips as a diagnostic clue for partial blockages in the line.
Observing pressure changes and drip rate helps narrow the frozen segment. A reduced steady drip often indicates a constriction rather than an open rupture; listening along accessible runs correlates sound with location.
Combining visual condensation, cold surfaces, and drip behavior gives a focused search area for thawing. Thermal imaging or careful touch confirms suspicions before applying heat.
Record observations to avoid unnecessary work and to guide professional help if thawing efforts reveal worsening conditions.
- Measure drip rate and pressure change.
- Listen for flow cues along pipe runs.
- Note cold spots and condensation.
How To Tell A Burst Pipe From A Frozen-But-Intact Pipe
Distinguish a burst pipe from a frozen-but-intact pipe by checking for continuous water loss, visible rupture, and changes in pressure or sound: a burst typically produces steady, uncontrolled flow or spray, wet stains, pooling, or a sudden drop in pressure, whereas an intact but frozen pipe shows limited or no flow, bulging or frost on the exterior, and muffled or intermittent trickling upstream of the freeze.
| Indicator | Burst |
|---|---|
| Flow pattern | Continuous spray or heavy flow |
| Pressure change | Sudden drop |
| Exterior signs | Wet stains, pooling |
| Temperature signs | No frost at leak |
| Sound | Roaring or steady gurgle |
Where Pipes Commonly Freeze In A Home
Once homeowners determine whether a pipe is burst or merely frozen, attention turns to where freezing is most likely to occur. Exterior walls, uninsulated attic spaces, and outdoor hose bibs receive focused inspection because they face cold exposure and reduced heat. Identifying these zones narrows searching and speeds thawing.
- Exterior wall runs: pipes routed along outer walls get colder faster, especially near windows and doors.
- Attic and garage penetrations: poorly heated voids let temperatures drop around plumbing lines.
- Under-sink and cabinet spaces: limited airflow and insulation gaps allow localized freezing near water supply connections.
Common Freeze Points In Basements And Crawlspaces
Basements and crawlspaces often host specific spots where pipes are most vulnerable to freezing.
These include runs along exterior walls, low-elevation sections that collect cold air, and lines near or connected to water heaters.
Identifying these common freeze points helps prioritize inspection and preventive insulation.
Near Exterior Walls
Along exterior walls, water lines face heightened risk because colder outside air penetrates foundation gaps and chills the surrounding framing; in basements and crawlspaces this creates predictable cold pockets where pipes run just inside the perimeter.
Inspection focuses on temperature differences, visible condensation, and proximity to openings.
Signs of freezing often appear near sill plates, uninsulated rim joists, and behind stored items that block air flow.
Access panels and lighting help reveal frost or discoloration.
Prioritize sections adjacent to vents and gaps for early checks.
- Check for cold spots with a noncontact thermometer.
- Look for frost, bulging, or flaky insulation.
- Verify air sealing around penetrations.
Low Pipe Elevations
In crawlspaces and low basement areas, pipes installed close to the floor are especially vulnerable because cold air settles downward and pooling near footings creates persistent chill zones.
Inspection focuses on low runs, bends, and joints where elevation drops occur; these spots lose heat fastest.
Visual cues include frost, condensation, or discoloration on pipe surfaces and surrounding insulation collapse.
Use a thermometer or infrared thermometer to map temperature gradients along low sections.
Check beneath and behind obstacles where cold pockets form.
Address access issues by removing debris before thawing attempts.
Mark identified low-elevation risks for future insulation and rerouting considerations.
Around Water Heaters
Near the water heater, exposed supply and drain lines, valves, and fittings present frequent freeze points because they extend into colder perimeters, sit near exterior walls or slab edges, and may be recessed into uninsulated consoles.
In basements and crawlspaces, thermal bridging and poor attic-to-floor seals further lower local temperatures.
Inspection focuses on fittings, unions, and drain pans where cold pockets form; feel for cool spots and listen for flow changes when fixtures run.
Remedies include targeted insulation, heat tape, and rerouting vulnerable runs.
Documentation of vulnerable locations aids future prevention and quick response during cold snaps.
- Inspect exposed joints and valves.
- Test while running hot water.
- Apply insulation or heat trace.
Finding Frozen Pipes In Attics And Vaulted Ceilings
Above the living spaces, attics and vaulted ceilings conceal sections of plumbing that are especially vulnerable to freezing because they are often uninsulated, poorly ventilated, and exposed to exterior temperatures.
Inspectors should look for frost on accessible pipes, condensation patterns, and brittle insulation. Listen near penetrations and vents for running water before cold stops. Use a noncontact infrared thermometer to compare pipe temperatures along runs; sudden drops indicate ice.
Examine attic access points for drafts and blocked soffit vents that lower ambient temperatures. Mark suspected freeze locations, document routes to shutoff valves, and plan thawing methods while avoiding open flames or excessive heat.
Locating Frozen Pipes Inside Exterior Walls
Moving from attic and vaulted-ceiling risks to wall-contained piping, inspectors face different challenges when pipes run inside exterior walls: access is limited, thermal bridging and insulation gaps can hide cold spots, and visual inspection is often impossible.
Professionals rely on indirect signs and targeted tools to narrow locations. Thermal imaging, careful tap-testing, and moisture detection reduce guesswork.
Heat-source mapping and reviewing pipe routes from fixtures guide decisions before invasive opening. Safety and minimal disruption direct choices; when detection is inconclusive, small exploratory access may be warranted to prevent bursts.
- Use thermal camera scans along wall surfaces.
- Tap-test sequences to compare sound changes.
- Track fixture-to-exterior pipe runs.
Checking Pipes Under Kitchen And Bathroom Cabinets
Under kitchen and bathroom cabinets, the cabinet floor and walls should be inspected for stains, swelling, or cold spots that indicate a frozen pipe.
Hands can be used to feel accessible pipes behind sinks and fixtures for unusually hard or icy sections.
Any visible frost or ice on fittings or insulation is a clear sign of freezing that requires immediate attention.
Inspect Cabinet Floor And Walls
In cabinets beneath sinks and along walls, a careful visual and tactile inspection of the floor and inner walls can reveal signs of frozen or compromised pipes. The observer notes discoloration, frost patterns, and water stains, then presses gently for cold spots or soft decking indicating slow leaks. Lighting and a mirror improve visibility in tight corners.
Attention to insulation gaps and routing where pipes traverse cabinet seams pinpoints vulnerable runs.
- Look for white or crystalline residue, dampness, and warped wood near pipe exits.
- Feel for localized cold with the back of the hand.
- Check insulation continuity and fastener penetration.
Feel Pipes Behind Fixtures
Beneath sinks and behind lavatories, the inspector carefully feels accessible pipe runs and fittings to detect cold spots, frost, or moisture that indicate imminent freezing or leaks. Gloves are worn to improve sensitivity and avoid cold shock.
Hands move along copper and plastic lines, pausing at joints, valves, and bends where constriction or exposure increases risk. Attention focuses on areas near exterior walls, under window-facing cabinets, and where insulation is missing.
Any unusually cold or damp section is noted and traced toward supply shutoffs and fixtures. Findings guide targeted warming, insulating, or professional repair to prevent ruptures.
Look For Frost Or Ice
Inspectors routinely check the undersides of kitchen and bathroom cabinets for frost or ice on supply lines and trap assemblies, since visible freezing is a clear sign of dangerously low pipe temperatures.
The practice focuses on immediate visual cues and subtle textural changes: dull, white frost on metal, opaque ice along joints, or a crystalline sheen near fittings.
Attention to these details narrows the search for interior freeze points and helps decide whether thawing or professional repair is needed.
- Look for white or gray frost patterns on pipe surfaces and insulation.
- Note ice near compression fittings and P-traps.
- Photograph findings for documentation.
Identifying Frozen Pipes In Garages, Sheds, And Outbuildings
When temperatures drop, plumbing in garages, sheds, and other outbuildings becomes especially vulnerable to freezing because these spaces often lack the insulation and heat of the main house. Inspect exposed pipes along walls, ceilings, and near doors for stiffness, bulging, or frost accumulation. Check utility sinks, hose bibs, and water heater lines for reduced or absent flow.
Listen for hollow or muted sounds when tapping pipes—frozen sections transmit sound differently. Examine remote shutoff valves and service entrances. Confirm ambient temperature near pipes with a thermometer. Document suspicious areas and act quickly to thaw or isolate affected lines to prevent rupture.
Spotting Freeze Risks In Mobile Homes And Trailers
Mobile homes and travel trailers often sit closer to the ground and have thinner exterior walls than site-built houses, making their plumbing especially prone to freezing in cold weather.
Attention to undercarriage insulation, skirting integrity, and interior heat distribution helps locate vulnerable runs.
Inspect exposed lines beneath the floor and inside exterior closets for cold spots, condensation, or frost.
Check skirting vents and gaps that admit wind.
Monitor interior rooms farthest from vents for low temperatures.
Document suspicious areas and trace piping paths to identify likely freeze points quickly.
- Undercarriage exposure
- Skirting breaches
- Interior cold pockets
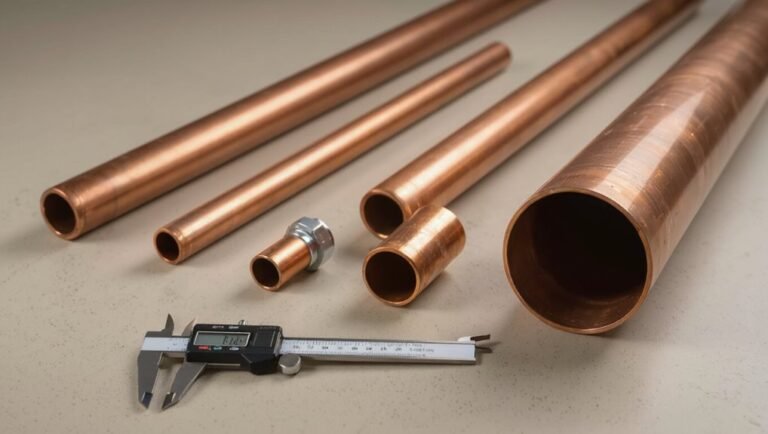
How Pipe Material Affects Freeze Location (Copper, PVC, PEX)
Different pipe materials change where and how quickly freezing occurs.
Copper conducts cold rapidly, often causing ice to form farther from the cold source.
PEX, by contrast, is more flexible and less conductive, making it less prone to freezing in comparable conditions.
Copper Conducts Cold Faster
Because copper is highly thermally conductive, it transfers ambient cold into the water column much faster than plastic alternatives, so freeze points tend to form farther from heat sources and closer to exposed metal fittings.
Copper’s thin walls and direct contact with structural elements accelerate heat loss, making localized freezing more predictable but quicker to develop.
Observers should prioritize exposed runs, joints, and bends when tracing cold spots.
- Inspect metal fittings and exposed straight runs near exterior walls.
- Listen for reduced flow or hollow sounds at rigid copper sections.
- Use an infrared reader to compare copper against nearby insulated or plastic lines.
PEX Resists Freezing Better
Several factors make PEX less prone to freezing than rigid piping: its low thermal conductivity slows heat loss, its flexibility permits slight expansion as ice forms, and its thicker wall profile compared with copper reduces cold transfer into the water.
Consequently, frozen sections in mixed-material systems often occur at copper or PVC runs, at fittings, or where pipes pass through uninsulated studs.
PEX’s resilience shifts likely freeze points toward external constrictions, exposed runs, and contact with cold metal.
When locating a freeze, inspectors should focus on material junctions, exposed lengths, and areas lacking insulation rather than assuming long continuous PEX runs will freeze first.
Why Fittings And Joints Often Freeze First
Exposed to colder air and containing more complex geometry, fittings and joints lose heat faster than straight runs of pipe, so the water inside them reaches freezing temperatures sooner.
The metal mass, thinner surrounding insulation, and irregular flow patterns create localized cold spots where ice nucleation is likeliest.
Thermal bridging at connections conducts heat away; crevices trap colder air; and flow disruption reduces convective warmth.
Inspection should prioritize these locations when tracing temperature drops.
- Thermal bridging: metals and soldered connections conduct heat away quickly.
- Geometry: irregular shapes promote uneven flow and stagnation.
- Insulation gaps: joints often lack continuous protective covering.
Detecting Ice At Bends, Valves, And Tees
When tracing a line for frozen sections, attention should focus on bends, valves, and tees because their altered flow and contact points make ice formation both more likely and harder to detect by touch alone.
These components create turbulence and pockets where water slows, so cold concentrates there. Probe along the pipe toward each fitting, listening for hollow sounds or reduced flow at fixtures.
Feeling for temperature gradients helps: abrupt cold spots near a fitting indicate ice. Valves may conceal blockages inside bodies; gently operate accessible handles to sense stiffness.
Mark suspected locations and prioritize them for gradual thawing to avoid pressure damage.
Using Visual Inspection To Spot Vulnerable Pipe Runs
By scanning pipe routes visually, an observer can quickly identify runs most susceptible to freezing: those routed along uninsulated exterior walls, through unheated attics or crawlspaces, and near drafty openings such as windows, doors, or poorly sealed vents.
The inspector notes exposed metal, sagging insulation, and proximity to cold air sources. Discoloration, frost streaks, or condensation patterns suggest thermal bridges.
Attention to routing where pipes cross uninsulated sheathing or join short runs of thinner piping is important. Visual clues guide targeted mitigation and further checks without touching the pipe surface.
- Exposed sections and insulation gaps
- Junctions near vents or openings
- Pipes against exterior sheathing
Feeling For Cold Spots Along Accessible Pipes
The inspector runs a hand along exposed pipe runs to feel for abrupt temperature changes that may indicate developing ice.
Attention is paid to sections where insulation is missing, crushed, or damp.
Noting both cold spots and compromised insulation helps pinpoint areas needing immediate attention.
Feel For Temperature Changes
Using gloved hands, a person should run fingers along accessible pipes to detect abrupt drops in temperature that indicate cold spots. The technique relies on tactile contrast: warm, flowing sections feel noticeably warmer than portions where water has slowed or frozen. Movement should be steady, covering joints, bends, and exposed runs. If a cold spot is found, mark its location for further inspection or thawing. Avoid pressing too hard to prevent injury or pipe damage. Consider ambient drafts that can create false positives; repeat checks after closing doors or vents to confirm the reading.
- Check joints and bends.
- Compare adjacent sections.
- Reassess after blocking drafts.
Inspect Pipe Insulation
After locating cold spots by touch, attention should move to examining the pipe insulation for gaps, compression, or missing sections that allow heat loss. The inspector should follow accessible runs, pressing gently to detect thin or flattened areas where insulation no longer performs.
Look for exposed metal, torn seams, or displaced pieces near fittings, joints, and hangers. Note sections with moisture, mold, or frost buildup, indicating compromised material.
Measure insulation thickness against recommended values for the climate. Mark deficient segments for repair or replacement. Proper labeling and brief photos assist future checks. Restoring continuous, snug insulation reduces refreeze risk and conserves heat.
Tapping And Listening: How Sounds Help Locate Ice
Often, technicians tap pipes methodically and listen for changes in pitch and resonance to pinpoint where ice has formed. The technique relies on contrast: solid ice dampens vibration producing a duller, lower-pitched sound compared with clear, ringing tones over unfrozen sections. Tapping proceeds along accessible runs, noting abrupt timbral shifts and muted responses near fittings or exposed segments. Attention to consistent tapping force and a small tool improves repeatability. Ambient noise should be minimized to avoid false cues.
- Tap consistently with a wrench or mallet rubber head.
- Compare tones along short intervals.
- Mark transition points for further inspection.
Checking Water Pressure To Narrow The Frozen Section
Measure static and dynamic water pressure at fixtures to help localize the frozen segment: reduced flow or a significant drop when a fixture is opened indicates the ice is upstream of that point, while normal pressure suggests the blockage lies elsewhere.
Inspect multiple fixtures sequentially—kitchen, bathroom, outdoor spigot—comparing flow behavior. Close valves selectively to see if pressure changes isolate a section.
Note whether hot, cold, or both lines are affected to narrow to branch or supply lines. Record observations and map suspected frozen segments before attempting thawing.
Use care interpreting low municipal pressure or multiple simultaneous failures as separate causes.
Using Pressure Gauges To Isolate The Frozen Segment
Using a pressure gauge at strategic points along the plumbing system provides objective data to pinpoint where a pipe is frozen. The method records static and dynamic pressure differences, revealing locations with abrupt drops or zero flow indicative of an obstruction caused by ice.
Measurements should be compared progressively from the main supply toward fixtures; sudden changes localize the frozen segment. Readings taken before and after valves, tees, and long runs are most informative.
Interpreting gauge data requires noting baseline pressure and temporal stability; trapped sections show sustained low or absent pressure under expected demand.
- Attach gauges at supply, midline, and fixture.
- Record static then open a faucet.
- Compare drops to locate blockage.
How To Shut Off Lines To Isolate And Test Sections
The technician first locates the main shutoff valve to stop water flow into the system.
Individual branch valves are then closed sequentially to isolate sections and narrow the affected area.
Each isolated section is tested for pressure or flow to confirm the frozen segment.
Locate Main Shutoff Valve
Before attempting repairs, a homeowner should locate the building’s main shutoff valve to isolate water flow and prevent further damage. The valve’s position — often near the water meter, where the supply enters the structure, or in a basement/crawlspace — must be confirmed visually and by feel. Shutoff operation is tested gently to avoid stress on aging fittings.
Once closed, verify supply cessation by opening a nearby faucet. If the valve is inaccessible or seized, call a professional to avoid causing a burst.
- Inspect entry points for meter or riser.
- Identify valve type (gate, ball, or stop).
- Test closure and verify flow cutoff.
Isolate Individual Branches
After the main shutoff is confirmed closed, work progresses to isolating individual branches so the frozen section can be located and tested without draining the entire system.
The operator identifies accessible branch shutoffs—valves at manifolds, under sinks, behind appliances—and closes them one at a time while noting which fixtures lose pressure. If a branch lacks a local valve, a temporary shutoff can be installed at a handy access point or supply flex line disconnected.
With each isolation, the technician opens a downstream faucet to confirm isolation, then applies heat or probes for cold spots. Marking tested branches prevents redundant checks and narrows the frozen pipe quickly.
Using Dye Or Food Coloring To Trace Flow And Blockages
Using a small amount of dye or food coloring, a plumber can quickly visualize where water is moving and where it stalls within a piping system. The colored tracer reveals flow paths, pinpoints stagnant pockets upstream of a freeze, and indicates leaks when dye appears outside the intended route.
It is applied to a fixture, flushed briefly, then observed at accessible vents, drains, or other fixtures downstream. Care is taken to use nonstaining, water-soluble dyes and minimal quantities to avoid discoloration.
Results guide targeted thawing and isolation without invasive opening.
- Introduce dye at fixture.
- Observe downstream points.
- Record stagnation locations.
When Condensation And Frost Mark A Frozen Area
Cold, damp conditions often reveal frozen sections of pipe through visible frost lines along insulation or exposed metal.
Areas with persistent cold damp patches on walls or ceilings can indicate where freezing has begun.
Formation of an ice bulge or localized swelling on the pipe is a clear sign that water inside has frozen and expanded.
Visible Frost Lines
A thin, white band often appears along the length of a frozen pipe where moisture in the air condenses and freezes, forming a visible frost line that pinpoints the section affected by freezing. Observers note that the frost band contrasts with adjacent warmer metal and often coincides with fittings, bends, or exposed runs. It serves as a clear, immediate indicator for inspection and targeted thawing without probing walls.
- Frost thickness correlates with exposure and duration, thicker where cold accumulates.
- Color and edge sharpness reveal recent versus long-standing freezes.
- Frost location often matches thermal bridges and insulation gaps.
Cold Damp Patches
Frost lines often accompany areas where moisture collects, and nearby surfaces may show darker, damp patches where condensation forms against the cold metal.
Such dampness signals a temperature differential: exposed pipe sections or fittings colder than surrounding air pull moisture, leaving persistent wet marks on insulation, drywall, or floor joists.
Inspectors should follow linear damp streaks, check seams and bends, and note recurring spots after nighttime cooling.
These patches may indicate reduced flow or ice inside without obvious external frost.
Use gloves to feel for coldness and observe humidity patterns; combine visual clues with localized temperature readings to pinpoint suspect pipe segments.
Ice-Bulge Formation
Inspectors note ice-bulge formation where condensation and frost coalesce into raised, crystalline ridges along pipe surfaces or surrounding insulation.
These bulges indicate localized freezing, restricted flow, and prolonged thermal bridging; their texture is granular, often with translucent pockets where expanding ice displaces material.
Observers should scan joints, straps, and low spots where moisture concentrates.
Surface temperature differences and repeated freeze–thaw cycles accentuate growth, compromising insulation and masking underlying cracking.
- Visual cues: irregular ridges, white frost lines, and glossy patches.
- Tactile checks: brittle crust that flakes under gentle pressure.
- Risk signs: nearby dampness, metallic coldness, and reduced flow.
Scanning For Drafts That Correlate With Freeze Points
In cold-weather pipe investigations, locating drafts that line up with known freeze points narrows the search to the most vulnerable sections.
Investigators use a handheld smoke pencil, incense stick, or simply feel for airflow along walls, ceilings, and crawlspaces where pipes run.
Marked draft locations are compared to plumbing layouts to identify likely frozen segments.
Particular attention goes to junctions, exterior walls, and under-sink cavities.
Seasonal changes in wind direction and open vents can reveal intermittent drafts.
Recording findings on a simple diagram speeds targeted warming or plumber response, reducing unnecessary demolition and accelerating thaw efforts.
How Insulation Gaps Point To Likely Frozen Spots
A visual inspection of pipe runs frequently reveals missing insulation sections that correspond with the coldest spots.
Those gaps create cold-air penetration points where heat loss accelerates and water is most likely to freeze.
Identifying and documenting these weak spots narrows the search for frozen sections.
Missing Insulation Sections
When insulation is missing along a run of piping, exposed areas become the most likely locations for rapid heat loss and eventual freezing.
Observers should scan visible runs for gaps, torn sleeves, and absent wraps; these reveal where metal or plastic is directly exposed to cold.
Missing sections concentrate vulnerability, often at joints, bends, and where insulation was cut for fittings.
To prioritize inspection and remediation:
- Inspect joints and elbow connections for bare pipe and compressions.
- Check under sinks and along crawlspace runs where insulation may have been removed.
- Note shifts between insulated and uninsulated sections as high-risk zones.
Cold-Air Penetration Points
Along air leaks and gaps in pipe insulation, cold drafts act like narrow rivers carrying outdoor temperature straight to vulnerable metal or plastic, so those penetration points reliably indicate where freezing is most likely to start.
Observers should trace insulation seams, joints, wall and floor penetrations, and areas near vents or windows.
Visual gaps, compressed or torn wrap, and exposed fittings concentrate chill and reduce thermal protection.
Moisture or frost accumulation often marks these spots.
Simple probes with a gloved hand or infrared thermometer confirm colder zones.
Addressing gaps with foam, tape, or replacement insulation prevents recurrent freezes and guides targeted repairs.
How Thermostat Zoning Or Heating Faults Create Cold Pockets
In homes with multiple thermostat zones or malfunctioning heating components, uneven temperature control can leave sections of piping insufficiently warmed, producing localized cold pockets where water is prone to freeze.
Faulty zone valves, dead thermostats, or blocked vents create microclimates; pipes near these failures cool faster than surrounding runs.
Detecting such pockets involves mapping heating zones, checking thermostat function, and feeling accessible pipework for temperature differentials.
Insulation gaps amplify the issue, and intermittent heating cycles worsen risk during nights or absences.
- Inspect thermostats and zone valve operation.
- Measure pipe temperatures across zones.
- Seal and insulate affected runs.
When To Call A Plumber For Professional Leak Detection
How can a homeowner tell whether a suspected frozen or leaking pipe requires professional leak detection?
Visible pooling, unexplained water bills, persistent damp spots, or loss of water pressure suggest issues beyond basic DIY checks.
If freezing is accompanied by cracking sounds, bulging pipes, or repeated thawing and re-freezing, a plumber’s diagnostic tools—thermal imaging, moisture meters, or pressure testing—can pinpoint concealed failures.
Professional intervention is also warranted when pipes run inside walls, under slabs, or beneath insulation where access is limited.
Prompt expert assessment prevents structural damage and mold growth, and guarantees repairs comply with local plumbing codes and warranty requirements.
Safety Steps Before Probing Or Thawing A Pipe
Before attempting to probe or thaw a suspected frozen pipe, the homeowner should shut off the main water supply to prevent sudden flooding.
Electrical hazards must be assessed and power turned off to nearby outlets or appliances if thawing near wiring or outlets.
A fire-safe thawing method should be chosen and flammable materials removed to reduce ignition risk.
Turn Off Water Supply
Shut off the main water supply to eliminate pressure and stop flow through the affected line before any probing or thawing begins. The action prevents sudden bursts, reduces leak risk, and isolates the section under inspection.
Confirm shutoff at the property’s exterior valve or internal main, and open a nearby faucet to relieve residual pressure.
If multiple zones exist, close only the relevant zone to conserve water elsewhere. Note valve type and position for prompt restoration.
- Verify closure by checking gauges or lack of flow.
- Drain lines downstream to remove standing water.
- Tag or mark the shut valve for workers.
Electrical And Fire Safety
Always check electrical and fire hazards prior to probing or thawing a frozen pipe.
The homeowner should cut power to nearby outlets and appliances to prevent shock if water escapes.
Portable heaters require caution: use only UL-rated units kept clear of combustibles and never leave them unattended.
Avoid open flames; torches and matches risk igniting insulation or framing.
Inspect wiring for moisture damage before restoring power.
Keep a fire extinguisher accessible and know how to use it.
If electrical systems are wet or damaged, contact a licensed electrician.
When in doubt, halt work and call professionals for safe thawing.
How To Avoid Electrical Hazards During Inspection
How can a homeowner inspect for a frozen pipe without creating electrical risks? A detached, safety-focused approach minimizes shock and fire hazards. Before touching walls or appliances, the homeowner should assume damp conditions may energize outlets and switchgear.
Use insulated tools, avoid standing water, and keep hands dry. When uncertain, shut off relevant circuits at the breaker panel and label them. If power must remain on, maintain a safe distance from wiring and call a licensed electrician for guidance.
- Shut off and tag breakers for the inspection area.
- Use insulated gloves and tools; avoid water contact.
- Call an electrician if wiring is exposed or unknown.
Using A Non-Contact IR Thermometer To Find Cold Spots
After ensuring electrical hazards are addressed, a homeowner can scan walls, floors, and pipes with a non-contact infrared (IR) thermometer to locate unusually cold spots that may indicate frozen or poorly insulated plumbing.
The device reads surface temperature quickly, allowing systematic checks along runs, behind cabinets, and near exterior walls. Readings should be compared to ambient indoor temperature and recorded to spot significant drops.
Aim the sensor perpendicular to surfaces, maintain the correct distance-to-spot ratio, and avoid reflective metals or wet surfaces that skew results. Mark suspicious areas for closer inspection or professional assessment to prevent bursts and water damage.
Affordable Infrared Tools For DIY Detection
Affordable handheld infrared thermometers offer quick temperature readings of exposed pipes and walls without specialized training.
Smartphone IR camera adapters provide visual heat maps that can reveal cold spots along runs of plumbing at a modest cost. Together they give homeowners practical, low-cost options for detecting potential freeze locations before damage occurs.
Budget Handheld IR Thermometers
Budget handheld infrared (IR) thermometers provide a quick, noncontact way to scan pipes for cold spots that indicate freezing risk without the cost and complexity of professional equipment. Compact models measure surface temperature from a distance, offering fast readings and easy maneuvering in tight crawlspaces. They suit homeowners wanting rapid diagnostics before thawing or shutting off water.
Accuracy varies; choose units with adjustable emissivity and a narrow field of view for pipe work. Batteries and response speed affect usability. Calibration checks against a contact thermometer improve confidence.
- Features: emissivity, distance-to-spot ratio, response time
- Use: scan joints, valves, exposed runs
- Limits: surface-only, reflections, insulation effects
Smartphone IR Camera Adapters
How can a homeowner get thermal imaging without buying a separate device?
Smartphone IR camera adapters attach to a phone to convert it into a basic thermal imager. They are affordable, compact, and simple to use: align, launch the app, scan suspect lines or walls.
Resolution and temperature range are limited compared with dedicated units, so interpret images cautiously; look for relative cold bands along pipes rather than exact temperatures.
Choose models compatible with the phone, check refresh rate and resolution, and read reviews for real-world performance. Adapters are a practical DIY aid for locating likely frozen sections before calling a plumber.
Using Thermal Cameras To Pinpoint Frozen Pipes
When winter temperatures drop, thermal cameras offer a rapid way to locate sections of pipe that have lost heat and are at risk of freezing; by displaying temperature differences on a visual map, they reveal cold spots behind walls or under floors without invasive demolition.
A handheld thermal imager guides inspection, highlighting linear cold signatures consistent with plumbing runs. Operators scan accessible surfaces, note anomalies, and correlate them with pipe layouts. Proper emissivity settings and steady movement improve reliability. Cameras do not prove ice presence but indicate likely trouble spots needing targeted verification or thawing.
- Scan systematically along known pipe routes.
- Compare adjacent temperatures.
- Record images for follow-up.
How To Read Thermal Images For Frozen Pipes
Using temperature contrast as the primary cue, the reader interprets thermal images by identifying linear cold anomalies that align with known plumbing routes and by evaluating temperature gradients across adjoining surfaces.
Focus on consistent cold streaks rather than isolated pixels; these indicate conductive metal pipes. Compare suspected lines to ambient background temperatures and nearby fixtures to rule out insulation gaps or drafts.
Note abrupt cold-to-warm shifts, which often mark blockage points where ice forms.
Verify readings from multiple angles to reduce parallax and emissivity errors. Document temperature values, timestamp images, and correlate findings with visible access points before probing or repairs.
When And How To Test Pipes With An Electrical Pipe Heater
After identifying suspect cold runs with thermal imaging, the next step is to determine whether an electrical pipe heater will safely and effectively restore flow. The inspector evaluates pipe material, accessibility, and presence of fittings or insulation that could overheat. Power availability and breaker capacity are checked before applying a heater. The procedure is monitored for gradual temperature rise and restored flow, avoiding direct heat on joints.
- Confirm pipe is metal or heater-rated plastic and unobstructed.
- Verify electrical circuit capacity and use a GFCI-protected heater.
- Monitor progress; stop if leaks or smells of burning occur.
Using An Extension Thermal Probe For Tight Spaces
An extension thermal probe can reach narrow cavities and wraparound sections that a standard sensor cannot, but careful placement is required to avoid false readings from nearby surfaces.
The probe tip should be positioned against the pipe jacket or as close to the suspected frozen segment as possible, with insulation or tape used to stabilize contact in tight spots.
Temperature trends and gradients, rather than single values, provide the best indication of ice presence and help distinguish a cold pocket from a truly frozen section.
Probe Placement Tips
In tight cavities where access is limited, guide an extension thermal probe along pipe bedding or through access panels to reach the suspected freeze point without stressing joints.
The probe should follow the pipe’s run, avoid kinks, and maintain gentle contact; secure any slack to prevent movement while reading.
When working around insulation, part it minimally to preserve thermal conditions.
Use steady, deliberate insertion and withdraw cycles to sample multiple spots.
- Probe routing: choose the straightest path that minimizes bends and contact with structural elements.
- Support: brace the probe to prevent slip or joint loading.
- Access: enlarge ports only as needed for safe, non-destructive placement.
Interpreting Temperature Readings
Typically, the extension thermal probe yields a sequence of localized temperature values that must be read relative to background temperatures and expected pipe temperatures rather than taken in isolation.
Readings near a cold spot show a clear dip compared with upstream and downstream values; a persistent several-degree drop over a short span often indicates freezing.
Note sudden plateaus or sharp gradients—those mark thermal boundaries like insulation gaps or exposed joints.
Account for ambient influences: drafts, sunlight, and nearby HVAC change surface readings.
Confirm suspect points by averaging repeated measurements and comparing to known supply temperatures before marking a freeze and starting remediation.
Temporary Checks With Hot Towels And Hair Dryers
Begin by applying heat to accessible sections of the pipe with a hot towel or a hair dryer to thaw localized ice and confirm flow restoration; this quick check helps identify whether the blockage is confined to a short span or extends further.
The practitioner observes temperature change, listens for resumed water movement, and notes remaining cold spots to map frozen segments.
Care is taken to avoid open flames and electrical hazards.
If thawing yields visible leaks, heating stops and repairs are arranged.
Consistent, measured heating prevents pipe damage while providing rapid diagnostic feedback.
- Monitor surface warmth and listen for flow.
- Avoid concentrated heat on joints.
- Stop if leaks appear.
How To Use Slow Drips And Flow Tests As Diagnostics
After attempting localized thawing with hot towels or a hair dryer, the technician next uses slow drips and controlled flow tests to pinpoint remaining frozen sections and assess pressure integrity. Observing tap flow rates, listening for irregular sounds, and noting pressure changes reveals partial blockages. A measured drip indicates downstream thawing; sudden cessation localizes ice. Flow tests with one fixture open and others closed map pressure loss and detect leaks. Results guide safe thawing priorities and confirm system recovery without overpressurizing weakened joints. Records of flow volumes and response times help determine whether professional intervention is required.
| Test | Observation |
|---|---|
| Drip rate | Measures flow |
| Sound check | Detects turbulence |
| Single-source | Isolates section |
| Pressure drop | Shows blockage |
| Response time | Indicates severity |
Low-Cost Detection Kit Checklist For Homeowners
For homeowners assembling an inexpensive frozen-pipe detection kit, a compact selection of tools and simple consumables enables fast, accurate troubleshooting without professional visits. The kit prioritizes thermal assessment, localized warming, and basic safety items to confirm freeze locations and restore flow.
- Infrared thermometer or thermal gun for surface temperature scans, noncontact and battery powered.
- Flexible inspection mirror, flashlight with high lumen output, and short length of soft wire for gentle probing and visual access.
- Hair dryer or heat gun (low setting), pipe-wrap insulation tape, and rubber gloves to protect hands when applying heat.
Preventive Mapping: Marking Vulnerable Pipe Routes
When tracing a home’s plumbing for winter preparedness, marking vulnerable pipe routes creates a clear reference that speeds inspections and targeted protection.
Maps note exposed runs, exterior walls, unheated spaces, and attic or crawlspace passages.
Use durable labels, a simple floor plan, and arrows to indicate flow and shutoff locations.
Color-code by vulnerability level and add dates of last inspection or insulation work.
Store paper and digital copies where homeowners can access them during a freeze event.
Clear, concise mapping reduces search time, guides temporary heat application, and helps prioritize permanent insulation or rerouting without guessing.
Seasonal Checklist To Inspect Likely Freeze Points
In preparing for cold weather, a seasonal checklist directs attention to the most likely freeze points so inspections are systematic and quick.
The homeowner follows a concise routine: scan exposed lines, verify insulation integrity, and check temperature-sensitive zones.
Each task is logged with date and findings to track recurring trouble spots.
Visual cues, audible changes, and reduced flow rates guide targeted checks.
Prioritize accessible valves and junctions, crawlspaces, attics, and garage walls where pipes run near exterior surfaces.
Use a thermometer and flashlight for consistent assessments and note any anomalies for immediate temporary mitigation.
- Exterior-facing walls
- Unheated spaces
- Under sinks
Long-Term Fixes To Prevent Repeat Freezes
As part of a long-term strategy to prevent repeat freezes, homeowners should prioritize durable solutions that address the root causes of pipe exposure and heat loss.
Insulating vulnerable pipes with foam sleeves or closed-cell spray reduces conduction. Relocating exposed plumbing away from unheated spaces during renovations eliminates recurring risk. Seal gaps and cracks in exterior walls, and add weatherstripping around doors and windows to stop drafts that cool pipe cavities. Install heat tape with a thermostat on critical runs where relocation isn’t possible. Improve attic and crawlspace insulation to stabilize indoor temperatures. Routine maintenance and professional assessment make sure measures remain effective.
How To Document Frozen-Pipe Locations For Repairs
For repair planning, homeowners should create a clear record of each suspected freeze point by noting exact locations, symptoms, and any visible damage. The record aids technicians, speeds repairs, and reduces missed problems.
Include dates, ambient temperatures, and whether water flow stopped or pipes bulged. Take photos from multiple angles and label them to match written notes. Store digital copies where accessible.
- List precise locations (room, wall, fixture) with timestamps.
- Describe observable symptoms and temporary remedies applied.
- Attach annotated photos and short video clips showing exterior pipe condition.
Insurance And Warranty Tips After A Freeze Event
Following a freeze event, homeowners should promptly review insurance policies and appliance or plumbing warranties to determine coverage, required documentation, and claim deadlines.
Record damage with dated photos, videos, and a concise inventory of affected items.
Notify the insurer and warranty providers quickly, noting policy numbers and following specified contact channels.
Retain receipts for emergency repairs, temporary solutions, and any professional assessments.
Understand exclusions, deductibles, and whether preventive measures influence eligibility.
Keep copies of communication, estimates, and repair invoices for claims.
When disputes arise, request written explanations and consider escalation paths such as consumer protection agencies or appointed claim adjusters.
Best Resources For DIY Pipe-Freeze Troubleshooting
Once insurance and warranty matters are settled, homeowners often look for reliable DIY resources to identify and address frozen pipes before calling a professional. Clear, concise guidance reduces risk and speeds recovery.
Trusted sources combine stepwise diagnostics, safety cautions, and repair limits.
- Government and utility handbooks: local water authority and emergency-preparedness pages offer region-specific freezing risks and approved thawing methods.
- Manufacturer and plumbing trade guides: piping and fixture makers publish temperature tolerances, installation details, and warranty-voiding practices.
- Reputable DIY media and certified professional blogs: measured tutorials, video demos, and forum threads with expert moderation validate techniques and flag hazards.
Conclusion
To sum up, a homeowner who follows these checks and remedies can often locate and address frozen pipes before major damage occurs. Quick inspections, listening for slow drips, and targeted thawing save time and money, but when in doubt, call a pro. Better to be safe than sorry: preventative insulation and documenting vulnerable spots avoid repeat trouble. With basic skills and prompt action, many freeze problems are manageable without extensive repairs.