How to Drain Pipes for Winter: Simple DIY Steps to Prevent Freezing
To effectively drain pipes for winter and prevent freezing, follow these key steps:
- Shut Off Water Supply: Before a prolonged freeze, turn off the main water supply and any interior isolation valves for exposed or unheated plumbing.
- Open Faucets: Open all cold faucets, outdoor hose bibs, and floor drains to relieve pressure and allow the lines to empty.
- Drain Toilets: Flush toilets to drain them and ensure no water remains.
- Water Heater and Appliances: Follow the manufacturer’s instructions to drain and flush water heaters and any relevant appliances.
- Irrigation Systems: If you have irrigation zones, use an air compressor to blow out any remaining water.
- Insulation: Insulate vulnerable pipes and label all valves for easy identification.
By following these steps, you can protect your plumbing from freezing damage during winter. For a comprehensive guide with tools, safety tips, and checks for restarting your system, continue reading.
Check Whether You Need to Drain Your Pipes This Winter
How can a homeowner determine if pipes should be drained before winter? A homeowner assesses vulnerability by noting exposed, unheated, or poorly insulated plumbing in attics, crawlspaces, garages, exterior walls, and basements.
Age and material of pipes factor: older, metal, or thin-walled pipes freeze more readily.
Local climate and forecasted lows guide urgency; prolonged subfreezing periods increase risk.
Seasonal occupancy matters—vacant homes or long absences demand draining.
Visible drafts, prior freeze incidents, and inaccessible shutoff valves warrant action.
When uncertainty exists, conservative choice favors draining and insulating vulnerable runs to prevent rupture and water damage.
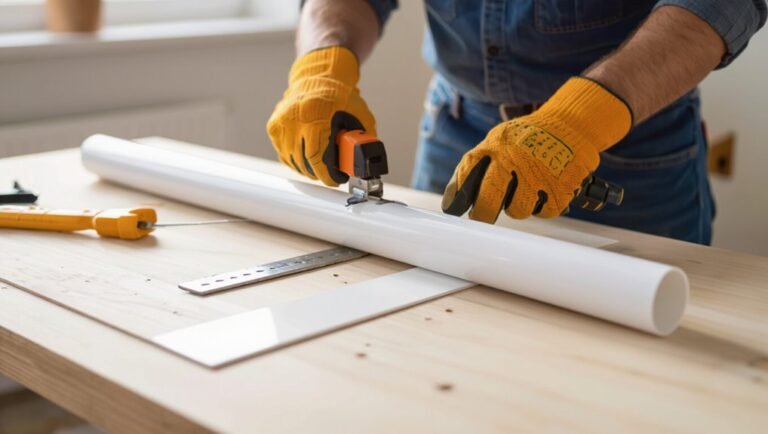
Tools & Supplies to Winterize and Drain Pipes
A concise inventory of the tools and supplies required to winterize and drain pipes helps guarantee the job is done correctly and safely.
This includes essential tools (wrenches, hoses, shop vacuum or air compressor), pipe-ready supplies (insulation, caps, antifreeze where appropriate), and a safety gear checklist (gloves, eye protection, and appropriate footwear).
The subsequent section will outline each item’s purpose and recommended specifications.
Essential Tools Needed
For effective winterization and pipe draining, a concise toolkit guarantees the job is safe and complete: an adjustable wrench and channel-lock pliers for valve and fitting manipulation, a wet/dry shop vacuum or air compressor for removing standing water, bucket and absorbent towels for spills, pipe insulation and foam tape for protecting exposed runs, and a reliable torchless heat gun or hair dryer for gentle thawing when required.
Additional essentials include a basin wrench for tight fixtures, plumber’s tape to seal threaded joints, a flashlight or headlamp for visibility, safety gloves and eye protection, and a small hand pump or siphon for hard-to-reach low points.
Pipe-Ready Supplies
With the right mix of tools and consumables, winterizing and draining pipes becomes systematic and reliable.
A basic kit includes pipe caps and plugs to seal open ends, hose bib vacuum breakers, and threaded adapters for different fittings.
Small containers of non-toxic antifreeze for traps and condensate lines, plus pipe insulation sleeves and self-adhesive foam tape, protect against residual cold.
Tubing cutters, drip pans, and hand pumps aid controlled drainage.
A coil of rope or drain snake clears minor clogs before flushing.
Labeling tape and weatherproof markers mark shut valves and drained lines for easier restart in spring.
Safety Gear Checklist
Having the right supplies is only part of a safe winterization; proper personal protective equipment and cautious procedures protect workers while draining and insulating pipes.
A checklist includes gloves resistant to cold and chemicals, safety glasses, and a hard hat when working in cramped mechanical spaces. Non-slip footwear and knee pads prevent slips and strain. A respirator should be available if using solvents, spray foam, or entering dusty crawlspaces. Portable lighting and a flashlight reduce trip hazards. A first-aid kit and fire extinguisher must be on site.
Inspect gear before use and replace damaged items promptly to maintain safety.
Turn Off the Main Supply and Interior Shutoff Valves
Before beginning, locate the home’s main water shutoff and any interior isolation valves, then close them to stop water flow into the plumbing system; this prevents fresh supply from refilling pipes while they are being drained and minimizes risk of freeze damage. The person should confirm full closure by checking a nearby faucet for stopped flow. Label interior valves for future use. Note valve types—gate, ball, or compression—so appropriate tools are available. Record the main shutoff position. If the shutoff is stiff, apply penetrating lubricant and operate gently to avoid damage.
| Valve Location | Recommended Action |
|---|---|
| Main supply | Close fully |
| Interior shutoffs | Close/label |
| Stiff valves | Lubricate gently |
| Valve types | Identify/model |
| Verification | Check faucet |
Open Faucets and Drains to Relieve Pressure and Empty Lines
With the main supply and interior shutoffs closed, all cold faucets should be opened to allow remaining water to flow out.
Drains and vent lines must also be cleared so trapped water and pressure can escape.
Completing these steps reduces the risk of frozen, burst pipes during winter.
Open All Cold Faucets
Open all cold-water faucets and any accessible drains to relieve trapped pressure and allow water to flow out of the supply lines. Doing so prevents pockets of pressurized water that can burst pipes when freezing occurs.
Begin at the highest fixtures and work toward lower ones so gravity assists draining. Leave faucets fully open, including outdoor hose bibs and basement sinks, until steady drips cease.
Check utility closets and appliance supply valves for accessible shutoffs and taps. Note that this step clears most supply piping but does not replace professional service for complex systems or the separate task of vent and drain-line maintenance.
Drain And Vent Lines
Drain-and-vent lines should be cleared by opening interior drains and vents to relieve trapped air and water so freezing and pressure buildup are minimized. The homeowner opens floor drains, basement cleanouts, and attic vents in sequence, listening for flow and watching for trapped pockets. Small runs are flushed and left open; larger systems are bled at high points. This prevents burst fittings and hidden ice. After draining, traps may require minimal water to preserve seals, so target low spots only. Inspect vents for debris; permanently blocked vents need professional attention to restore safe atmospheric relief.
| Quiet relief | Visible safety |
|---|---|
| Careful action | Avoided damage |
| Simple steps | Peace of mind |
| Small cost | Lasting protection |
Flush and Drain Toilets, Water Heaters, and Appliances
Before temperatures drop below freezing, homeowners should flush and fully drain toilets, water heaters, and water-using appliances to prevent freeze damage.
Toilets are emptied by shutting off the supply, flushing until tanks and bowls are clear, and removing residual water with a sponge or wet vacuum.
Appliances like washing machines, dishwashers, and ice makers require following manufacturer drain procedures: disconnect supply lines, run drain cycles, and clear trap hoses.
Portable water softeners and filtration units should be bypassed and drained.
Finally, verify all valves remain open or closed per appliance instructions and label disconnected lines to simplify winter maintenance and spring reassembly.
Drain and Protect a Tank Water Heater
To protect a tank water heater from freeze and corrosion damage, the homeowner should shut off power or gas, close the cold-water supply, and relieve system pressure before draining. The unit is then drained via the drain valve to a safe discharge point; a hose helps direct water. Open a hot faucet to allow air in, flush until clear, close valves, and refill slowly, checking for leaks. If the heater has a sacrificial anode, inspect and replace if heavily corroded. Restore power or gas only after the tank is fully refilled and vented.
| Step | Action |
|---|---|
| 1 | Shut off power/gas |
| 2 | Close cold supply |
| 3 | Relieve pressure |
| 4 | Drain and flush |
| 5 | Refill and restore |
If You Have a Well or Pressure Tank: What to Do Differently
When dealing with a well or pressure tank, the homeowner must account for the pump, pressure switch, and exposed piping that are not present with a typical municipal-fed water heater.
The pump should be isolated and drained per manufacturer instructions; power must be disconnected before any work.
The pressure tank may require repressurizing or draining to prevent freeze damage. Insulate exposed piping, pressure switch, and the tank’s fittings. Consider a small heater or wrap for vulnerable components and verify valves operate freely. If unsure, consult a qualified well technician to avoid damaging the pump or contaminating the system.
- Isolate and power down the pump
- Drain and insulate fittings
- Consult a well technician
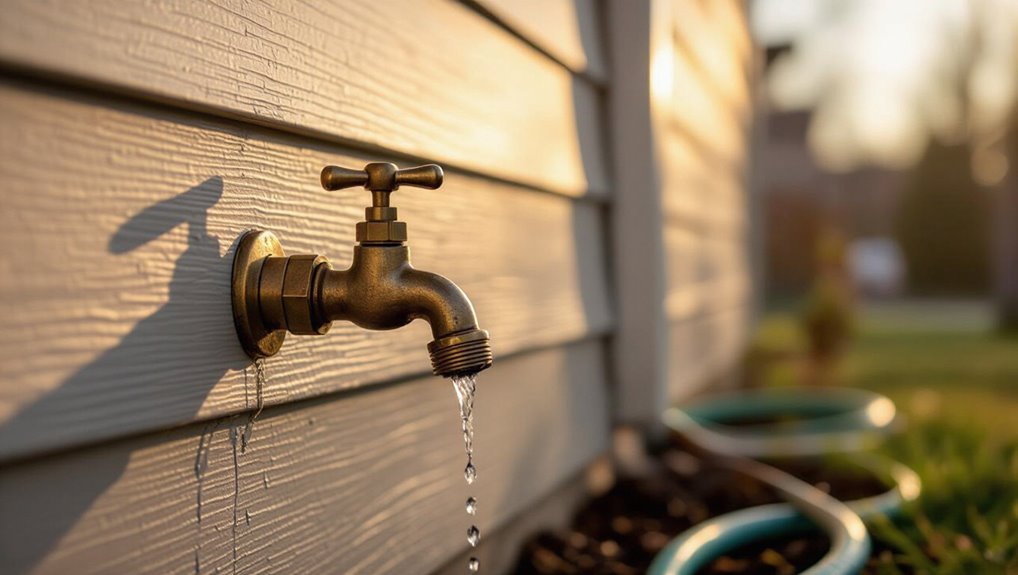
Blow Out Outdoor Hose Bibs and Irrigation Lines Safely
Flush and purge outdoor hose bibs and irrigation lines of standing water to prevent freeze damage and burst pipes. The homeowner should disconnect hoses, open all exterior faucets, and drain accessible valves and low points.
Close backflow preventers per manufacturer guidance and winterize aboveground components. For irrigation, remove and store filters, drain zone valves by opening manual drain screws, and tilt fittings to shed water.
If lines have built‑in automatic drains, verify operation. Seal exposed spigots with insulated covers and label buried shutoffs for future access.
When unsure, consult a plumber to avoid inadvertent damage or code violations.
Use an Air Compressor: Step-by-Step Forced Blowout (PSI Tips)
Although using an air compressor requires care and the right fittings, a forced blowout is the most effective way to clear irrigation lines of residual water before freezing temperatures arrive.
The operator isolates the zone, attaches a blowout adapter to the mainline, and applies compressed air in short bursts to avoid overpressurizing PVC. Recommended PSI depends on pipe type; 30–50 PSI suits most residential polyethylene systems, while rigid PVC may tolerate up to 80 PSI if rated.
Advance slowly downlines until water clears, then move to the next zone. Verify valves and drain caps after each zone.
- Confirm compressor fittings match system threads.
- Use quick, controlled bursts, not continuous blasts.
- Wear eye and hearing protection.
Prevent Frozen Pipes After Draining: Insulation, Heat Tape, and Thermostat Tips
After completing a forced blowout, attention shifts to protecting any remaining vulnerable sections and fittings from freezing; drained lines can still harbor small pockets of water in low spots, valves, or meter assemblies that will freeze without further measures.
Insulate exposed pipes with foam sleeves or fiberglass wrap, sealing seams and endpoints. Apply approved self-regulating heat tape to metal or plastic pipes, following manufacturer spacing and power guidelines.
Keep interior thermostats set no lower than recommended levels and program setbacks cautiously overnight. Open cabinet doors to warmer air where pipes run.
Regularly inspect insulation and tape for damage, and restore power to heat tape before cold snaps.
Common Winterizing Mistakes That Cause Leaks or Damage
Many homeowners shut main valves partially rather than fully, leaving residual water that can freeze and rupture pipes.
Others overlook air vents, allowing trapped moisture to expand and cause blockages or leaks. Highlighting these errors helps prevent winter damage and costly repairs.
Improper Valve Shutdown
Failing to shut valves correctly during winterization can leave sections of a plumbing system pressurized or exposed, increasing the risk of frozen pipes, ruptures, or uncontrolled leaks. Technicians and homeowners should identify shutoff types, confirm full closure, and isolate appliances before draining.
Partial closures trap water; reversed or corroded valves may appear closed but still pass fluid. After draining, inspect for residual pressure and test taps downstream.
Document valve positions for reopening. Proper tools and gentle force prevent damage; replace faulty valves prior to winter to guarantee reliable isolation and avoid emergency repairs when temperatures drop.
- Verify valve type and full closure
- Test downstream taps for pressure
- Replace corroded or leaking valves
Neglecting Air Vents
Although often overlooked, neglected air vents can allow trapped air to expand and force water from seals or create pressure differentials that stress pipes and fittings during freeze–thaw cycles.
Failure to open or maintain vents prevents proper drainage and can leave pockets of water that freeze, crack fittings, or push seals loose.
Routine winterizing should include checking vents for blockages, corrosion, or frozen debris and verifying they seat and vent correctly.
Simple steps—clearing obstructions, replacing damaged vent caps, and confirming vents operate during system drain—reduce risk of leaks and minimize repair needs after thawing.
Check for Leaks or Freeze Damage Before Restarting Water
Often overlooked, a careful inspection for leaks and freeze damage is essential before turning the water back on. The homeowner should visually inspect exposed pipes, fittings, and fixtures for cracks, bulges, or rust stains indicating prior leaks. Signs of ice splitting, warped insulation, or unexplained damp spots warrant repair before pressurizing the system. If any damage is suspected, isolate that section and consult a professional.
- Check joints and valve connections for hairline cracks or corrosion.
- Inspect under sinks, basements, and crawlspaces for puddles or stains.
- Examine pipe insulation for compression, moisture, or gaps.
Seasonal Restart Checklist: Restore Water and Test Plumbing
When preparing to restore water after draining pipes for winter, a systematic restart checklist helps prevent pressure surges, hidden leaks, and appliance damage.
Begin by ensuring all shutoff valves are closed and drain plugs removed where intended/intendedly.
Inspect visible fittings, fixtures, and appliances for frost or corrosion.
Slowly open the main supply to pressurize the system incrementally, monitoring pressure gauges if available.
Check each fixture—sinks, showers, outdoor hose bibs—for steady flow and air pockets; run hot water to confirm heater operation.
Observe for leaks for at least thirty minutes.
Finally, purge trapped air and reset any appliance controls.
Conclusion
When winter’s grip arrives, draining pipes is like tucking a house into a warm blanket: careful preparations prevent cold’s bite. Following checklist steps—shutting main valves, opening faucets and drains, flushing appliances, insulating lines and avoiding common mistakes—minimizes freeze risk and damage. Inspect for leaks before restoring water, then follow the seasonal restart steps methodically. A deliberate, stepwise approach keeps plumbing safe through cold months and makes spring reopening smooth.