How to Disconnect Soldered Copper Pipe: Step-by-Step DIY Guide
To disconnect a soldered copper pipe, follow these key steps:
1. Isolate the Supply: Shut off the water supply to the pipe.
2. Drain the Pipe: Ensure the pipe is completely drained.
3. Protect Your Surroundings: Use heat shields and cover nearby surfaces to prevent damage.
4. Disconnect the Joint:
- Heating Method: Use a torch to heat the joint until the solder melts.
- Cutting Method: Alternatively, use a tubing cutter for a clean cut, then deburr the ends.
5. Take Safety Precautions: Always wear personal protective equipment (PPE) and keep a fire extinguisher nearby. Verify any necessary permits and avoid working on high-risk systems.
6. For Seized Joints: Utilize short bursts of heat, apply penetrating oil where safe, or use freezing methods if needed.
Following these steps ensures a safe and effective disconnection of soldered copper pipes. Further safety details and steps can be provided as needed.
Quick Answer: Who Should Disconnect Soldered Copper Pipe
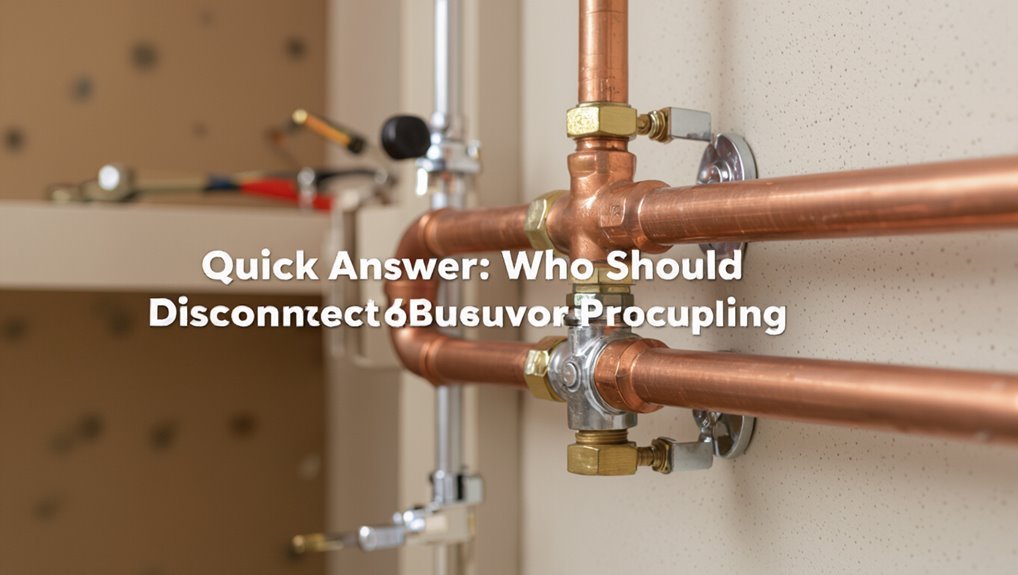
Disconnecting soldered copper pipe should be left to a skilled plumber or a competent DIYer with proper tools and experience; the task requires knowledge of solder joints, safe use of heat, and local plumbing codes.
Professionals are recommended for complex systems, concealed piping, or when gas or fire risk exists.
Competent DIYers may proceed on simple, accessible runs if they understand flux, solder melting points, and can isolate water and power.
Novices, those without proper PPE, or anyone unsure of code or permit requirements should hire a pro.
Correct technique prevents leaks, corrosion, or code violations and protects property and occupants.
When You Must Remove a Soldered Copper Joint
When a repair, replacement, or reconfiguration requires separating pipes that were permanently joined, the soldered joint must be removed rather than merely loosened or patched; this is necessary when a fitting or section is corroded, when moving or replacing fixtures, when modifying line routing, or when a fitting obstructs access to other components.
Removal is required if leaks recur at the joint after multiple repairs, if internal blockage or mineral buildup compromises flow, or if replacing a faulty valve or appliance requires a clean, solderable surface.
Proper removal preserves surrounding piping, prevents hidden damage, and enables reliable reassembly with new fittings.
When Not to Attempt a DIY Disconnection
Signs of severe structural damage warrant leaving the work to professionals rather than attempting a DIY disconnection.
Likewise, complex multi-branch systems and networks that feed multiple fixtures are best handled by a trained plumber to avoid inadvertent system-wide failures.
High-pressure or hazardous lines present safety risks that exceed typical homeowner skills and require specialized equipment and permits.
Severe Structural Damage
Assess the building’s structural integrity before attempting any work on soldered copper pipes; extensive cracks, sagging floors, bowed walls, or compromised support beams indicate conditions that make DIY disconnection unsafe. A professional structural assessment is advised when visible deformation, water-soaked framing, or shifting foundations are present. Temporary shoring, evacuation, and coordinated repairs often precede plumbing work. Document damage, halt DIY attempts, and contact licensed contractors to plan safe interventions. The following table summarizes key indicators, immediate actions, and recommended professional roles.
| Indicator | Immediate Action | Professional Role |
|---|---|---|
| Large cracks | Evacuate area | Structural engineer |
| Sagging floor | Shore up | General contractor |
| Bowed wall | Monitor/support | Masonry specialist |
| Rotted beam | Replace | Carpenter |
| Foundation shift | Full assessment | Geotechnical engineer |
Complex Multi-Branch Systems
After structural concerns are addressed, attention should turn to plumbing layouts that feature multiple branches, parallel runs, or interconnected manifolds—configurations that multiply the risk of unintended leaks, pressure imbalances, and prolonged shutdowns if handled improperly.
A homeowner should defer DIY attempts when tracing flow paths proves difficult, when isolation valves cannot fully separate affected sections, or when multiple fixtures rely on the same feed. Complexity increases diagnostic time and the chance of cross-contamination. Recommended considerations include:
- Unclear circuit mapping that obscures downstream connections
- Inaccessible junctions inside walls or ceilings
- Systems serving critical appliances or multiple units
High-Pressure Or Hazardous Lines
Frequently, homeowners should not attempt to disconnect high-pressure or hazardous lines themselves; these systems—including gas mains, boiler feed lines, oxygen, acetylene, and industrial compressed-air pipes—require specialized tools, pressure-rated fittings, and trained procedures to prevent catastrophic leaks, explosions, or toxic exposure.
A qualified technician evaluates system pressure, isolation methods, ventilation, and regulatory compliance before any work.
DIY attempts risk improper depressurization, incompatible fittings, or ignition sources.
Notify utility providers, shut off and lock out energy sources, and secure permits where required.
For safety and liability reasons, leave disconnection, repair, and testing of hazardous or high-pressure piping to certified professionals.
Identify Soldered Joints vs. Compression or Push‑Fit Fittings
When examining copper plumbing, distinguishing soldered joints from compression or push‑fit fittings hinges on visible connection features and material changes.
A soldered joint shows a smooth, often slightly discolored bead where flux and solder fused metal; the pipe and fitting appear continuous.
Compression fittings have a nut and visible ferrule, while push‑fit fittings are bulkier plastic or brass bodies with no solder bead.
- Solder: thin metallic bead, possible greenish flux residue, seamless look.
- Compression: threaded nut, ring (ferrule) between nut and pipe end.
- Push‑fit: snap‑in connection, plastic/metal body, quick‑disconnect profile.
Shut Off and Drain the Water Supply Safely
Before working on soldered copper pipe, the water to the affected circuit should be shut off and the lines drained to prevent injury and avoid water damage.
Locate and close the appropriate shutoff valve or the main supply if necessary, then open nearby faucets to relieve pressure.
Flush remaining water from the segment by opening the lowest drain valve or a downstream fixture.
Catch residual water with a bucket and towels to protect flooring and finishes.
Verify the circuit is dry by feeling joints and wiping interiors.
Leave valves clearly labeled and closed until repair or disconnection is complete.
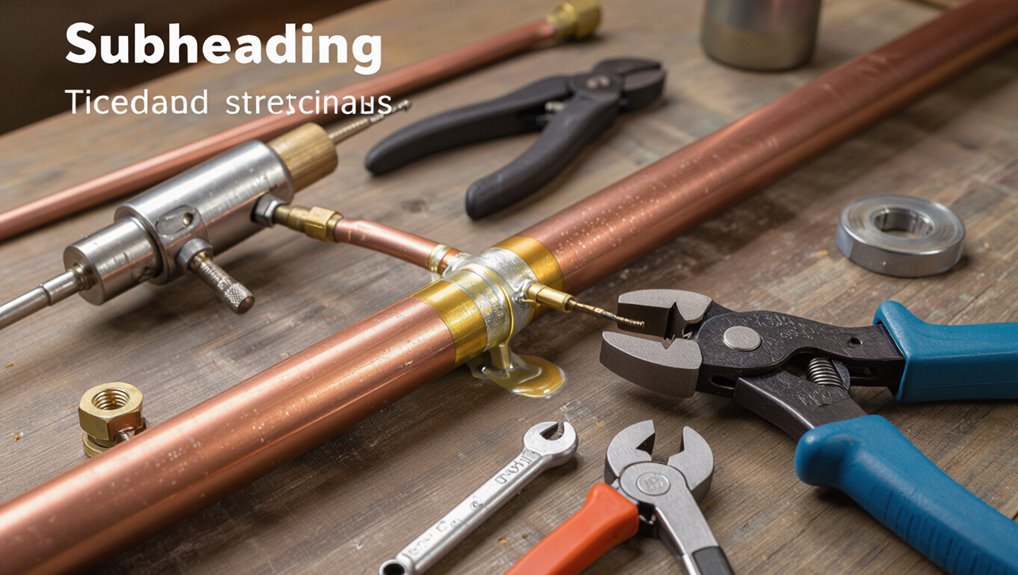
Tools and Materials You Need for Copper Pipe Work
Before beginning work, a concise list of tools and materials speeds the disconnecting process and reduces mistakes. Essential hand tools (pipe cutters, adjustable wrenches, deburring tools) and appropriate safety gear (gloves, eye protection, heat-resistant materials) should be assembled.
Pipe joining materials — flux, solder, or fittings for replacement — are required if sections will be reattached or repaired.
Essential Hand Tools
Essential hand tools for disconnecting soldered copper pipe include a tubing cutter, adjustable wrench, pipe wrench, and slip-joint pliers, each serving a specific role in cutting, gripping, and loosening fittings.
The tubing cutter produces clean, square cuts; wrenches apply torque to fittings; pliers hold and manipulate small parts.
Additional handy items include a deburring tool for smooth edges and a wire brush for joint cleaning.
Selection prioritizes fit and condition to prevent slippage or damage.
Proper maintenance—tightening, blade replacement, lubrication—ensures reliable performance during disassembly.
- Tubing cutter
- Adjustable and pipe wrenches
- Slip-joint pliers
Safety Gear Needed
Wearing appropriate safety gear markedly reduces risk when disconnecting soldered copper pipe; gloves protect hands from sharp edges and hot fittings, safety glasses shield eyes from flying debris and flux splatter, and a respirator limits inhalation of fumes from solder, flux, and any old sealants. Protective clothing, closed-toe shoes, and hearing protection are recommended when cutting or using power tools. A fire extinguisher should be nearby when heat is used. Inspect gear before work and replace damaged items.
| Item | Purpose | When to Use |
|---|---|---|
| Gloves | Cut/heat protection | Always |
| Safety glasses | Eye protection | Always |
| Respirator | Fume protection | When soldering |
Pipe Joining Materials
Pipe-joining requires a concise set of tools and consumables to create reliable, leak-free connections in copper systems. The list centers on items that clean, secure, and seal joints: a tubing cutter, emery cloth or brushes, and flux plus solder. Proper fittings and spare lengths of copper tubing are advised. Use of a propane torch or soldering iron suited to plumbing completes the setup.
Essential safety items include heat shields and a fire extinguisher. Typical materials include:
- Cleaners: emery cloth, wire brush, and cleaning pads
- Joining consumables: lead-free solder and flux
- Fittings: couplings, elbows, and adapters
Measure and Mark the Pipe for Removal Accurately
Before cutting, the technician measures twice and marks clearly to guarantee the removal section is exact and leaves enough clean copper for a new joint. The technician records dimensions from fixed references, allowing for fitting tolerances and solder overlap. Marks are placed with a permanent marker and scribe, visible after flux application. Measurements account for deburring and potential pipe deformation; a small allowance prevents shortfall. A straightedge ensures cuts are square. Verification uses calipers or a tape measure before any heat or cutting begins.
| Tool | Purpose |
|---|---|
| Tape measure | Lengths, offsets |
| Marker/scribe | Visible cut line |
| Calipers | Precise allowance |
Protect Nearby Finishes, Fittings, and Insulation
With the cut line confirmed, attention shifts to protecting nearby finishes, fittings, and insulation to prevent heat, solder splatter, or mechanical damage during removal.
The worker isolates sensitive surfaces, shields adjacent fittings, and temporarily moves or wraps insulation. Protective measures minimize repairs and keep system components serviceable.
- Cover painted walls and countertops with heat-resistant cloth or metal shields; tape edges to secure.
- Wrap nearby fittings and valves with wet rags or silicone pads to absorb stray heat and solder.
- Remove or loosely retract insulation sections, labeling them for reinstallation to maintain thermal continuity after work.
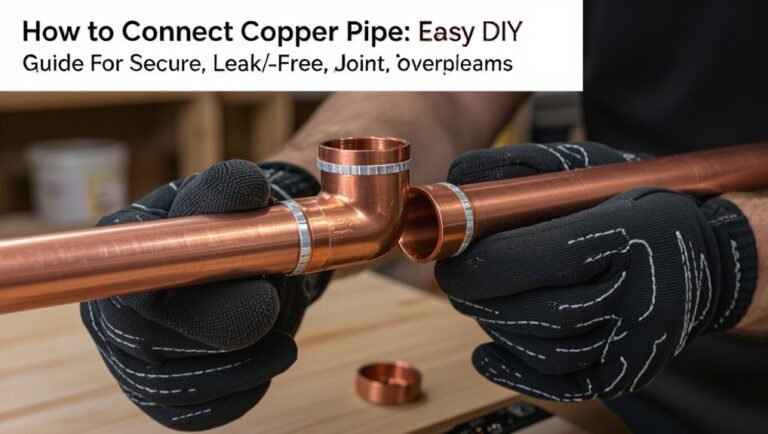
Remove a Soldered Fitting With a Torch
The technician heats the soldered joint evenly with a propane or MAPP gas torch until the solder liquefies and the fitting can be twisted free.
Wearing heat-resistant gloves and eye protection, the technician keeps a wet rag and fire extinguisher nearby, shields adjacent components, and removes combustible materials.
After heating, pliers or a wrench are used to rotate the fitting while avoiding excessive force that could deform pipe.
Once separated, the technician cools the parts with a damp cloth and inspects for damage or remaining solder.
Clean-up includes removing flux residue and preparing the pipe for a new fitting or repair.
Torch Technique: Flame Control, Solder‑Melting Signs, and Loosening Joints
After the joint reaches solder-melting temperature, flame control becomes the primary skill for loosening without damaging the assembly. The operator eases the torch to a low, focused cone, watching for subtle solder flow and color change rather than prolonged heating. When a bead softens, slight rotational force breaks the bond; excessive force before melting risks distortion.
- Observe shiny, liquid solder and a faint capillary refill along the seam.
- Reduce flame size immediately when solder moves to prevent overheating adjacent fittings.
- Use steady, controlled torque with pliers, avoiding sudden impacts that can crack softened metal.
Stop heating as soon as separation begins.
Use Heat Shields and Flame‑Retardant Pads Correctly
Proper placement of heat shields and flame‑retardant pads prevents scorching of nearby materials and directs radiant heat away from vulnerable surfaces during torch work.
The installer positions shields between the joint and combustibles, securing them with clamps or magnets so they remain immobile.
Pads are tucked into cavities, behind insulation, and under fittings to absorb stray heat.
Metallic shields reflect infrared; ceramic or fiberglass pads absorb it.
Maintain a safe clearance, inspect shields for damage, and replace charred pads.
Ventilation prevents heat buildup behind barriers.
After cooling, remove all protective devices and inspect substrates for hidden heat damage before proceeding.
Cut Out Soldered Pipe Without Heat (Tubing Cutter Method)
Before cutting, the pipe and adjacent fittings should be inspected for corrosion, alignment, and enough clearance to work safely.
A proper tubing cutter sized for the pipe should be used and adjusted for clean, even cuts.
After cutting, the ends must be deburred and test-fitted to verify a correct, gap-free connection.
Inspect Pipe And Fittings
How should the tubing and fittings be examined prior to cutting out a soldered section without heat? The pipe and fittings are inspected visually and by touch to identify corrosion, deformation, and joint condition. Clear assessment prevents damage and selects appropriate removal points.
- Check for pitting, greenish oxidation, and thin spots that indicate weakened metal.
- Verify fittings are straight, not dented, and that solder joints show no hairline fractures or excessive residue.
- Confirm surrounding materials (insulation, supports, nearby pipes) and note clearance constraints to avoid unintended strain during cutting and subsequent replacement.
Use Proper Tubing Cutter
After inspection confirms stable pipe and fitting condition and adequate clearance, attention turns to selecting and using a tubing cutter designed for copper. The person chooses a cutter sized to the pipe, positions the wheel squarely, and tightens incrementally while rotating to score the pipe evenly. Excessive force is avoided to prevent crushing. Multiple light turns produce a clean, controlled cut. Cut location is selected to allow later joining or cap installation.
| Tool Feature | Purpose |
|---|---|
| Cutter wheel | Scores and severs copper |
| Adjustable frame | Fits various diameters |
| Roller bearings | guarantee smooth rotation |
Deburr And Test Fit
With the cut made, the pipe end is immediately deburred and smoothed to guarantee a proper fit and prevent future flow restrictions or damage to seals. The technician uses a deburring tool and fine emery cloth, removing burrs from inside and outside the tube while preserving roundness.
Test fitting follows: fittings slide on easily without excessive force, align squarely, and sit fully to the stop. Any resistance prompts rework. Final checks confirm no visible deformation or remaining rough edges before proceeding to flux and join.
- Inspect inner and outer edges for metal shards.
- Re-round with a conical reamer if needed.
- Verify alignment and seating depth.
Cutter vs. Hacksaw vs. Reciprocating Saw: Choose the Right Tool
When deciding how to sever soldered copper pipe, the choice between a tubing cutter, a hacksaw, and a reciprocating saw hinges on precision, speed, and access.
A tubing cutter delivers clean, square cuts with minimal burrs—ideal for visible joints and quick, controlled work on straight runs.
A hacksaw is versatile and inexpensive, suited to tight budgets and occasional cuts but requires steady motion to avoid uneven edges.
A reciprocating saw excels in speed and restricted spaces, cutting through fittings or crowded areas; it sacrifices neatness and may require extensive deburring and cleanup before fitting new connections.
Work on Live Pipes Safely Using a Freeze Kit
Before attempting to disconnect soldered copper pipe while it remains pressurized, the technician prepares the freeze kit according to the manufacturer’s instructions, checking cartridge type, insulation, and proper clamping.
The safe freezing procedure requires mounting the clamp securely, monitoring ice formation until a solid ice plug forms, and verifying isolation with pressure gauges.
Throughout the process the operator observes safety precautions for cold agents and confirms the frozen section before cutting or de-soldering.
Preparing The Freeze Kit
For work on live copper pipes using a freeze kit, technicians must assemble and inspect the kit components for safe, effective operation. They verify cylinder pressure, check valve and hose integrity, confirm clamp fit to pipe diameter, and guarantee frost-pack compatibility. Personal protective equipment is laid out and a pressure gauge is calibrated. Documentation of system layout and isolation points is reviewed to minimize risk.
- Confirm cylinder charge and expiry date.
- Inspect hoses, fittings, and clamp seals for damage.
- Verify PPE, gauges, and emergency shutoff access before proceeding.
Safe Freezing Procedure
With the freeze kit assembled and inspected, the technician begins the safe freezing procedure by confirming system documentation and establishing clear communication among crew members.
The technician isolates the work section, closes valves as required, and drains residual water to minimize ice volume.
Freeze clamps are positioned with thermal contact paste, then connected to the refrigerant source.
Pressure gauges monitor upstream and downstream lines; a secondary relief path is maintained.
Freezing proceeds incrementally, verifying ice plug integrity before cutting.
After service, clamps are removed gradually while observing for leaks and pressure changes.
All actions are logged and the system restored per documentation.
Remove Stubborn Fittings After Heating or Cutting
After applying heat or making a cut, stuck fittings often remain bonded by residual solder, corrosion, or tar-like flux deposits that resist simple twisting or pulling.
The technician selects methods that minimize pipe damage and personal risk: reheat short bursts to soften solder, tap gently with a brass hammer to break corrosion, or apply penetrating solvent to loosen deposits.
If heat is used, protect nearby materials and cool the joint before attempting removal.
Persisting fittings may require controlled leverage with a fitting puller or rotary action with a split-bit remover.
- Use short heat intervals
- Avoid excessive force on thin pipe
- Protect adjacent fittings and insulation
Clean Copper Pipe Ends and Remove Remaining Solder
When preparing copper pipe ends for a new joint, remove all remaining solder, oxidation, and flux to guarantee a clean, bright surface that will accept heat and filler evenly.
Use a wire brush or emery cloth to abrade the inside and outside of the pipe for about 1/2 inch from the end, achieving a uniform bright copper finish.
Scrape or file away solder lumps and burrs, then apply a solvent or flux remover to dissolve residue.
Rinse with clean water and dry thoroughly with a lint-free cloth.
Inspect for nicks or thinning; replace pipe if integrity is compromised.
Prevent Damage to Adjacent Valves and Fittings During Removal
Protecting nearby valves and fittings requires deliberate restraint and the right tools: isolating the work area, supporting adjacent components, and choosing heat-control methods that limit thermal and mechanical stress.
Work proceeds with measured heat and firm supports to prevent movement or warping of fittings. Shielding and thermal sinks protect seals and plastics; mechanical clamps and blocks absorb leverage. When cutting, scoring, or applying force, the operator must avoid twisting joints.
- Use heat shields and wet rags to control temperature transfer.
- Support assemblies with temporary brackets or wood blocks.
- Apply cutting and bending forces perpendicular to fittings to minimize torque.
Temporarily Cap or Seal Disconnected Copper Pipe Ends
Having secured adjacent valves and fittings against heat and movement, the next step is to temporarily cap or seal any disconnected copper pipe ends to prevent leaks, contamination, or moisture ingress.
Clean pipe ends of debris and burrs; use a cloth and deburring tool for a snug fit.
Select appropriate temporary caps: threaded brass for fittings, rubber caps with hose clamps for plain copper, or foam plugs for short-term closure.
Make certain caps sit squarely and fasten clamps or threads tightly.
Label capped lines and note pressure status.
Inspect seals after pressure testing and periodically during the repair process to confirm integrity.
Choose the Right Replacement Coupling or Repair Method
Before selecting a coupling or repair approach, the technician measures the pipe diameter and wall thickness to make certain of a correct fit.
Next, different coupling materials—soldered, compression, push-fit, and mechanical—are compared for compatibility, pressure rating, and durability.
Finally, the choice between repairing a section or replacing the run is weighed based on joint condition, corrosion, and long-term reliability.
Measure Pipe Size Accurately
To choose the correct replacement coupling or repair method, the pipe’s outside diameter and wall thickness must be measured precisely so fittings match and seals hold.
The technician uses calipers for OD, a micrometer for wall thickness, and notes nominal size standards.
Measurements determine whether sweat, compression, or push-fit parts are appropriate and if reaming or chamfering is required before installation.
- Use vernier or digital calipers to record OD to 0.01 mm.
- Measure wall thickness at multiple points; average to detect corrosion.
- Confirm nominal pipe size charts to translate OD/wall into standard fitting sizes.
Compare Coupling Materials
Selecting the appropriate coupling material requires balancing compatibility with copper, expected service conditions, and installer skill so the repair remains durable and leak-free.
Copper couplings solder tightly to existing pipe and match thermal expansion, best when soldering skill and open flame are acceptable.
Brass fittings offer strength and corrosion resistance but may galvanically interact unless dielectric unions or proper alloys are used.
Compression fittings enable flame-free joins and are good for accessible repairs, though not ideal for buried or vibration-prone locations.
Push-fit (sharkbite) couplings provide rapid, tool-free connections suitable for temporary or confined repairs when approved for the system.
Consider Repair Versus Replace
Assess whether a localized repair or full replacement will provide the most reliable long‑term outcome by weighing pipe condition, leak location, system age, and access constraints.
A technician should evaluate corrosion, wall thinning, joint integrity, and future maintenance access before choosing a coupling type or replacing a section.
Quick repairs suit single-pinholes or accessible joints; widespread pitting or multiple failures favors section replacement.
Consider compatibility with system pressure and water chemistry, and prefer proven materials when accessibility is limited.
When in doubt, replace the affected run to avoid repeated interventions and increased lifetime cost.
- Localized repair: clamp, epoxy, or slip coupling
- Partial replacement: cut-and-sleeve coupling
- Full replacement: new run with matched material
Basic Reflow: Solder New Copper Connections After Removal
After the removed section is cleaned and fluxed, the new copper fittings are positioned and gently preheated to promote even solder flow.
The operator applies solder evenly at the joint while maintaining heat until capillary action draws molten solder fully around the seam. Excess solder is wiped with a damp cloth once cooled slightly to prevent buildup.
After joints solidify, the system is pressure-tested for leaks using water or compressed air at recommended pressure. Any visible seepage is reheated and re-soldered or cut out and replaced.
Finally, insulation and supports are restored to prevent stress on the new connections.
Use Push‑Fit or Compression Connectors as Solder‑Free Alternatives
For applications where flame and flux are undesirable or access is limited, push‑fit and compression connectors provide reliable, solder‑free alternatives for rejoining copper pipe. They simplify repairs, require minimal tools, and suit tight spaces where a torch cannot be used. Selection depends on pipe size, system pressure, and anticipated permanence.
- Push‑fit: quick installation, no tools beyond cutting and deburring; removable options exist.
- Compression: uses a ferrule and nut for mechanical seal; better for long‑term or semi‑permanent joints.
- Installation tips: cut square, deburr, mark insertion depth, torque compression nuts per manufacturer.
Pressure Test and Leak‑Test Repaired Copper Pipe Sections
Once a solder‑free or soldered repair is completed and fittings are secured, the repaired section should be pressure tested to confirm integrity before returning the system to service.
The technician isolates the branch, caps open ends, and connects a calibrated pressure gauge and pump or air compressor with a regulator.
Apply water or air to the recommended test pressure (typically 1.5× working pressure for residential systems), hold for the specified duration, and monitor the gauge for drop.
Inspect joints, fittings, and surrounding areas for visible leaks or moisture.
Release pressure slowly after testing, drain trapped air, and document results before reactivating the line.
Common DIY Mistakes When Disconnecting Soldered Copper Pipe
In approaching the disconnection of soldered copper pipe, many DIYers underestimate the need for proper preparation and technique, leading to common mistakes that can damage fittings, cause leaks, or create safety hazards.
Typical errors include insufficient heat control, poor joint protection, and inadequate workspace planning. To minimize problems, attention to sequencing and tool selection matters. Common pitfalls often stem from haste or overconfidence rather than lack of skill.
- Applying too much heat and warping fittings or nearby components
- Cutting or prying before the joint is properly softened
- Neglecting to shut off and drain the system fully before starting
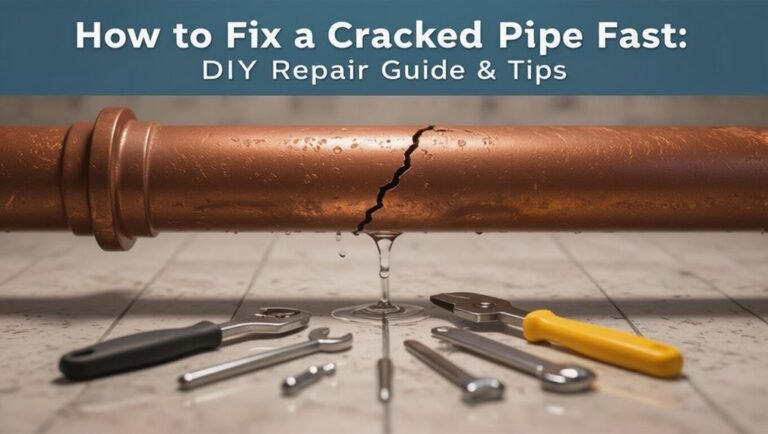
Troubleshooting: Stuck Fittings, Split Pipe, and Leaks
When heat, corrosion, or mechanical stress prevents a soldered joint from separating cleanly, diagnosing whether a fitting is seized, a pipe is split, or a hidden leak exists is the first priority; proper assessment determines whether extraction, repair, or replacement is safest and most effective.
Inspect for green/white corrosion, movement at the joint, and signs of thinning.
Test with controlled heat and penetrating oil where safe.
For seized fittings consider cutting behind the fitting and replacing it or using a pipe extractor.
For split pipe, cut out the damaged section and install a coupling.
For leaks, dry the area, pressure-test, and repair with an appropriate fitting or sleeve.
When to Call a Pro: Permits, Large Damage, or Complex Systems
When work may require permits, involves structural or widespread damage, or affects complex or interconnected plumbing systems, professional involvement is advisable.
A licensed plumber can confirm permit needs, assess risks to structure and safety, and coordinate repairs that span multiple fixtures or zones.
Engaging a pro reduces the chance of code violations, missed damage, or cascading failures.
Permit Requirements For Work
Who determines whether a permit is required for disconnecting a soldered copper pipe depends on local building codes and the scope of the work.
Responsibility typically falls to municipal building departments; they assess risk, water system impact, and required inspections. Homeowners should verify requirements before beginning work to avoid fines or failed inspections. When uncertainties arise, consult the authority having jurisdiction or a licensed plumber.
- Minor repairs within a single fixture often require no permit, but rules vary.
- System alterations, relocations, or work affecting fire suppression usually trigger permitting.
- Complex multi-unit or commercial systems commonly require licensed contractors and approvals.
Structural Or Large Damage
Any significant structural damage, widespread corrosion, or major water loss should prompt immediate engagement of a qualified professional.
A contractor evaluates framing, load-bearing elements, and water intrusion paths to determine safe repair scope.
Large-scale pipe failures that compromise floors, ceilings, or adjacent systems require structural shoring, moisture mitigation, and coordinated trades.
Insurance claims often hinge on professional assessments and documented repairs.
DIY attempts risk hidden damage, mold growth, or code violations.
The specialist secures permits, sequences demolition and replacement, and verifies pressure testing and inspection.
Homeowners should prioritize safety, thorough documentation, and licensed workmanship for extensive or structural plumbing failures.
Complex Or Interconnected Systems
In homes with branching water mains, multi-zone heating, or integrated fixtures, plumbing work can quickly affect unrelated areas and require coordination beyond basic repairs.
A homeowner should recognize when systems interlink: isolated solder removal may disrupt pressure zones, heating loops, or appliance supply lines.
Complex layouts often need permits, zoning knowledge, or temporary rerouting to avoid damage. Consulting a licensed plumber minimizes risk and guarantees code compliance. Consider professional assessment when system maps are unclear, multiple trades are involved, or liability concerns arise.
- multi-zone heating balancing and controls
- shared mains affecting multiple units
- permit, inspection, and code coordination
Conclusion
Disconnecting soldered copper pipe can be straightforward with the right tools, but it also hides pitfalls that can make a project unravel like a poorly knit sweater. Homeowners with basic plumbing skills can cut, heat, and rejoin short runs; however, complex systems, permits, or extensive corrosion deserve a pro. Prioritize safety: shut off and drain water, test for leaks, and avoid common mistakes. When unsure, calling an experienced plumber protects time, money, and peace of mind.