How to Cut PVC Pipes: Easy DIY Guide for Clean, Accurate Cuts
Key Takeaway: To cut PVC pipes cleanly and accurately, follow these steps:
- Measure and Mark: Determine the length you need and mark the pipe.
- Stabilize the Pipe: Secure it in a clamp or a stable surface to prevent movement.
- Choose the Right Tool: Select a cutter or saw appropriate for the pipe’s diameter and wall thickness.
- Safety Gear: Wear eye protection, a mask for respiratory protection, and cut-resistant gloves.
- Cutting Technique: Clamp the pipe square and use a steady motion with a fine-tooth blade or ratcheting cutter.
- Deburr and Chamfer: Smooth the edges of the cut pipe to avoid any sharp edges.
- Dry-Fit Parts: Assemble the pieces without adhesive to ensure a proper fit.
- Final Assembly: Use solvent welding or threading as required for the project.
- For Multiple Cuts: Use a stop block for consistency.
- Tool Maintenance: Keep your cutting tools sharp for the best results.
Following these steps ensures clean, accurate cuts when working with PVC pipes.
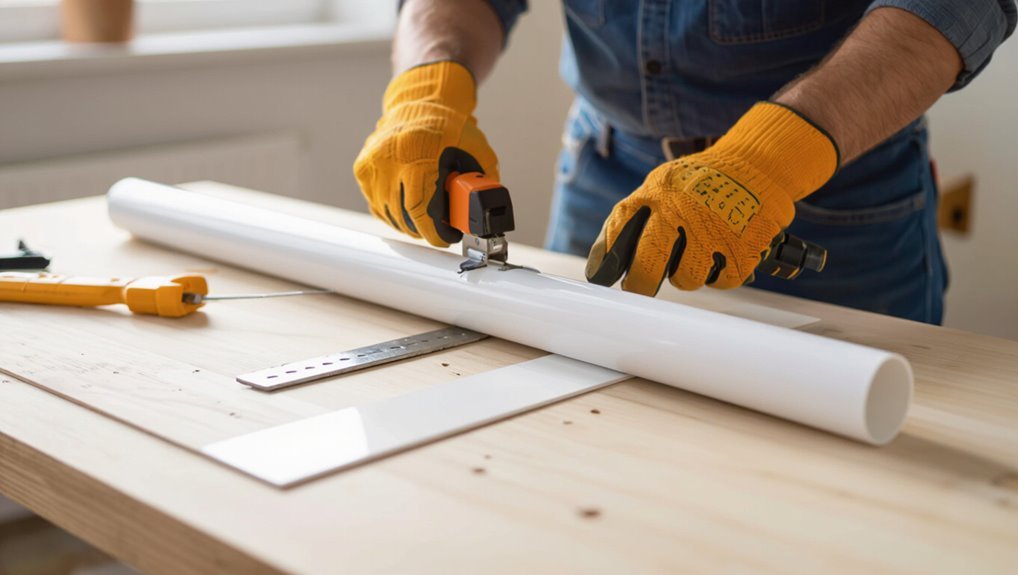
Quick Step‑By‑Step: Cut PVC Pipe Safely In 5 Minutes
Gather the right tools, secure the pipe, and make a clean cut in under five minutes: begin by measuring and marking the cut line, clamp the PVC firmly to prevent movement, deburr the edge after cutting with a utility knife or file, and finally check the fit before assembly.
The technician selects an appropriate saw or PVC cutter, aligns the mark, and makes a steady cut without twisting.
After removing burrs and testing alignment, minor adjustments are made with a file.
Safety gear—glasses and gloves—remains worn throughout.
Timed practice improves speed while maintaining straight, clean ends for reliable joints.
What You’ll Be Able To Do After This Guide: Cut, Fit, And Join PVC
With straight, deburred ends and practiced cutting technique in hand, the reader will be prepared to complete the next stages: dry-fit parts for alignment, apply solvent or primer where required, and assemble joints that hold and seal under pressure. The guide enables precise measurement, neat fitting, and reliable joining for repair or new runs. Attention to end finish and angle prevents leaks and improves aesthetics. Properly cut pieces simplify gluing and threading tasks, reduce wasted material, and speed installation. Confidence grows with repeatable technique, promoting safer, watertight outcomes in common household and light commercial PVC projects.
| Task | Outcome |
|---|---|
| Measure & mark | Accurate lengths |
| Cut & deburr | Smooth ends |
| Fit & join | Leak-resistant joints |
Which PVC Pipe Types And Sizes To Expect
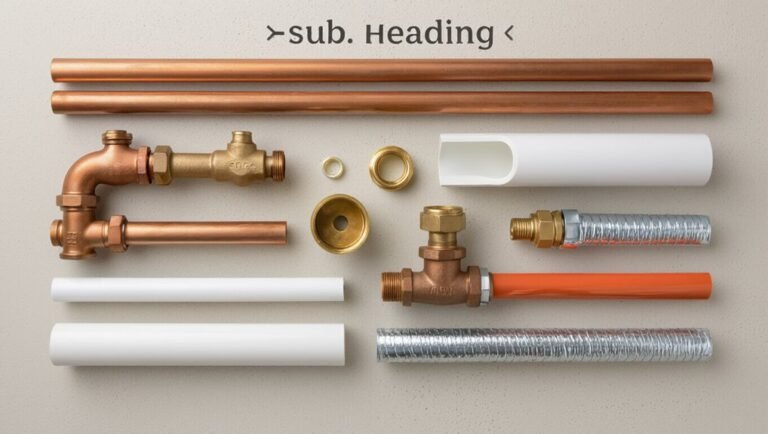
PVC pipe comes in several families—schedule PVC, CPVC, and thin-wall DWV—each sized and rated for different pressures, temperatures, and uses; common nominal diameters range from 1/2 inch to 6 inches for household and light commercial work, while fittings and wall thicknesses vary by schedule (e.g., Schedule 40 vs. Schedule 80).
Schedule PVC is common for cold-water and irrigation, CPVC handles higher temperatures for hot water, and DWV suits gravity drainage with thinner walls.
Pipes are measured by nominal diameter and actual outside diameter, so matching fittings requires confirming both schedule and size before cutting or joining.
When To Cut PVC Instead Of Replacing It
After confirming pipe type and size, a decision must be made whether to cut a section of PVC or replace the entire run. Cutting is preferable when damage is localized—cracks, pinholes, or fittings failures within a short span—or when access limits removal of long lengths.
Choose cutting when matching existing pipe material and diameter is feasible, when joints can be reassembled reliably, and when the remaining run is structurally sound and free of widespread degradation. Replace the run if corrosion, multiple leaks, extensive warping, chronic blockages, or outdated material compromise integrity.
Cost, time, and long-term reliability guide the choice.
Safety Gear You Must Wear When Cutting PVC
Before cutting begins, the individual should equip themselves with basic personal protective equipment: safety glasses or a full-face shield to guard against flying shards and dust, a respirator rated for fine particulates to prevent inhalation of PVC dust and fumes, cut-resistant gloves to protect hands from sharp edges and blades, and hearing protection when power tools are used.
Additional precautions include wearing long sleeves and durable work trousers to shield skin, closed-toe non-slip footwear, and secure hair or jewelry removal.
PPE must fit properly and remain in place. Inspect gear for damage, replace disposable filters as specified, and keep a first-aid kit nearby.
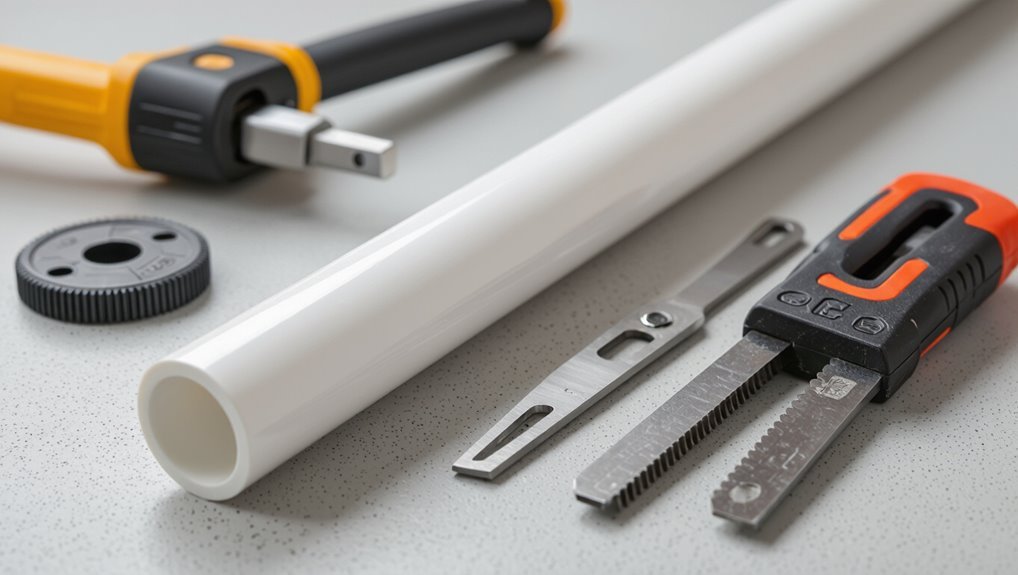
Tools That Make Clean PVC Cuts Fast
A handful of purpose-built cutting tools—rotary saws with fine-tooth blades, ratcheting PVC cutters, pipe-cutting wheels, and miter boxes paired with a hacksaw—allow professionals and DIYers to make fast, square, burr-free cuts with minimal cleanup.
Each tool suits specific diameters and access conditions: ratcheting cutters excel on small-diameter tubing, pipe wheels glide around larger runs, and a rotary saw yields speedy straight cuts on long lengths. Miter boxes guarantee consistent angles.
Proper blade selection and steady technique reduce melting and splintering.
For thick-walled or tangled runs, a reciprocating saw with a fine-tooth blade offers controlled power.
How To Measure And Mark Pipe For Exact Cuts
With the cutting tools ready, precise measurement and clear marking determine whether each piece of PVC fits the intended layout.
The worker measures from a reference point, adding allowances for fittings and solvent-weld joints.
A tape measure and a straightedge guarantee square lines; a flexible tape suits curved runs.
Marking uses a fine-tip permanent marker or a pencil for visibility; marks wrap around the pipe for alignment.
For multiple identical pieces, use a stop block or transfer measurement from a master piece.
Double-check critical dimensions, then re-verify marks before cutting to prevent costly mistakes.
How To Score And Snap Small‑Diameter PVC By Hand
For small‑diameter PVC, the worker first marks and measures the cut line precisely to guarantee fit.
A shallow, consistent score is made around the pipe’s circumference using a sharp utility knife.
The pipe is then snapped cleanly along the score by applying steady, even pressure until it separates.
Mark And Measure Precisely
How far should the cut be from the fitting? The installer measures twice, accounting for socket depth and adhesive gap. A tape measure or caliper marks the pipe circumference; marks are aligned using a square or a pipe-marking tool to guarantee a perpendicular cut. For repeatable runs, a jig or template speeds consistent spacing.
When end play matters, subtract insertion depth plus 1–2 mm for solvent swell. Transfer marks clearly with a pencil or fine-tip marker, checking around the pipe to confirm alignment. Final verification of length before cutting prevents costly rework and guarantees reliable joint fit.
Score With A Utility Knife
Score the pipe by making a single, firm incision around the circumference with a sharp utility knife, turning the pipe as the blade advances to guarantee an even groove.
The operator secures the tube on a stable surface, aligns the mark with eye level, and presses deliberately to cut only into the outer wall.
Multiple light passes risk unevenness; one controlled pass produces a consistent channel.
Rotate evenly, maintain blade angle perpendicular to the surface, and avoid twisting motions that widen the groove.
Inspect the score for continuity and depth; a clear, uninterrupted groove guarantees predictable fracture when later applying controlled pressure to separate the piece.
Snap Cleanly Along Score
Align the scored line with the edge of a stable work surface and apply steady, even pressure to bend the pipe away from the score until it fractures cleanly.
The technician supports the short end, keeps fingers clear, and uses controlled force to avoid splintering.
After the snap, a deburring pass with a file or sandpaper removes sharp edges and guarantees a square face.
Visual inspection verifies a continuous, even break along the score.
If the break is rough, recut slightly deeper and repeat.
- Support short end
- Bend slowly and evenly
- File burrs for fit
How To Use A PVC Cutter For 1/2″ To 2″ Pipe
Using a ratchet-style or scissor-style PVC cutter, the operator positions the 1/2″ to 2″ pipe squarely in the jaws, clamps firmly, and applies steady pressure to make a clean, burr-free cut.
The cutter blade should meet the marked line; if ratcheting, advance in controlled clicks to prevent binding.
Maintain the pipe perpendicular to the blade to guarantee a square end.
After cutting, inspect the edge for small burrs and remove them with a deburring tool or fine file.
Clean cuts improve fit and glue adhesion.
Store the cutter clean and lubricated to preserve blade sharpness and safety.
How To Cut Larger PVC With A Hacksaw The Right Way
For cutting larger PVC pipes where handheld cutters won’t reach, a sharp hacksaw provides control and a straight edge when used correctly. The pipe is secured in a vise or between blocks to prevent twist. Mark the cut line, remove burrs after sawing, and check fit before assembly. Use steady, even strokes and let the blade do the work to avoid melting or chipping.
- Select a fine-tooth blade and clamp pipe firmly.
- Saw along the marked line with controlled forward strokes.
- Deburr with a file or sandpaper, then test fit and adjust as needed.
Cut PVC Square With A Miter Box
Selecting an appropriately sized miter box guarantees straight, accurate cuts and prevents blade binding.
The pipe should be clamped securely in the box to eliminate wobble and maintain a true square edge.
A steady, controlled sawing motion with minimal pressure produces a smooth, burr-free cut ready for fitting.
Choose The Right Miter Box
A miter box provides the stability and guide necessary to cut PVC square, so choosing one that matches the pipe size and the planned cut types is essential.
One-sided descriptions highlight fit, material, and angle options. Consider a rigid plastic or aluminum box for durability; make certain the slot width accommodates the pipe diameter.
For angled cuts, pick a box with preset 45° and 90° guides or adjustable fences. Portable models suit fieldwork; bench-mounted boxes favor repeatability.
Evaluate clamp compatibility and blade clearance to avoid binding. Proper selection reduces errors and speeds accurate, repeatable square cuts.
- Match pipe diameter
- Material and rigidity
- Angle and clamp features
Secure Pipe Firmly
When placed in the miter box, the pipe must be clamped so it cannot shift during the cut; even a slight movement will turn a square cut into a tapered one.
The workpiece should rest against the miter box back and be supported along its length.
Use a quick-release clamp or a miter-box built-in clamp, positioning the clamp on the side opposite the saw path to avoid blade interference.
Apply firm, even pressure without deforming the pipe.
Verify alignment with the marked cut line and re-tighten if necessary.
Check stability by gently trying to rotate or slide the pipe before sawing begins.
Make Smooth Controlled Cuts
With the pipe secured, the cutter should be guided in a slow, steady stroke so the saw teeth engage evenly and the blade remains perpendicular to the pipe.
The work proceeds with measured pressure, avoiding twisting or rocking that causes uneven edges.
The miter box keeps alignment; pauses let debris clear and prevent binding.
After cutting, the edge is inspected and any burrs removed with a file or deburring tool for a snug fit.
- Steady strokes, light pressure.
- Keep blade square; use miter slots.
- Debris clearance and final deburring.
How To Use A Reciprocating Saw To Cut PVC Safely
If precision and safety are priorities, a reciprocating saw offers a fast, controlled method for cutting PVC when used with the right blade and technique.
Secure the pipe in a vise or clamp to prevent movement and mark the cut clearly.
Fit a fine-tooth blade designed for plastics to reduce chipping and melting.
Start the saw at low speed, letting the blade reach full motion before contacting the pipe, and maintain steady, light pressure.
Keep the cut perpendicular by aligning the saw, and pause to clear chips.
Deburr the edge with a file or utility knife and inspect the cut for accuracy.
Cut Long PVC Runs With A Circular Saw
A circular saw can speed through long runs of PVC more efficiently than a reciprocating saw, provided the pipe is properly supported and the operator uses the correct blade and settings.
The operator secures the pipe in rollers or sawhorses, marks cuts, and uses a fine-tooth blade for plastics. Cut slowly to avoid melting; let the blade do the work. After each pass, deburr edges with a file or chamfer tool.
- Support evenly to prevent vibration and binding.
- Use a blade with 60–80 teeth for clean cuts.
- Wear eye, ear, and respiratory protection.
How To Make Angled And Mitred PVC Cuts
For angled and mitered PVC cuts, precise layout and steady support are essential to guarantee clean joints and accurate fit-up.
Mark the angle with a protractor or bevel gauge; transfer the line around the circumference with a pencil or tape to secure alignment.
Secure the pipe in a padded vise or clamp to prevent rotation.
Use a fine-tooth miter saw, chop saw, or miter box with a backsaw for control; cut slowly to avoid melting.
File or sand the cut face and deburr the inside edge for snug, square mating surfaces.
Test-fit pieces before solvent welding or gluing.
How To Cut PVC Pipe In Tight Or Awkward Spaces
Work around restricted clearance by selecting tools and techniques that prioritize control and minimal swing. A compact ratcheting PVC cutter, a mini hacksaw, or a rotary tool with a cutting wheel allows precise work where a full saw can’t reach.
Support the pipe, mark clearly, and cut incrementally to avoid binding or uneven edges. Deburr with a file or sandpaper using short strokes. Maintain steady breathing and a stable stance; work slowly.
If space prevents one-handed operation, use clamps or a strap wrench to secure the pipe before cutting to guarantee safe, accurate results.
- Ratcheting cutter
- Mini hacksaw
- Rotary tool
How To Cut Buried Or In‑Wall PVC Without Damage
Before any cutting begins, the location of buried or in‑wall PVC should be verified using appropriate detection tools to avoid striking utilities.
Excavation or exposure should proceed slowly and carefully, hand‑digging around the pipe to prevent impact or abrasion.
Once exposed, cuts should be made with suitable tools and the exposed pipe immediately wrapped or sleeved to protect against future damage.
Locate Pipes Safely
When preparing to cut buried or in‑wall PVC, the first priority is accurately locating the pipe to prevent damage to the line and surrounding structures.
A methodical approach reduces risk and speeds work. Use noninvasive detection before any cutting or digging begins.
- Scan with a pipe locator or stud finder to map runs and depth.
- Trace visible fixtures, shutoffs, and cleanouts back toward the target to infer pipe direction.
- Verify with small exploratory probes or a capped inspection camera through accessible access points.
Record locations and mark surfaces clearly; consult plans or utility records if available.
Excavate With Care
With steady, deliberate actions and the mapped pipe locations in hand, excavation should proceed from the surface inward using tools and techniques that minimize vibration and lateral force on the surrounding soil. The operator uncovers the pipe gradually, removing soil in layers and clearing bedding material by hand near the conduit. Small hand tools, soft brushes, and a vacuum or compressed air reduce accidental strikes. Maintain a stable trench wall, support exposed sections, and stop to reassess alignment frequently. Work deliberately until the target segment is fully visible and accessible for the next phase, avoiding heavy impacts or undermining.
| Tool | Purpose |
|---|---|
| Shovel | Bulk soil removal |
| Trowel | Precise digging |
| Brush | Clean debris |
| Vacuum | Gentle clearing |
| Support blocks | Stabilize pipe |
Cut And Protect
After the pipe segment is fully exposed and secured, attention turns to cutting and protecting the PVC to prevent cracking, misalignment, or soil intrusion.
The worker scores the pipe with a marker, supports it rigidly, and uses a fine-toothed saw or PVC cutter for a square, burr-free cut.
Deburring and chamfering follow to assure proper fit and glue contact.
Finally, the exposed section is wrapped and sleeved before backfill to block moisture and grit.
- Stabilize pipe and mark cut line.
- Make controlled cut; remove burrs.
- Sleeve, seal, and compact backfill.
How To Deburr And Remove Burrs For Snug Joints
For a secure, leak-free connection, removing burrs and chamfering cut edges guarantees pipe ends seat fully into fittings. The handler inspects the cut, scrapes internal and external ridges with a deburring tool or utility knife, then lightly files rough spots. Cleanliness matters: wipe away shavings and test fit before solvent or adhesive. Gentle, even strokes prevent gouging and maintain diameter. For thin-walled sections, avoid excessive pressure that can deform the tube.
| Tool | Purpose |
|---|---|
| Deburring tool | Remove internal burrs |
| Utility knife | Trim external flash |
| File | Smooth edges |
| Cloth | Clean debris |
How To Chamfer Pipe Ends For Easier Fittings
Chamfering pipe ends improves fit and prevents damage when inserting into fittings.
A slight bevel on the outer lip guides the pipe into the socket, while smoothing the inner edge removes sharp ridges that can interfere with sealing.
Proper chamfering requires only a deburring tool or file and a steady, even stroke.
Smooth Inner Edge
Smoothing the inner edge of a cut PVC pipe removes burrs and sharp angles that can impede fittings and compromise seals.
The process improves glue flow and seating, ensuring reliable joints.
First, remove loose shards with a deburring tool or utility knife, working circumferentially.
Next, gently chamfer the inside lip at a shallow angle so the fitting nose passes without catching.
Finally, wipe away dust and test-fit before solvent application.
- Deburr with tool toward the center to avoid nicking the outer wall.
- Chamfer 15–30 degrees for most fittings.
- Clean with a dry cloth.
Bevel Outer Lip
When preparing PVC pipe ends, a slight bevel on the outer lip eases insertion of fittings and prevents the pipe edge from catching or deforming the socket.
To chamfer, hold the pipe steady and use a fine file, deburring tool, or sanding block at a shallow angle, removing only enough material to create a 15–30° bevel.
Rotate the pipe for an even chamfer, checking the fit periodically. Clean off burrs and dust before gluing.
A modest bevel reduces installation force, minimizes stress on sockets, and improves alignment, especially for slip-fit or tight-tolerance connections, without weakening the pipe wall.
How To Dry‑Fit And Test Alignment After Cutting
How well the pieces fit together determines whether the joint will hold and seal; before solvent or primer is applied, the cut sections should be dry‑fitted to verify alignment, end‑face contact, and correct spacing. The installer assembles the pieces without adhesive, checking for snug insertion, parallelism, and rotation. Any burrs or uneven faces are noted and corrected. Measure gap tolerances and confirm overall run and slope where required. If misalignment appears, trim or re‑square the ends, re-check fit, and repeat until satisfactory.
- Check insertion depth and end‑face contact.
- Verify straightness and rotation.
- Confirm gap and slope.
How To Join Cut PVC With Solvent Cement
With dry‑fit confirmed, the installer proceeds to bond the parts using solvent cement, which chemically softens the mating surfaces to form a fused joint.
Surfaces are briefly re‑cleaned and marked for alignment. Primer is applied where required, then an even coat of cement is brushed onto both pipe end and fitting socket. The pipe is inserted with a quarter‑turn twist to spread cement and align marks quickly before solvent sets.
Excess cement is wiped away and the assembly held stationary for the recommended cure time. Full pressure testing is delayed until the manufacturer’s cure schedule is complete to guarantee a leak‑free joint.
How To Join Cut PVC With Threaded Fittings
Cut threaded fittings onto PVC provide a removable, mechanical connection ideal for assemblies that require disassembly or adjustment. The cut end must be square, deburred, and dry.
Apply PTFE tape or pipe thread sealant to the male threads, wrap clockwise three to five times, then hand-start the fitting to avoid cross-threading. Tighten with a wrench until snug; do not over-torque.
- Prepare: measure, cut square, remove burrs, test fit.
- Seal: apply PTFE tape or compatible thread sealant evenly.
- Tighten: hand-start, then wrench to a snug, leak-free fit without deforming the plastic.
How To Transition Between PVC And Other Pipe Materials
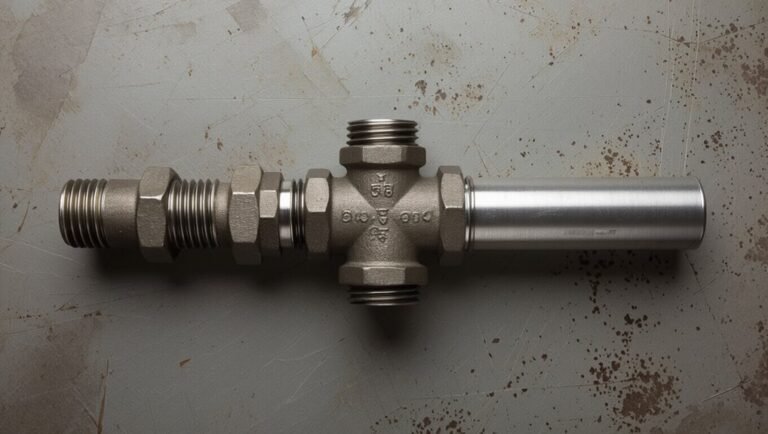
Changing over between PVC and other pipe materials requires selecting adapters rated for the specific materials and pressures involved.
Proper joining methods—such as solvent weld-to-threaded adapters, rubber-coupling connectors, or dielectric unions—should be chosen to prevent leaks and corrosion.
Attention to correct sealing techniques and torque specifications guarantees a durable, watertight connection.
Choosing Compatible Adapter Types
Select adapters that match both the pipe materials and the designed application to guarantee a secure, code-compliant join between PVC and other pipe types. Consider pressure rating, chemical compatibility, and temperature limits when choosing materials. Use adapters that convert smoothly between sizes and connection styles to minimize stress and turbulence. Prefer certified crossover fittings where codes require.
- Metal-to-PVC: use threaded or flanged adapters with dielectric isolation for galvanic protection.
- CPVC-to-PVC: select material-matched adhesives or transition couplings rated for temperature.
- PEX-to-PVC: employ crimped or push-fit crossover fittings rated for both systems and intended use.
Proper Joining And Sealing
Proper joining and sealing between PVC and other pipe materials requires matching connection types, compatible sealants or gaskets, and installation practices that prevent leaks and corrosion.
The installer selects adapters—mechanical couplings, solvent-weld adaptor fittings, or threaded reducers—based on materials and pressure.
Surfaces are cleaned, chamfered, and dried; primer and solvent cement are used only for approved PVC-to-PVC joints.
For dissimilar materials, use listed adaptor fittings with elastomeric gaskets or PTFE tape on threads, avoiding solvent cement.
Support and align pipes to minimize stress.
Test assemblies under pressure, inspect for leaks, and replace any gasket or fitting showing corrosion or deformation.
How Temperature Changes Affect Cutting And Fit
When ambient temperatures rise or fall, PVC piping expands and contracts predictably, altering both the ease of cutting and the resulting fit of joints; colder pipes become slightly smaller and stiffer, making clean cuts and snug solvent-weld or press-fit connections more difficult, while warmer pipes are more pliable, cut more smoothly, and can lead to looser fittings if thermal expansion isn’t accounted for.
- In cold conditions, allow warming time or use sharper blades to avoid cracking and guarantee square cuts.
- In heat, measure for expansion gaps and avoid forcing tight assemblies; recheck alignment after cooling.
- Store and handle pipe near installation temperature to minimize fit issues.
How To Cut Schedule 40 Vs Schedule 80 PVC Differently
Schedule 40 and Schedule 80 PVC require different handling because Schedule 80 has thicker walls that affect cutting depth and force.
Tool selection should reflect that difference—stronger blades or tube cutters and slower feeds for Schedule 80, lighter tools and quicker cuts for Schedule 40.
After cutting, careful deburring and checking fitment are essential to make certain seals seat properly and joins meet pressure specifications.
Wall Thickness Differences
Because wall thickness determines cutting approach, Schedule 40 and Schedule 80 PVC require different tools and techniques to achieve clean, square cuts.
Schedule 40 has thinner walls and is easier to compress and align; Schedule 80 is thicker, stiffer, and resists deformation, affecting clamp pressure and blade feed rates. Observing wall depth at the cut line guarantees full penetration without burning or chipping.
Clean deburring methods vary with thickness to maintain fit and seal integrity.
- Thinner walls: faster cut, gentler clamping.
- Thicker walls: slower feed, firm support.
- Inspection: confirm uniform wall after cutting.
Cutting Tool Selection
Choose cutting tools based on wall thickness and desired finish: lighter, quicker blades or shears suit Schedule 40-like thin-walled pipe, while robust saws and slower feeds are necessary for Schedule 80-like thick-walled pipe.
For Schedule 40, PVC cutters, fine-tooth handsaws, and compact miter saw blades provide fast, clean cuts with minimal effort; torque and heat buildup are low.
For Schedule 80, use coarse-tooth blades, reciprocating saws with controlled feed, or powered miter saws with reduced speed to prevent melting and binding.
Blade condition, proper clamping, and steady control matter equally to maintain straight, square cuts across both types.
Deburring And Fitment
When preparing cut ends for joining, different deburring and fitment techniques are required for thin-walled Schedule 40 versus thick-walled Schedule 80 PVC: Schedule 40 typically needs only a quick chamfer and light sanding to remove burrs and guarantee a snug solvent-weld or slip fit, while Schedule 80 demands more aggressive material removal, a deeper bevel to compensate for thicker walls, and careful inspection for heat-induced distortion before test-fitting.
- File or chamfer edges: light for 40, deeper for 80.
- Sand interior and exterior faces to remove burrs and guarantee flush seating.
- Dry test-fit, correcting any tight spots or ovality before solvent or primer application.
How To Cut PVC For Plumbing Vs Irrigation Projects
Cutting PVC for plumbing versus irrigation requires different priorities: plumbing cuts demand smooth, deburred ends and precise measurement for solvent-weld or threaded fittings, while irrigation cuts often tolerate slight imperfections and prioritize speed and corrosion-resistant joints.
For plumbing, use a fine-tooth saw or PVC cutter, square the cut with a miter box, deburr both faces, and test-fit before solvent application or threading.
For irrigation, quicker methods like ratcheting cutters or power tools are acceptable if cuts are reasonably square; clamps or tape prevent crushing.
Material choice and joint type guide tool selection and tolerances for each application.
Preserve Inner Diameter On Thin‑Wall PVC
For thin‑wall PVC, maintaining the full inner diameter during cutting and joining is critical to prevent flow restriction and guarantee pressure ratings are met.
Careful technique preserves wall uniformity and prevents lip formation that narrows bore.
Use tools and methods that minimize deformation and burrs.
- Score and snap for small diameters, then deburr inside with a round file or reamer to remove any ridge.
- Use a fine-toothed saw with steady support to avoid crushing; clamp gently to maintain roundness.
- Test fit and light sanding inside the socket area before solvent cement to assure smooth, full ID continuity.
How To Cut PVC Conduit For Electrical Runs
For electrical runs, selecting the proper PVC conduit—scheduling, wall thickness, and planned location—ensures mechanical protection and code compliance.
Accurate cutting with a fine-tooth saw or conduit cutter followed by thorough deburring preserves conductor space and prevents insulation damage.
Properly prepared ends and smooth internal edges simplify pulling cable and reduce installation issues.
Choosing The Right Conduit
When selecting PVC conduit for electrical runs, attention must be paid to diameter, wall thickness, and rating to guarantee safe cable capacity and code compliance.
The installer evaluates run length, bend allowance, and fill to pick nominal conduit size.
UV resistance and sunlight-rated materials matter for exposed outdoor runs; schedule numbers indicate wall thickness and mechanical strength.
Compatible fittings and solvent-cement or threaded connections must match conduit type and electrical code.
Consider temperature range and burial depth for underground installations.
Inspect labeling for NEMA or UL listings and local code approvals before purchase.
- Match cable fill to conduit diameter.
- Choose wall thickness by application.
- Verify UL/NEMA ratings.
Cutting And Deburring Techniques
Start by measuring and marking the conduit for each run, then use appropriate cutting tools—a PVC pipe cutter for smaller diameters, a fine-toothed hacksaw or miter saw for larger sizes—to produce straight, square cuts.
After cutting, remove burs and plastic shavings with a deburring tool, utility knife, or round file, rotating inside the end to chamfer the inner edge.
Lightly sand the outside edge for a smooth fit.
Verify length after deburring and test-fit couplings before gluing.
Wear eye protection and gloves, secure conduit in a vise or clamp for stability, and clean surfaces of dust and oil prior to solvent cementing.
How To Minimize Dust And Fumes When Cutting PVC
While cutting PVC, minimizing dust and fumes requires a combination of technique, equipment, and ventilation: using tools that generate less particulate (hand saws, fine-tooth blades, or PVC-specific scoring knives), employing dust-capture attachments or vacuum systems, working in well-ventilated areas or outdoors, and wearing appropriate respiratory protection and eye protection to reduce inhalation and contact risks.
The operator should plan cuts to limit airborne debris and avoid enclosed spaces.
Use wet-cutting only when compatible with the tool.
Dispose of PVC dust safely.
Consider local regulations when working indoors.
- Choose low-dust tools and collectors.
- Ventilate or work outside.
- Wear respirator and goggles.
How To Avoid Cracking, Melting, Or Chipping PVC
Reducing dust and fumes is only part of careful PVC work; preventing cracking, melting, or chipping requires attention to cutting speed, blade choice, support, and heat buildup.
Use a fine-tooth blade or PVC-rated blade and avoid coarse or damaged cutters. Clamp the pipe firmly with soft jaws to prevent flexing and support both sides of the cut to reduce vibration.
Cut steadily, letting the tool do the work—force and high speed generate heat and stress. For power saws, make multiple shallow passes rather than one deep cut.
Cool material with brief pauses; avoid abrasive methods that fray or delaminate the edges.
Quick Fixes If A Cut Is Slightly Off‑Length
If a cut comes out a little long or short, simple adjustments can often save the piece without re-cutting the pipe. Small length errors are common; evaluating the slack in fittings and available coupling length is the first step.
Then use these quick fixes:
- Slip an extra short coupling or spacer into the run to absorb a few millimeters.
- Shift adjacent fittings or rotate removable joints to reclaim slight excess or gap.
- Replace a single compression ring or use a slightly longer primer/cement overlap where codes and seals permit.
Each tactic aims to preserve alignment and seal while avoiding full rework.
How To Repair A Damaged Cut End Without Replacing Pipe
Minor adjustments described earlier can often avoid re-cuts, but when a cut end is nicked, crushed, or ragged the pipe can still be salvaged without replacing the entire length.
First, trim a small amount with a fine-tooth saw or rotary cutter to remove damaged material, keeping the cut square using a guide. Lightly deburr and chamfer the inside and outside edges with a deburring tool or sandpaper.
For minor crushed ends, insert a mandrel or expanding plug to reshape before trimming.
Clean, dry, and test-fit fittings; if gaps remain, use a short coupling or repair sleeve to restore a reliable joint.
How To Prepare Cut PVC For Painting Or Coating
After cutting, the surface should be thoroughly cleaned and degreased to remove dust, oils, and debris that prevent adhesion.
Rough the cut edges and faces with fine sandpaper to smooth burrs and provide a key for coatings.
Finish by applying a compatible primer or sealer recommended for PVC before painting or topcoating.
Clean And Degrease
Before any primer or paint touches the PVC, the cut surfaces and nearby areas must be thoroughly cleaned and degreased to guarantee adhesion and a uniform finish.
The technician wipes away dust, filings, and oils using a lint-free cloth dampened with isopropyl alcohol or a mild detergent solution.
Solvent-based cleaners may be used briefly, then flushed with water and fully dried.
Remove fingerprints and machining residues; contaminants cause fish-eyes and poor bonding.
Final inspection under bright light confirms cleanliness before proceeding.
Recommended steps:
- Wipe with detergent, rinse, dry.
- Degrease with isopropyl alcohol.
- Inspect and re-clean if needed.
Sand And Smooth Edges
With the surface cleaned and free of contaminants, attention turns to refining the cut edges so that primer and paint adhere evenly and the finished piece looks professional. Lightly sand the rim with 120–220 grit to remove burrs, then progress to 320–400 grit for a smooth finish. Remove dust with a tack cloth. For internal edges, use a rounded file or sandpaper wrapped on a dowel. Make certain uniform bevels to avoid paint buildup.
| Tool | Purpose |
|---|---|
| 120–220 grit | Deburrs |
| 320–400 grit | Smooths |
| File/dowel | Internal edges |
| Tack cloth | Dust removal |
Apply Primer Or Sealer
When preparing cut PVC for painting or coating, a compatible primer or sealer must be applied to promote adhesion and create a uniform surface for topcoats.
The technician guarantees the surface is clean and dry, selects a primer formulated for PVC, and applies thin, even coats. Drying times are observed between coats; sanding light between layers improves bonding.
Solvent-based primers chemically soften the surface for weld-like adhesion, while water-based sealers reduce odor and cleanup. Proper ventilation and gloves are used.
This step prevents peeling, improves durability, and creates a consistent finish ready for painting.
- Clean, dry surface
- Apply thin coats
- Observe drying times
How To Store Cut PVC Pieces For Future Use
A homeowner’s neatly labeled bin of cut PVC pieces saves time and waste on later projects; storing sections by diameter and length prevents confusion and speeds retrieval.
Small bins or dividers keep fittings, couplings and short offcuts separated.
Wrap delicate or painted pieces in paper to avoid scratches.
Record lengths and planned uses on adhesive labels or a simple inventory sheet.
Store long straight sections on wall-mounted racks or suspended hooks to prevent warping and tripping hazards.
Keep PVC away from direct sunlight and extreme heat to avoid brittleness.
Regularly inspect stock for damage and discard unusable scraps.
How To Choose The Right Tool On A Budget
Having a well-organized stash of cut PVC makes selecting a cutting tool easier, because the likely job sizes and frequencies are already known. The writer recommends evaluating typical pipe diameters, cutting precision required, and storage constraints before purchasing. Budget choices balance cost, speed, and durability. For occasional small jobs, hand tools suffice; for frequent work, a powered saw pays off. Consider replacement blade availability and safety features. A simple comparison helps.
- Small, infrequent cuts: PVC pipe cutter or hacksaw.
- Medium use: ratcheting cutter or miter box with fine-tooth saw.
- Heavy or precise work: compact circular saw with guide.
How To Maintain And Sharpen PVC Cutting Tools
With regular care and occasional sharpening, PVC cutting tools stay accurate and safe for longer.
Inspect blades and ratchets after each session; remove plastic shavings and dirt with a brush and mild solvent.
Lubricate moving parts lightly with machine oil to guarantee rust and stiffness.
For handheld saws and utility knives, use a fine-tooth file or sharpening stone at the original bevel angle, stroking evenly.
Replace deeply nicked blades and worn ratchet mechanisms rather than forcing repairs.
Store tools dry in protective cases.
Periodic calibration of pipe cutters guarantees clean, square cuts and extends tool life.
Common Beginner Mistakes When Cutting PVC And How To Avoid Them
Often, beginners make predictable errors that compromise cut quality and safety when working with PVC. Common mistakes include poor measurement, wrong tool choice, and unsafe handling; each leads to uneven cuts, waste, or injury.
To avoid these, practice marking, select the correct cutter or saw, and secure the pipe before cutting. Additional precautions include deburring and checking fit before glue application.
Below are three frequent errors and remedies:
- Mismeasuring — use a square and double‑check before cutting.
- Using dull or inappropriate tools — match blade type and sharpen regularly.
- Neglecting clamping and PPE — stabilize work and wear gloves/goggles.
Time‑Saving Tips For Cutting Multiple Pipes Accurately
Streamline the process by organizing work into repeatable steps and using simple jigs or stops to maintain consistent lengths across multiple cuts.
Batch-mark pipes with a template, clamp them securely, and cut in sequence to reduce setup time.
Use a miter box or portable fence with a tape-stop for repeatable positioning.
For long runs, employ a pipe holder or sawhorse to support material and prevent binding.
Keep cutting tools sharp and clear of debris to speed strokes.
Measure twice when creating the template; one accurate setup saves many re-measures and guarantee uniform, professional results across all pieces.
When To Call A Pro Instead Of Cutting Yourself
When projects involve complex fittings, pressurized systems, or portions of a home’s plumbing that are concealed behind walls or under slabs, hiring a licensed professional is advisable. A pro guarantees code compliance, safe handling of live systems, and proper leak testing.
DIY attempts risk costly damage, voided warranties, or safety hazards from improper joints or trapped water. Consider professional help when access is restricted, the work affects other trades, or permits are required.
- Major repairs involving sewer, water mains, or high-pressure lines.
- Jobs requiring permits, inspections, or code-specific materials.
- Limited access: behind slabs, in ceilings, or within structural elements.
Quick Reference Cheat Sheet: Steps For A Perfect PVC Cut
Although precision matters less for rough mockups, a clean, square cut is essential for durable PVC joints; this cheat sheet lists the concise, sequential steps—measure, mark, secure, cut, deburr, and test—that produce reliable results every time.
First, measure twice and note cut location. Mark clearly around circumference with a pencil and square. Secure pipe in a vise or clamp, protecting the surface. Choose an appropriate saw or cutter and slice slowly, keeping the blade perpendicular. Remove burrs with a deburring tool or file, then dry-fit parts to verify alignment and length. Finalize with solvent cement if fit is correct.
Conclusion
With practiced hands and the right precautions, a simple slice can gently reshape a project’s future. The quiet precision of measured cuts, softened by careful safety, turns raw lengths into useful forms. Small errors become modest lessons rather than failures; time saved feels like a courteous nod from experience. When tasks are approached with respect and patience, PVC transforms unobtrusively into something dependable, leaving behind only tidy ends and quiet satisfaction.