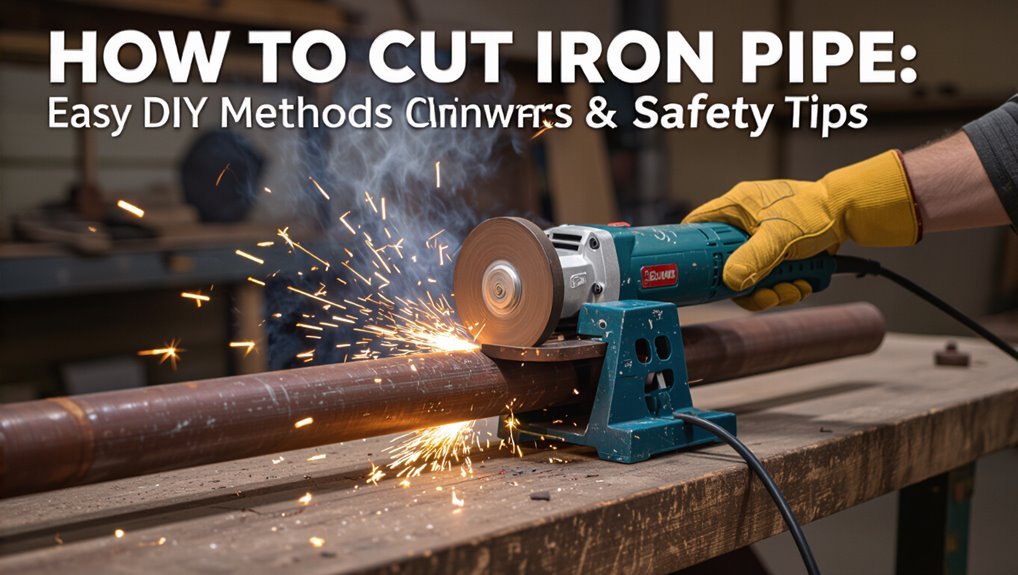
How to Cut Iron Pipe: Easy DIY Methods & Safety Tips
To cut an iron pipe safely and effectively, follow these key steps:
1. Measure and Mark: Measure twice and mark a clear circumferential line on the pipe.
2. Secure the Pipe: Use a vise to hold the pipe securely in place.
3. Wear Safety Gear: Always wear eye, ear, respiratory, and hand protection to ensure safety during the cutting process.
4. Choose the Right Tool:
- Use a hacksaw or ratcheting cutter for small cuts.
- Opt for a reciprocating saw or an abrasive/diamond wheel for thicker pipes or multiple cuts.
5. Cutting Technique: Use slow, steady strokes and take coolant breaks to limit heat buildup.
6. Deburr and Dispose: After cutting, deburr the edges and identify the metal for proper disposal.
This concise guide will help you cut iron pipes safely and effectively, ensuring you have the right tools and precautions in place. For more detailed guidance on tool choices and tight-space tricks, consult additional resources.
Quick: How to Cut Iron Pipe in 3 Steps
With simple tools and careful measuring, cutting iron pipe can be completed in three clear steps: measure and mark, secure the pipe, and make the cut.
First, measure twice and mark the cut line with a permanent marker or scribe, accounting for burr removal and thread allowance.
Second, clamp the pipe firmly in a vise or use a pipe clamp to prevent rotation; protect the pipe with soft jaws if needed.
Third, choose an appropriate cutter—hacksaw, reciprocating saw with metal blade, or pipe cutter—then cut steadily, deburr the edge with a file, and inspect the finish before reuse.
When to Cut Pipe Yourself or Call a Pro?
After learning the basic three-step method for cutting iron pipe, a homeowner or handyman must decide whether to perform the cut themselves or hire a professional.
DIY is reasonable for short, accessible runs, non-pressurized pipes, simple straight cuts, and when proper tools and PPE are available. Call a pro for buried, pressurized, corroded, or load-bearing pipes, complex fittings, tight spaces, or code-sensitive plumbing and gas work.
Consider time, skill level, liability, permits, and potential hidden damage. When in doubt, obtaining a professional assessment prevents costly mistakes, safety hazards, and failed inspections.
Identify Iron vs. Steel vs. Galvanized Pipe (And Why It Matters)
For a homeowner or tradesperson deciding how to cut or repair piping, distinguishing cast iron, carbon steel, and galvanized pipe is essential because each material requires different tools, fittings, and safety precautions.
Cast iron is heavy, brittle, and often gray with a flakey fracture; it uses hub-and-spigot or no-hub couplings.
Carbon steel is magnetic, darker, and used in gas or structural lines; it accepts threading and oxy-fuel or abrasive cutting.
Galvanized steel has a zinc coating, may appear shiny or dull, and resists corrosion but produces toxic zinc fumes when heated.
Proper identification prevents improper cutting methods, mismatched fittings, and corrosion issues.
Essential Safety Gear for Cutting Iron Pipe
In preparing to cut iron pipe, appropriate personal protective equipment and site safeguards are nonnegotiable to prevent injury from sparks, flying fragments, and toxic dust.
The worker should wear ANSI-rated safety glasses with side shields plus a full-face shield when grinding.
Respiratory protection must match dust and fume levels—N95 for light dust, half-mask respirator with P100 cartridges for heavy particulate or galvanized coatings.
Heavy-duty gloves, flame-resistant long sleeves, and ear protection for loud power tools are required.
Secure the pipe in a sturdy vise, clear the work area of combustibles, and keep a fire extinguisher and first-aid kit within reach.
Tool Choices and Pros/Cons
The article compares manual tools and power tools for cutting iron pipe, highlighting trade-offs in effort, control, and required setup.
It contrasts cutting speed with achievable precision, noting that faster power tools can sacrifice fine accuracy while manual options offer greater control at slower pace.
Readers are prompted to weigh the importance of speed versus precision when selecting a method.
Manual Tools vs Power Tools
When choosing between manual and power tools for cutting iron pipe, considerations hinge on accuracy, speed, safety, and equipment cost; hand tools like pipe cutters and hacksaws offer control and low expense for small jobs, while power tools such as reciprocating saws, angle grinders, and cold-cutting saws provide greater speed and consistency for larger or repetitive work.
- Manual tools: lower cost, quieter, better control for delicate fittings.
- Power tools: faster cuts, suited for thick or many pipes.
- Safety: manual tools reduce kickback risk; power tools need PPE and secure clamping.
- Portability: hand tools excel in remote or tight spaces.
- Maintenance: power tools demand more upkeep and consumables.
Cutting Speed vs Precision
Balance speed against precision dictates the best tool choice for cutting iron pipe: rapid methods like angle grinders and reciprocating saws maximize throughput but sacrifice finish quality and fine control, while slower options—manual pipe cutters, hacksaws, or cold-cutting saws—yield cleaner edges and tighter tolerances at the cost of time.
Power tools suit demolition, rough plumbing, or when many cuts are required; they need deburring and careful clamping.
Manual and specialty cutters suit finish plumbing, tight fittings, or threaded connections where concentricity matters. Choose based on required tolerances, available time, skill level, and post-cut cleanup capacity.
Measure and Mark an Accurate Cut Line
The practitioner selects appropriate measurement tools—tape measure, calipers, or a combination square—based on pipe diameter and required tolerance.
Using a fine-tip marker or scribe, the cut line is transferred around the circumference with steady, consistent strokes to guarantee precision.
Before cutting, alignment is checked twice against reference marks or fittings to confirm the layout.
Choose Measurement Tools
Accurate measurement starts with choosing tools that match the pipe material, diameter, and the tolerance required for the joint.
Selection prioritizes repeatability and readability: calipers for small diameters, tape or folding rulers for long runs, and thickness gauges when wall measurements affect fit.
Tools should be calibrated, clean, and suited to the working environment to avoid errors.
Consider tool rigidity to prevent flex on larger pipes and visibility in low light.
Protective caps or stops help secure measurements.
- Vernier or digital calipers for precise OD/ID readings
- Steel tape for long lengths
- Combination square for alignment
- Pipe calipers for curved surfaces
- Thickness gauge for wall measurements
Mark With Precision
With measurements verified and tools in hand, a clear, repeatable marking routine guarantees the cut line corresponds exactly to the planned dimension. The technician places the pipe on a stable surface, uses a square or caliper to locate the cut point, and scores a fine line with a scribe or permanent marker. Marks should be thin, continuous, and visible from all angles. Transfer measurements from reference faces, not the pipe edge, to avoid error. Lightly rotate the pipe to confirm alignment before clamping. Use the following quick-check grid to assure mark clarity and location consistency:
| Location | Tool used | Visibility |
|---|---|---|
| Face reference | Caliper | High |
| Circumference | Scribe | Medium |
| Edge offset | Square | High |
Verify Alignment Twice
Regularly confirming alignment before cutting prevents costly rework.
The technician measures twice, marks once and rechecks supports, ensuring the cut line matches required orientation and length.
Visual inspection and a straightedge confirm that fittings will seat correctly.
A firm clamp holds the pipe to prevent movement while the blade meets the mark.
Final verification reduces gaps, misfits, and wasted material.
- Measure from fixed reference points on both sides of the cut
- Use a permanent marker and scribe a thin, visible line
- Align a square or straightedge along the mark
- Clamp the pipe securely before cutting
- Re-measure after clamping to confirm position
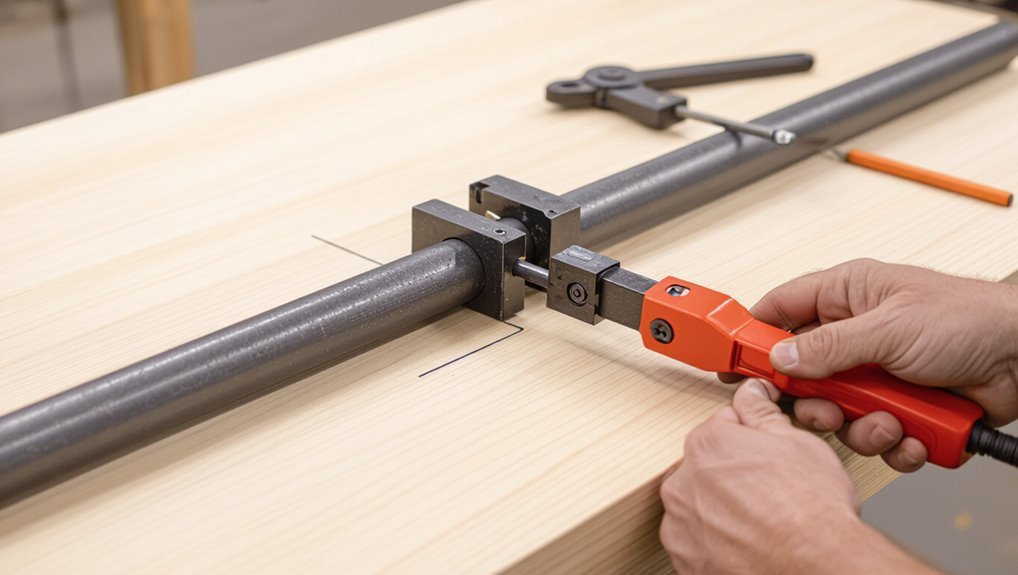
Secure Iron Pipe Safely in a Vise or Clamp
Before any cutting begins, the pipe must be secured in a vise or clamp that matches its diameter and material to prevent slipping and deformation.
Position the pipe so the marked cut line sits just beyond the jaws, allowing full blade travel while protecting fixtures.
Use soft jaw covers or scrap wood to avoid marring threaded ends and maintain roundness.
Tighten incrementally, checking alignment and rotation resistance; over-tightening can flatten thin walls.
Make sure the vise is bolted to a stable workbench and clamps sit on solid supports.
Confirm clearance for tools and hands before starting any cutting operation.
Cut Iron Pipe With a Hacksaw : Step‑by‑Step
Begin the cut by confirming the pipe is still secure in the vise and the marked line is visible and accessible.
The operator fits a bi‑metal hacksaw blade coarse enough for iron, aligns the frame, and starts with slow, controlled strokes to establish a groove.
Maintain steady pressure, keep the blade perpendicular, and use full‑length strokes to distribute wear.
Clear metal filings periodically and inspect the cut for straightness.
After breakthrough, ease pressure to avoid jagged edges, then deburr the cut with a file.
- Choose a proper coarse blade
- Position body for steady strokes
- Keep blade perpendicular
- Clear filings frequently
- Deburr after cutting
Use a Reciprocating Saw (Sawzall): Blades & Technique
A reciprocating saw can speed through iron pipe when fitted with the correct blade and used with proper technique.
Choose a bi-metal or carbide-grit blade sized for metal and secure steady, controlled strokes while keeping the shoe against the pipe to reduce vibration.
The following steps outline blade selection tips and a concise cutting technique for safe, efficient results.
Blade Selection Tips
Which blade best suits the job depends on pipe material, wall thickness, and access. For a reciprocating saw, choose bi-metal or carbide-grit blades for iron; tooth count affects speed versus life. Longer blades reach confined spots; shorter blades give control. Match blade length to pipe diameter and clamp setup. Replace worn blades to avoid bind and overheating.
- Bi-metal blades (high-speed steel teeth) for general iron cutting
- Carbide-grit for heavily corroded or cast iron
- Coarse teeth (low TPI) for faster cuts on thick walls
- Fine teeth (high TPI) for thin-walled or precision cuts
- Variable-pitch blades to reduce vibration
Cutting Technique Steps
After selecting the appropriate blade type and length for the pipe material and access, the operator should position the reciprocating saw so the shoe rests firmly against the pipe to steady the cut and reduce vibration.
Clamp the pipe securely and mark the cut line.
Start the saw at low speed to seat the blade, then increase to a steady cutting pace; apply consistent forward pressure without forcing the blade.
Keep hands clear of the blade path and watch for sparks or heat.
Pause periodically to let the blade cool and clear chips.
Finish slowly to guarantee a square edge, deburring the cut before installation.
Cut With an Angle Grinder: Discs, Speed, and Control
Begin by selecting the correct grinding wheel and setting up the angle grinder for safe, controlled cuts: a thin abrasive or diamond cutting disc rated for ferrous metals, matched to the grinder’s RPM, minimizes heat and burrs while a guard, side handle, and steady two-handed grip provide necessary control. Maintain steady feed, avoid forcing the tool, and let the disc do the cutting. Moderate speed reduces burning; too slow increases friction. Clamp the pipe, mark the cut, and pause periodically to check progress and cool the metal.
- Use PPE: goggles, gloves, hearing protection
- Choose disc rated for iron
- Secure pipe in a vice
- Cut at consistent angle
- Deburr edges after cutting
Use a Pipe Cutter for Threaded or Thin‑Wall Pipe
For threaded or thin‑wall iron pipe, a manual pipe cutter offers faster, cleaner cuts than power tools when used properly. The tool clamps around the pipe and uses a rotating cutting wheel to score progressively deeper until separation occurs. Choose a cutter sized for the pipe diameter and with a hardened wheel suited to iron.
Mark the cut, align the wheel squarely, tighten incrementally after each full rotation, and keep the tool aligned to avoid burrs or ovaling. Finish with a deburring tool or file to remove sharp edges and preserve thread integrity for fittings.
When to Use an Oxy‑Acetylene Cutting Torch
When is an oxy‑acetylene cutting torch the appropriate choice for iron pipe work? An oxy‑acetylene torch suits thick, heavy iron pipe where speed and beveling matter, and where portability outweighs setup complexity. It excels for demolition, on‑site repairs, or when other tools cannot reach curved or embedded sections. Operators should be trained and use proper PPE, ventilation, and cutting techniques.
- Thick‑wall pipe thicker than practical for saws or grinders
- Need for fast, large‑volume cutting
- Requirement to bevel or chamfer pipe ends
- Limited access for bulky stationary tools
- Remote or outdoor locations without power
Cold Saws and Chop Saws: Straight, Fast Cuts
Cold saws and chop saws offer rapid, straight cuts for iron pipe when set up correctly.
Attention to blade selection—tooth geometry and material—and matching cutting speed to pipe thickness are key to clean edges and long blade life.
Simple accuracy tips such as proper clamping, feed rate control, and verifying blade runout help prevent burrs and misaligned cuts.
Cut Accuracy Tips
Achieving straight, fast cuts on iron pipe with cold and chop saws depends on a few disciplined setup and technique choices: secure the pipe in a rigid vise or clamp, align the blade to the marked cut line using a square or laser guide, and select the correct blade tooth geometry and speed for the material.
Consistent repetition and minor adjustments reduce wander and produce clean ends ready for fitting or welding.
Focus on stable workholding, repeatable alignment, and measured feed pressure.
Verify each cut with a framing square and deburr lightly to maintain dimensions.
- Tight, vibration-free clamping
- Verify blade-to-mark alignment
- Use a sacrificial backing stop
- Consistent, steady feed
- Inspect and adjust after test cuts
Blade And Speed Choices
After securing the pipe and confirming alignment, selecting the correct blade and cutting speed determines both cut quality and throughput for cold and chop saws. Carbide-tipped blades with fine tooth counts suit thin-walled pipe and produce clean edges; heavier, coarse-tooth or abrasive wheels handle thicker, weld-seamed iron more aggressively.
Cold saws benefit from slower feed and moderate RPM with coolant to minimize heat and burrs, preserving material temper. Chop saws run faster and require rigid fixturing and steady feed to avoid vibration. Operators should match blade material and tooth geometry to pipe thickness, and adjust speed to balance cutting rate and finish.
Deburr and Clean Cut Iron Pipe for Fittings
Prepare the cut end of the iron pipe by removing burrs and cleaning all residue so fittings seat evenly and threads seal properly.
After cutting, inspect the edge for sharp protrusions and metal shavings.
Use a deburring tool or file to smooth the inner and outer edges, rotating the pipe for uniformity.
Wipe the surface with a clean rag; a solvent removes oil and fine particles.
Verify fitment with the intended fitting before final assembly.
- Remove large burrs with a coarse file
- Smooth edges with a round deburring tool
- Brush inside with a wire brush
- Wipe with solvent and lint-free cloth
- Re-inspect for remaining shards
Cutting Threaded vs. Plain‑End Iron Pipe (What Differs)
Cutting threaded iron pipe differs from cutting plain‑end pipe in both technique and final preparation because threads require preservation while plain ends often need clean, square faces for fittings; consequently, the cutter must avoid deforming threads and leave enough thread length for engagement, whereas plain‑end cuts prioritize a burr‑free, flat surface for welding, flanging, or mechanical couplings.
Threaded pipe is measured from existing thread start, cut beyond damaged thread, then re‑chased with a die or tap to restore pitch.
Plain ends are cut square, deburred, and measured for face thickness.
Tool selection and clamping differ to protect thread form.
Common Cutting Problems and Fixes
Identify common issues early to reduce rework and safety risks when cutting iron pipe. Typical problems include burrs, uneven cuts, binding saw blades, excessive heat, and mismeasured lengths. Each problem has a concise fix to restore quality and safety without major rework.
- Burrs: deburr with a file or reamer for smooth ends and proper fittings.
- Uneven cuts: realign the pipe in the vice and use a guide or steady cutting motion.
- Binding blade: lubricate and back out to clear chips; replace dull blades promptly.
- Overheating: pause, cool with water, and use slower feeds.
- Wrong length: remeasure, mark clearly, and trim minimally.
Cutting Pipe in Tight Spaces or on Installed Runs
When working in confined areas or on pipes already installed in a system, the cutter must balance access limitations with maintaining clean, accurate cuts; cramped conditions call for compact tools, controlled cutting motion, and careful protection of surrounding components to prevent damage or leaks. Small tubing cutters, mini reciprocating saws, or ratcheting pipe cutters fit tight spots; support the pipe to reduce vibration, score and rotate for even cuts, and shield nearby fittings. Use short, measured strokes and inspect the bevel for burrs before reassembly.
| Tool | Best use |
|---|---|
| Mini cutter | Tight bends |
| Ratchet cutter | Thick runs |
| Saw | Obstructions |
| File | Deburring |
Avoid Heat, Sparks, and Warping When Cutting
After working in confined spaces, attention must turn to controlling heat and sparks that can damage pipe metallurgy, nearby components, or insulation.
The cutter should use low-heat methods where possible, clamp securely to prevent movement, and cool the cut frequently to avoid temper changes. Protective shielding for surroundings minimizes fire risk.
Monitor for warping and straighten or replace sections if dimensional integrity is compromised. Proper PPE and ventilation reduce inhalation and burn hazards.
- Use abrasive cutting with light pressure and coolant
- Prefer mechanical cutters over torch cutting
- Clamp to disperse heat
- Shield adjacent materials
- Inspect for distortion immediately
Disposal, Recycling, and Handling Cutoffs
After cutting, remnants should be sorted by metal type to prevent contamination and to maximize recycling value.
Cutoffs require secure, labeled storage to avoid tripping hazards and to protect workers from sharp edges.
Disposal options range from selling to scrap yards and scheduled metal recycling pickups to following local hazardous-waste rules for contaminated pieces.
Sorting Metal By Type
For efficient disposal and recycling, cut iron pipe remnants must be accurately sorted by metal type to prevent contamination, reduce processing costs, and maximize material recovery. The author recommends visual inspection for ferrous vs nonferrous, use of magnets, labeling bundles, and separating painted or coated pieces. Contaminated or mixed-material items should be quarantined for specialist processing. Proper documentation speeds pickup and improves scrap value. Facilities appreciate clearly marked loads and minimal debris.
- Use a strong magnet to identify ferrous metals.
- Group stainless separately from mild steel.
- Remove attached fittings when practical.
- Keep painted pieces distinct.
- Record weights and types for recyclers.
Safe Storage Of Cutoffs
In storage areas, cutoffs should be organized to prevent injury, contamination, and corrosion while preserving material value for disposal or recycling. Cutoffs are separated by size and condition, labeled, and kept off the floor on pallets or racks. Sharp ends are capped or bundled; oily pieces are drained and stored in drip trays. Access is limited to trained personnel using gloves and eye protection. Records note quantities and pickup dates to avoid accumulation. Signage reminds handlers of hazards and protocols. Containers are checked regularly for leaks, rust, or contamination and moved promptly when full.
| Condition | Emotion | Action |
|---|---|---|
| Sharp | Unease | Cap |
| Oily | Disgust | Drain |
| Rusty | Sadness | Inspect |
| Full | Urgency | Move |
Recycling And Disposal Options
When managing iron pipe cutoffs, facilities should prioritize options that minimize environmental harm, comply with regulations, and recover value; common paths include segregation for recycling, controlled disposal of contaminated pieces, and transfer to authorized scrap handlers.
Cutoffs should be sorted by material and condition, decontaminated if needed, and documented for chain-of-custody.
Local recycling centers accept clean ferrous metal; contaminated or coated pieces require hazardous-waste routes or licensed processors.
Records of weight, origin, and disposal method support compliance.
Proper packaging prevents injury and contamination during transport.
- Separate clean iron for scrap recycling
- Isolate coated or contaminated cutoffs
- Use licensed waste carriers
- Retain disposal documentation
- Follow local environmental rules
Cost, Time, and Simple Tool Maintenance Tips
Regarding cost and time, cutting iron pipe typically requires only a few basic tools—pipe cutter, hacksaw, or angle grinder—each with different price and labor profiles: a manual pipe cutter is low-cost and quick for small diameters, a hacksaw is cheapest but slower and more physical, while an angle grinder is pricier, faster, and demands protective gear.
Material cost is minimal; consumables like blades or discs add modest expense. Time varies by method and skill.
Maintain tools by cleaning metal debris, lubricating moving parts, replacing worn blades/discs, and checking guards and cords.
Proper maintenance reduces downtime and improves cut quality.
Conclusion
Like a seasoned gardener pruning iron vines, the DIYer trims pipes with measured care, knowing when to call the arborist for stubborn roots. Tools are the shears, safety the steady hand; judgment prevents sparks that scorch the soil of a project. Small cutoffs become seeds for recycling, while patience and proper gear sow durable results. In this workshop-garden balance, skill and caution yield a tidy, lasting harvest.