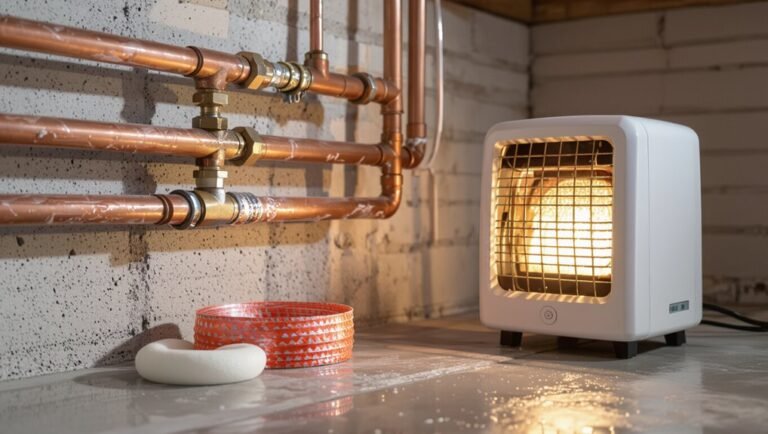
How to Clean a Washer Drain Pipe Fast: Simple DIY Guide
Key Takeaway: Quickly clean a clogged washer drain pipe by following these simple steps.
- Power Off and Prepare: Turn off the washer and shut off the water supply.
- Remove Components: Detach the drain hose or pump trap and catch any residual water.
- Clear Visible Debris: Use gloves or pliers to pull out any visible lint or trapped debris.
- Break Blockages: Use hot water flushes, a wet/dry vacuum, or a small drain snake to eliminate stubborn clogs.
- Rinse and Reassemble: Rinse the components, reassemble everything, and run a short cycle to ensure proper flow.
Following these steps will help you efficiently clear your washer drain pipe and restore its functionality.
Why a Clogged Washer Drain Pipe Causes Problems
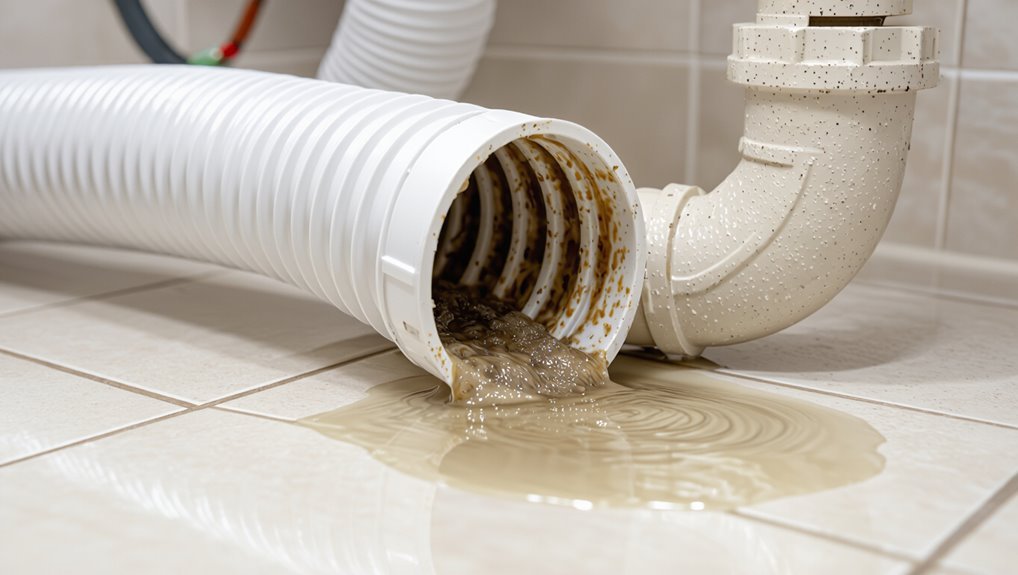
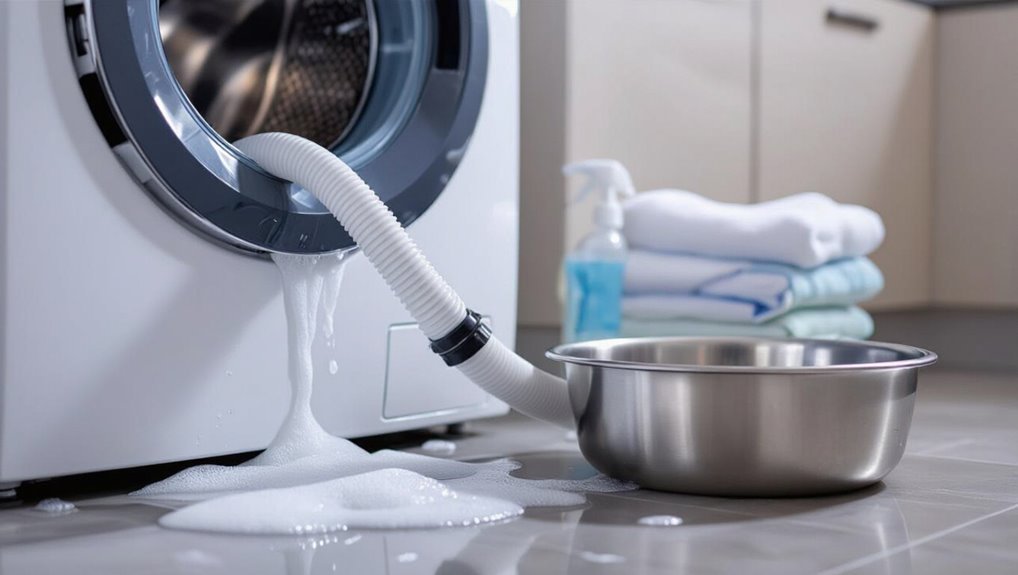
A clogged washer drain pipe restricts water flow, causing slow draining, backups into the drum, and standing water that can damage laundry and the machine’s components.
Debris, lint, grease, and mineral buildup reduce pipe diameter, increasing pressure during pump cycles and forcing strained seals and hoses to leak or fail.
Impeded drainage prolongs cycle times and leaves residue on clothes.
Backflow can flood floors and foster mold growth in cavities and gaskets.
Repeated motor and pump overwork shortens mechanical life and raises energy use.
Prompt clearing prevents escalating repairs, preserves wash quality, and reduces safety and sanitation risks.
Quick: Signs Your Washer Drain Is Clogged
Often, homeowners notice clear warning signs when a washer drain becomes clogged: slow or incomplete draining, water pooling in the drum after a cycle, or foul odors emanating from the machine. Observe operation and smell for clues.
Listen for unusual gurgling during drain cycles and watch for persistent dampness around the washer base. Check the laundry after spin; residual wetness indicates poor drainage. Inspect nearby floor drains for backups. Document intermittent problems that worsen over time.
If multiple signs appear, the drain is likely compromised and requires prompt attention to prevent damage or odors.
- Slow draining or standing water
- Gurgling or sputtering sounds
- Persistent odors or dampness
Decide Now : Can You Fix It Yourself?
The reader should first assess their own skill level, noting comfort with basic plumbing tasks and willingness to follow safety steps.
Next, they should evaluate the tools required—snake, pliers, bucket, and possibly a wrench—and whether those are on hand or affordable to obtain.
If skills or tools are lacking, professional help may be the safer choice.
Assess Your Skill Level
Before attempting any repairs, determine whether the task matches the individual’s mechanical aptitude, available tools, and comfort with basic plumbing: simple clogs accessible at the trap or hose connection can usually be handled by someone comfortable with hand tools and turning off water, while recurring backups, foul odors without an obvious blockage, or visible damage to pipes or the washer require professional diagnosis.
The person should honestly assess patience, ability to follow instructions, and readiness to stop and call a plumber if problems escalate.
Consider safety, leak risks, and warranty implications before proceeding.
- Skill realism
- Safety awareness
- When to call pro
Evaluate Required Tools
How much time and what tools will the job require? The evaluator lists estimated duration—typically 30–90 minutes—and necessary tools: adjustable wrench, pliers, bucket, gloves, flashlight, plumber’s snake or drain auger, shop vacuum (optional), towels, and a mild drain cleaner or baking soda and vinegar.
Replacement hose clamps or a new drain hose may be needed.
Safety gear includes eye protection and rubber gloves. Matching tool availability to the task complexity helps decide if a DIY attempt is sensible.
If specialized tools or uncertain skills are present, hiring a plumber is the safer choice.
Tools to Unclog a Washer Drain Fast
Several essential tools make unclogging a washer drain fast and reliable: a drain snake for breaking up blockages, a wet/dry vacuum for extracting standing water and debris, a plunger sized for household drains, and a pair of long-nosed pliers or channel locks for removing trapped lint and hose clamps.
Useful extras include a bucket, flashlight, plumber’s tape, and replaceable hose clamps. Selecting the right sizes and a flexible snake speeds work. Proper tool choice reduces repeat trips and limits component damage.
- Drain snake (flexible, appropriate length)
- Wet/dry vacuum (with hose adapters)
- Long-nosed pliers or channel locks
Safety Steps Before You Start Cleaning the Washer Drain
With the power supply disconnected and the water shut off, the technician confirms the area is safe to work in by removing standing water from around the washer and placing a bucket and towels to catch any spills. He dons gloves and safety glasses, checks for electrical hazards, and makes certain the floor is dry to prevent slips. Valuables are moved away; pets and children are kept out. A flashlight and phone are nearby for visibility and emergency contact. Labels on valves and cords are noted to restore settings afterward.
| Item | Purpose | Priority |
|---|---|---|
| Gloves | Protect hands | High |
| Glasses | Eye safety | High |
| Bucket | Contain leaks | Medium |
| Towels | Absorb spills | Medium |
| Flashlight | Improve visibility | Low |
Quick Inspection: Check the Drain Hose Without Disconnecting
A quick inspection begins with a visual and smell check of the accessible hose section for cracks, bulges, debris buildup, or musty odors that suggest trapped water or mildew.
Next, gently flex the hose along its length to confirm flexibility and listen for any creaks or see visible deformation that could indicate aging.
Finally, run a short rinse cycle and watch for drips or seepage at connections to catch active leaks without disconnecting the hose.
Visual And Smell Check
Before disconnecting anything, inspect the washer drain hose visually and by smell to catch obvious problems quickly.
The observer notes discoloration, soft spots, cracks, or grease buildup along accessible hose sections.
A sour, musty, or sewage-like odor indicates trapped organic matter or partial clogging near the outlet.
No tools are required for this rapid assessment; good lighting and a sniff suffice.
Document suspicious areas for later attention.
If odors or visible damage are present, plan cleaning steps or replacement.
Otherwise, proceed to more detailed tests.
- Look for cracks, bulges, or residue.
- Smell along the hose length.
- Mark areas needing follow-up.
Flexibility And Leak Test
After noting any discoloration or odors, the inspector moves on to a hands-on flexibility and leak test that can be done without disconnecting the hose. The inspector gently squeezes along the hose, feeling for soft spots, cracks, or brittleness. While running a short rinse cycle, attention is paid to joints and clamps for drips. Any wobble or seepage prompts tightening or replacement. Documentation notes locations and recommended action. Below is a quick reference to guide evaluation and decisions.
| Observation | Action |
|---|---|
| Soft spot | Replace hose |
| Crack | Replace immediately |
| Clamp leak | Tighten or replace |
| Brittle | Replace hose |
Fix Simple Kinks or Twists in the Drain Hose
Inspect the drain hose along its entire length for visible bends or twists that restrict flow.
The person straightens minor kinks by running fingers along the hose while supporting it to prevent new bends.
If the hose is compressed, gentle heating with a warm (not hot) towel restores flexibility; allow cooling before testing.
Replace sections that are permanently creased or cracked.
Make sure the hose follows a smooth path to the drain without sharp turns or pinch points.
- Free small kinks by hand-moving and supporting the hose.
- Soften stiff areas with a warm towel, then reshape.
- Cut out and replace damaged segments.
Flush the Washer Drain With Hot Water
The next step recommends flushing the washer drain with hot water, taking care to pour boiling water slowly and use a heat-resistant funnel or container to avoid burns or pipe damage.
The process should be repeated in several short cycles, allowing the hot water to break up and carry away grease and residue between pours.
After each cycle, the drain should be checked for improved flow before deciding whether additional flushes are needed.
Use Boiling Water Safely
When flushing a washer drain with boiling water, exercise caution to protect plumbing seals and plastic fittings from sudden thermal stress. The person should allow metal parts to warm gradually, pour slowly, and avoid direct contact with plastic couplings. Boiling water can loosen grease and dislodge residues but may damage older hoses or PVC.
- Pre-rinse with warm tap water to reduce shock and test flow.
- Pour boiling water in stages, pausing between batches to let the system adjust.
- Inspect fittings afterward for softening, leaks, or warping; stop if damage appears.
Repeat Flush Cycles
Frequently, homeowners repeat flush cycles with hot water to break up and carry away remaining soap scum, grease, and lint that a single pour may not clear. After an initial hot-water pour, they wait several minutes to allow debris to loosen, then pour another batch.
Repeating three to five cycles often dislodges stubborn buildup and moves it toward the trap or main drain. Between pours, gentle agitation with a plastic plumber’s snake or a long brush helps loosen clinging material.
They finish with a final hot-water flush to verify flow. If sluggishness persists, professional inspection or mechanical cleaning is recommended.
Use a Plunger on the Washer Drain
A plunger can often dislodge clogs near the washer drain by creating pressure differentials that break up trapped lint and debris. The technician positions the plunger over the drain opening, ensuring a tight seal, then uses firm, steady strokes to force water through the obstruction.
Short, controlled thrusts reduce splash and prevent damage to fittings. After several plunges, the washer is briefly run on drain to check flow. If resistance remains, repeat or try alternative methods. Safety includes wearing gloves and ensuring electrical controls are off.
- Use a cup-style plunger for narrow openings.
- Maintain a watertight seal.
- Plunge in bursts, not continuous force.
Use a Wet/Dry Vacuum to Clear a Washer Drain
Use a wet/dry vacuum to evacuate water and dislodge lint lodged in the washer drain by creating strong suction at the trap or standpipe opening.
The technician-first approach involves sealing the hose to the drain with a cloth or adapter, setting the vacuum to liquid mode, and running short bursts to avoid overheating.
Lift trapped debris toward the vacuum and inspect the collection cup periodically.
If suction yields only small amounts, reverse the hose to blow air into the line briefly to loosen blockages, then vacuum again.
Finish by flushing the drain with hot water to confirm clear flow and clear debris from the vacuum.
Remove and Check the Rubber Drain Elbow
The technician locates the rubber drain elbow where the washer hose meets the standpipe or drain fitting.
They disconnect the elbow by loosening clamps or gently twisting it off.
The removed elbow is inspected visually and by running water through it to check for lint, debris, or kinks that restrict flow.
Locate The Rubber Elbow
Before inspecting the washer’s drain line, identify the rubber elbow that connects the drain hose to the household standpipe or laundry sink.
The elbow is typically a short, flexible, L-shaped rubber fitting secured over the drain opening or slip-fit into the standpipe.
Visually confirm its location behind or beside the washing machine, noting orientation and any clamps or ridges.
Check for visible cracks, hardening, or oil residue that indicate age.
Record the elbow’s size and attachment method before any manipulation to guarantee correct replacement.
If access is limited, move the washer slightly to gain clear sight lines.
- Visual locate elbow
- Note attachment type
- Inspect surface condition
Remove The Elbow
Loosen any clamps and carefully detach the rubber elbow from the drain hose and standpipe or sink, supporting the hose to prevent strain on its connections.
Once removed, place the elbow on a towel or tray to catch residual water.
Inspect its outer surface and the lip where it seats for cracks, splits, or hardening that can cause leaks.
Check the hose end and mounting area for compressed or misshapen rubber that may prevent a tight seal.
If the elbow shows wear, replace it with a matching-size part.
Reattach with new or cleaned clamps, ensuring a snug, leak-free connection.
Inspect For Blockages
With the elbow removed and set on a towel, inspect its interior and the hose opening for debris or buildup that can impede flow.
The technician visually checks for lint, soap scum, small articles, and mineral deposits. A flashlight helps reveal hidden clogs; a slender brush or pipe cleaner clears trapped material.
If residue is stubborn, soak the elbow in warm, soapy water or a vinegar solution, then scrub and rinse thoroughly.
After drying, reattach and test with a short wash cycle to confirm unobstructed drainage.
- Remove visible debris with gloves.
- Soak and scrub persistent buildup.
- Test drain after reassembly.
Disconnect the Washer From the Drain Safely
Carefully shutting off the water supply and power reduces hazards when disconnecting the washer from the drain.
The technician confirms the appliance is unplugged and the cold and hot valves are closed.
A towel and shallow pan are placed under the hose connection to catch residual water.
The drain hose clamp is loosened with pliers, and the hose is gently pulled free from the standpipe or utility sink.
Any clips or zip ties securing the hose are removed.
The hose is inspected for tears or kinks and set aside on a clean surface.
The area is left ready for drain servicing.
Manual Snake: Clear the Drain Pipe With an Auger
A manual auger is recommended for stubborn clogs, and selecting the correct length and cable thickness for the washer drain improves effectiveness.
The operator should feed the snake slowly, rotating the handle to break up blockages and retracting periodically to clear debris.
Proper technique and the right tool minimize damage to the pipe and reduce the need for professional service.
Choosing The Right Auger
For selecting an auger, match the tool to the drain’s size, type, and blockage severity to guarantee efficient clearing without damage. The right auger reduces risk to pipe fittings and speeds clearing.
Consider cable diameter, length, and head design; flexible cable suits long runs, rigid heads penetrate compacted debris. Choose a hand-crank model for light household clogs and a power auger only when necessary.
Inspect connector compatibility with the washer standpipe and avoid oversized bits that may snag plastic. Maintain proper storage and clean the cable after use to prevent corrosion and cross-contamination.
- Match cable diameter to pipe size
- Select head type for debris composition
- Confirm connector and length compatibility
Proper Snake Technique
After selecting an appropriately sized auger, the operator feeds the cable into the washer standpipe while maintaining a firm grip on the drum to control rotation. The technician advances slowly, feeling for resistance; when encountered, gentle clockwise rotation engages the head to break debris. Retract periodically to clear buildup, flushing with water between passes. Avoid forcing the cable to prevent kinks. Once flow resumes, withdraw the snake while rotating to collect loosened material. Sanitize the area and inspect the trap. Proper technique minimizes pipe damage and recurring clogs.
| Step | Action | Caution |
|---|---|---|
| 1 | Feed cable | Do not force |
| 2 | Rotate | Gentle pressure |
| 3 | Retract | Clear debris |
Motorized Auger: When and How to Use One
When clogs resist manual snaking or recurring backups signal a deep or stubborn obstruction, a motorized auger becomes the appropriate tool; it delivers greater torque and reach than hand-operated snakes, allowing plumbing professionals and experienced DIYers to break up and extract dense blockages within long or offset drain runs.
Use a motorized auger when repeated manual attempts fail, when pipe configuration limits hand tools, or when grease and compacted debris dominate.
Operate with protective gear, steady feed, and controlled speed to avoid pipe damage.
Hire a pro for unknown piping or PVC thin walls.
- Assess
- Operate
- Inspect
Snake the Standpipe or Floor Drain (If Applicable)
Begin by determining whether the washing machine drains into a standpipe or a nearby floor drain; if present, these openings are common choke points and should be addressed before working farther down the line.
Remove any visible debris or covers, then feed a flexible drain snake into the opening slowly. Rotate the snake clockwise while advancing to break up clogs; withdraw occasionally to clear captured lint and residue.
For stubborn blockages, extend farther and use gentle pressure rather than force to avoid damaging pipe joints. Flush with hot water after clearing to rinse loosened material.
Replace covers and test a short wash cycle to confirm flow.
Clean Lint Traps and Internal Washer Filters
Typically, washing machines have lint traps or internal filters that collect fibers, coins, and debris, and these should be inspected and cleaned before proceeding further.
The technician or homeowner locates the trap per manual, powers off the machine, and removes the cover or access panel.
Debris is extracted with gloves and a soft brush; trapped coins or strings are set aside.
Rinse the filter under running water and dry thoroughly before reinstalling.
Regular checks prevent clogs that affect the drain pipe.
If a filter is damaged, replace it with the manufacturer-approved part to maintain proper drainage.
- Inspect and remove debris.
- Rinse and dry filter.
- Replace if damaged.
Open and Clean the Washer Pump Trap
Access the pump trap by unplugging the washer, shutting off the water, and locating the access panel or service door at the machine’s base; this isolates power and water and prevents spills.
Remove screws or clips, slide the panel aside, and position a shallow pan and towels beneath.
Unscrew the trap cap slowly to relieve residual water, then extract debris, lint, coins, and foreign objects with gloved hands or needle-nose pliers.
Inspect the trap cavity for buildup, wipe interior surfaces with a cloth soaked in mild detergent, and flush briefly with water using a cup.
Reassemble securely, restore water and power, and test for leaks.
Check and Clear the Drain Pump Impeller
Next, attention turns to the drain pump impeller, a small rotating part that can trap debris and restrict flow.
The technician locates the pump, removes the access panel, and exposes the impeller for inspection.
Any lint, coins, or obstructions are cleared and the impeller is checked for damage before reassembly.
Locate The Pump
Before inspecting the drain pump, the washer should be unplugged and the water supply turned off to eliminate electrical and flooding hazards.
The pump is usually located at the machine’s base, behind a front access panel or beneath a top-loading agitator housing.
Visual cues include a small round cover, hoses, and electrical connectors.
Identify the pump by tracing the drain hose from the tub to its connection point.
If unsure, consult the model diagram in the manual or manufacturer label on the cabinet.
Take care not to force components; note fastener types for reassembly.
- Trace drain hose path.
- Look for round pump cover.
- Verify model diagram
Remove The Access Panel
With the pump located, power and water are already off and the machine is ready for panel removal to reach the impeller.
The technician removes screws or clips securing the access panel, keeping fasteners organized to avoid loss.
Panels may hinge or slide; gentle prying with a plastic tool prevents damage.
Once detached, the panel is set aside on a soft surface.
The pump housing is exposed, and any visible debris around connections is noted.
Care is taken not to disturb wiring or hoses; connectors are observed but not disconnected.
The workspace is kept clear and well-lit for the next inspection step.
Clean And Inspect Impeller
The technician inspects the drain pump impeller visually and by hand, looking for lodged debris, broken blades, or signs of corrosion that would impede rotation.
With power disconnected and hoses removed, the impeller housing is accessed; small obstructions such as coin, lint, or fabric fragments are cleared with needle-nose pliers and a soft brush.
Rotation is checked manually to guarantee smooth movement; stiff or wobbly impellers indicate bearing wear or damage requiring replacement.
- Confirm power off and drain residual water.
- Remove debris, then test free rotation.
- Replace impeller or pump if blades are cracked or seized.
Remove Hair, Lint, and Soap Scum Blockages
When hair, lint, and soap scum collect in a washer drain pipe, they form fibrous clogs that slow drainage and can cause odors or backups. A technician or homeowner should disconnect the drain hose, inspect visually, and remove visible debris with gloves and a flexible brush. Flush the pipe with hot water and a vinegar-baking soda rinse to dissolve residue. Repeat until flow clears. Reassemble and run a short wash to verify. Regular lint-trap cleaning and using liquid detergent reduce recurrence.
| Tool | Purpose |
|---|---|
| Gloves | Protection |
| Brush | Scrape debris |
| Hot water | Flush residue |
| Vinegar | Dissolve scum |
Remove Grease or Oil Clogs From a Washer Drain
Grease and oil buildup in a washer drain can be softened with a recommended safe degreaser, such as enzyme-based cleaners or diluted biodegradable solvents.
After applying the degreaser according to product instructions, follow with a controlled hot water flush to carry loosened residue through the line.
Care should be taken to avoid scalding and to make certain the degreaser is compatible with plumbing materials.
Safe Degreaser Options
Which degreasing method best clears oil and grease without harming plumbing or the environment? Objective-safe options prioritize biodegradable formulas and non-corrosive action. Choose products labeled septic-safe and biodegradable, or use common household agents that emulsify grease without damaging pipes.
- Citrus-based biodegradable degreasers: effective on oily residues, low toxicity, safe for most pipe materials.
- Enzyme cleaners: consume organic grease gradually, ideal for maintenance and septic systems, non-corrosive.
- Mild alkaline solutions (diluted washing soda): break down grease when used sparingly; rinse thoroughly to prevent residue.
Always follow manufacturer directions and test compatibilities before full application.
Hot Water Flushing
Pouring hot water through a washer drain helps soften and carry away oil and grease clogs without chemicals, relying on temperature to reduce viscosity and flush residues downstream.
A homeowner should run the hottest tap water available, pouring slowly in stages to avoid overwhelming the drain.
For persistent buildup, hot water can be combined with a dash of biodegradable dish soap to emulsify oils.
Avoid boiling water if pipes are plastic; extremely hot water may deform fittings.
After flushing, run a cold rinse to solidify any remaining loosened particles and inspect for improved flow.
Repeat as needed, monitoring pipe integrity.
Use Vinegar and Baking Soda Safely on Washer Drains
When household cleaners are limited to common pantry items, a measured combination of vinegar and baking soda can help remove buildup in a washer drain without harsh chemicals. Use distilled white vinegar and baking soda in controlled amounts to avoid foaming overflow.
Pour 1/2 cup baking soda into the drain, follow with 1 cup vinegar, wait 15 minutes, then flush with hot water. Repeat monthly or as needed. Avoid combining with bleach or commercial acids. Make certain proper ventilation and keep children and pets away during treatment.
- Measure precisely
- Flush thoroughly
- Store supplies safely
When to Use Enzyme Cleaners Instead of Chemicals
Choosing enzyme cleaners is appropriate when organic residue—like soap scum, hair, food particles, or mildew—drives recurring odors or slow drains, because enzymes target and break down those materials without the corrosive action of harsh chemicals.
They suit plastic and rubber components, older pipes, and situations where residual chemical buildup might worsen corrosion or damage seals.
Enzymes work more slowly than caustic cleaners, so they are best for routine maintenance or persistent biological clogs rather than immediate emergency clearing.
Follow product instructions for contact time and temperature, avoid mixing with bleach, and repeat treatments until odors and flow improve.
Temporary Fixes to Keep Laundry Running Until Help Arrives
When a washer’s drain is temporarily obstructed, simple workarounds can keep laundry moving until professional help arrives.
One option is to attach a temporary drain hose to route wastewater to a nearby floor drain or sink.
Another is to bypass the machine by draining through a utility tub, allowing loads to be washed and emptied safely.
Use A Temporary Drain Hose
Secure a temporary drain hose to route washer discharge into a nearby utility sink, floor drain, or a sturdy bucket to keep laundry running until a permanent repair is made.
The hose should fit snugly on the washer outlet, secured with a clamp or strong zip tie, and positioned to prevent kinks or spills.
Monitor each load to catch leaks and avoid overfilling the receptacle.
Once service is available, remove the temporary setup and restore the factory hose and drain configuration.
- Choose a hose length that reaches the receptacle without stretching.
- Secure connections with a clamp or heavy-duty zip tie.
- Check slope and support to prevent backflow.
Bypass With A Utility Tub
If routing the washer discharge to a sink or bucket is impractical, a utility tub can serve as a temporary bypass to collect and drain washer effluent until professional repairs are made.
Place a large utility tub or laundry sink adjacent to the machine, positioning the washer hose securely into the tub.
Make certain the tub’s drain is clear and connected to a functioning drain line or place a garden hose into a floor drain.
Monitor for overflow during cycles and secure the hose to prevent dislodgement.
This temporary setup keeps laundry operational while limiting spills; arrange prompt professional evaluation and permanent repair.
How to Tell the Clog Is in House Plumbing, Not the Washer?
How can one determine whether slow draining or backups stem from the home’s plumbing rather than the washing machine itself? Visual and simple tests help isolate the issue.
Observe water behavior when other fixtures run; persistent backups from multiple drains implies house plumbing.
Run the washer on a short cycle and monitor if clear water exits the drain hose; if so, the washer likely functions.
Listen for gurgling in other drains or toilets when the washer discharges—signs of a main-line clog.
If uncertainty remains, a temporary drain cap test or professional camera inspection confirms whether the obstruction lies beyond the appliance.
- Check multiple fixtures.
- Inspect washer discharge.
- Note gurgling or odors.
Flush Your Household Drain Line After Clearing the Washer
After clearing a clog at the washer, flushing the household drain line guarantees any remaining debris is swept out and prevents immediate re‑blockage. The technician or homeowner should run a strong flow of water through the affected drain—use the washer’s rinse cycle or pour several gallons of hot water—while monitoring nearby drains and cleanout access.
If available, briefly open the main cleanout and flush from there to move solids toward the sewer. Avoid harsh chemical mixtures; use mechanical flushing or enzyme cleaners if needed.
Finish by checking for steady drainage and inspecting for leaks at junctions and traps.
Prevent Recurring Washer Drain Clogs (Quick Habits)
Routine habits cut down on repeated clogs.
Emptying the lint trap after each load prevents fibers from reaching the drain.
Using the correct amount and type of detergent reduces suds and residue that can build up in the pipe.
Regular Lint Trap Cleaning
Regularly clearing the washer’s lint trap prevents small fibers from accumulating and eventually blocking the drain, preserving water flow and reducing strain on the pump.
Routine inspection and removal of lint keeps the trap effective and minimizes the need for pipe cleaning.
Use a soft brush or cloth to dislodge buildup, and check after heavy loads or pet-hair cycles.
- Empty: remove visible fibers and compressions after each few washes.
- Inspect: look for trapped debris or damage to the housing that could let lint escape.
- Clean: rinse the trap under running water monthly and dry before reinstalling.
Proper Detergent Use
Many households benefit from using the correct type and amount of detergent, because excess suds and undissolved powder contribute to residue that clogs the washer drain over time. Users should choose HE detergent for high-efficiency machines and measure precisely per load size and soil level.
Powder should be dissolved before adding bulky items; liquid dosing caps or auto-dispensers help prevent overuse. Avoid fabric softener buildup by using sparingly and cleaning dispenser compartments periodically.
Occasional runs with a washer-cleaning tablet or vinegar cycle clear residual soap. Consistent, measured detergent habits reduce buildup, fewer drain clogs, and longer appliance life.
Best Maintenance Routine After Every Few Loads
Often, after every few loads, a quick inspection and light cleaning of the washer drain pipe prevents buildup and odors from developing.
The routine should be brief, consistent, and focused on visible issues.
Check for lint, small obstructions, and leaks at connections.
Run a hot water rinse cycle with a cup of vinegar to dislodge mild residue.
Wipe accessible fittings dry and resecure clamps if loose.
Note any persistent slow drainage for future attention.
Keep a small brush and a towel nearby so the task stays fast and tidy.
- Inspect for lint and leaks.
- Rinse with hot water and vinegar.
- Wipe and tighten fittings.
How Often to Deep-Clean the Washer Drain Pipe
Periodically evaluating and deep-cleaning the washer drain pipe prevents stubborn clogs, odors, and premature pipe wear.
A recommended schedule is every three to six months for typical households; quarterly for heavy use, homes with pets, or frequent lint-heavy loads.
Inspect visually and smell for slow drainage or mildew between deep cleans.
Perform a deep clean immediately if wash cycles slow, backups occur, or persistent odors develop.
Seasonal checks before winter and after extended inactivity help catch issues early.
Document dates and findings to adjust frequency based on performance.
Consistent interval-based cleaning prolongs function and reduces emergency repairs.
Parts and Upgrades That Reduce Future Clogs
Preventive hardware and simple upgrades can substantially reduce future clogs in a washer drain pipe. The article outlines practical parts and modest improvements that intercept lint, ease debris removal, and improve flow without altering hose positioning or mounting.
- In-line lint trap: installs between hose and standpipe to catch fibers; removable basket simplifies cleaning.
- Mesh washer screen: fits inside the drain opening to block large particles while preserving flow; replaceable and inexpensive.
- Smooth-radius elbow or larger-diameter adapter: reduces turbulence and offers fewer snag points, lowering buildup and making periodic flushing more effective.
Position and Secure the Drain Hose for Proper Flow
After fitting lint traps or smoothing elbows, attention turns to the physical placement and securing of the washer drain hose to make certain unobstructed flow. The hose should run with a gentle downhill slope, avoid kinks, and be anchored near the standpipe. Use a high loop or clip to prevent backflow and keep the end above trap water level. Fasten with a clamp or zip tie where it enters the standpipe to stop movement. Check for strain where the hose connects to the washer to prevent leaks.
| Item | Recommendation |
|---|---|
| Slope | Gentle downhill |
| Fastening | Clamp or zip tie |
| Height | High loop above trap |
Troubleshoot Persistent Smells From the Washer Drain
Often a sour or musty odor lingering in laundry areas signals buildup or trapped organic matter in the washer drain system.
The guide recommends inspecting accessible hoses, the drain trap, and the standpipe for residue.
Run a cleaning cycle with hot water and a washer-safe enzymatic cleaner, then flush the drain with boiling water if piping allows.
Check for kinks or low loops that trap water and harbor bacteria.
- Remove and clean the drain hose and its fittings.
- Sanitize the trap and standpipe with enzyme solution.
- Ventilate the area and run repeated rinse cycles to confirm odor removal.
Track Clog Patterns to Find the Root Cause
Regularly recording when and where clogs occur reveals patterns that point to their cause.
Notes should include time, load type, water level, and any noises or backups. Correlating entries can expose repeating triggers: specific fabrics shedding lint, heavy loads overwhelming the trap, or gradual buildup after water softener use.
Mapping clog locations—drain hose, standpipe, trap—narrows inspection focus.
Use simple logs or a calendar; review weekly for trends. Once a pattern is clear, targeted actions replace trial-and-error: remove lint sources, adjust load size, or clean the identified section.
Document results to confirm the root cause.
Eco-Friendly Ways to Clean Washer Drains
When aiming to keep washer drains clear while minimizing environmental impact, homeowners can choose grease-free, biodegradable cleaners and mechanical methods that avoid harsh chemicals; these options remove lint, soap scum, and mineral buildup without harming septic systems or waterways.
- Use a baking soda and white vinegar paste to loosen grime, flush with hot water, and follow with a vinegar rinse to reduce mineral deposits.
- Employ a drain snake or flexible cleaning brush to extract lint and debris manually, preventing chemical use and preserving seals.
- Install a lint trap on the washer hose and perform regular dry-brushing to prevent future clogs.
When to Call a Plumber for a Stubborn Washer Clog
After basic DIY methods fail to clear standing water or persistent slow drainage, a plumber should be called to diagnose and repair the issue. Professional assessment is warranted when repeated clogs recur, odors persist despite cleaning, or water backs up into other fixtures.
A plumber identifies hidden blockages, collapsed or kinked hoses, and problems in the trap or house drain that DIY tools cannot reach. They can perform camera inspections, safe hydro-jetting, or targeted repairs, and advise on code-compliant replacements.
Calling early prevents damage from leaks, mold, or sewer backup and often reduces overall repair costs.
10-Minute Checklist: Unclog a Washer Drain Fast
Start with quick, decisive checks to restore flow: confirm the washer is off and unplugged, place towels and a shallow pan to catch water, and remove the drain hose from the standpipe to inspect for visible obstructions.
Then follow a focused, timed routine to clear blockages without delay.
- Flush the hose with a garden nozzle or pour hot water through it; dislodge lint, soap residue, or small debris.
- Use a plumber’s snake or flexible brush in the standpipe; rotate and extract trapped material gently.
- Reattach, run a short drain-only cycle, observe for leaks and steady flow before full use.
Conclusion
A quick, decisive approach keeps laundry moving and prevents water damage. About 20% of household drain problems stem from lint and soap buildup in washing machine lines, so routine checks pay off. Armed with basic tools, a safe workflow and eco-friendly cleaners, most homeowners can clear a clog quickly; persistent blockages beyond simple fixes or recurring patterns, however, usually signal it’s time to call a professional to avoid larger repairs.