
How to Keep a Water Tank From Freezing Without Electricity: 9 Proven Low-Tech Methods
To prevent a water tank from freezing without electricity, homeowners can utilize a combination of insulation, strategic placement, and passive techniques. Effective methods include wrapping the tank with high-R insulation, burying it below frost depth, installing windbreaks, using dark covers for passive solar gain, adding floating covers, and promoting occasional gravity-driven flow or manual mixing. Additionally, inspect and seal fittings before winter and only use safe antifreeze when necessary. Continue reading for detailed methods, costs, and step-by-step setups.
How to Keep a Water Tank from Freezing without Electricity Quick Answer and Overview
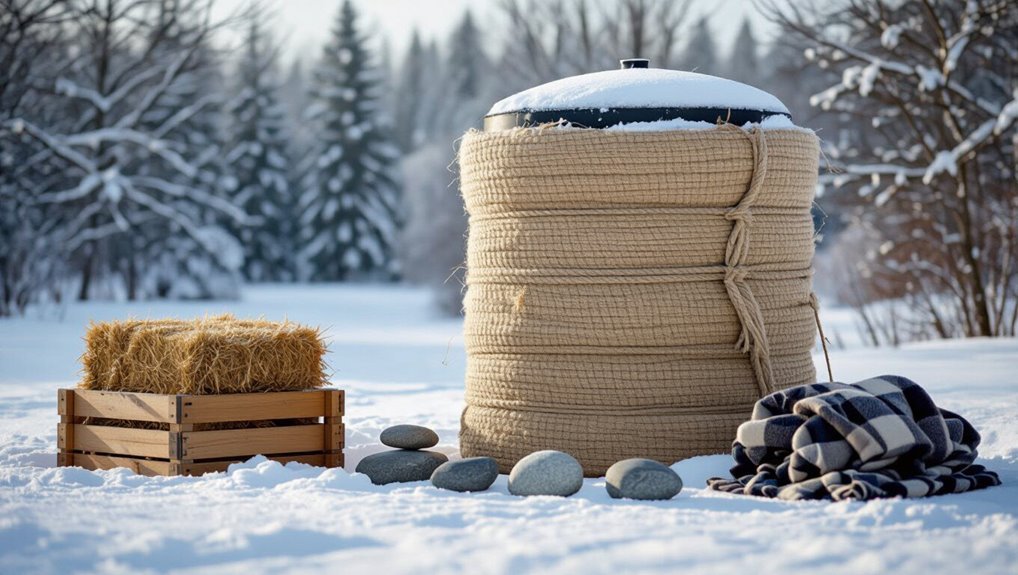
The most effective low-tech measures are insulation, passive solar placement, burying or partial burial, and using gravity-fed circulation or overflow for turnover.
Freezing is most likely in climates with prolonged subfreezing temperatures and for aboveground, exposed, shallow, or poorly insulated tanks.
Tanks placed in wind-exposed locations or on cold foundations face the highest risk.
One-sentence summary of the most effective low-tech methods
Several practical low-tech methods reliably prevent tank freezing: insulating the tank, burying or partially burying it, using passive heat sources (solar exposure, compost or manure piles nearby), minimizing airflow around fittings, and keeping water moving with simple mechanical agitators or siphons.
A concise summary: for how to keep a water tank from freezing without electricity, combine insulation, ground buffering, passive warmth, airtight fittings, and occasional manual agitation.
When and where freezing is most likely to occur (climate, tank type, placement)
Freezing risk concentrates where ambient temperatures regularly drop below 32°F (0°C), but severity depends on duration, wind, and radiative loss as much as absolute low.
Exposed aboveground tanks in cold, windy climates or on clear nights are far more vulnerable than buried or insulated tanks in the same region.
Small tanks freeze faster; dark, metal, or shallow vessels lose heat quickly.
Sheltered, buried, or massed systems resist freezing longest.
Why Water Tanks Freeze and What Makes Them Vulnerable
Freezing damages tanks and their contents by expanding ice, stressing seams and fittings, and reducing usable volume.
Risk increases with lower temperatures, strong winds, poor or absent insulation, and direct exposure to cold and moisture.
Material and design matter: thin metal or polyethylene tanks, aboveground installations, and older or uninsulated models are more vulnerable than insulated, buried, or thick-walled tanks.
How freezing affects water tanks and contents
Ice formation in and around water tanks can damage the tank structure, plumbing, and stored water by expanding, blocking flow, and stressing materials.
Freezing can rupture seams, crack fittings, and lift lids.
Sediments concentrate solutes as ice forms, altering water quality.
Trapped ice prevents drawing and leads to pump cavitation when restarted.
Repairs are costly and contamination risk increases.
Key factors that increase freeze risk (temperature, wind, insulation, exposure)
Because ambient conditions and tank characteristics interact, several predictable factors determine a water tank’s susceptibility to freezing.
Lower air temperatures shorten safe exposure time. Wind increases convective heat loss and drives colder air against surfaces.
Poor or absent insulation allows rapid thermal exchange.
Direct exposure—shading, elevation, and siting near cold drafts—heightens risk by preventing heat retention and promoting ice formation.
Types of tanks and materials with different freeze risks
Having outlined the environmental and siting factors that raise freeze risk, attention turns to how tank design and materials influence vulnerability.
Metal tanks conduct cold rapidly and thin-walled tanks freeze fastest.
Concrete and masonry offer thermal mass but crack risk exists.
Plastic tanks insulate poorly unless double-walled or shaded.
Buried or partially buried tanks and insulated, coated surfaces reduce freezing likelihood.
Preparing Your Tank Before Winter
Before the first freeze, a thorough inspection of leaks, vents, and fittings helps prevent heat loss and water damage.
Proper siting and positioning—shielded from prevailing winds and placed on well-drained, insulated ground—reduces exposure to cold.
For tanks that will be unused, draining and applying winterizing measures minimizes freeze risk and eases spring recommissioning.
Inspecting and repairing leaks, vents, and fittings
Inspect the tank’s exterior and connections for signs of corrosion, dripping, or wet stains. Then address any defects promptly to prevent heat loss and ice formation.
Check vents for blockages or damaged screens and repair or replace to maintain airflow without allowing cold drafts.
Tighten loose fittings, replace worn gaskets, and seal small leaks with appropriate tape or epoxy to stop moisture loss and freezing.
Optimal tank positioning and site preparation
When preparing a water tank for winter, siting and surface preparation are critical to minimize exposure to cold and secure stable support.
Choose a sheltered, sun-facing location away from prevailing winds and frost pockets.
Place the tank on a level, compacted base—gravel, crushed rock, or concrete pad—to facilitate drainage and prevent settling.
Leave access for maintenance and snow clearance.
Draining and winterizing options for unused tanks
Flush and drain all lines and valves, then remove or isolate fittings that could trap water to prevent freeze damage.
Empty the tank fully, open vents and manways to allow complete drainage and drying.
Apply non-toxic antifreeze to traps where required, cap inlets, and plug drains.
Store removable components indoors.
Inspect seals and add desiccant or breathable covers to inhibit condensation and corrosion.
9 Low-Tech Methods to Prevent Freezing
A selection of simple, low-tech strategies can considerably reduce the risk of a water tank freezing without relying on electricity or complex equipment.
Consider practical options such as:
- Insulation (blankets, wraps, foam)
- Burying or partially burying the tank
- Windbreaks, thermal mass/passive solar, and floating/internal covers.
Each method’s suitability depends on local climate, tank size, and available materials.
Insulation with blankets, wraps, and foam
The article outlines common insulation materials—fiberglass blankets, polyethylene foam, and reflective wraps—and recommends targeting an overall R-value appropriate for the climate (typically R-10 to R-20 for exposed tanks in cold regions).
It summarizes proper wrapping techniques, including overlapping seams, securing with corrosion-resistant fasteners or tape, and maintaining ventilation where condensation is a concern.
Attention is called to vulnerable spots such as pipe connections, the tank base, and fittings, which require additional layers or custom-fit foam to prevent thermal bridges.
Materials to use and R-values to target
Several practical materials—fiberglass, closed-cell polyurethane foam, and insulated blankets—are commonly used to protect water tanks from freezing, each offering different R-values and installation trade-offs.
Recommended targets: R-6 to R-10 for mild cold, R-10 to R-20 for prolonged subfreezing.
Closed-cell foam scores highest per inch; fiberglass is economical but bulkier; insulated blankets balance convenience and performance.
Proper wrapping techniques and vulnerable spots to cover
With material choices and R-value targets established, attention shifts to how those products are applied: proper wrapping technique determines whether insulation delivers its rated performance.
Wrap tanks snugly, overlapping seams and sealing edges with tape or weatherproof fasteners. Insulate fittings, pipes, valves, and the tank base; prioritize seams, inlet/outlet connections, and exposed joints.
Leave access panels removable for maintenance.
Burying the tank or partially burying it underground
Burying or partially burying a water tank uses earth’s relatively stable temperatures to reduce freezing risk, with recommended burial depths varying by climate and frost line.
Soil type, drainage, and frost susceptibility affect effectiveness and ease of installation.
The method’s pros (passive protection, reduced insulation needs) and cons (excavation cost, access difficulty, groundwater concerns) determine when it is feasible.
Recommended depths and soil considerations
Ground-level frost depth and local soil type are the two primary determinants of how deep a tank should be placed to avoid freezing.
Recommended burial depth equals frost line plus safety margin (typically 6–12 inches).
Well-draining, compacted soils reduce freeze heave; insulating topsoil or straw layer further mitigates cold.
Avoid saturated, clay-heavy sites unless additional drainage and insulation are provided.
Pros, cons, and when it’s feasible
After considering recommended burial depths and soil conditions, evaluating the practicality of fully or partially burying a tank becomes the next step.
Benefits include stable temperatures, passive insulation, and reduced exposure to wind.
Drawbacks are excavation cost, access difficulty, flooding risk, and limited maintenance.
Feasibility depends on frost depth, water table, soil type, site access, and budget; it suits rural or new-build sites.
Installing windbreaks and shelter structures
Consideration of windbreak design and placement is essential for reducing convective heat loss from exposed tanks.
Practical options range from temporary barriers—such as straw bales or portable panels—that block prevailing winds to permanent shelters like timber or metal enclosures that provide year-round protection.
Each choice balances effectiveness, cost, and accessibility for maintenance and should be matched to local wind patterns and site constraints.
Effective windbreak designs and placement
When exposed tanks are left unshielded from prevailing winds, convective heat loss accelerates freezing; effective windbreaks reduce that flow and help maintain water temperature.
Ideal designs use dense, porous barriers—hedges, snow fences, stacked pallets—positioned upwind at a distance roughly two to four times barrier height.
Partial porosity dissipates wind energy without creating turbulence; orient barriers to block dominant gusts while allowing drainage and access.
Temporary vs. permanent shelters
Although both temporary and permanent shelters reduce exposure and heat loss, they differ markedly in cost, durability, and installation effort.
Temporary covers—tarps, foam wraps, pop-up canopies—offer quick, low-cost protection for occasional freezes but require frequent adjustment.
Permanent enclosures—insulated sheds or lean-tos—demand investment and permits but provide consistent shelter, easier maintenance, and better long-term prevention of tank freezing.
Using thermal mass and passive solar heat
Placement of dark covers, black water bags, or heat-retaining stones against a tank increases daytime heat absorption and slows overnight cooling.
Orienting tanks and adding simple glazing or clear windbreaks on the sunny side boosts passive solar gain during daylight hours.
These low-tech measures combine thermal mass and solar capture to reduce freezing risk with minimal energy input.
Placing dark covers, black water bags, or stones to absorb heat
Several simple additions can raise a tank’s daytime temperature by absorbing sunlight and storing heat for release after dark.
Dark covers, black water bags, or stacked stones increase solar absorption and thermal mass. They warm surface water, reduce ice formation, and slowly radiate stored heat overnight.
Materials should be weatherproof, non-toxic, and secured to prevent displacement by wind or animals.
Orientation and glazing options to maximize solar gain
Building on surface-darkening and added thermal mass, orientation and simple glazing choices can greatly boost daytime solar gain and extend heat retention after sunset.
Position tanks to face equatorward with unobstructed low-angle winter sun. Use south-facing (northern hemisphere) clear glazing, insulated thermal curtains for night, and shallow angled polycarbonate or glass panels to create a passive solar greenhouse around the tank.
Floating covers and internal surface insulation
Floating covers sit on the water surface to cut evaporative and convective heat loss, helping maintain temperature with minimal intervention.
Common DIY materials include closed-cell foam, pond aeration mats, or layers of polyethylene sheeting secured to float, with attention to overlap and drainage.
Installation should guarantee a snug fit around inlets and outlets and allow for inspection and occasional removal for maintenance.
How floating covers reduce evaporative and convective heat loss
When a cover rests on the water surface, it interrupts the direct pathway for heat loss by evaporation and reduces air currents at the interface, thereby lowering both evaporative and convective cooling.
DIY floating cover materials and installation tips
Several simple materials—insulating foam panels, rigid polystyrene sheets, closed-cell pool noodles, and UV-resistant polyethylene sheeting—can serve as effective DIY floating covers when sized and joined to limit gaps.
Components should be sealed with marine adhesive, overlapped, and weighted at edges to resist wind.
Allow for maintenance access via removable panels.
Inspect seasonally for UV degradation, waterlogging, and secure fastenings to guarantee continued insulation performance.
Tank painting and external color choices
Consideration of tank paint and external color can considerably influence solar heat gain and long-term durability.
Darker, matte finishes absorb more heat during daylight, while UV-resistant coatings protect the tank shell and maintain thermal performance.
Selection should balance maximum heat absorption with coatings rated for corrosion and UV protection to extend service life.
Best colors and coatings for heat absorption and UV protection
Color and surface treatments greatly influence a tank’s ability to absorb solar heat and resist UV degradation, making them a key low-tech defense against freezing.
Dark matte colors—charcoal, deep green, navy—maximize heat absorption.
Select UV-stable, weatherproof coatings (acrylic elastomeric or marine-grade paints) to prevent chalking and cracking.
Reflective bands or light tops balance overheating and reduce thermal loss overnight.
Circulating or mixing water manually and by gravity
Simple hand-operated paddles, siphon loops, or weighted ropes can be used to stir a tank or induce intermittent flow without power.
Moving water disrupts surface ice formation and mixes warmer layers upward, lowering overall freeze risk.
For most small tanks, brief mixing sessions every few hours during extreme cold are sufficient, with more frequent agitation needed as temperatures drop further.
Simple hand or gravity-driven mixing setups
A few low-tech mixing methods can greatly reduce the risk of a water tank freezing by disrupting surface ice formation and promoting heat distribution.
Options include a hand-operated paddle or pole to stir periodically, a weighted rope-and-buoy system that shifts with wind, and a simple siphon loop allowing intermittent gravity flow.
Installations should be sturdy, accessible, and sized to avoid splashing and contamination.
Why moving water reduces freeze risk and frequency recommendations
After outlining low-tech mixing options, the focus shifts to why movement prevents freezing and how often it should be applied.
Moving water disrupts surface ice formation, maintains uniform temperature, and reduces nucleation points.
Periodic stirring every few hours during cold snaps or continuous slow circulation via gravity minimizes freeze risk.
Frequency depends on temperature, tank size, and exposure; colder conditions require more frequent agitation.
Adding safe antifreeze or non-toxic additives (where appropriate)
When temperatures threaten freezing, selecting appropriate additives depends on whether the tank supplies potable water or is designated non-potable.
Guidance on types and dosing should follow manufacturer instructions and local regulations to guarantee effectiveness without contaminating supplies.
Safety precautions and legal limits governing use and disposal must be observed to protect users and comply with law.
Suitable additives for potable vs. non-potable tanks
Many homeowners and operators must choose additives based on whether a tank stores potable water or non-potable water, because safety, regulatory compliance, and freeze-protection effectiveness differ greatly between the two.
Potable systems require food-grade, NSF-approved inhibitors or glycol formulations explicitly labeled safe for drinking-water contact.
Non-potable tanks may use standard propylene glycol, salt brines, or corrosion inhibitors where permitted, minimizing contamination risk.
Dosing guidance, safety, and legal considerations
Because additives for freeze protection carry both efficacy and contamination risks, dosing must follow manufacturer instructions, regulatory limits, and water-quality goals.
Users should select approved products, calculate concentration by tank volume, and apply measured doses with calibrated equipment.
Label treated tanks, log additions, and provide warnings. Verify residuals when required.
Consult local regulations and a water professional for potable supplies to guarantee compliance and safety.
Using insulation enclosures and straw/bale berms
A simple insulated box, basic wooden shelter, or a straw/bale berm can greatly reduce heat loss from an exposed water tank.
Each option varies in upfront cost, expected lifespan, and required upkeep—straw is cheap but decomposes faster, while wood and proper insulation cost more but last longer with periodic maintenance.
The choice should match the site’s budget, climate severity, and the owner’s willingness to perform seasonal repairs.
Building an insulated box, wooden shelter, or straw berm
Constructing an insulated box, wooden shelter, or straw berm provides a simple, low-cost barrier that slows heat loss and shields a water tank from wind and cold radiative exposure.
Materials include rigid foam, plywood, straw bales, or reclaimed lumber.
Designs prioritize air gap insulation, raised platforms to avoid ground chill, removable panels for access, and secure anchors against wind while maintaining ventilation to prevent moisture buildup.
Cost, longevity, and maintenance considerations
When evaluating insulated boxes, wooden shelters, or straw berms, upfront material and labor costs are generally low but vary with size, quality of insulation, and whether reclaimed materials are used.
Straw bales and secondhand lumber minimize expense while rigid foam and treated plywood raise initial investment but improve durability.
Expected lifespan ranges months to decades; routine inspections, straw replacement, pest control, and moisture management dictate longevity and recurring costs.
Comparing Options: Effectiveness, Cost, and Suitability
A concise side-by-side view helps readers weigh effectiveness, cost, and best use cases for the nine low-tech methods. The table below highlights three representative options to illustrate trade-offs; readers can extend the format to compare the rest. This comparison frames practical choices for varying budgets and climates.
| Method | Effectiveness | Best use case |
|---|---|---|
| Insulation wrap | High | Cold climates with limited space |
| Heat lamp | Medium | Small tanks with reliable power |
| Floating balls | Low | Mild freezes and large surface areas |
Quick comparison table of the 9 methods (effectiveness, cost, best use cases)
Nine commonly used methods for preventing a water tank from freezing are summarized here with concise ratings for effectiveness, typical cost, and the situations where each works best.
Methods:
- insulation (high, low, general)
- burial/partial burial (high, moderate, rural/portable tanks)
- windbreaks (low–moderate, very low, exposed sites)
- solar wrap/panels (moderate, low–moderate, sunny locations)
- thermal mass (moderate, low, small tanks)
- covers/lids (low, very low, all tanks)
- antifreeze/food-grade additives (high, moderate, potable concerns)
- circulating siphon/tank agitator (high, moderate, continuous use)
- earth berming (high, moderate, permanent installations).
Step-by-Step Installation and Maintenance Guides
This section outlines practical, step‑by‑step procedures for preventing tank freeze, starting with choosing and installing insulation: selecting materials, measuring and cutting, fastening securely, and weatherproofing joints.
It also covers simple construction of windbreaks or insulated shelters and the methods for building and fitting a floating cover.
A concise seasonal maintenance checklist and troubleshooting tips conclude the guide to guarantee year‑round protection.
How to insulate a tank: materials, cutting, fastening, weatherproofing
Begin by selecting insulation materials that balance thermal performance, durability, and suitability for the tank’s shape and exposure; common choices include closed-cell spray foam, rigid polyiso or EPS panels, fiberglass with a vapor barrier, and reflective blankets.
Measure and cut panels to fit contours; secure with corrosion-resistant straps, adhesive, or mechanical fasteners. Seal seams and edges, add vapor barriers, and finish with weatherproof cladding.
How to build a simple windbreak or insulated shelter
Construct a simple windbreak or insulated shelter around a water tank to reduce convective heat loss, using affordable materials and straightforward assembly so performance and maintenance are both manageable.
Frame a three-sided barrier from vertical posts and boards or pallets. Add rigid foam panels or straw bales against the sides. Roof with corrugated sheet and foam.
Guarantee ventilation near the top, seal gaps, and inspect yearly for damage.
How to construct and fit a floating cover
Install a floating cover to reduce heat loss and prevent ice formation by creating a movable insulating layer that rests on the water surface and adjusts to changing levels.
Use closed-cell foam panels or polyethylene floats joined with corrosion-resistant ties, cut to fit tank shape with clearance for inlets.
Secure edge anchor points, allow overflow paths, and test movement as water level changes.
Seasonal maintenance checklist and troubleshooting
After fitting a floating cover, seasonal maintenance and timely troubleshooting keep the system effective through freeze–thaw cycles.
Inspect covers, seals, vents, and insulation monthly; remove debris and repair tears.
Check tank supports, pipes, and overflow for leaks or ice damage.
Test float movement and breather function.
Address slow leaks, blocked vents, or sinking insulation immediately to prevent freezing and structural failure.
Safety, Water Quality, and Regulatory Considerations
When preventing tank freezing, attention must be paid to potable water safety when using chemical additives, liners, or external coverings to guarantee they are approved for contact with drinking water.
Insulation and heating choices should be evaluated for fire hazards, pest attraction, and mold growth that can compromise the tank or surrounding structures.
Installers and owners must also follow local codes and best practices for burying, altering, or servicing tanks to avoid legal and health risks.
Ensuring potable water safety when using additives or coverings
Although additives and physical coverings can reduce freezing risk, they introduce potential hazards that require careful evaluation to maintain potable water safety.
Users should verify additive approvals, safe concentrations, and compatibility with plumbing.
Covering materials must be non-toxic, cleanable, and resist leaching.
Regular testing for contaminants, routine tank cleaning, and adherence to local regulations guarantee chemical treatments or barriers do not compromise potable water quality.
Fire, pest, and mold risks from insulation materials
Assess the fire, pest, and mold hazards of insulation materials before installation, because these risks can threaten safety, water quality, and regulatory compliance.
Select noncombustible, treated, or naturally resistant materials; avoid organic loose fills that attract rodents or retain moisture.
Guarantee vapor barriers, drainage, and ventilation to prevent mold.
Inspect periodically for damage, contamination, or pest entry and replace compromised insulation promptly.
Local regulations and best practices for buried or altered tanks
Because burying or modifying a water tank changes its exposure to pressure, contaminants, and regulatory oversight, owners must verify local codes and obtain any required permits before work begins.
Inspectors may require structural ratings, backflow prevention, and accessible inspection ports.
Follow setback, burial depth, and material standards to protect water quality and avoid fines.
Document approvals and use qualified installers for compliance and safety.
Cost Estimations and DIY vs Professional Help
Estimated expenses for DIY freeze-prevention—such as insulation, heat tape, and small heaters—typically range from modest one-time purchases to a few hundred dollars depending on tank size and materials.
For complex installations, persistent freezing, or when safety and code compliance are concerns, hiring a professional can add several hundred to a few thousand dollars but provides expertise, warranties, and guaranteed compliance.
The article will compare common DIY cost examples against professional scope, pricing expectations, and indicators for when to call a contractor.
Rough cost ranges for DIY solutions and materials
A few common DIY measures—insulation wraps, heating cables, small thermostatic heaters, and enclosure upgrades—typically fall into clear price bands that help owners compare options.
Basic foam wraps: $10–$50.
Reflective jackets and taped seams: $20–$100.
Low-wattage thermostatic heaters: $50–$200.
Heating tapes and installation materials: $30–$150.
Weatherproofing enclosures and vents: $40–$300.
Tools and fasteners: $10–$75.
When to hire a professional and what to expect
After outlining typical DIY price bands for insulation wraps, heating cables, and enclosure upgrades, homeowners should consider when a professional is the better option.
Professionals assess site-specific risks, recommend code-compliant solutions, and provide reliable installation. Expect diagnostic fees, labor rates, and possible permit costs.
Hire a licensed plumber or insulation contractor for complex piping, confined spaces, structural modifications, or warranty-backed work.
Real-World Scenarios and Recommended Solutions
Recommendations differ by use case: compact heated enclosures, insulation jackets, and small electric heaters suit most residential tanks.
Large agricultural systems benefit more from insulated pits, recirculation with heat-traced piping, or professionally installed tank heaters.
For travel trailers and seasonal setups, temporary options like heated pads, insulated covers, and passive antifreeze systems provide short‑term protection.
Best solutions for small residential tanks
Consider specific household contexts—climate severity, tank size, placement, and water usage patterns—when selecting freeze-prevention measures for small residential tanks.
Insulation jackets, foam wraps, and buried or sheltered placement reduce heat loss.
Passive solar exposure, dark covers to absorb heat, and intermittent manual water circulation or drip outlets prevent stagnation.
Combine methods for reliability and prioritize easy maintenance and quick winter removal.
Best solutions for large agricultural or livestock tanks
Larger agricultural and livestock tanks pose different challenges than small residential systems, so solutions must scale for volume, accessibility, and animal needs.
Recommended measures include heavy insulation blankets, earthen berms or windbreaks, floating covers or balls to reduce surface exposure, recirculation via gravity-fed slow flow, and placement in sun-exposed or sheltered locations.
Durable animal-safe access points and routine ice checks complete the approach.
Temporary measures for travel trailers, campers, and seasonal use
For seasonal use in travel trailers and campers, temporary antifreeze strategies must balance effectiveness, portability, and safety to prevent pipe and tank damage during short cold snaps.
Recommended measures include draining tanks and lines, using non-toxic RV antifreeze in drains and low points, insulating exposed plumbing with foam and heat tape alternatives, circulating water occasionally, and storing tanks indoors or elevated to reduce freeze risk.
Troubleshooting Common Problems
If ice forms despite precautions, the cause should be identified by checking heat sources, seals, and water movement.
The tank and plumbing should be inspected for cracks, bulging, or compromised fittings to detect and repair freeze damage promptly.
Persistent wet spots, frost buildup on insulation, or recurring temperature drops indicate failing insulation or methods and warrant immediate corrective action.
What to do if ice still forms despite precautions
When ice forms despite preventive measures, assess the situation systematically to identify causes and apply targeted fixes.
Inspect insulation integrity, check for drafts, verify float and vent function, and confirm thermal mass or dark covers remain in place.
Increase insulation, seal leaks, add passive heat sources (solar-warmed black barrels), or reposition tanks to sunnier, sheltered spots.
Reevaluate maintenance routines and monitor closely.
Detecting and repairing freeze damage
Detecting and repairing freeze damage begins with a systematic inspection of the tank, plumbing, and fittings for visible cracks, bulges, split seams, or displaced joints that indicate rupture from ice expansion.
Record leak locations, isolate affected sections, drain and dry interiors, and temporarily patch using appropriate sealants or clamps.
Replace compromised components promptly and pressure-test the system before returning to service.
Signs insulation or methods are failing
After inspecting and repairing visible freeze damage, attention should shift to recognizing signs that insulation or other preventive measures are failing.
Indicators include condensation or frost on tank surfaces, unexplained heat loss, recurring ice buildup, damp or compressed insulation, sagging wraps, drafts reaching the tank, and frequent temperature drops despite measures.
Promptly address failures to prevent refreezing and structural damage.
Practical Tips and Quick Wins
The section offers low-cost, immediate measures homeowners can try during a cold snap, such as insulating exposed pipes, adding temporary heat sources, and reducing tank drawdown.
It also outlines simple seasonal habits—winterizing fittings, scheduling pre-winter inspections, and keeping surrounding vegetation trimmed—to minimize freeze risk next year.
Practical, quick-to-implement steps are emphasized so readers can act now and prevent repeat problems.
Low-cost immediate measures to try during a cold snap
A few simple, low-cost actions can considerably reduce the risk of a water tank freezing during a sudden cold snap.
Insulate exposed pipes with foam or old blankets, wrap the tank with reflective tarp and quilts, add straw or foam around the base, and create temporary windbreaks.
Circulate water periodically by opening a tap briefly and drain vulnerable outdoor lines.
Monitor and adjust as needed.
Seasonal habits to prevent freezing next year
How can simple seasonal habits cut the risk of a frozen water tank next winter?
Regular inspections, draining and flushing before first freeze, adding insulation or windbreaks, and repairing leaks reduce vulnerability.
Maintain surrounding vegetation to block wind, schedule top-up fills after warm spells, and mark vents.
Record dates and actions each year to refine timing and prevent repeat problems.
Conclusion
As frost creeps like pale lace across the landscape, the careful steward of the water tank becomes a quiet guardian, choosing insulation, circulation, and clever low-tech tricks like tools in a weathered chest. Each method is a lantern against the cold—some burn steady, some flicker—yet together they form a warm map that keeps liquid lifelines flowing. With foresight and simple craft, the tank endures winter’s hush and wakes ready when thaw arrives.
