DIY Guide: How to Install a Toilet Drain Pipe Step-by-Step Tutorial
To successfully install a toilet drain pipe, follow these key steps:
- Measure the Rough-In: Determine the distance from the wall to the center of the drain.
- Plan the Drain Route: Choose a short, code-compliant path for the drain pipe.
- Prepare the Subfloor: Remove any old toilet and inspect for rot, ensuring the area is clean.
- Select Materials: Choose the appropriate 3″ or 4″ pipe, fittings, primer, and solvent cement.
- Cut and Fit: Cut the pipe to length, dry-fit the pieces, and then solvent-weld them together, ensuring proper slope.
- Install the Flange: Position the flange at the finished floor height.
- Set the Toilet: Place the toilet on a wax or rubber seal, connect the water supply, and test for leaks.
For detailed instructions on each step, please refer to the full guide.
Quick Overview: What This Toilet Drain Install Covers
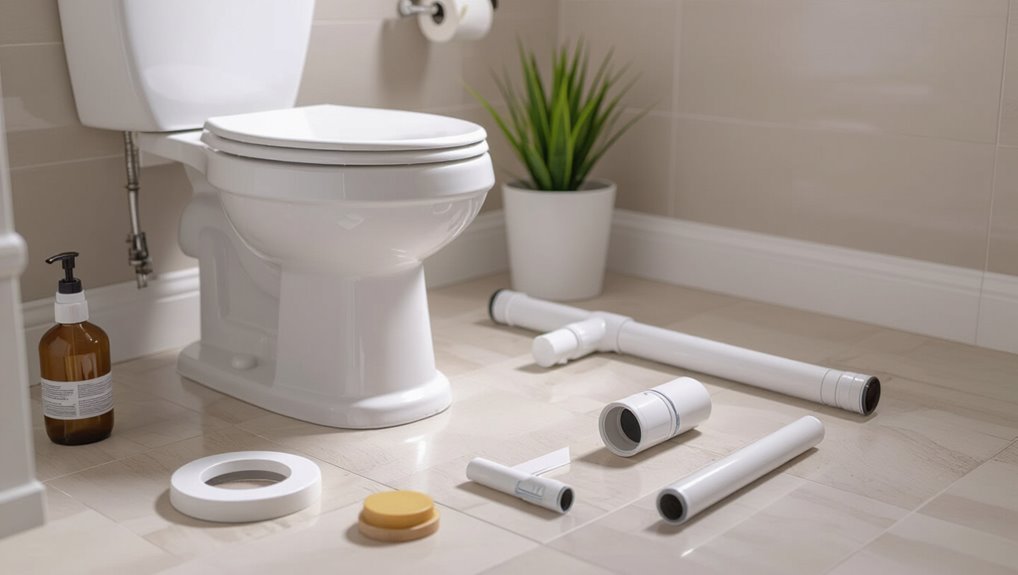
In this overview, the guide outlines the scope of the toilet drain installation: the tools and materials required, site preparation, cutting and fitting the waste pipe, connecting the flange and trap, securing joints and testing for leaks, and basic troubleshooting.
The procedure proceeds from evaluating existing plumbing and floor structure to removing the old fixture and preparing the flange seat.
It covers measuring and cutting pipe to align with rough‑in dimensions, dry‑fitting components, solvent welding or mechanical joining as appropriate, installing a wax or rubber flange seal, and verifying water and air tightness.
Safety and code compliance are emphasized throughout.
Tools, Materials, Time & Cost Estimate
The section outlines the specific tools and equipment required for installing a toilet drain pipe, from wrenches and saws to seals and pipe supports.
It also lists materials with typical unit costs and suggests budget ranges for common scenarios.
Estimated labor time for a straightforward replacement and factors that may increase cost are briefly noted.
Tools And Equipment
A straightforward kit of basic plumbing tools and materials guarantees the toilet drain pipe installation proceeds efficiently and safely. The list focuses on necessary hand tools, measuring devices, safety gear, and a compact selection of fittings. Time estimates assume intermediate DIY skill and typical bathroom access. The following table summarizes core items and their primary purpose.
| Tool/Equipment | Purpose |
|---|---|
| Adjustable wrench | Tighten nuts, secure fittings |
| Hacksaw or PVC cutter | Cut pipe to length |
| Tape measure & level | Assure proper slope and alignment |
Allow one to three hours for preparation and installation.
Materials And Costs
After listing the required tools, attention shifts to materials and their costs, which determine both final fit and budget. The installer selects pipe type (PVC, ABS, cast iron), correct diameter, fittings, wax ring, bolts, and sealants.
Pricing varies: basic PVC and fittings are inexpensive; cast iron and couplings cost more. Include adhesive, primer, and pipe hangers.
Time estimates depend on access and modifications—simple replacement: 2–4 hours; rerouting or joist work: a day or more. Factor in disposal and permit fees where applicable.
A modest project typically ranges $50–$300; complex jobs exceed $500.
- Pipe and fittings (type/size)
- Seals, rings, bolts
- Adhesives, hangers, permits
Check Local Plumbing Codes & When to Call a Pro
Why check local plumbing codes before cutting into a sewer line? Local codes dictate pipe materials, slope, venting, cleanout placement, and permit requirements; compliance prevents fines, failed inspections, and unsafe connections.
The homeowner should verify jurisdictional rules and obtain permits when required. Call a licensed plumber if the job involves stack ties, cast-iron removal, modifying venting, main sewer taps, or work beyond a simple flange replacement.
Also contact a pro if unexpected structural, drainage, or sewage odors appear, or if the work requires specialized tools or knowledge. Proper documentation and professional involvement safeguard liability and guarantee long-term system function.
Measure and Plan the Drain Route and Flange Location
First, the installer confirms the toilet rough-in measurement to make certain the fixture will align with the waste outlet.
Next, the planned pipe routing is mapped from the fixture to the soil stack or sewer, avoiding obstacles and keeping slopes within code.
Finally, the flange location and height are set so the flange will sit flush with the finished floor and provide the correct seal.
Determine Toilet Rough-In
Before cutting any flooring or locating the flange, the installer measures the toilet rough-in to make certain the drain aligns with the fixture and the planned route to the soil line.
The installer records the distance from the finished wall to the center of the waste outlet, checks toilet specs for required rough-in (commonly 10, 12, or 14 inches), and verifies subfloor thickness and flange height relative to finished floor.
Measurement informs flange placement and guarantees trapway alignment without offset stress.
Accurate rough-in prevents leaks, wobble, and costly rework.
- Measure wall-to-center distance precisely.
- Compare to toilet manufacturer rough-in.
- Note subfloor and finished floor heights.
Map Pipe Routing
With the rough-in dimensions established, the installer lays out the drain route and final flange position on the subfloor, plotting the shortest, most direct path to the soil stack while avoiding joists, ducts, and electrical runs. Measurements are taken from the wall to the flange center, and the path is sketched, noting offsets, required bends, and slope. Access panels and cleanouts are planned. Where routing choices exist, compare trade-offs: fewer fittings, easier access, and minimal floor penetration. Use the table to weigh key factors.
| Option | Fittings | Accessibility |
|---|---|---|
| Direct | Low | Moderate |
| Offset | High | Low |
| Routed around | Medium | High |
Position Flange Height
Standing over the rough layout, the installer determines the flange height by measuring the finished floor thickness and accounting for bedding material, flange type, and toilet base requirements so the flange top sits flush with or slightly above the finished surface.
The installer marks the drain center, records elevation relative to subfloor, and verifies slope and clearances to walls and fixtures.
Consideration is given to wax ring type or rubber gasket, flange fasteners, and potential future floor coverings.
Adjustments for tile, thin-set, or plywood underlayment are noted before cutting or raising the waste stub to the planned height.
- Measure finished floor + bedding
- Mark drain center and elevation
- Verify flange type and clearances
Remove the Old Toilet and Drain Components Safely
During the removal process, the old toilet and its drain components should be handled methodically to prevent damage and sewage exposure.
Begin by shutting off water and flushing to empty the tank and bowl; absorb residual water with a sponge and container. Disconnect the supply line and cap it to limit drips.
Unbolt the toilet at the base, rocking gently to break the seal; lift straight up with assistance to avoid dropping.
Remove the old wax ring and flange hardware, placing bolts and parts in a labeled container. Clean surrounding area, disposing of contaminated materials in sealed bags per local regulations.
Inspect Subfloor and Drain Opening for Damage
Inspect the subfloor and drain opening immediately after removal to identify rot, cracks, or misalignment that could compromise a new installation.
The inspector notes moisture stains, soft spots, and gaps at the flange seat, documenting size and location.
Check the surrounding joists and plywood edges for delamination or fungal growth.
Verify the drain pipe alignment and that the opening diameter matches flange specifications; measure any offset.
Photograph findings and mark areas needing repair.
If structural damage exists, plan for targeted replacement rather than cosmetic fixes to guarantee a secure, watertight future flange connection.
- Moist stains, soft spots, delam
- Cracks, gaps at flange seat
- Pipe offset, opening diameter mismatch
Prep Subfloor and Opening for the New Flange
Next, the installer assesses the subfloor condition around the drain to confirm it is sound and free of rot or soft spots.
Exact measurements are taken and the new flange location is marked to guarantee proper alignment with the waste line and toilet bolt pattern.
The flange seat area is then cleared of debris, old wax, and uneven material so the flange will sit flush and form a secure seal.
Inspect Subfloor Condition
Before installing the new flange, assess the subfloor around the waste opening for rot, soft spots, or water damage that could compromise a secure seal.
The inspector checks firmness by pressing and tapping; discoloration, crumbling edges, or spongy give indicate decay.
Remove loose debris and note the extent of damage to determine patching or replacement.
Make certain joists and surrounding plywood are dry and structurally sound before proceeding.
If hidden moisture persists, address the source to prevent recurrence.
Document findings and plan corrective work so the new flange will seat on a stable, level surface.
- Visual signs: stains, mold, delamination
- Physical test: press, tap, probe for softness
- Scope: localized patch vs. full plywood/joist repair
Measure And Mark Opening
With the subfloor confirmed sound and any damaged material removed, the installer measures and marks the opening for the new flange to guarantee a proper fit and alignment with the waste pipe. Measurements include flange diameter, pipe centerline location, and clearance to studs or joists. Marks are made with a straightedge and pencil, then checked against the flange template. The installer verifies symmetry for bolt placement and confirms floor thickness for flange type selection. Final pencil lines guide cutting; protective masking tape prevents splintering. A measured, precise opening prevents leaks and assures the flange seats squarely.
| Item | Measure | Verify |
|---|---|---|
| Flange diameter | Tape measure | Template fit |
| Centerline offset | From wall | Pipe alignment |
| Clearance | To framing | No obstructions |
| Floor thickness | Caliper/ruler | Flange type |
Prep Flange Seat Area
After confirming the cut lines, the installer clears the subfloor opening and inspects the surrounding area to create a stable, level seat for the new flange. Debris and old wax are removed; damaged plywood is noted. The installer checks for rot, measures thickness to guarantee flange sits flush, and marks any shim or repair zones.
For concrete floors, edges are dressed and dust cleared. The opening’s perimeter is squared if needed. Final dry-fit confirms alignment with waste pipe and bolt locations before securing the flange.
- Remove debris and old wax.
- Assess and repair subfloor damage.
- Dry-fit flange for alignment.
Choose Pipe, Fittings, and Primer for a Toilet Drain
Select pipe, fittings, and primer based on the toilet’s waste flow, the wall or floor penetration type, and local plumbing codes; typical choices are 3- or 4-inch PVC or ABS waste pipe, solvent-weld fittings for permanence, and a compatible primer for secure joints.
The installer evaluates code requirements, slope needs, and space constraints, then chooses pipe diameter and material. Select matching couplings, elbows, traps, and adapters rated for sanitary waste. Pick pressure‑rated or DWV fittings as required. Buy primer and solvent cement specified for the chosen material, plus gaskets or wax rings for flange connections. Verify compatibility and manufacturer cure times.
Cut, Dry‑Fit, and Mark the Drain Pipe Pieces
Before permanently bonding any fittings, the installer measures, cuts, and dry‑fits each pipe section to guarantee correct alignment, slope, and clearance.
The installer marks cut lines, deburrs edges, and checks that trap, flange, and waste riser positions match the fixture and subfloor.
During dry‑fit, slight adjustments confirm proper pitch and avoid conflicts with joists or other services.
Once satisfied, alignment marks on both pipe and fitting indicate final orientation for assembly.
Careful trial assembly prevents rework and verifies clean joints later without relying on guesswork.
- Measure, mark, and cut squarely.
- Deburr and test fit for slope.
- Mark mating alignment on parts.
Solvent‑Weld Joints and Secure the Drain Run
With the dry‑fit confirmed, the installer begins bonding the PVC sections using solvent cement and primer, working methodically from the fixture toward the main stack to maintain alignment and slope. Each joint receives primer, then cement, followed by a quarter‑turn twist to evenly distribute adhesive and set proper depth. After bonding, the run is supported with hangers at code‑specified intervals and level checked to preserve the 1/4″–1/2″ per foot slope. Allow curing time per manufacturer instructions before testing. Final checks include verifying no stress on joints and accessibility for future maintenance.
| Step | Action |
|---|---|
| 1 | Prime fittings |
| 2 | Apply cement |
| 3 | Join with twist |
| 4 | Secure supports |
Install the Toilet Flange and Connect to the Drain Pipe
Moving into the final connection, the installer seats the toilet flange over the drain pipe, aligns it to the finished floor level, and secures it so the closet bolts will sit plumb and at the correct spacing.
The flange type (PVC, ABS, metal) and the pipe adapter are matched, the joint is primed and glued or fastened per material, and the flange is anchored to the floor with corrosion‑resistant screws.
A wax or waxless ring interface is prepared but not compressed yet. Excess adhesive is cleaned, and a final visual check makes certain the flange is level and unobstructed.
- Match flange to pipe and secure adapter.
- Anchor flange to floor plumbly.
- Verify bolt spacing and clear path.
Set the Toilet, Tighten Bolts, Connect Supply, and Test for Leaks
After positioning the wax (or waxless) seal over the flange, the installer lowers the toilet bowl straight down onto the closet bolts, ensuring the bolt slots align with the flange studs and the bowl sits level on the finished floor.
Nuts and washers are installed, tightened alternately to compress the seal evenly without cracking the porcelain. Excess bolt length is trimmed and caps fitted.
The water supply line is connected to the tank inlet with thread tape as needed, then the shutoff valve is opened. The tank is filled, the bowl is flushed, and all visible joints and connections are inspected carefully for any leaks.
Troubleshooting, Maintenance Tips, and When to Schedule a Pro
Regularly inspecting the toilet and drain assembly helps catch small problems before they become costly repairs.
The guide outlines common issues: slow drainage from partial clogs, wobbling due to loose bolts or degraded wax rings, and persistent odors from leaks.
Basic troubleshooting uses a plunger, auger, and visual leak checks.
Routine maintenance includes clearing debris, testing seals, and tightening mounts.
If clogs recur, there is sewage backup, or plumbing noises persist after attempts, a licensed plumber should be contacted to inspect vents, drain lines, or replace damaged fittings.
- Slow drain: plunger, auger
- Leak: tighten, reseal
- Recurring: call pro
Conclusion
Installing a toilet drain pipe can empower homeowners to tackle a common but impactful repair. About 13% of U.S. homes reported plumbing leaks in the past year, highlighting how small fixes prevent larger damage. Following careful measuring, solvent‑weld joints, secure flange installation, and leak testing reduces risk and guarantees proper operation. When complexities arise or local codes demand, a licensed plumber should be called to guarantee safety, compliance, and lasting results.