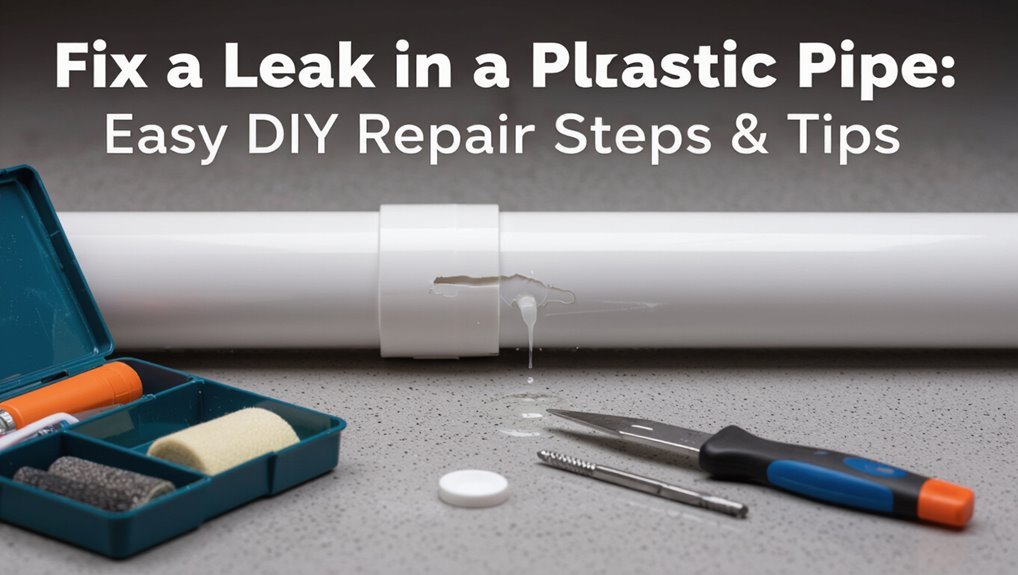
Fix a Leak in a Plastic Pipe: Easy DIY Repair Steps & Tips
Key Takeaway: Quick and Effective Plastic Pipe Leak Repair
To fix a leak in a plastic pipe, follow these straightforward steps:
- Stop Water Flow: Turn off the water supply to prevent further leakage.
- Isolate the Circuit: Ensure the affected area is isolated to avoid any water pressure.
- Identify Pipe Type: Determine if the pipe is PVC, CPVC, or PEX.
- Clean and Dry: Thoroughly clean and dry the area around the leak for effective repair.
Quick Fix Options:
- Rubber Repair Sleeve: Use with two stainless clamps.
- Self-Fusing Silicone Tape: Wrap around the leak for a temporary seal.
- Epoxy Putty: Apply as a quick patch.
Permanent Repair:
- Cut out the damaged section of the pipe.
- Join the new section using a matched coupling or push-fit fitting, adhering to the manufacturer’s prep and cure times.
For detailed step-by-step guidance and safety tips, continue reading.
Stop a Plastic Pipe Leak Now and Stay Safe

Facing a plastic pipe leak, a homeowner should act immediately to minimize water damage and reduce safety risks.
They assess the leak source, note pipe material and fitting type, and move valuables and electronics away from the area.
Wearing gloves and eye protection, they contain escaping water with towels, buckets, or a temporary clamp if available.
Electrical hazards are avoided by keeping hands and tools away from outlets and appliances; if water contacts electrical components, a professional is summoned.
The responder documents the leak for repairs or claims, then prepares tools and materials before attempting any temporary or permanent repair.
Shut Off Water and Relieve Pressure Safely
The first step is to shut off the main water valve to stop flow to the affected pipe.
Next, open the nearest faucet to release water from the line.
Finally, drain any residual pressure by leaving fixtures open until flow ceases.
Turn Off Main Valve
Before any repairs begin, the main shutoff must be closed to stop water flow and prevent pressure-related spray; this isolates the system so work can proceed safely.
The homeowner locates the valve—usually near the meter or where the service enters the building—and turns it fully clockwise until it stops. Valves vary: gate, ball, or curb stop; correct operation prevents damage.
After closing, the remaining pressure must be handled before cutting or sealing the pipe.
Essential reminders:
- Confirm valve is fully seated and does not rotate further.
- Wear eye protection when manipulating the valve.
- Note valve type for future maintenance.
Open Closest Faucet
Why open the nearest faucet after shutting off the main valve? Opening the closest faucet confirms the valve stopped supply and provides an immediate visual check: water should stop flowing or drop to a drip.
It also prevents vacuum formation and allows trapped water to exit from the section being worked on, reducing pressure at the repair site. A faucet near the leak speeds depressurization of that segment, minimizing residual force on fittings.
After opening, observe for any unexpected flow indicating an incomplete shutoff. Close the faucet only when ready to proceed with repairs or when instructed by subsequent steps.
Drain Residual Pressure
After confirming flow has stopped at the nearest faucet, attention shifts to eliminating any remaining pressure in the affected pipe section.
The homeowner or technician proceeds methodically: close the shutoff valve supplying the pipe, then open a downstream faucet or drain to allow trapped water to escape.
For multi-branch systems, isolate the specific segment and verify pressure relief before cutting or applying a repair.
Small precautions prevent spraying or injury during repairs.
- Open a downstream tap or low drain point to vent water.
- Check for secondary shutoffs serving the branch.
- Wear eye protection and use a catch bucket for residual discharge.
Quick Temporary Fixes to Stop the Leak
Temporary pipe clamps can halt flow quickly by compressing the damaged section until a permanent repair is made.
Epoxy putty and wrap products bond to wet plastic and harden to seal small cracks or pinholes. The following steps describe when each option is appropriate and how to apply them safely.
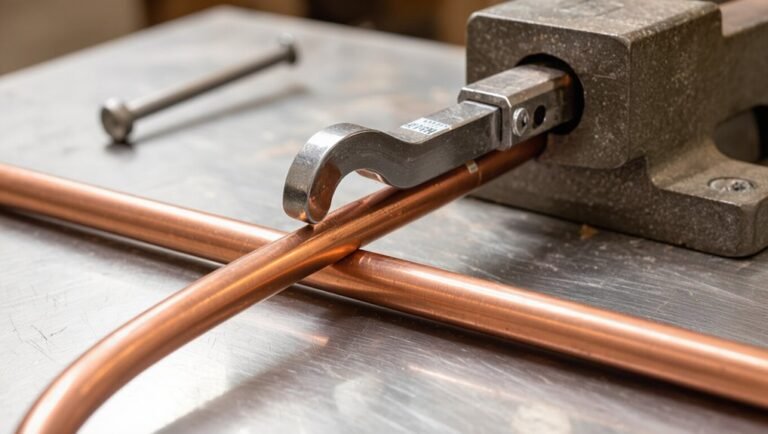
Temporary Pipe Clamps
Clamp a leaking plastic pipe quickly to stop water flow while preparing a permanent repair. Temporary pipe clamps provide a fast, mechanical seal that limits damage and buys time. They suit hairline cracks, pinholes, or joint leaks when shutting water off is impractical. Proper selection and installation matter: match clamp size to pipe diameter, center over the leak, and tighten gradually to avoid crushing plastic.
- Choose a rubber-saddled clamp for even pressure distribution.
- Use stainless hardware to resist corrosion and maintain grip.
- Inspect frequently and schedule a permanent repair to restore integrity.
Epoxy Putty Wrap
When a mechanical clamp is impractical or as an additional safeguard, an epoxy putty wrap offers a quick, moldable seal for leaking plastic pipe. The surface must be cleaned and dried; sand or scrape off loose material.
Knead the two-part putty until uniform color appears, then press firmly over the leak, extending several inches each side. Smooth and compact to remove air pockets and guarantee adhesion.
Allow the recommended cure time before restoring pressure. Epoxy putty is a temporary solution suitable for small cracks or pinholes; inspect frequently and plan a permanent repair or replacement, especially for pressurized or load-bearing lines.
Decide: DIY Now or Call a Plumber?
How urgent is the leak and how skilled is the homeowner will determine whether attempting a DIY repair or calling a plumber is the safer, more cost-effective choice. The decision balances immediate risk, available tools, and confidence with pipe materials and fittings.
Minor pinhole leaks or accessible joints suit DIY fixes if isolation and proper materials are possible. Larger cracks, hidden damage, or uncertain fittings justify professional assessment to prevent water damage and code violations.
- Assess leak severity, access, and shutoff options.
- Match required repair skill to experience and tools.
- Consider long-term reliability and warranty implications.
Which Plastic Pipes Fail Most: PVC, CPVC, PEX?
Typically, failure rates among common plastic plumbing materials differ because of their composition, installation methods, and operating conditions.
PVC often resists corrosion and handles cold-water distribution well, but becomes brittle with UV exposure and improper solvent-weld joints can leak.
CPVC tolerates higher temperatures, so failures usually stem from poor fittings, over-tightening, or chemical attack.
PEX is flexible and resistant to freeze damage, yet failures arise from faulty connections, UV degradation, or rodent chewing.
Overall, PEX and properly installed CPVC show lower in-service failure rates than exposed or poorly joined PVC.
Installation quality and environmental stresses dictate most failures.
Tools and Materials to Have Before You Start
Before beginning repairs, a basic set of hand tools—pipe cutters, adjustable wrench, pliers, and a deburring tool—should be assembled.
Appropriate sealants and tapes, such as thread sealant, PVC cement or solvent, and plumber’s tape, are necessary for creating reliable joints.
A small stock of common replacement parts like couplings, slip fittings, and spare sections of the pipe type being repaired will save time and prevent delays.
Essential Hand Tools
Essential hand tools form the foundation of any successful plastic-pipe repair, combining basic wrenches, cutting tools, and sealing supplies so the job proceeds efficiently and safely.
A concise kit speeds diagnosis and minimizes additional damage: a pipe cutter for clean, square cuts; adjustable wrenches and slip-joint pliers for fittings; and a deburring tool to remove burs before joining.
Protective items and measuring aids assure accuracy and safety.
- Pipe cutter, deburring tool
- Adjustable wrench, slip-joint pliers
- Tape measure, utility knife, gloves
These essentials cover most small repairs and prep work.
Sealants And Tapes
Sealants-and-tape choices determine whether a plastic-pipe repair will hold under pressure and temperature changes.
Appropriate materials include silicone RTV for flexible joints, polyurethane sealant for durability, and plumber’s epoxy for small cracks.
Threaded fittings require PTFE (Teflon) tape applied clockwise; make certain tape is compatible with pipe material and fluid.
Avoid solvent-based adhesives that can degrade some plastics.
Use pipe-specific repair tape—self-fusing silicone or rubberized repair wrap—for temporary emergency patches.
Always clean and dry the surface before applying.
Follow manufacturer cure times and pressure ratings to match pipe service conditions for a reliable, lasting seal.
Replacement Parts
Replacement parts and the right tools determine whether a plastic-pipe repair proceeds quickly and holds under pressure. A concise parts kit prevents delays: matching pipe segments, compatible fittings, and fresh seals or O-rings.
Select materials that match pipe type (PVC, CPVC, PEX) and pressure rating. Include replacement couplings, a spare length of pipe, and appropriate adhesive or solvent cement.
Verify dimensions and thread types before purchase to avoid returns. Store small parts in labeled containers to streamline work.
A basic toolkit paired with correctly sized replacement parts increases the likelihood of a durable, leak-free repair.
- Couplings and adapters
- Seals and O-rings
- Replacement pipe sections
Dry and Clean the Pipe Surface Step-by-Step
Before any repair is applied, the damaged area must be completely dry and free of dirt, oil, and loose particles.
First, turn off water and drain the pipe section. Use a clean cloth to remove surface moisture, then allow air drying or use a hair dryer on low heat to guarantee complete dryness. Inspect for residue, and wipe with isopropyl alcohol on a lint-free rag to remove grease.
Lightly sand glossy plastic around the leak with fine-grit sandpaper to promote adhesion for later steps.
Finally, blow away dust with compressed air and recheck the area before proceeding.
Patch Small Cracks With Epoxy Putty
With the surface cleaned and abraded, epoxy putty provides a quick, durable means to seal small cracks in plastic pipe.
The two-part compound is kneaded, shaped over the defect, and smoothed to form a watertight patch that cures hard. Proper bond requires dry conditions and removal of loose material; gloves and a tool for shaping improve results.
Curing time varies by product; pressure should be minimized until full cure. Consider matching putty to pipe material for best adhesion.
- Knead equal portions until uniform color.
- Apply firmly, extending beyond crack.
- Trim and sand after curing.
Use PVC Cement for Clean Cut Joints
Before bonding clean-cut PVC joints, the surface must be free of dirt, burrs, and old adhesive to guarantee a secure seal.
The correct cement should be selected for the pipe type and schedule, matching solvent strength and cure time to the application.
Proper application technique and allowing the recommended curing time are essential for a leak-free connection.
Proper Surface Preparation
For a reliable bond on clean-cut PVC joints, surfaces must be properly prepared so the cement can penetrate and chemically fuse the plastic. Attention to cleanliness, dryness, and fit guarantees a consistent weld.
Remove burrs and rough edges from the cut with a deburring tool or fine file. Wipe the mating surfaces with a clean, lint-free cloth and solvent to remove grease, dust, and moisture. Test-fit parts to confirm alignment and full insertion depth before adhesive application.
- Remove burrs and chamfer edges for full contact
- Clean with appropriate solvent until residue-free
- Guarantee parts are dry and correctly aligned
Choosing Correct Cement
Choosing the correct cement is essential to achieve a chemically fused, watertight joint in clean-cut PVC piping.
For standard PVC pressure lines, a medium- or regular-bodied PVC solvent cement formulated for schedule 40/80 pipe provides proper penetration and weld.
Use cement labeled for the specific pipe material—PVC, not CPVC or ABS—and select clear or matching color when aesthetics matter.
Check manufacturer compatibility with pipe schedule and temperature range.
Prefer approved brands and inspect cans for separation or expired shelf life.
For small diameter fittings, a fast-setting formula may be suitable; for larger diameters, choose a slower-bodied cement designed for deeper welds.
Application And Curing
When the pipe and fitting are clean and dry, apply PVC solvent cement promptly to guarantee a strong chemical bond. The installer brushes a thin, even coat to both surfaces, seats the joint fully, and twists slightly to distribute cement. Excess is wiped away and alignment checked within the working time.
Set pieces on a stable surface and avoid movement during initial grab.
- Allow tack time specified on the product label before testing.
- For pressurized systems, follow full cure time; morning-to-evening cures are common.
- Warm, dry conditions accelerate cure; cold or damp conditions require longer waits.
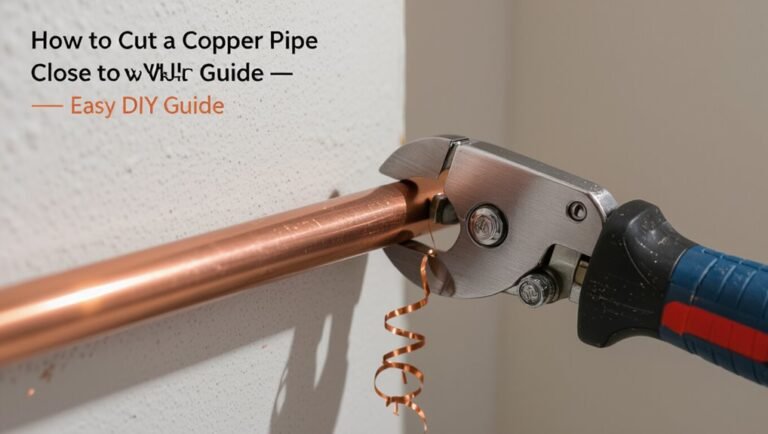
Replace a Damaged Plastic Pipe Section With Couplings
Begin by isolating the damaged section and shutting off the water supply to prevent flow while work proceeds.
Measure and mark cut lines beyond visible damage, allowing room for couplings.
Cut out the damaged segment squarely with a pipe cutter or fine-tooth saw; deburr and clean pipe ends.
Select compatible plastic couplings (slip or compression) sized to the pipe material and diameter.
Dry-fit the replacement section and couplings to verify alignment.
Apply primer and solvent cement if required by material, or tighten compression fittings per manufacturer instructions.
Restore water slowly, inspect joints for leaks, and retighten or recaulk if necessary.
Use a Slip Coupling Without Changing Pipe Length
With the water shut off and the damaged area exposed, a slip coupling lets a technician repair the pipe without shortening it by sliding over one end and then back into place.
The method preserves existing alignment and avoids cutting extra length. After cleaning and deburring, the coupling sleeve slides over the damaged section; once centered, compression or solvent welds secure it. Proper sealing and correct coupling size are essential to prevent future leaks.
- Confirm pipe material and matching coupling type.
- Clean, dry, and measure overlap per manufacturer instructions.
- Test under pressure before final insulation or concealment.
Repair Threaded Plastic Fittings and Adapters
Before replacing threaded plastic fittings and adapters, the condition of the threads should be inspected for cracks, cross-threading, or worn profiles that prevent a proper seal.
If threads are damaged but salvageable, choose an appropriate sealant—such as PTFE tape rated for plastic or a compatible pipe thread compound—applied per manufacturer instructions.
If inspection reveals significant thread damage, replacement of the fitting is recommended rather than relying on additional sealant.
Inspect Threads For Damage
Carefully examine the male and female threads on the plastic fitting and adapter for cracks, rounded crests, cross-threading, or embedded debris that can prevent a proper seal.
Visual inspection should note wear patterns, stress fractures, and any material deformation; palpation can reveal burrs or grit.
Cleanliness and intact geometry determine reusability.
If damage is localized, light dressing with a fine file or soft abrasive may restore form, but avoid removing excessive material.
Severely compromised parts require replacement to guarantee leak-free joints.
- Check for uneven thread depth and missing crests.
- Look for plastic shavings or foreign particles.
- Feel for binding or misalignment when hand-threading.
Choose Proper Sealant
Select a sealant that matches the plastic type, thread form, and fluid service to guarantee a durable, leak-free joint.
The technician evaluates compatibility: PTFE tape for PVC/CPVC and most thermoplastics, anaerobic thread sealants designed for plastics, or compatible pipe dope rated for potable water.
Thread pitch and taper determine sealant thickness and application technique; tapered threads generally need fewer wraps or a paste, while straight threads may require an O-ring or gasket plus sealant.
Avoid solvent-based products that soften plastic.
Apply evenly, avoid overfilling, assemble to specified torque, and cure per manufacturer instructions for reliable performance.
Fix Pinhole Leaks With Self-Fusing Silicone Tape
For small pinhole leaks in plastic pipes, self-fusing silicone tape provides a quick, durable patch by bonding to itself and forming a watertight, flexible seal that resists pressure and temperature changes. The surface should be clean and dry; the tape is stretched and wrapped tightly with overlap to activate fusion.
Curing occurs through compression rather than adhesives, yielding a resilient joint that accommodates movement.
- Clean and dry the area before application.
- Stretch tape 50–100% and overlap each wrap by half.
- Inspect for complete coverage and smooth edges to prevent snags.
Use a Rubber Repair Sleeve and Hose Clamps
After a temporary patch with silicone tape, a more robust repair can be made using a rubber repair sleeve secured with hose clamps.
The damaged area must be clean, dry, and free of burrs.
Select a sleeve sized to overlap undamaged pipe by at least 1–2 inches each side.
Slide the sleeve over the leak, center it, then position two stainless steel hose clamps—one on each sleeve edge.
Tighten clamps evenly until the sleeve compresses and stops the drip, avoiding over-tightening that can cut the rubber.
Test at normal pressure and re-tighten if minor seepage appears.
CPVC vs PVC: Solder-Free Repair Options
Compare CPVC and PVC repair options without using solder-based methods, focusing on compatibility, temperature limits, and adhesive choices. CPVC tolerates higher hot-water temperatures; PVC suits cold-water and drainage. Repairs rely on mechanical couplings, solvent cements formulated for each polymer, or push-fit fittings rated for the specific pipe material.
Adhesive selection must respect pipe chemistry; do not interchange CPVC and PVC cements. Temperature exposure, pressure, and chemical contact determine method choice.
Common solder-free choices include:
- Push-fit fittings for quick, tool-free joins and moderate temperature service
- Solvent-weld cements matched to CPVC or PVC
- Mechanical repair couplings for temporary or permanent fixes
Match Glue, Primer, and Pipe Material Correctly
Repair guidance emphasizes selecting an adhesive formulated for the specific plastic type, since PVC and CPVC require different solvent cements.
It also notes that primer is necessary for certain joints to guarantee proper solvent welding and should be used where the manufacturer specifies.
The correct combination of glue, primer, and pipe material is essential for a durable, leak-free bond.
Match Glue To Plastic
Which solvent cement or adhesive to use depends entirely on the plastic type and joint style.
Identification of the pipe material—PVC, CPVC, ABS, polyethylene, or PEX—guides adhesive selection. Manufacturers label compatible glues; using the wrong product prevents proper bonding and may cause leaks or failures.
For mechanical fittings, use adhesives rated for stress; for slip joints, select solvent cements designed to chemically weld.
Observe cure times and temperature ranges specified by the adhesive.
Match surface preparation recommendations precisely to assure adhesion.
- PVC/CPVC: use respective solvent cement
- ABS: use ABS-specific cement
- Polyethylene/PEX: use heat or specialty adhesives
Use Primer When Required
Often overlooked, primer is essential when the manufacturer’s instructions specify it because it softens and cleans the pipe surface to allow solvent cement to chemically fuse plastic joints.
The technician should confirm material compatibility—PVC primer for PVC, CPVC primer for CPVC, and the correct primer for ABS where required.
Apply primer evenly to fitting and pipe, allow brief dwell time, then apply solvent cement before the primer dries.
Use labeled products, follow ventilation and safety guidance, and discard contaminated applicators.
Skipping primer when specified weakens bonds, risking leaks and failures; following instructions secures durable, code-compliant joints and reliable repairs.
Cut Out and Splice In a Replacement Pipe (Steps)
When a damaged section of plastic pipe must be removed, the following step-by-step guide describes how to cut out the bad portion and splice in a replacement so the line restores watertight integrity.
The area is isolated and drained, the offending segment measured and marked, and clean, square cuts made beyond visible damage.
A matching replacement piece is prepared, deburred, and aligned.
Appropriate solvent cement or compatible connectors are applied per pipe material, then joints are held until set.
Pressure is restored and joints inspected for leaks.
Follow manufacturer cure times before full use.
- Measure twice, cut once
- Deburr edges
- Verify alignment and support
Prepare and Join Push-Fit (SharkBite) Fittings
After cutting and fitting the replacement pipe, attention turns to preparing and joining push-fit (SharkBite) fittings, a fast method that ensures soldering or solvent welding are eliminated.
The pipe ends require deburring and a clean, square cut; a file or deburring tool removes burrs and a marker guarantees insertion depth.
Measure and mark insertion distance on the pipe for consistent seating.
Push the pipe firmly into the fitting until it seats against the stop—no twisting needed.
To test, pull gently to confirm engagement.
Once joined, restore water slowly and inspect for leaks; tighten nearby connections if minor seepage appears.
Repair Leaks Inside Walls or Under Floors
When a leak is suspected inside a wall or under a floor, the first step is to locate the source by tracing moisture, listening for flow, or using a moisture meter or infrared camera.
Once located, the wall or floor must be opened to access the damaged section of pipe with minimal removal of surrounding materials.
After repairing or replacing the pipe, the joint should be sealed and the system pressure-tested before restoring finishes.
Locate The Leak
In a home where water stains or damp patches appear on walls or floors, locating the leak requires a methodical approach that isolates the source before any cutting or opening begins. Visual inspection tracks stains, mold patterns, and paint blistering.
Listening for drip sounds with quiet conditions narrows timing. Isolate fixtures and shut-off valves to observe pressure loss or continued dampening.
Use moisture meter readings across suspect surfaces to map the wettest zone. When uncertainty remains, small noninvasive probes (inspection camera, infrared scan) confirm location prior to access.
- Visual mapping of stains and mold
- Moisture meter and infrared checks
- Isolation of fixtures and valves
Access The Pipe
With the leak located, the next step is gaining controlled access to the affected pipe section while minimizing damage to surrounding finishes and structural components.
Determine the shortest, safest route—remove a small drywall panel, cut floorboard sections, or lift a few tiles—keeping cuts square for easier repair.
Turn off water, clear the immediate area, and support surrounding materials to prevent collapse.
Use a stud finder, flashlight, and probing tool to confirm pipe position before cutting.
Preserve removed pieces and label them for reinstallation.
If access risks wiring, insulation, or load-bearing elements, stop and consult a professional.
Seal And Test
Seal the repair area completely and verify the fix before restoring finishes. After applying adhesive, clamp or tape the joint as recommended and let cure fully. For concealed work, temporary access panels may be left until testing is confirmed. Perform pressure and visual checks to make sure no seepage.
- Pressurize the system to normal working pressure and observe for 10–15 minutes.
- Inspect joints and surrounding materials for moisture; use a dry tissue or paper towel to detect slow leaks.
- Repeat pressure test after curing time specified by the product to confirm a permanent seal before closing walls or floors.
Check Your Repair Under Pressure for Leaks
After allowing the repair to cure, the technician reintroduces water to the line and observes fittings, joints, and the patched area for any sign of weeping or drip. Pressure is raised gradually to operating level while watching for sudden changes. Short observation intervals help isolate slow leaks. Record pressure readings and visible moisture; compare against baseline. If dry, the repair is confirmed. If not, stop and depressurize for reassessment.
| Item inspected | Action required |
|---|---|
| Patch seam | Visual and tactile check |
| Adjacent fittings | Tighten or reseal if needed |
| System pressure | Monitor for drop over time |
Troubleshoot: Why a Repaired Leak Still Drips
When a repaired plastic pipe continues to drip, common causes include poor surface preparation, incompatible repair materials, or unseen damage along the pipe.
Each factor can prevent proper adhesion or conceal cracks that reopen under pressure.
Systematic inspection and matching the repair method to the material and damage type usually reveal the root cause.
Poor Surface Preparation
Poor surface preparation is a common cause of repaired plastic pipe leaks that continue to drip despite visible patching.
Dirt, residue, or moisture prevents adhesives and tapes from bonding to plastic, so technicians recommend cleaning, drying, and roughening the area before applying a repair.
Inadequate preparation can hide small cracks and produce gaps under sealants.
Proper steps include degreasing, abrading lightly, and ensuring a dry surface; skipping any step reduces reliability.
Inspectors should verify adhesion and test under pressure after curing.
Persistent leaks often trace back to missed or rushed surface-prep steps rather than material failure.
- Clean: remove grime and oils
- Abrade: scuff for adhesion
- Dry: eliminate all moisture
Wrong Repair Materials
Selecting inappropriate repair materials is a frequent reason patched plastic pipes continue to leak. Using mismatched adhesives, tapes, or fittings that are not rated for the specific plastic type, temperature range, or pressure leads to failures. Silicone meant for nonplumbing uses, general-purpose duct tape, or metal clamps on PVC can deform or fail under water exposure.
Chemical incompatibility prevents proper bonding; flexible materials may not withstand system pressure. The correct approach matches sealant and patch materials to pipe polymer (PVC, CPVC, PEX), follows manufacturer’s cure times, and uses plumbing-grade couplings and adhesives to restore a durable, watertight joint.
Hidden Pipe Damage
Beneath paint, soil, or a patch of tape, unseen damage in a plastic pipe can undermine even a textbook repair. Corrosion, micro-cracks, or internal delamination may allow slow leaks to persist despite surface fixes. Inspection and targeted action are required to prevent recurrence and water damage.
- Use a dye test or pressure gauge to locate hidden breaches.
- Excavate or remove coverings to visually confirm crack extent.
- Replace affected sections or install a properly sized coupling when structural integrity is compromised.
A methodical approach distinguishes a temporary stopgap from a durable repair, saving time and avoiding repeat failures.
How Temperature and Pressure Affect Plastic Pipe Repairs
Often technicians must account for temperature and pressure because both factors directly influence the material behavior and sealing performance of plastic pipe repairs. Cold makes plastic rigid and brittle, reducing adhesive wetting; heat softens it, risking deformation under pressure. Higher internal pressure stresses joints and cured patches; lower pressure may hide defects. Repair selection—adhesive type, clamp strength, cure time—should match expected service conditions. Testing under representative temperature and pressure before returning to service guarantees durability. Use controlled cool-down or warm-up when specified, and avoid pressurizing newly cured joints prematurely.
| Condition | Repair implication |
|---|---|
| Low temperature | Reduced adhesive flow |
| High temperature | Material softening |
| High pressure | Increased joint stress |
| Low pressure | Hidden leaks |
Prevent Leaks With Proper Support and Alignment
Proper support and precise alignment keep plastic piping free of stress that causes cracks, joint separation, and seal failure. The installer should make certain runs are straight, supported at manufacturer-recommended intervals, and allowed minimal axial movement to prevent fatigue. Hangers and clamps must cradle pipe without compressing it; insulated or rubber-lined supports reduce abrasion and thermal expansion noise.
Flexible connections absorb slight misalignment near fixtures while maintaining seal integrity. Regular inspection verifies supports remain secure and bolts are not over-tightened. Small adjustments now prevent leaks later and extend service life.
- Use spaced hangers per pipe size
- Isolate from rigid structures
- Allow thermal movement
When Age or Damage Means Full Replacement Is Best
Recognizing when a plastic pipe system has reached the end of its useful life or sustained irreparable damage is essential to prevent recurring leaks and costly repairs.
Observations of widespread cracking, persistent pinhole leaks, significant discoloration, deformation, or brittle sections indicate systemic failure rather than isolated defects.
Corrosion at metal-plastic junctions, multiple patched joints, and compromised structural integrity from freezing or crushing also justify replacement.
Full replacement restores flow capacity, guarantees reliable connections, and reduces future emergency interventions.
A thorough inspection identifies scope; planning for full section or entire-system replacement avoids repeated temporary fixes and protects property from progressive water damage.
Cost Comparison: Temporary Patch vs Section Replace
One clear way to decide between a temporary patch and replacing a damaged section is to compare immediate cost against long‑term value: a patch usually minimizes upfront expense and downtime but can incur repeated repairs and higher cumulative costs, while section replacement requires a larger initial outlay yet often yields greater reliability, lower maintenance, and predictable lifecycle expense.
The decision balances budget, expected remaining pipe life, and risk tolerance.
Typical considerations include:
- Immediate material and labor costs versus projected repeat-repair expenses.
- Likelihood of failure recurrence and impact on property.
- Time and access constraints that affect feasibility and total cost.
Choose Durable Materials for Long-Term Repairs
Selecting durable materials for long-term repairs substantially reduces the chance of repeat failures and lowers lifecycle costs.
The writer recommends choosing pipe materials compatible with the system—CPVC, PEX, or UV-stabilized PVC—based on temperature, pressure, and chemical exposure.
Use industry-grade fittings, solvent welds or proper mechanical couplings, and corrosion-resistant clamps.
Select adhesives, primers, and tapes rated for the pipe type and operating conditions.
Replace compromised sections rather than relying on temporary patches.
Prioritize certified products (ANSI, ASTM) and matched pressure ratings.
Proper material selection minimizes maintenance, improves reliability, and preserves system integrity over time.
Document Repairs for Warranty or Insurance
After choosing durable materials and performing a proper repair, thorough documentation protects warranty rights and supports insurance claims. The homeowner records date, location, cause, and steps taken, plus part numbers and receipts. Photographs before, during, and after repair demonstrate condition and work quality. Clear notes on tools and curing times strengthen credibility.
- Date-stamped photos and close-ups of fittings and seals
- Itemized receipts, warranty cards, and part serial numbers
- A brief repair log noting procedures, measurements, and tester results
Maintain digital copies and a printed folder to present to manufacturers or insurers when needed.
Dispose of Replaced Plastic Pipe Responsibly
Disposing of replaced plastic pipe responsibly protects the environment and complies with local regulations while preventing unnecessary landfill waste.
The homeowner should sort removed sections by material — PVC, CPVC, PEX — because recycling streams differ.
Clean off adhesive, fittings, and contamination before transport.
Contact municipal waste services or recycling centers to confirm acceptance, drop-off locations, and any preparation requirements.
For large quantities, arrange a bulk pickup or take them to a hazardous waste facility if mixed with chemical residues.
Consider donating usable offcuts to community workshops or makerspaces.
Keep receipts or documentation of proper disposal for records.
Seasonal Checks to Prevent Winter Burst Leaks
Regularly performing a few targeted seasonal checks can markedly reduce the risk of winter burst leaks by identifying vulnerable pipes, insulation gaps, and problematic fixtures before freezing temperatures arrive.
A concise inspection routine focuses on identifying exposed piping, evaluating insulation integrity, and testing water flow to reveal slow leaks or blockages.
Homeowners should document findings and schedule repairs promptly to prevent escalation.
Simple preventive measures minimize emergency repairs and water damage.
- Inspect exposed and exterior-facing pipes for cracks or thinning insulation.
- Verify attic, crawlspace, and garage insulation coverage and seals.
- Run faucets and check for slow drips or reduced pressure.
Safety Checklist: PPE, Ventilation, and Adhesives
Before beginning any repair on a plastic pipe, the worker should assemble and inspect personal protective equipment (gloves rated for chemicals and abrasion, safety glasses, and a respirator if solvent-based adhesives are used), confirm adequate ventilation for confined spaces, and select adhesives and primers specifically rated for the pipe material and pressure class.
The checklist includes chemical-resistant gloves, eye protection, and a fitted respirator when vapors are present. Assure ventilation with fans or open access and monitor vapor levels.
Verify adhesive cure times, temperature range, and compatibility with pipe type (PVC, CPVC, ABS, PEX). Keep a spill kit and extinguisher nearby.
Quick Checklist: Final Tests Before Restoring Service
How should the repair be verified before water is reintroduced? A technician inspects joint alignment, adhesive cure, and surrounding area for stress or residue.
Pressure testing proceeds at low psi, then at operating pressure, monitoring for drops or seepage over a defined interval. Visual checks confirm no hairline leaks or distortions.
- Apply graduated pressure and hold for 10–15 minutes while observing fittings.
- Wipe connections to reveal any slow weeps and recheck threaded seals.
- Validate valve function and system gauges, ensuring readings remain stable before full service.
Only when all tests pass is normal water service restored.
Conclusion
After the heroic plumbing saga — a shut valve, heroic tape, and an oxygen-free adhesive prayer — the leaking plastic pipe lies defeated (for now). The homeowner, having flirted briefly with DIY immortality, files away safety goggles like a trophy and vows to consult a professional before attempting surgery on PEX again. In the grand comedy of home repairs, temporary fixes applaud, responsible disposal winks, and winter waits with popcorn for Act Two.