How to Fix a Broken Exhaust Pipe: Quick DIY Repair Guide
Quick DIY Fix for a Broken Exhaust Pipe: Key Takeaways
- Safety First: Secure your vehicle by chocking the wheels, using jack points for lifting, and placing jack stands for stability.
- Inspection: Examine hangers, joints, the muffler, and the pipe for any signs of rust, soot, or cracks.
- Minor Repairs: For small holes, utilize high-temperature tape, muffler putty, or clamp-on sleeves. Fix loose hangers with wire or replace them with new isolators.
- Major Damage: If there are significant issues, consider cutting, splicing, or replacing affected sections of the exhaust.
- Final Check: After repairs, test for leaks to ensure everything is sealed properly.
Follow these steps for a straightforward and effective repair of your exhaust pipe.
What This Exhaust Guide Fixes: Leaks, Cracks, Hangers, Sections
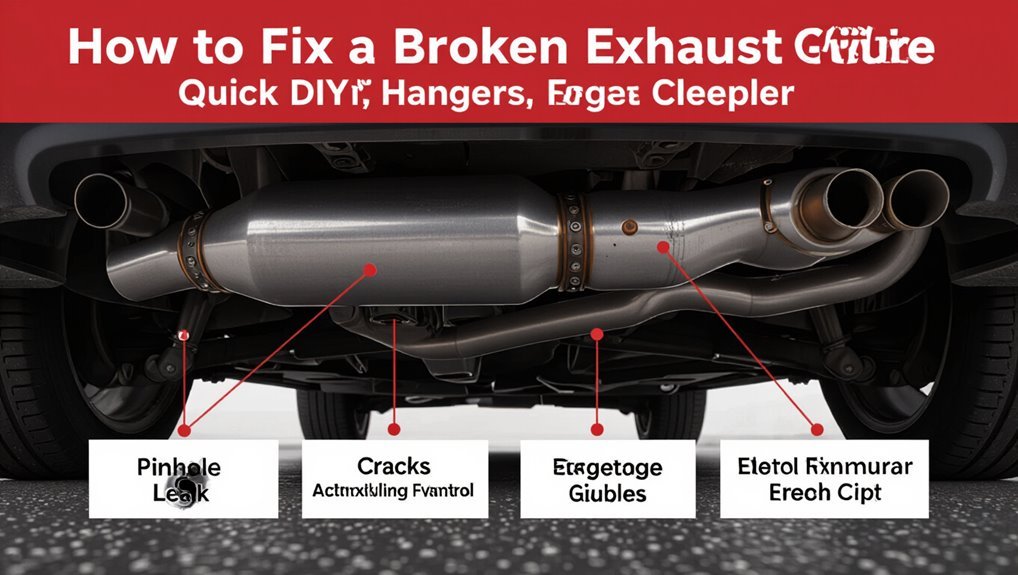
This guide addresses common exhaust problems encountered in everyday driving: leaks at joints and connections, cracks in pipes and mufflers, failed hangers that allow excessive movement, and damaged sections that require patching or replacement.
It outlines diagnosis steps, basic tools, and safety precautions.
For leaks, it recommends locating the source, cleaning surfaces, and using clamps, sealant, or patch kits.
For cracks, temporary wraps or welding options are summarized.
Hanger failures are corrected by replacing or reinforcing mounts and rubber isolators.
Severely damaged sections are assessed for splice plates or full replacement, prioritizing secure fit and corrosion resistance.
Broken Exhaust vs. Noisy Exhaust: How to Tell?
Distinguishing a broken exhaust from ordinary noise requires attention to sound character, location, and vehicle behavior. A broken exhaust often produces sharp metallic rattles, loud hissing from leaks, or sudden volume increases, while normal noise tends to be steady resonance or engine-originated tones. Observers note whether sounds change with acceleration, steering, or vibration, and whether visible damage, soot, or misaligned hangers is present. Use brief checks: listen near joints, probe for leaks with a gloved hand (without touching hot parts), and inspect mounting points.
| Symptom | Likely cause | Quick check |
|---|---|---|
| Rattle | Broken hanger | Wiggle pipe |
| Hiss | Leak/crack | Soap test |
Safety Checklist: Tools, PPE, and Workspace for Exhaust Repair
After identifying the likely fault and its location, attention turns to preparing a safe work environment before attempting any exhaust repair.
Gather specific tools: socket set, exhaust clamps, replacement pipe or patch, wire brush, heat-resistant sealant, and penetration oil.
Personal protective equipment: gloves rated for mechanical work, eye protection, long sleeves, and a respirator for rust or solvent fumes.
Make certain the workspace is level, well-ventilated, and free of flammable materials; keep a fire extinguisher nearby.
Have proper lighting and a clear escape path.
Keep needed parts and a first-aid kit within reach.
Confirm phone access for emergencies.
How to Lift and Support Your Car for Exhaust Work
Before any work begins, secure the vehicle on a firm, level surface and guarantee the parking brake is engaged; use wheel chocks on the wheels that will remain on the ground to prevent rolling.
Position jack points per the owner’s manual and lift using a rated hydraulic jack. Install sturdy jack stands beneath designated support locations, lowering the vehicle onto stands—never rely on the jack alone. Verify stability by gently rocking the car.
For extended work, use ramps where appropriate and combine ramps with stands for additional security.
Keep the workspace clear, maintain good lighting, and wear protective gloves and eye protection.
How to Locate Exhaust Leaks, Cracks, and Breaks
With the vehicle safely supported and stabilized, inspection for exhaust leaks, cracks, and breaks begins at the most accessible points and works systematically toward the engine and tailpipe.
Visual inspection seeks rust, holes, loose clamps, and fractured welds.
Listen for hissing or popping with the engine revved briefly.
Feel for escaping air (carefully, with gloves) and use soapy water to reveal leaks as bubbles.
Probe suspicious areas with a flashlight and mirror, and note movement when components are gently shaken.
- Examine hangers and mounting points
- Inspect joint flanges and gaskets
- Scan muffler body for perforations
- Check catalytic converter housing
- Trace pipe runs for hairline cracks
Quick Decision: Temporary Fix or Full Replacement?
When evaluating a broken exhaust pipe, the choice between a temporary patch and full replacement hinges on budget and expected longevity.
A patch can restore function quickly and cheaply but often sacrifices durability, while replacement costs more upfront yet typically provides a longer-term solution.
The best decision weighs immediate expense against how long the repair must last.
Temporary Patch Versus Replacement
Faced with a visible hole or crack in an exhaust pipe, a vehicle owner must decide between a quick temporary patch and a full replacement based on severity, cost, and time constraints.
A temporary patch suits small holes, short trips, and immediate noise or fume reduction; it’s fast but limited. Replacement is preferred for structural damage, corrosion, or long-term reliability.
Safety, emissions compliance, and access to parts influence the choice.
Assess inspection findings, driving needs, and available tools before acting. Prefer professional replacement when doubt exists.
- Size and location of damage
- Intended vehicle use
- Available time and skills
- Short-term safety needs
- Long-term reliability considerations
Cost Versus Durability
Deciding between a temporary fix and a full exhaust replacement often comes down to balancing upfront cost against long-term durability: a cheap patch can restore function and quiet the system for a few hundred miles, while replacement typically demands higher immediate expense but yields reliable, maintenance-free performance and better emissions control over years.
A pragmatic assessment weighs vehicle age, expected remaining ownership, part availability, and local repair costs. Temporary repairs suit short-term use or until funds allow replacement. Full replacement is justified for frequent use, failing emissions tests, or when corrosion compromises structural integrity, minimizing repeated repair expenses.
Quick Temporary Exhaust Fixes You Can Do Without Welding
A few quick, non-welding repairs can silence rattles and seal small leaks long enough to reach a shop or finish a trip. The guide lists safe, temporary options that require basic tools and common materials. Emphasis is on short-term effectiveness and inspecting mounts, hangers, and joints. Users are reminded to avoid prolonged driving with major damage and to seek professional repair soon.
- Tighten loose clamps and replace missing bolts
- Reposition and secure hangers with wire or hose clamps
- Wrap joints with high-temperature aluminum or foil tape
- Use muffler putty for small seam gaps
- Replace deteriorated rubber isolators
Patch Small Holes With Exhaust Tape and Wraps
When addressing small holes in an exhaust pipe, selecting the correct exhaust tape—high-temperature, adhesive-backed, or fiberglass-based—determines durability and seal quality.
Equally important is the wrapping technique: clean the area, overlap the tape evenly, and apply firm tension to prevent gaps or movement.
Proper material choice combined with a tight, methodical wrap can provide a reliable temporary repair until a permanent fix is made.
Choosing The Right Tape
Which tape fits a particular exhaust repair depends on heat tolerance, adhesive strength, and whether the patch must be temporary or long-term.
The writer evaluates common choices: aluminum foil tape for high heat resistance but limited flexibility; high-temperature silicone tape for moderate heat and electrical insulation; stainless steel exhaust tape for durability on external joints; self-fusing silicone for quick, temporary seals; and specialist exhaust wraps that combine heat shielding with adhesion.
Selection hinges on temperature ratings, surface cleanliness, exposure to oil or moisture, and expected lifespan.
Proper product data sheets and vehicle specifications guide an appropriate, safe selection.
- Heat rating
- Adhesive type
- Flexibility
- Corrosion resistance
- Anticipated lifespan
Proper Wrapping Technique
Having selected tape suited to the pipe’s temperature and exposure, attention turns to the wrapping method for patching small holes with exhaust tape and wraps.
The pipe must be cool, clean, and free of rust or scale; a wire brush and degreaser prepare the surface.
Begin the wrap upstream of the hole, overlap each turn by 50% to guarantee sealing, and maintain moderate tension to compress but not shear the material.
Extend the wrap several inches beyond the damaged area.
Finish with an outer protective layer or high-temperature clamp.
Inspect for leaks, re-tighten after a short heat cycle, and replace when permanent repair is possible.
Use Exhaust Patch Putty for Medium Cracks and Seams
Several products on the market are formulated as exhaust patch putty specifically for sealing medium cracks and seams in pipes and mufflers. The putty adheres to clean, cool metal, fills gaps, and cures into a heat-resistant seal.
Application requires removing rust and grease, roughening the area, and pressing the putty firmly into the defect. Cure times vary; some need heat cycles to fully harden.
After curing, excess can be trimmed and sanded for a smoother finish. Properly applied putty restores pressure containment and reduces noise until a permanent repair or replacement is performed.
- Clean and degrease first
- Roughen surface for adhesion
- Press putty into the crack
- Allow recommended cure/heating
- Trim and smooth after curing
When to Use a Clamp-On Sleeve vs. a Patch
Decide between a clamp-on sleeve and a patch based on the size, location, and severity of the leak. A clamp-on sleeve suits larger holes, crushed sections, or joints where structural reinforcement and quick installation are priorities; it slips over the damaged area and secures with bolts, providing mechanical strength and easy removal.
A patch fits small punctures, hairline cracks, or thin seam leaks where minimal alteration is needed; adhesives or welding seal the opening without replacing adjoining pipe. Corrosion extent, heat exposure, and access determine choice: choose sleeves for compromised integrity and patches for localized, minor leaks that remain mechanically sound.
Cut Out and Replace a Short Damaged Exhaust Pipe Section
First, the technician assesses the extent of corrosion or fracture to determine whether a short section replacement is needed.
Next, the damaged segment is cut out cleanly using appropriate tools and the pipe ends are prepared for joining.
Finally, a matching replacement pipe is installed and secured with clamps, flanges, or welds to restore flow and seal.
Assess Damage Extent
When inspecting a short damaged section of exhaust pipe, a technician should begin by cleaning the area and visually evaluating the extent of corrosion, cracks, or deformation to determine whether a cut-and-replace is appropriate.
The technician measures damage length, checks adjacent joints, and assesses attachment points and hanger integrity. Surface-only rust may allow patching, while through-holes or crushed sections usually require replacement.
The technician also considers access, available replacement pipe, and required fittings. Accurate assessment prevents repeated failures and guarantees safe exhaust routing.
- Measure damage length precisely
- Inspect for through-holes
- Check nearby welds and joints
- Evaluate hanger condition
- Verify replacement fitment and access
Remove Damaged Section
Before cutting, the technician secures the vehicle on jack stands or a lift, supports the exhaust to prevent strain on adjacent components, and marks the cut lines just beyond the compromised area.
Wearing eye and hand protection, the technician uses a reciprocating saw or cutoff wheel to make straight, controlled cuts at the marks, avoiding welds and surrounding heat-sensitive parts.
After removing the corroded or crushed section, the mating pipe ends are deburred and cleaned of rust and carbon with a wire brush and sandpaper.
The technician verifies alignment and gap dimensions, then prepares surfaces for clamps or welding.
Install Replacement Pipe
With the vehicle securely supported and the mating pipe ends cleaned and aligned, the technician measures and trims the replacement section to match the gap and orientation precisely.
The new segment is test-fit, clamped, and checked for clearance and correct slope. Welding or bolting follows, ensuring full-penetration welds or torque-specified fasteners.
After cooling, hangers and heat shields are reinstalled, and joints are sealed with high-temp gasket or weld beads.
The system is inspected for alignment, ground clearance, and missing hardware before lowering.
- Verify exact pipe diameter and wall thickness
- Use proper clamps or weld techniques
- Maintain exhaust slope for drainage
- Reuse or replace hangers
- Perform leak test and road check
Remove Corroded Bolts, Hangers, and Mounts Safely
Using penetrating oil and steady, methodical force, the technician addresses corroded bolts, hangers, and mounts to prevent sudden breaks or injury.
After soaking hardware, patience allows lubricant to penetrate threads. Appropriate sockets and breaker bars apply gradual torque; heat with a torch loosens stubborn corrosion where safe.
When bolts shear, extractors or cutting tools remove remnants, taking care to protect tubing and surrounding components.
Rubber hangers are pried free and replaced; metal hangers are inspected for cracks and bent or cut as needed for removal.
All hardware is cleaned, anti-seize applied, and new fasteners staged for reassembly.
Fit and Seal a Replacement Exhaust Pipe Section
When aligning the replacement section, the technician guarantees proper orientation and gap clearance so the new pipe mates squarely with adjoining components.
The section is test-fit, ensuring hanger positions match and bends align. Clamps or flange bolts are temporarily tightened, then loosened for final adjustment.
A gasket or high-temp exhaust sealant is applied at flange faces or slip joints as specified. Torque is set to manufacturer range and hangers secure vibration isolation. The system is inspected for pinches or contact.
- Confirm inlet/outlet diameters match
- Use anti-seize on bolts
- Seat gaskets evenly
- Hand-start fasteners first
- Check for axial play
Welding a Durable Exhaust Repair (Basic Method)
Before welding, the exhaust surface must be cleaned of rust, paint, and debris to guarantee proper fusion.
The technician should use short, controlled welds and maintain consistent travel speed to prevent burn-through and warping.
Appropriate protective equipment and adequate ventilation are required to protect the welder from fumes, sparks, and heat.
Preparing The Exhaust Surface
To achieve a reliable weld, the exhaust surface must be clean, dry, and free of paint, rust, and oil. The area should be inspected, marked, and prepared before any welding begins. Mechanical removal of scale and contaminants guarantees metal-to-metal contact. Degreasing and drying prevent porosity and poor adhesion. Edges may be beveled for better penetration; fitment must be tight. Cleaning improves inspection for cracks or thin spots that require patching.
- Use a wire brush or grinder to remove rust
- Degrease with solvent and wipe thoroughly
- Sand to bare metal around the joint
- Clamp parts for exact alignment
- Reinspect for hidden defects
Welding Technique And Safety
Begin welding only after confirming the repair area is clean, securely clamped, and properly fitted; the operator should use steady, controlled motions and the correct settings for the chosen process. The technician selects MIG or TIG, maintains short weld runs to avoid warping, and peens or grinds as needed for smooth joints. Proper PPE, ventilation, and fire prevention are mandatory. Inspect welds for porosity or cracks and perform a leak test when cool.
| Item | Purpose |
|---|---|
| MIG/TIG | Appropriate heat/detail |
| PPE | Eye/skin protection |
| Ventilation | Fume control |
| Fire watch | Prevent ignition |
Reattach or Replace Muffler Hangers and Mounts
Loosened or broken muffler hangers and mounts can cause exhaust sagging, rattling, and premature wear; inspecting their condition and attachment points is essential before proceeding.
After assessment, remove rusted brackets, replace cracked rubber isolators, or install new hangers sized to the vehicle. Use penetrating oil on seized fasteners and proper sockets; support the exhaust while swapping mounts to prevent damage.
Torque bolts to manufacturer specs and verify secure connections. Test for movement and noise with light vehicle rocking.
- Inspect hangers for cracks or stretching
- Compare new parts to originals
- Use safety stands when working underneath
- Lubricate fasteners before removal
- Recheck after a short road test
Check Exhaust Alignment, Clearances, and Rubbing Points
The mechanic inspects all mounting brackets for wear or misalignment to guarantee the exhaust is supported correctly.
Pipe clearances are measured at frame, suspension, and body contact points to confirm adequate separation.
Any rubbing locations are marked for correction or added insulation to prevent noise and damage.
Inspect Mounting Brackets
With the vehicle raised and supported, inspect each mounting bracket and hanger for correct alignment and secure attachment to the chassis. The inspector notes worn rubber, bent tabs, missing fasteners, and contact points where the pipe rubs metal. Mounting hardware should permit slight movement without letting the pipe sag or touch heat-sensitive components. Replace cracked hangers, tighten loose bolts, and realign brackets to restore designed support.
After adjustments, recheck alignment visually and by gently lifting the exhaust to confirm stability.
- Look for cracked or hardened rubber hangers
- Check for missing or corroded bolts
- Verify bracket orientation
- Identify metal-to-pipe contact points
- Test for excessive play or sag
Measure Pipe Clearances
Before tightening final fasteners, measure pipe clearances to confirm the exhaust follows its planned path and maintains safe distances from chassis, brake lines, wiring, and heat-sensitive components.
Using a straightedge and tape measure, verify lateral and vertical offsets at multiple points: flange, hanger mounts, bends, and mid-span.
Allow recommended gap—typically 1–2 inches—from body panels and flexible lines, more near plastic or fuel lines.
Rotate wheels or suspension through travel to guarantee dynamic clearance. Note any proximity under load conditions.
Record measurements and adjust hangers, shims, or pipe positions until consistent, symmetrical alignment and required clearances are achieved.
Identify Rubbing Locations
After confirming static and dynamic clearances, inspection shifts to pinpointing actual rubbing locations where the exhaust contacts nearby structures.
The inspector observes worn paint, heat discoloration, metal scoring, or fresh abrasions along hangers and heat shields. Testing includes gently moving the suspension and rotating wheels to reveal intermittent contact. Marked spots are noted for repair or additional clearance, and temporary padding can prevent further damage during diagnosis. Prioritize areas near brackets, sway bars, body seams, and heat shields for detailed evaluation. Document findings before corrective work to guarantee alignment and lasting clearance.
- Visual evidence: scratches, soot, or dents
- Movement test: simulate road motion
- Check hanger positions and bolts
- Inspect nearby components and shields
- Mark and photograph each contact point
Test Your Repair for Leaks, Noise, and Emissions
To verify the repair’s effectiveness, the vehicle is inspected for leaks, unusual noise, and increased emissions under both idle and driving conditions.
The technician visually examines joints and patched areas for soot, fresh exhaust stains, or escaping gases while the engine runs. A hand placed near—but not touching—connections senses leaks; soapy water can reveal bubbles at low pressure.
Road testing follows: acceleration, steady cruise, and deceleration checks for rattles, hisses, or backpressure symptoms. Emissions are monitored by smell and, if available, a portable gas analyzer to confirm levels return to acceptable ranges before concluding the repair successful.
Diagnose Persistent Problems After a DIY Repair
How can one determine why an exhaust issue persists despite a recent DIY repair? A systematic approach helps isolate causes: recheck seals, inspect adjacent components, and verify attachment integrity. If noise, smell, or performance problems continue, gather observations before proceeding.
- Reinspect welds, clamps, and gasket seating for missed gaps.
- Check for new cracks or rust propagation near the repair.
- Verify hanger and bracket alignment to prevent stress on joints.
- Inspect catalytic converter and muffler for internal damage causing noise or restriction.
- Use a smoke or soapy water test while engine idles to pinpoint leaks.
Record findings and choose targeted corrective steps.
Cost & Time: DIY Fixes vs. Professional Replacement
When weighing a DIY exhaust repair against professional replacement, the primary considerations are total cost and downtime: DIY often lowers immediate outlay but can require more time and yield uncertain longevity, while professional service increases upfront expense but typically offers faster completion, proper tooling, and warranty-backed results.
DIY repairs commonly use basic sealants, clamps, or patch kits costing under $50–$200, though hidden issues can escalate labor and parts needs. Professionals charge higher labor rates and parts markup but reduce diagnostic time and rework risk.
Decision depends on skill level, available tools, vehicle age, and tolerance for temporary fixes versus long-term reliability.
Parts, Sizes, and Materials Checklist for Exhaust Repair
For an effective exhaust repair, a clear checklist of parts, sizes, and materials prevents mismatches and wasted trips to the parts counter. The list identifies pipe diameters, clamp types, gasket dimensions, and compatible metals; confirming measurements and material grades avoids corrosion and fit issues. Protective gear and sealants are included to complete a safe, durable repair. Proper selection guarantees the repair matches vehicle specifications and local emissions requirements.
- Exhaust pipe diameter and length (measure twice)
- Clamp type and size (band, U-bolt, or V-band)
- Gaskets and flange dimensions
- Material grade ( aluminized steel vs stainless)
- High-temp sealant and heat-resistant gloves
Maintenance Tips to Prevent Future Exhaust Failures
Regularly inspecting and maintaining the exhaust system reduces the risk of sudden failures and costly repairs.
Owners should schedule visual checks for holes, rust, loose hangers, and leaks every few months and after harsh winters or off-road use.
Tighten clamps, replace deteriorated gaskets, and lubricate rubber hangers to maintain alignment and reduce vibration.
Clean visible buildup and avoid short trips that promote condensation and corrosion.
Use corrosion-resistant replacements when components need changing.
Promptly address unusual noises or performance losses.
Keeping records of inspections and repairs aids trend spotting and prevents small issues from becoming major failures.
Conclusion
A concise summary: this guide equips readers to identify and repair common exhaust problems—leaks, cracks, broken hangers and sections—safely and efficiently, while noting when professional help is warranted. One striking statistic: according to vehicle maintenance surveys, nearly 30% of exhaust failures begin as small leaks left unrepaired, later requiring full-section replacement. Prompt inspection and simple DIY fixes can cut repair costs and extend system life, stressing prevention and informed troubleshooting.