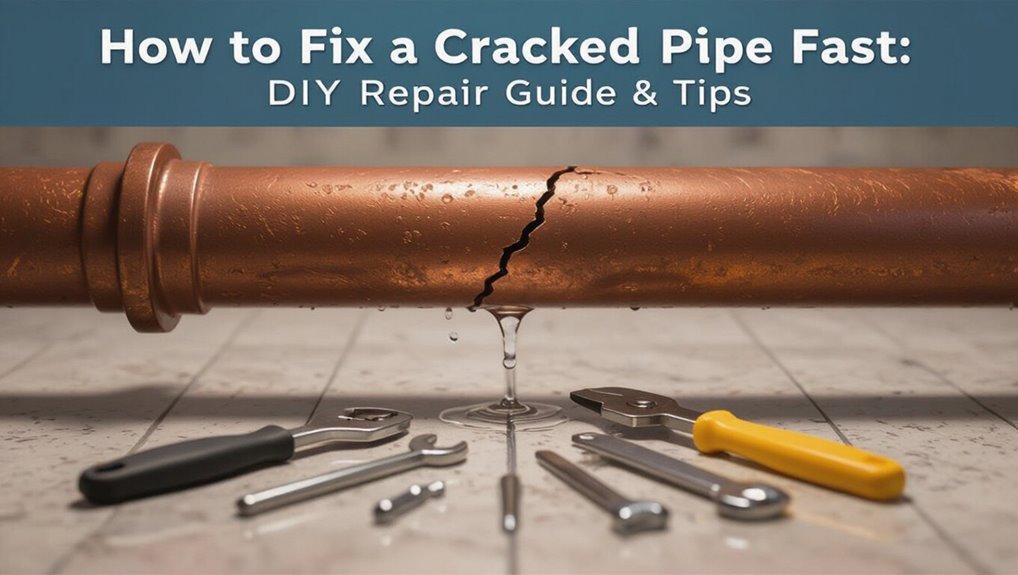
How to Fix a Cracked Pipe Fast: DIY Repair Guide & Tips
Quick Fix for a Cracked Pipe: A DIY Guide
If you have a cracked pipe, follow these steps for a fast and effective repair:
1. Shut Off Water Supply: Turn off the main valve to stop water flow.
2. Relieve Pressure: Open faucets to drain water and relieve pressure in the pipes.
3. Prepare the Area: Use towels and buckets to contain any leaking water.
4. Identify Pipe and Crack Type: Determine if the pipe is PVC, copper, PEX, or galvanized, and assess the crack (hairline, split, or burst).
5. Clean and Dry the Area: Ensure the damaged section is clean and dry for better adhesion.
6. Apply Temporary Fix:
- For small leaks: Use epoxy putty or repair tape.
- For larger splits: Use a rubber sleeve with hose clamps.
- For cut-out replacements: Utilize a slip coupling.
7. Test for Leaks: Slowly restore water pressure and check for leaks before fully turning the water supply back on.
By following these steps, you can quickly and effectively address a cracked pipe. Always take precautions and consult professionals if the damage is extensive.
Stop the Leak Now : Emergency Steps
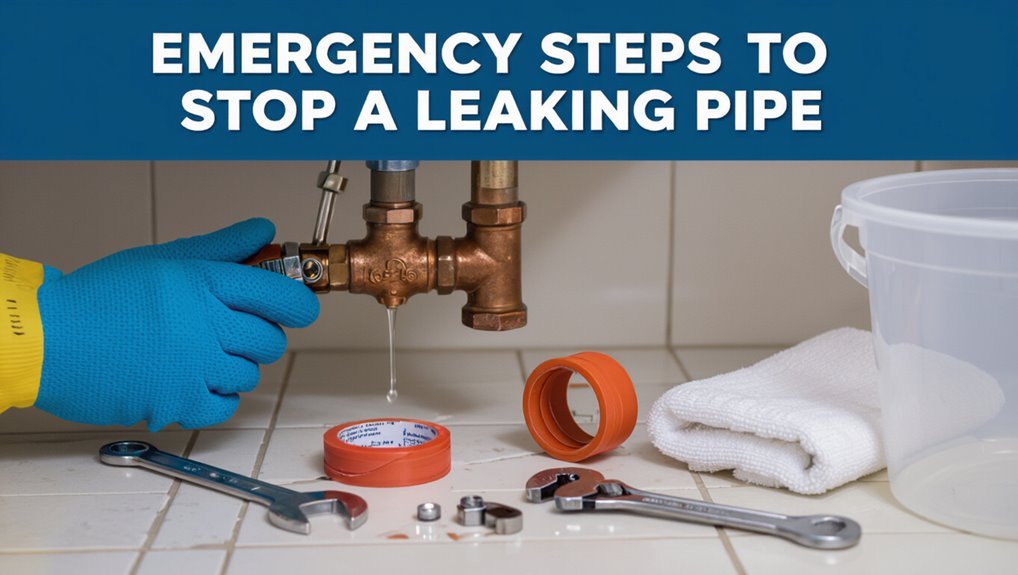
When a pipe cracks, immediate containment takes priority: shut off the main water supply, open nearby faucets to relieve pressure, and plug or wrap the break with a temporary patch (rubber and hose clamps, epoxy putty, or a commercial leak clamp) to reduce flow.
The responder isolates affected fixtures, moves valuables and electronics away, and uses buckets and towels to capture runoff.
After containing the leak, they ventilate the area and document damage for records.
Temporary measures are inspected for secure seating and monitored until a qualified repair or replacement is performed.
Safety gloves and eye protection are recommended during containment.
Shut Off the Water Quickly and Safely
The homeowner should locate and close the main shutoff valve immediately to stop water flow to the damaged pipe.
After the valve is closed, any remaining pressure in the system should be relieved by opening nearby faucets and flushing toilets. These steps reduce further water loss and make temporary repairs safer to perform.
Turn Off Main Valve
Locate and close the home’s main shut-off valve immediately to stop water flow and limit damage.
The individual locates the valve—often near the water meter, garage, basement, or where the main line enters the house—then turns it clockwise until it stops.
If a wheel-type valve is present, a firm quarter-turn may suffice; for a ball valve, align the handle perpendicular to the pipe.
Use pliers or a wrench if the valve is stiff, applying steady pressure to avoid breakage.
Once closed, verify faucets run dry or sputter, confirming the main supply is secured before proceeding with repairs.
Relieve Remaining Pressure
After shutting off the main valve, any remaining pressure in the system must be relieved before cutting or patching a pipe to prevent sudden sprays.
The homeowner opens faucets at lowest and highest points—tubs, sinks, outdoor spigots—to drain trapped water.
For closed systems, the boiler or water heater’s pressure relief valve may be briefly opened following manufacturer guidance.
A bucket catches residual drips; towels protect surroundings.
After drainage, the repair area is inspected for residual flow by loosening a nearby joint slightly; if water appears, recheck shutoff valves.
Only when flow has ceased should cutting, sanding, or applying patches begin.
Minimize Water Damage While You Work
Before any repair begins, shut off the main water supply and drain the lines to stop flow and reduce pressure.
The area should be cleared, soaked materials removed, and a tarp placed to protect floors.
Quick containment limits damage and eases cleanup.
Use buckets, towels, and a wet/dry vacuum to capture residual water.
If electricity is nearby, cut power to affected circuits before working.
- Isolate the leak zone with towels and a tray.
- Elevate and cover nearby belongings with plastic.
- Use a wet/dry vacuum for pooled water.
- Call a professional if spreading damage appears.
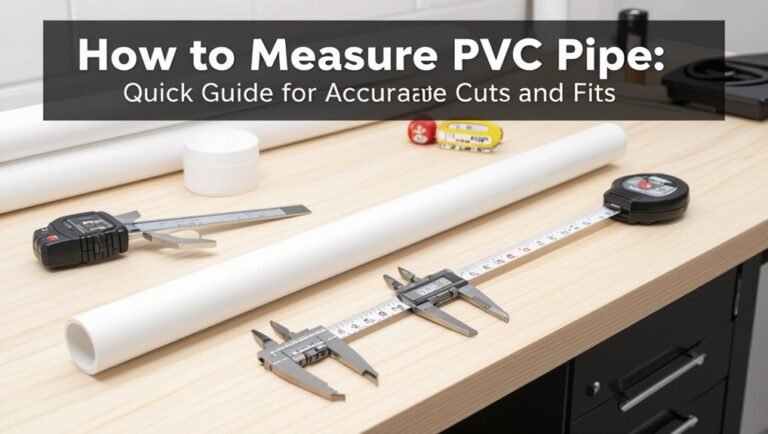
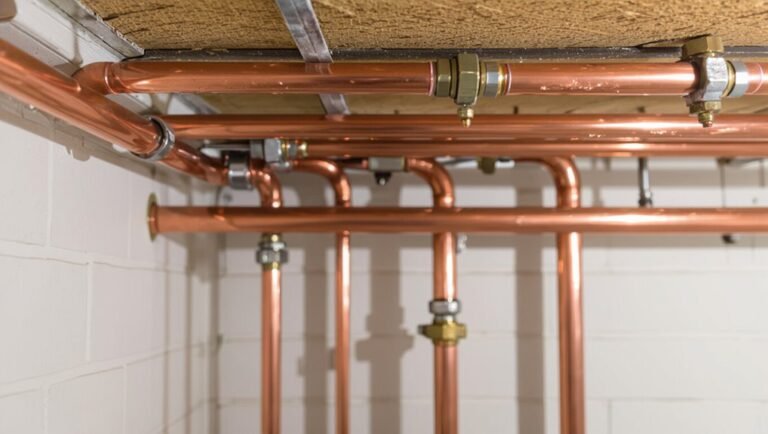
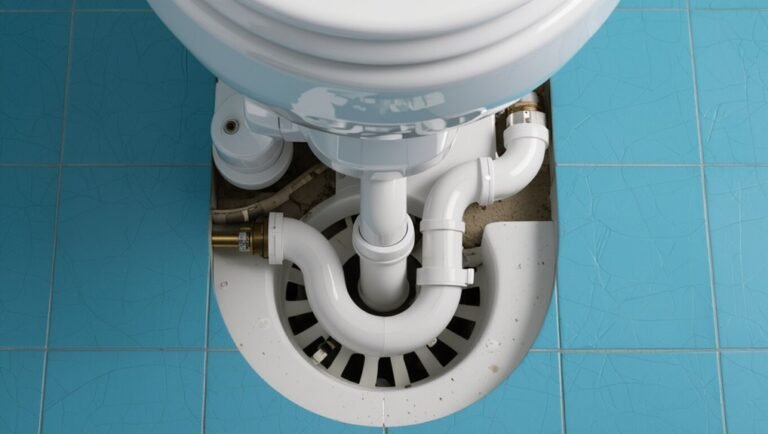
Identify the Pipe Type: PVC, Copper, PEX, or Galvanized
With standing water managed and the work area secured, attention turns to identifying the pipe material—PVC, copper, PEX, or galvanized—because repair methods and compatible fittings differ by type.
PVC is rigid, white or gray plastic, often solvent-welded with smooth ends.
Copper appears metallic, reddish-brown, and may have soldered joints or compression fittings.
PEX is flexible, usually colored (red, blue, or white), and uses crimp or push-fit connectors.
Galvanized steel is heavier, gray with threaded fittings and potential rust.
Accurate identification guarantees selection of correct adhesives, soldering, clamps, or replacement sections for a reliable repair.
Assess Crack Size: Hairline, Split, or Burst
The inspector first distinguishes a hairline crack—thin, often slow-leaking and sometimes only visible under moisture— from larger failures that demand immediate attention.
A split runs along the pipe’s seam or length, producing a steady stream, while a burst is a catastrophic rupture with high flow and rapid pressure loss.
Correctly classifying the damage guides the urgency and repair method.
Hairline Crack Identification
How small is a hairline crack and why does its size matter for repair choices? A hairline crack is a narrow surface fracture, often less than 0.5 mm wide, that may leak slowly or only under pressure. Identifying it guides temporary sealing versus scheduled replacement.
Visual inspection, dye tests, and feeling for dampness help confirm size and location. Record findings before repair.
- Visual: look for fine lines, corrosion, or stress marks.
- Touch: run a dry finger for moisture or seepage.
- Dye test: apply colored water to reveal hidden paths.
- Monitor: note changes under varying pressure and time.
Burst Versus Split
Distinguish between a hairline, split, and burst by measuring width, length, and surrounding damage to determine urgency and repair method.
A hairline is a thin surface crack under 0.5 mm, often slow-leaking and manageable with clamps or epoxy.
A split runs along a seam or joint, typically several millimeters wide and longer; it may require coupling, sleeve repair, or section replacement.
A burst is a full-thickness rupture with rapid flow, visible deformation, or multiple fractures; it demands immediate shutoff and usually pipe replacement.
Prioritize safety, isolate the supply, document dimensions, and choose a repair rated for pipe material and pressure.
Essential Tools and Materials for Emergency Repair
When facing a cracked pipe, having a compact kit of reliable tools and materials is essential to stop leaks quickly and safely. A prepared responder relies on simple, multiuse items: adjustable wrench, pipe cutter or hacksaw, rubber repair tape, and a roll of plumber’s tape.
Also useful are a portable shutoff tool, bucket, rags, and a flashlight. Protective gloves and eye protection reduce injury risk. Keep materials organized in a waterproof bag for fast access. Inspect tools periodically and replace degraded tape or adhesives to guarantee readiness for emergency intervention.
- Adjustable wrench
- Rubber repair tape
- Pipe cutter/hacksaw
- Plumber’s tape
Temporary Fixes by Pipe Type (Quick Options)
For different pipe materials, quick temporary fixes prioritize compatibility and speed: rubber repair tape or a silicone patch works well on metal and PVC, a hose clamp plus rubber sleeve suits small-diameter copper or galvanized lines, epoxy putty adheres to most hard surfaces for a short-term seal, and compression fittings can stop leaks on threaded joints.
For plastic pipes, use specially rated repair tape or a plastic epoxy; avoid solvents that worsen cracks.
For cast iron, wrap with heavy-duty tape and support the pipe to reduce stress.
Always depressurize, dry the area, and monitor the repair until permanent replacement occurs.
Quick Fixes for Hairline Cracks
How small can a hairline crack be before it warrants only a temporary fix? Assessment focuses on leak rate, pipe material, pressure, and accessibility. For minor weeps or non-structural surface fissures, immediate temporary actions stabilize the situation until permanent repair. Recommended quick responses prioritize stopping water, reducing pressure, and preventing spread.
- Dry and clean the area, then apply epoxy putty for small, slow leaks.
- Use a fast-setting liquid sealant for pinhole leaks inside accessible sections.
- Reduce system pressure and isolate the affected line.
- Monitor frequently and schedule a permanent repair promptly.
Wrap and Seal: Repair Tape, Rubber Sleeve, and Clamps
Apply wrap-and-seal methods when a localized crack or pinhole needs a durable temporary-to-semi-permanent repair without replacing the pipe immediately.
Clean and dry the area thoroughly; remove corrosion and roughen smooth surfaces for adhesion.
For small leaks, self-fusing silicone repair tape stretched tightly around the pipe creates a pressure-resistant seal.
For larger gaps or irregular shapes, position a rubber sleeve over the damaged section and secure it with stainless steel hose clamps, tightening evenly to avoid distortion.
Confirm compatibility with pipe material and system pressure, then test under controlled conditions and monitor periodically for signs of deterioration or re-leakage.
Using Epoxy Putty for Cracked Pipe Repairs : Step-by-Step
Begin by cutting or kneading the epoxy putty per manufacturer instructions until the color is uniform and the curing agents are fully mixed.
Clean and dry the pipe; remove corrosion and loose debris.
Press the putty firmly over the crack, shaping a smooth, continuous patch that overlaps pipe edges by at least 1/2 inch.
Allow full cure time before restoring pressure; test for leaks with a slow fill and visual inspection.
- Surface prep: sand and wipe with solvent.
- Application: compact and feather edges.
- Curing: follow temperature and time limits.
- Testing: pressurize slowly and recheck.
When a Repair Clamp or Coupling Is the Right Fix
A repair clamp suits small, localized cracks or pinholes where pressure containment and a quick stopgap are the priorities.
For larger breaks, offset joints, or when pipe alignment is uncertain, a coupling—chosen for material compatibility and pressure rating—provides a stronger, longer-term solution.
Selecting the right option depends on crack size, pipe material, operating pressure, and whether a temporary or permanent fix is meant.
When Clamp Works Best
Repair clamps and couplings work best when the damage is localized, pipe alignment is intact, and the surrounding material can maintain a seal under system pressure.
They suit small longitudinal or pinhole leaks, predictable through-wall holes, and failures on accessible straight runs.
Clamps provide rapid containment without cutting out sections, minimizing downtime.
Corrosion or extensive wall loss, misaligned joints, or branching fittings reduce effectiveness.
Proper surface cleaning and correct clamp size guarantee a reliable seal.
Inspect for pressure ratings and compatibility before installation; temporary emergency patches differ from permanent repairs and may require later replacement.
- Localized, accessible leaks
- Intact alignment
- Adequate surrounding support
- Compatible materials and pressure rating
Choosing The Right Coupling
When selecting a coupling, match the device to the leak type, pipe material, and operating pressure to guarantee a durable seal.
A coupling suits longitudinal cracks, pinholes, or short removed sections where alignment is intact.
Choose materials compatible with pipe composition—stainless or brass for metal, rubber-sheathed stainless for mixed joints, and plastic-specific couplers for PVC or CPVC.
Verify pressure ratings exceed system peak, and pick compression, slip, or repair couplings based on access and required movement allowance.
Make certain correct diameter and gasket type for temperature and chemical exposure.
Proper installation torque and surface preparation complete a reliable, lasting repair.
Cutting Out and Replacing a Damaged Pipe Section
Before cutting, the area around the damaged section should be isolated, drained, and dried to prevent water damage and guarantee a clean joint.
The defective segment is measured, marked, and removed with a suitable cutter, keeping cuts square.
Debris and burrs are deburred and the remaining pipe ends are inspected for cracks or corrosion.
Replacement involves sizing the new piece to match and dry-fitting before final installation.
Proper support and alignment prevent stress.
Pressure is restored only after leak-testing the repair.
- Measure twice, cut once.
- Use the correct cutter for material.
- Deburr and clean pipe ends.
- Support and align before final fit.
Join PEX Fast: Replacement Section and Fittings
To connect a replacement PEX section quickly and reliably, the installer selects compatible fittings and the correct joining method—crimp, clamp, or push-fit—based on pipe type and local code.
The cut pipe ends are squared, deburred, and measured for proper insertion depth.
For crimp or clamp connections, rings are positioned evenly and tightened with calibrated tools; excess ring placement or under-crimping risks leaks.
Push-fit fittings require full engagement and a tactile click; verify by pulling gently.
After assembly, the installer pressures the system and inspects joints for seepage.
Documentation of fittings and test results completes the repair record.
Soldering Copper Pipes Safely and Quickly
Before soldering copper, the technician dons appropriate safety gear and prepares the joint by cleaning and applying flux to guarantee a reliable bond.
They choose the correct solder and apply heat with controlled technique to melt the solder into the joint without overheating the pipe.
After completing the weld, the joint is allowed to cool naturally while the operator inspects for proper flow and a solid seal.
Safety Gear And Prep
How should one prepare to solder copper pipes without risking injury or property damage? One must clear the area, shut off and drain the water, and ventilate the space. Appropriate PPE includes flame-resistant gloves, safety glasses, and a respirator if ventilation is limited. Heat-resistant pads protect nearby surfaces; a fire extinguisher should be within reach. Confirm combustible materials are removed or shielded.
- Inspect workspace and remove combustibles.
- Shut off water, drain lines, and dry joints.
- Wear flame-resistant gloves, eye protection, and a mask.
- Place heat shields, pads, and a nearby extinguisher.
Proper Flux And Solder
When selecting flux and solder for copper plumbing, match the alloy and flux type to the pipe material and service (potable water versus drainage) to guarantee a reliable, code-compliant joint.
Use lead-free solder (typically 95/5 tin/copper or 99.3/0.7 tin/silver) for potable systems; stay clear of rosin-core electrical solders.
Choose an acid-free, water-soluble or no-clean flux labeled for plumbing to promote capillary flow without contaminating drinking water.
Apply flux sparingly to cleaned, deburred fittings.
Wipe excess after soldering to prevent corrosion.
Store materials in a cool, dry place and replace flux that has darkened or crusted.
Heat Technique And Cooling
With properly matched flux and solder in place, attention shifts to applying heat and managing cooling to form a strong, leak-free joint.
The torch flame should heat the fitting evenly, targeting the fitting rather than the solder. Heat until flux sizzles and solder flows on contact; withdraw flame and feed solder evenly. Avoid overheating—charred flux or scorched fittings signal excessive heat.
Allow the joint to cool naturally; quenching with water can create stress and cause cracks. After cooling, wipe residual flux and inspect for complete fillet formation before pressurizing the system.
- Use medium, steady flame
- Heat the fitting, not solder
- Let solder wick evenly
- Cool naturally
PVC Repairs: Primer, Glue, and Slip Couplings
In repairing a cracked PVC pipe, proper surface preparation and the correct use of primer and solvent cement are essential to restore a watertight joint; slip couplings provide a straightforward way to replace a section without removing adjacent fittings.
The pipe ends should be clean, dry, and deburred. Apply primer to soften PVC, then apply solvent cement evenly to both pipe and fitting, joining with a quarter-turn for full contact. Hold until initial set.
For short repairs, cut out the damaged section and slide in a slip coupling sized to the pipe. Test under low pressure before returning to normal service.
Compression Fittings vs. Glued Joints : When to Use Each
Choose the right joint type based on the pipe material, accessibility, expected pressure, and permanence of the repair.
Compression fittings suit metal and some plastic pipes where disassembly or temporary fixes are needed; they clamp mechanically and work without solvents.
Glued joints (solvent-welded) create permanent seals for PVC and CPVC, offering greater leak resistance under steady pressure but require clean, accessible surfaces and curing time.
Match method to longevity, pipe type, and space constraints.
Consider temperature, chemical exposure, and code requirements before choosing.
- Pipe material compatibility
- Accessibility and space
- Required permanence
- Pressure and temperature ratings
Pressure-Test the Repair Before Restoring Water
The repaired section should be isolated from the rest of the system to prevent accidental flow.
A pressure gauge is then attached and the segment is pressurized to the appropriate test level.
The pressure is monitored for a set period to confirm there are no leaks before water service is fully restored.
Isolate The Section
With valves or temporary plugs set just beyond the repaired area, the isolated section can be filled and sealed off from the rest of the system for testing.
The technician slowly introduces water or air, watching for pressure loss and inspecting joints and the repair surface.
Isolation prevents leaks elsewhere from skewing results and allows focused observation.
Any seepage is traced and corrected before full system reactivation.
Once confirmed stable, the barriers are removed and water is restored gradually.
Proper isolation reduces risk and verifies repair integrity without involving unrelated piping.
- Confirm upstream/downstream closures
- Use compatible plugs or stop valves
- Vent trapped air
- Observe for minutes before proceeding
Apply A Pressure Gauge
After isolation is confirmed and no external leaks are observed, a pressure gauge is attached to the sealed section to verify repair integrity before restoring service. The gauge connects to an access port or threaded fitting; adapters may be used for different pipe materials.
The isolated volume is slowly pressurized to a value equal to or slightly above normal operating pressure, then held steady. Readings are observed for any drop over a specified interval—typically five to fifteen minutes.
A stable pressure indicates a sound repair. Any significant decline prompts re-inspection, tightening, or reapplication of the repair method before reopening the line.
Monitor For Leaks
Regularly, the repaired section is pressure-tested before water service is restored to confirm there are no hidden leaks or seal failures.
The tester isolates the repaired segment, applies recommended pressure, and holds it for the specified dwell time while monitoring gauges and fittings.
Visual inspection complements gauge readings; any drop in pressure or visible seepage indicates an incomplete seal or material failure.
If stable, slowly reintroduce system pressure and observe connections downstream.
Document results and label the repair date for future reference.
If pressure falls, depressurize, disassemble the fitting, and repeat repairs.
- Confirm isolation valves closed
- Apply test pressure gradually
- Watch gauge for pressure hold
- Inspect all joints and fittings
Common Mistakes That Make Temporary Fixes Fail
Often, temporary repairs fail because they rely on quick fixes that ignore the underlying cause of the leak.
Common mistakes include using incompatible materials, applying patches to corroded or wet surfaces, and neglecting proper surface preparation.
Over-tightening clamps, relying solely on tape or sealant, and skipping pressure testing lead to re‑failure.
Temporary plugs left indefinitely degrade under thermal cycling and water chemistry.
Improperly aligned or unsupported joints introduce stress that reopens cracks.
Failure to clean or dry the area prevents adhesion.
Each mistake shortens the lifespan of a stopgap repair, increasing risk of sudden, larger leaks and more extensive damage.
When to Call a Plumber : 7 Signs You Need Pro Help
Call a plumber when indicators go beyond simple, temporary fixes — persistent leaks, sudden drops in water pressure, discolored or foul-smelling water, recurring clogs, visible pipe corrosion or bulging, unexplained increases in the water bill, or water damage that spreads despite patching all warrant professional assessment.
A professional evaluates root causes, safety risks, and permanent repair options that DIY attempts may miss. Waiting can escalate damage, mold, and costs. Homeowners should document symptoms and shut off affected valves before the visit. Prompt expert intervention preserves structural integrity and water quality.
- Hidden leaks detected by moisture sensors
- Structural or ceiling damage
- Gas-scented plumbing incidents
- Repeated repair failures
Preventive Steps to Avoid Future Cracked Pipes
Preventive maintenance reduces the chance of future cracked pipes and limits repair costs when issues do arise.
Regular inspections identify corrosion, loose fittings, and pressure irregularities early.
Insulating exposed pipes prevents freeze damage; adding heat tape in cold climates adds protection.
Maintain consistent indoor temperatures and shutoff valves to reduce stress from thermal expansion.
Replace degraded sections with appropriate materials and use pressure regulators to avoid burst-inducing surges.
Keep drains clear to prevent backpressure and chemical buildup.
Schedule professional plumbing checks every few years.
Document repairs and dates to track component lifespan and plan timely replacements.
Conclusion
Investigating whether swift DIY fixes truly solve a cracked pipe reveals a deeper lesson: temporary measures can halt damage, yet often conceal underlying failure. In practice, quick shutoffs, patches, and tests buy time but do not always address corrosion, pressure problems, or poor installation. Recognizing this truth urges homeowners to treat emergency repairs as interim solutions, document conditions, and seek professional evaluation when warning signs persist—balancing immediate action with prudent long-term care.