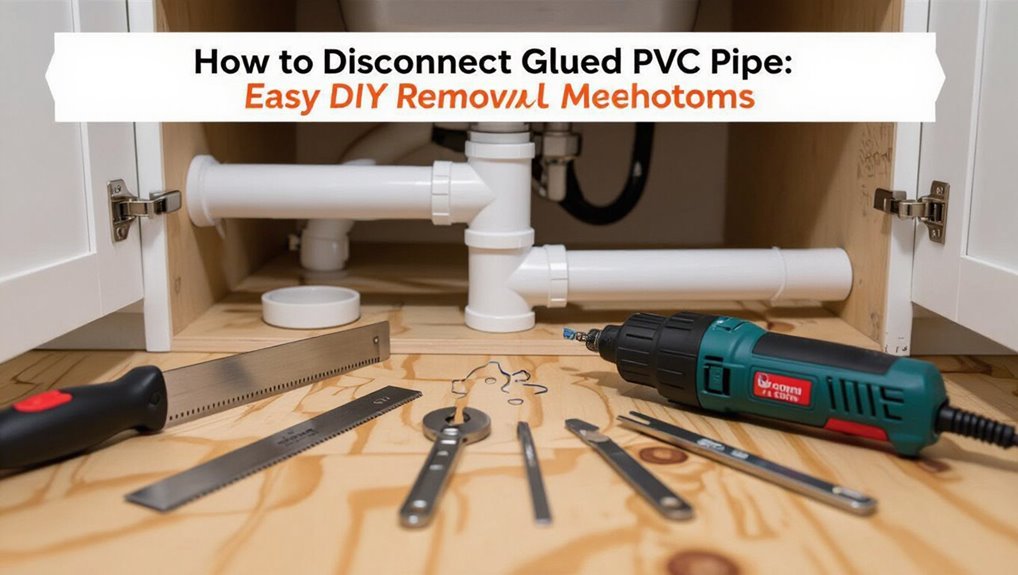
How to Disconnect Glued PVC Pipe: Easy DIY Removal Methods
To disconnect glued PVC pipe, follow these key steps for effective and safe removal:
- Identify the Material: Confirm that you are dealing with PVC and ensure the system is shut off and drained.
- Cut the Pipe: Use hand tools to cut the pipe just outside the fitting for reliable removal.
- Soften the Joint (Optional): If you want to preserve the fittings, gently apply heat or use a manufacturer-approved debonder to soften the joint.
- Safety First: Always work in a well-ventilated area and wear appropriate eye and chemical protection.
- Prepare for Reassembly: After cutting, deburr and clean the ends of the pipe before reassembly or replacement.
Continue reading for detailed step-by-step methods, safety notes, and repair options.
Quick Answer: Safely Disconnect Glued PVC Pipe
Cut through the joint carefully: disconnecting glued PVC pipe requires softening or removing the solvent-weld bond without damaging surrounding fittings or the piping system.
The safest approach uses heat, mechanical separation, or chemical softeners selectively.
Heat applied with a heat gun softens the joint for twist-and-pull removal but risks warping if overheated.
Mechanical cutting through pipe just outside the fitting preserves the fitting but sacrifices pipe length.
Chemical debonders can weaken the bond where rated for PVC; use only manufacturer-recommended products with ventilation and PPE.
After separation, inspect fittings for cracks and clean mating surfaces before reassembly or replacement.
Who This Guide Is For and What You’ll Learn
This guide is designed for homeowners, DIYers, and tradespeople who need to separate solvent-welded PVC without replacing entire assemblies.
It outlines the tools, safety precautions, and step-by-step methods suited to different joint types and conditions.
Readers will learn when each method is appropriate and how to minimize damage to pipes and fittings.
Who Should Try This
Who is this guide suited for and what will be learned?
This guide targets homeowners, DIY enthusiasts, and maintenance personnel facing glued PVC joints needing removal. It suits readers comfortable with basic hand tools and willing to follow safety precautions. Professionals seeking a quick refresher may also find it useful, though trade plumbers might prefer specialized techniques.
The content is not for those lacking tool access, unwilling to isolate plumbing systems, or handling pressurized, industrial, or hazardous chemical lines—such situations require licensed intervention. Readers will be prepared to assess suitability and attempt safe, stepwise disassembly on typical residential PVC plumbing.
What You’ll Learn
Having established the appropriate audience and limitations, the reader will learn specific, practical steps for safely disconnecting glued PVC joints in typical residential systems.
The guide outlines required tools, protective measures, and inspection criteria to determine reuse viability.
It details non-destructive methods (heat, solvent application, mechanical separation) and when controlled cutting is preferable.
Safety protocols for ventilation, fire risk, and pressure isolation are emphasized.
Troubleshooting covers stuck fittings, joint damage assessment, and repair options.
Expected outcomes, time estimates, and tips for preserving adjacent plumbing are presented to help readers plan and execute removal with minimal collateral damage.
When to Remove Glued PVC Versus Replace the Section
Decision-making hinges on the extent of damage, weighing whether a localized crack or widespread failure is present.
Cost versus repair must be compared, including material and labor expenses for patching against replacing a section.
Accessibility and time constraints affect feasibility, since hard-to-reach joints or urgent repairs may favor section replacement over painstaking disassembly.
Extent Of Damage
When evaluating glued PVC, the extent of damage dictates whether individual fittings can be removed or an entire section must be replaced. Assess cracks, splits, and crushed areas: hairline cracks near joints might allow cutting back to sound pipe and installing new fittings, while longitudinal splits or shattered hubs typically require replacing the whole run.
Check chemical or heat damage that softens walls; compromised material cannot reliably hold solvent welds. Corrosion or internal scaling that thins walls necessitates replacement.
Consider accessibility: hidden or heavily braced segments often favor section replacement. Document damage extent before choosing removal or replacement.
Cost Versus Repair
In weighing whether to remove glued PVC fittings or replace an entire run, the comparison hinges on labor time, material cost, long-term reliability, and access difficulty.
Decision-makers should itemize parts, couplings, primer, cement, and replacement pipe costs versus hourly labor or DIY time.
Removing fittings can save material expense but risks compromised joints and repeated work; full replacement increases upfront cost yet restores uniform integrity and reduces leak likelihood.
Consider projected service life, availability of matching pipe, and warranty implications.
When repair complexity, joint count, or nonstandard fittings rise, replacement often yields better value despite higher immediate expenditure.
Accessibility And Time
After comparing cost and long-term reliability, the next factor is how access and available time affect the choice between removing glued PVC fittings and replacing a section.
Limited access — tight crawlspaces, buried runs, or fixtures close to walls — often makes removal impractical; cutting and replacing a section is faster and less risky.
When fittings are reachable and time permits, careful heat, solvent, or scoring methods can preserve existing pipe and reduce waste.
Emergency situations favor quick replacement.
Project scope, tool availability, and skill level determine the best approach: choose the method that minimizes downtime while ensuring a reliable, leak-free joint.
Check Pipe and Cement Type (PVC, CPVC, ABS; Solvent vs Primer)
Before attempting separation, identify the pipe material and the type of cement used, because PVC, CPVC, and ABS require different solvents and heat tolerances and some joints were assembled with primer plus solvent cement while others may have been bonded with a heavy-bodied cement.
The inspector then notes visual cues: color, wall thickness, and presence of purple primer. Recommended actions include:
- Match material (white PVC, cream CPVC, black ABS) to compatible solvent or heat method.
- Look for primer staining—indicates solvent cement was used.
- Heavy-bodied cement suggests stronger mechanical resistance.
- When uncertain, test a hidden section before committing to full separation.
Shut Off and Drain the Line Before You Work
Before attempting to separate glued PVC, the water supply to the affected section should be shut off to prevent flow.
Any remaining pressure in the line must be released by opening a downstream faucet or a convenient drain.
Confirming the line is both off and depressurized reduces leaks and injury risk during disassembly.
Turn Off Water Supply
With the home’s water supply shut off at the appropriate valve, the section of PVC to be worked on can be safely depressurized and emptied; closing the main or local shutoff prevents sudden flow and reduces the risk of water damage while removing glued joints.
The homeowner confirms valve position, not relying on visual alone, and notifies occupants. Any downstream fixtures are opened to verify flow cessation. Remaining water is routed to a bucket or drain.
Steps to follow:
- Locate main and branch shutoffs.
- Close chosen valve fully.
- Open nearby taps to bleed lines.
- Check for leaks before cutting or disassembly.
Release Remaining Pressure
After the shutoff valve is confirmed closed and fixtures are opened to relieve flow, any remaining pressure and trapped water must be released from the section to be worked on.
The technician should open low drains or nearby faucets, then loosen a clean joint or removable cap at the lowest point of the isolated segment to allow trapped water to escape.
Wear eye protection and have a bucket and rags ready.
If gas or compressed-air lines are involved, follow specific purge procedures and ventilate the area.
Confirm zero pressure by gently attempting to open a test fitting; no steady flow should occur before cutting or disassembling.
Tools and Supplies You’ll Need for Every Method
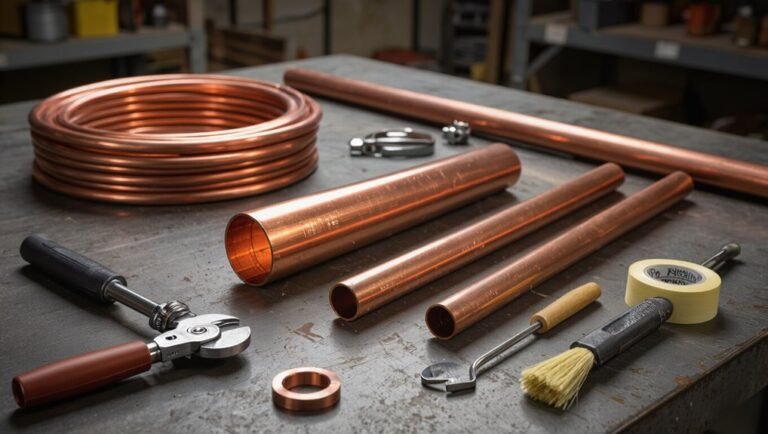
What tools and supplies are essential for disconnecting glued PVC pipe depends on the chosen method, but every approach requires a basic set: eye protection and gloves, a tape measure and marker, a utility knife, a heat source (propane torch or heat gun) or PVC cutter depending on technique, a deburring tool or sandpaper, replacement fittings and solvent cement, and a bucket or rag to catch residue.
Additional items streamline work and reduce damage:
- Measuring and marking tools for accurate cuts.
- Cutting implements: saw, cutter, or rotary tool.
- Heating gear or chemical solvent for joint release.
- Cleaning and finishing supplies: brushes, primer, sandpaper.
Safety Gear and Precautions
Before any work begins, appropriate personal protective equipment—gloves, eye protection, and a respirator when using solvents or heat—should be worn to prevent chemical exposure and burns.
The work area must be well ventilated to disperse fumes from solvent cements, primers, or heated PVC.
These precautions reduce immediate hazards and help guarantee a safer disconnection process.
Personal Protective Equipment
Personal-protection measures are essential when disconnecting glued PVC pipe because solvents, flying debris, and pressurized fluids can cause eye, skin, and respiratory injuries; appropriate PPE—safety glasses or goggles, chemical-resistant gloves, long sleeves, and a respirator when solvent fumes are present—reduces those risks and should be selected based on the specific materials and tools in use.
The practitioner inspects gear for damage, fits respirators to the face, and uses gloves rated for solvents. Foot protection and hearing protection are added when cutting or using power tools. Follow manufacturer PPE guidance and replace compromised equipment promptly.
- Eye protection
- Glove selection
- Respiratory protection
- Foot and hearing protection
Work Area Ventilation
Adequate ventilation complements personal protective equipment by removing solvent fumes, dust, and airborne particulates generated when cutting or disassembling glued PVC pipe.
The work area should be outdoors when possible; otherwise open windows and doors to create cross-ventilation. Use a box or oscillating fan to direct airflow away from the worker and toward an exterior opening.
For enclosed spaces, employ a portable exhaust fan or respirator rated for organic vapors and particulates. Avoid running powered tools in poorly ventilated areas.
Monitor odor and dizziness; stop work and ventilate further if symptoms occur. Keep ignition sources away from solvent vapors.
How Solvent-Welded PVC Joints Are Made
Solvent-welded PVC joints are formed by chemically softening the mating surfaces with a solvent cement that temporarily dissolves the pipe and fitting material, allowing the parts to fuse into a single, continuous piece as the solvent evaporates and the polymer rehardens.
The process requires cleanly cut, deburred surfaces, proper application of primer where specified, and correct alignment during dwell time to guarantee a uniform bond.
Typical steps include:
- Clean and deburr both mating surfaces.
- Apply primer to soften the PVC where required.
- Brush solvent cement evenly onto pipe and fitting.
- Assemble, rotate slightly, and hold until initial set.
How Solvent-Cement Joints Fail and When They Separate
Under certain conditions, solvent-cemented PVC joints can lose integrity and separate when the chemical bond is compromised by improper preparation, incorrect cementing technique, mechanical stress, or environmental degradation.
Failure often begins at weak solvent-softened zones where inadequate priming, contaminated surfaces, or incorrect cement application prevent full polymer fusion.
Thermal expansion, freeze-thaw cycles, vibration, or overload can introduce cracks or peel mating surfaces.
UV exposure and chemical attack embrittle plastic, reducing bond strength.
Joints may fail immediately if assembly errors occur or gradually as fatigue and environmental effects accumulate.
Visible leakage, joint gaps, or sudden disconnection indicate separation and loss of sealing function.
Choose the Right Method for Your Situation
Which approach fits best depends on the joint condition, the pipe material, and access constraints. The decision balances preservation of surrounding pipe, safety, tools available, and whether fittings must be reused. Consider these factors before proceeding:
- Joint integrity — brittle, partially bonded, or fully fused dictates intervention severity.
- Pipe composition — CPVC, schedule 40 PVC, or reinforced varieties respond differently to heat and mechanical force.
- Accessibility — open workspaces allow larger tools; tight spaces favor compact or chemical options.
- Reuse requirements — preserving fittings requires gentler methods; disposal permits more destructive removal.
Select the least invasive effective option that guarantees a reliable repair.
Method 1 : Cut Out Only the Glued Joint
Method 1 focuses on removing only the glued joint and the minimum adjacent pipe so the original fittings can be preserved or replaced with short repair sections; it is appropriate when the bond is localized and the surrounding pipe is sound.
The operator measures and marks cut lines just outside the glued area, guarantees the system is drained and depressurized, and protects nearby surfaces.
Using a cutting tool appropriate for confined spaces, the glued segment is excised cleanly.
Remaining ends are deburred and prepared for coupling or solvent-weld repair sleeves.
This conserves material, limits disruption, and simplifies reassembly when executed carefully.
Use a Hacksaw to Cut Glued PVC Cleanly
The writer outlines the necessary tools and safety gear for cutting glued PVC with a hacksaw, including a fine-tooth blade, a vise or clamps, gloves, and eye protection.
Best practices for a clean cut are summarized, such as marking the cut line, securing the pipe, and using steady, even strokes to avoid binding.
Brief tips on blade selection and maintaining a square, burr-free edge complete the introduction.
Tools And Safety Gear
For cutting glued PVC cleanly, a sharp hacksaw and basic protective gear are essential: a fine-tooth blade mounted in a comfortable frame, safety glasses to shield eyes from plastic shavings, work gloves to protect hands and improve grip, and a dust mask if sawing indoors.
The operator should gather tools and guarantee a stable workspace, clamping the pipe to avoid movement.
Additional items increase control and safety:
- Measuring tape for accurate cut placement.
- Marker to scribe the cut line.
- Bench vise or pipe clamp to secure the tube.
- A small file or deburring tool to smooth the cut edge.
Cutting Technique Tips
When positioned securely in a vise, the glued PVC should be cut with steady, even strokes using a fine-tooth hacksaw blade held nearly vertical to the pipe.
The operator should mark the cut line clearly, keeping sight of the mark while sawing to avoid wandering.
Apply light forward pressure; let the blade do the work to prevent cracking or melting. Periodically back the blade to clear chips and cool the edge.
Maintain a consistent angle and pace to produce a square, burr-free end.
After cutting, deburr and square the edge with a file or sanding block before test-fitting or solvent cleaning.
Use a Tubing Cutter on Small-Diameter PVC
Using a tubing cutter on small-diameter PVC offers a quick, clean alternative to saws, especially in tight spaces where precision matters. The tool rotates around the pipe, scoring and tightening until the piece separates with minimal burrs. It suits 1/8″ to 1″ lines and reduces vibration that can damage fittings.
Steps emphasize steady pressure and full rotations; lubrication prevents sticking. After cutting, a light deburr with a file or deburring tool guarantees a smooth join for reassembly or solvent removal.
Use protective eyewear and clamp the pipe to maintain alignment throughout the cut.
- Measure and mark cut.
- Secure pipe.
- Rotate cutter evenly.
- Deburr and clean.
Use a Rotary Tool (Dremel) to Free a Glued Connection
Before using a rotary tool to separate a glued PVC joint, the operator should put on eye protection, gloves, and a dust mask to guard against plastic shards and fumes.
The rotary tool is then used with a cutting or grinding bit to score a ring around the socket or fitting, keeping the cut shallow and controlled.
Once the groove is complete, gentle twisting or prying usually releases the bond without damaging the remainder of the pipe.
Safety Gear First
Always wear appropriate personal protective equipment: safety goggles, a dust mask or respirator rated for fine particulates, hearing protection, and cut-resistant gloves.
The operator should verify fit and condition before using a rotary tool on glued PVC. Secure work area, guarantee adequate lighting, and keep bystanders clear. Confirm power tool guards and bits are appropriate and sharp. Disconnect power when changing accessories.
Be aware of vibration and heat; pause to cool components and rest hands.
- Inspect PPE fit and integrity.
- Position workpiece to prevent slippage.
- Use correct RPM and bit type.
- Keep a first-aid kit nearby.
Cut Around Joint
With PPE in place and the workpiece secured, the operator marks the joint and selects a rotary tool bit suited for PVC—typically a carbide or fine-grit cutting wheel—to score around the glued connection.
The tool is run at moderate speed, guiding steady pressure to cut a shallow groove circumferentially without penetrating deeply into the fitting body.
After scoring, the groove is deepened incrementally until the joint weakens.
A flat chisel or pry tool is then used gently to separate the pieces, avoiding torque that could crack remaining pipe.
Finally, burrs are deburred and the cut edges inspected for reuse or disposal.
Method 2 : Heat to Soften Adhesive (When It Works)
When gentle heat is applied to a glued PVC joint, the solvent-weld bond can sometimes soften enough to allow separation without damaging the pipe.
This method is selective: it works best on recent joints and moderate glue use.
The technician warms the joint gradually, tests for pliability, then twists and pulls once the bond yields.
Precautions preserve pipe shape and fittings.
- Assess joint age and glue amount.
- Apply gradual, even heat until plastic becomes slightly flexible.
- Test movement periodically; avoid overheating.
- Use mechanical leverage only after adhesive softens.
Use a Heat Gun Safely Without Warping PVC
For controlled softening of a glued PVC joint, the technician uses a heat gun at low settings and moves it steadily to prevent hotspots that can warp the pipe.
Heat is applied in short passes, maintaining a safe distance and monitoring for surface gloss changes indicating softening.
Protective gloves and eye protection are worn; ventilation is guaranteed to avoid inhaling fumes.
The technician tests flexibility periodically with pliers, stopping if the pipe becomes tacky or deforms.
Temperature control, even motion, and patient incremental heating allow adhesive to soften for separation without compromising pipe shape or integrity.
When Not to Use Open Flame on PVC
Often, using an open flame on PVC is inappropriate and unsafe because direct heat can rapidly burn the plastic, release toxic fumes, and irreversibly weaken or deform the pipe.
Practitioners should avoid flames in confined spaces, near flammable materials, or when ventilation is inadequate.
Consider alternatives that control temperature and limit damage.
- Risk to health: combustion emits hydrogen chloride and other toxic gases.
- Structural harm: uneven burning causes warping and loss of pipe integrity.
- Fire hazard: sparks or embers can ignite surrounding materials.
- Code and insurance: open flame methods may violate local regulations and void coverage.
Method 3 : Mechanical Separation With Pipe Splitters
After ruling out open flames because of toxic fumes and material damage, mechanical separation with pipe splitters offers a controlled, non-thermal way to remove glued PVC joints.
This method relies on scored compression: a splitter wheel or blade tracks around the pipe, cutting through the solvent-welded layer without crushing the pipe body.
It suits repairs where preserving fittings or lengths is important. Operators choose appropriate splitter size, secure the pipe, and make steady passes until the bond releases.
Results depend on joint age, adhesive penetration, and access. Mechanical separation minimizes chemical exposure and structural heat effects compared with thermal or solvent approaches.
How to Use a PVC Pipe Splitter Safely
When preparing to use a PVC pipe splitter, the operator should prioritize a secure setup and personal protection to prevent injury and damage.
The operator inspects the splitter for sharp blades, tight fastenings, and correct blade alignment.
The pipe is supported horizontally and clamped to prevent rotation; the splitter is centered over the glued joint.
Operation proceeds with steady, even pressure, avoiding sudden twists that can shatter PVC.
After separation, burrs are removed and debris cleared before testing the joint.
- Wear gloves and eye protection.
- Verify blade condition.
- Clamp pipe securely.
- Apply controlled pressure only.
Use Wedges and Prying Techniques Without Cracking PVC
Carefully insert thin, tapered wedges into the glued joint and apply gentle, even prying force to separate PVC without inducing stress cracks. The technician uses plastic or hardwood shims rather than metal to reduce point loading. Work around the circumference, advancing wedges incrementally and alternating positions to distribute stress.
Light taps with a rubber mallet can seat wedges; avoid heavy blows. If the joint resists, pause and reassess for solvent-weld overlap or mechanical fasteners; excessive force increases fracture risk. Clean debris from the gap as separation proceeds.
Once loosened, remove pipes with steady axial motion, inspecting for deformation before reuse.
Method 4 – Chemical Debonders: What Works and Safety
Often, technicians turn to chemical debonders to weaken or dissolve solvent-welded PVC joints when mechanical methods fail or risk damage. These products vary in formulation and effectiveness; selection depends on joint type and exposure limits. Safety precautions are critical: ventilation, gloves, eye protection, and avoiding ignition sources.
- Read product data sheets for compatibility and required dwell time.
- Apply sparingly to avoid spreading into system interiors.
- Allow full penetration; test joint gently after recommended time.
- Neutralize and flush residues per manufacturer instructions to prevent contamination or long-term degradation.
Choose and Use a PVC Cement Remover Correctly
After considering chemical debonders, attention turns to selecting and applying a PVC cement remover that matches the joint type and service conditions.
The writer recommends confirming compatibility with schedule and solvent-weld formulations, consulting manufacturer data for dwell time, temperature range, and VOC considerations.
Small test areas validate effectiveness without damaging pipe.
Apply sparingly with a brush or applicator, allow specified penetration, then pry or twist joint using appropriate tools.
Ventilate and wear gloves and eye protection; contain runoff.
Rinse per instructions and inspect bond; repeat if necessary.
Dispose of residues and containers following local hazardous-waste rules.
Method 5 : Grind or Shave Adhesive Inside Fittings
When solvent or heat methods have failed or are unsuitable, grinding or shaving the cured cement from inside a fitting provides a mechanical alternative that removes material without stressing the joint.
The worker uses hand tools—files, chisels, scrapers—or slow, controlled power tools with appropriate guards to pare adhesive layers.
Care prevents damage to the fitting wall and pipe seating.
- Inspect access and choose a flat, narrow tool.
- Support the assembly to avoid flexing.
- Remove adhesive gradually, checking fit frequently.
- Clean debris and test dry-fit before reassembly or replacement.
Use a Rotary File to Remove Adhesive Inside a Fitting
A rotary file offers controlled abrasion for removing cured solvent weld from inside a PVC fitting.
The operator should wear eye and respiratory protection and secure the fitting before starting to prevent slips and dust inhalation.
Controlled, light passes with the file prevent gouging the pipe while gradually restoring a clean mating surface.
Rotary File Safety Tips
Using a rotary file to remove cured solvent cement from inside a PVC fitting requires strict attention to safety and technique.
The operator should wear eye protection, a dust mask or respirator rated for fine particulates, and hearing protection.
Secure the fitting in a vise or clamp to prevent movement.
Maintain a firm, two-handed grip on the tool and keep fingers clear of the bit.
Work in a well-ventilated area and avoid open flames.
Inspect the rotary file and cord before use and stop if vibration increases or unusual noise occurs.
- PPE: goggles, respirator, ear protection
- Secure workpiece
- Two-handed control
- Inspect tool
Effective Filing Technique
To remove cured solvent cement from inside a PVC fitting, the operator should employ steady, controlled passes with a rotary file, starting with light pressure to establish the tool’s path and gradually increasing only as needed to guarantee against gouging the substrate. The file should follow the fitting’s contour, rotating at moderate speed to crop adhesive without melting plastic.
Rotate the workpiece or reposition the tool to maintain consistent contact angles. Clear debris frequently with a brush or compressed air to inspect progress. Stop when the joint face is flat and the socket depth is restored. Finish with fine abrasive to smooth edges and guarantee fit.
How to Salvage and Test Fittings After Removal
After removal, inspect each fitting visually and tactilely for cracks, delamination, or softened material that indicates chemical or heat damage; small surface residue can often be cleaned, but structural flaws warrant replacement.
Next, clean fittings with a soft brush and isopropyl alcohol, avoiding aggressive abrasives that alter dimensions.
Dry and measure inner and outer diameters against mating parts to confirm fit.
Perform a low-pressure air or water leak test before reuse.
If tests pass, apply fresh primer/cement per manufacturer instructions and monitor joints after initial curing for seepage or loosening.
- Clean and dry thoroughly
- Dimensionally verify fit
- Leak-test under low pressure
- Rebond and monitor
When to Cut Out and Replace an Entire Pipe Section
Decide to cut out and replace a pipe section when inspection reveals irreversible damage—cracks, extensive chemical or heat degradation, severe warping, or internal corrosion—that compromises structural integrity or creates persistent leaks despite attempted repairs. The operator evaluates extent, access, and fixture impact; multiple repaired joints, recurring failures, or collapsed runs justify full replacement. Safety, water shutoff, and contamination risks factor in. Time-and-cost comparisons often favor replacement for aged or brittle systems. Visualize damaged segments, joints, fastenings, and surrounding framing to plan cuts and supports.
| Damaged area | Visual cue |
|---|---|
| Crack length | Hairline to gaping |
| Wall thinning | Translucent spots |
| Warping | Ovalized pipe |
| Joint failure | Bond separation |
Install Replacement PVC After Removing Glued Joints
With the glued joints removed and the cut ends clean and square, the installer dry-fits replacement PVC to confirm alignment, length, and clearance before applying primer or solvent cement. The process emphasizes measured cuts, proper socket depth, and unobstructed flow paths.
Necessary steps include:
- Verify pipe orientation and slope to maintain drainage or pressure requirements.
- Trim and chamfer edges for full socket engagement.
- Test assembly for interference with nearby fixtures or supports.
- Mark reference lines on pipe and fitting to guarantee correct rotational positioning during final bonding.
Final preparation focuses on cleanliness and accurate fit prior to adhesive application.
Join Repaired PVC to Existing Pipe With Adapters
Selecting the correct adapter is the first step to guarantee diameter and material compatibility between the repaired and existing PVC.
The pipe ends should be cleaned, squared, and lightly chamfered before dry-fitting the adapter.
Once glued or mechanically fastened, the connection must be secured and pressure-tested for leaks.
Choose The Correct Adapter
When reconnecting a repaired section of PVC to the existing run, choosing the correct adapter guarantees a secure, leak-free joint; the adapter must match pipe diameter, wall type (schedule or thin-wall), and connection style (glue, slip, or threaded) to be effective.
The installer verifies measurements and inspects fittings for pressure rating and material compatibility. Common scenarios call for conversion adapters between PVC and CPVC or threaded metal; solvent-weld adapters differ from slip-on couplings and require proper priming.
Consider flow restrictions and burial conditions when selecting.
- Match diameter and wall spec
- Confirm connection type
- Check pressure/material ratings
- Use conversion adapters when needed
Prepare Pipe Ends
How should the pipe ends be prepared to guarantee a reliable bond between the repaired section and the existing run? The procedure focuses on clean, square cuts, smooth edges, and correct priming. Deburr the cut surfaces with a knife or reamer. Sand lightly if rough. Dry-fit the adapter to confirm alignment and depth. Wipe away dust and oils with a cloth and solvent if needed. Apply sealant to both pipe and adapter socket, then apply cement evenly around the pipe end. Insert with a quarter-turn twist to spread cement. Hold briefly for initial set before moving to the next step.
| Task | Purpose |
|---|---|
| Deburr & sand | Ensure smooth fit |
| Clean & dry-fit | Remove contaminants |
| Prime & cement | Create solvent weld |
Secure Connection And Test
With the repaired section seated and adapters dry-fit to confirm alignment, the technician bonds the new assembly to the existing run using properly primed and cemented joints, ensuring each connection is fully inserted and rotated a quarter turn to spread solvent evenly.
After allowing recommended cure time, the system undergoes a pressure test to verify integrity. Observations focus on joint seams, adapter faces, and nearby fittings for leaks or solvent wicking.
If leaks appear, the technician isolates the section, cuts out the faulty joint, and repeats the prep and bonding process.
Recommended checklist:
- Verify alignment and seating.
- Apply primer and cement correctly.
- Wait full cure time.
- Perform pressure test.
Test the Repair for Leaks and Pressure Safety
Verification of the repair’s integrity begins by slowly reintroducing water and monitoring for leaks and pressure stability. The technician observes joints, listens for hissing, and checks fittings with a dry tissue for small weeps. Pressure gauges, if available, confirm system steadiness and detect drops. After a short pressurized interval, visual inspection and tactile checks guarantee no hidden seepage. If clear, normal flow resumes; document readings and time tested. If any concern arises, isolate the section and re-evaluate adhesives, seating, or supports before full restoration.
| Item inspected | Action taken |
|---|---|
| Joint seams | Visual check |
| Fittings | Tissue test |
| Gauge | Record reading |
| Flow | Observe |
| Support | Verify stability |
Troubleshooting: Pipe Still Stuck After Trying a Method
If a glued PVC joint remains stuck after initial attempts, the condition of the pipe and fittings should be assessed carefully for cracks, softening, or excessive solvent-cement buildup.
If the damage is limited and the fitting remains intact, controlled mechanical removal using pipe wrenches, strap wrenches, or a tubing cutter may free the joint. If mechanical methods risk further damage, the installer should consider replacing the affected section instead of forcing the connection.
Assess Damage Carefully
Before proceeding further, the installer should closely inspect the joint and surrounding pipe for cracks, splits, deformation, softened areas, or adhesive residue that indicate compromised material. The assessment guides whether repair, replacement, or gentler techniques are appropriate.
Document visible damage, note leak risk, and avoid applying force to weakened sections. Consider accessibility for replacement and downstream components that could be affected.
If corrosion or solvent attack is suspected, isolate the system and consult codes. Use the checklist below to prioritize actions and determine if professional help is warranted.
- Surface cracks or crazing
- Deformation or softened walls
- Adhesive residue extent
- Leak or pressure risk
Try Mechanical Removal
Apply controlled mechanical methods when chemical or heat techniques have failed to free the glued PVC joint.
The technician first secures the assembly and protects surrounding surfaces.
A pipe cutter or hacksaw is used to remove a short section near the joint, minimizing damage to the mating piece.
For buried or fixed systems, a rotary tool with a carbide bit or oscillating multi-tool carefully abrades the solvent-welded bead until parts separate.
Clamps and a pipe vice provide steady leverage; avoid excessive twist force that cracks PVC.
After separation, clean mating surfaces and prepare for proper replacement or re-bonding.
Troubleshooting: Fitting Cracked During Removal – Fixes
When a PVC fitting cracks during removal, assess the break immediately to determine whether the joint can be repaired in place or requires replacement; small hairline fractures near the hub sometimes accept solvent-weld patches or epoxy, while larger splits or damage to the socket face necessitate cutting back to a sound section and installing a new fitting or coupler.
Evaluate leak risk, accessibility, and surrounding stress. Consider temporary containment to stop water. Follow these steps:
- Clean and dry the area to inspect crack length.
- Apply appropriate epoxy or solvent patch for minor fractures.
- Cut out and deburr for major damage.
- Install new fitting or coupler, then pressure test.
How to Avoid Common Mistakes That Cause Leaks
To prevent leaks after disconnecting glued PVC, attention to preparation, correct materials, and proper technique is essential.
Inspect pipe ends for burrs, cracks, or uneven cuts; clean and deburr with a utility knife or file to guarantee full contact.
Use primer and solvent cement specified for the pipe diameter and pressure rating; avoid substitutes.
Apply primer, then even cement, twisting joint slightly for uniform distribution and following manufacturer open‑time.
Allow recommended cure before pressure testing.
Avoid overcutting, misalignment, or insufficient drying time.
Proper measurements and steady work minimize gaps, preventing common leak causes.
Cost and Time Comparison of Removal Methods
Across common removal methods—cutting and replacing sections, using heat to soften joints, and mechanical separation with cutters or saws—cost and time vary predictably with pipe diameter, joint access, and the extent of damage.
Generally, cutting and replacing small accessible runs is fastest and low-cost for materials and basic tools.
Heat methods require more time and caution, modest tool expense, and slower cure or cleanup.
Mechanical separation can be quick but needs specialized tools for larger diameters, raising cost.
Consider labor, disposal, and replacement fittings when comparing total expense and schedule.
- Cutting: low cost, short time.
- Heat: moderate cost, moderate time.
- Mechanical: higher cost, variable time.
- Complex runs: highest cost, longest time.
When to Call a Plumber Instead of DIY
After weighing cost and time for cutting, heat, and mechanical separation, a homeowner should recognize situations better handled by a professional rather than attempting DIY glued PVC disconnection.
Complex systems with unknown joints, inaccessible fittings behind walls or under slabs, or installations tied to main water or sewage lines warrant a plumber.
Signs of mold, persistent leaks despite temporary fixes, or when local codes require certified repairs also justify calling a pro.
Limited tools, uncertain skill with solvent or heat methods, and potential for extensive collateral damage are further reasons.
A plumber guarantees proper disassembly, replacement, testing, and code-compliant restoration.
How to Dispose of Old PVC and Used Solvents Responsibly
When removing glued PVC and the solvents used to join it, homeowners should treat both as materials that require deliberate disposal rather than ordinary trash.
Local regulations often classify solvents as hazardous; used cans and contaminated rags belong at household hazardous waste (HHW) events or designated facilities. PVC cuttings may be recyclable if clean, but soiled pieces should follow municipal guidance.
To minimize risk, store materials in sealed, labeled containers until drop-off, and never pour solvents down drains.
- Contact local HHW program for drop-off rules.
- Keep solvent containers sealed and labeled.
- Separate clean PVC for recycling.
- Use approved hazardous waste sites only.
Maintenance Tips to Prevent Future Glued-Joint Problems
By establishing a simple schedule of inspection and preventive care, homeowners can greatly reduce the likelihood of glued-joint failures in PVC systems.
Regularly check joints for hairline cracks, discoloration, or stiffness; address minor leaks promptly to prevent deterioration.
Make sure pipes remain supported to avoid stress on glued connections and replace worn hangers.
Protect PVC from prolonged UV exposure with paint or insulation and avoid chemical exposure that softens cement.
Use compatible cleaners and avoid over-tightening nearby fittings.
Document inspections and repairs so patterns emerge, enabling targeted updates before failures occur.
Quick Checklist: Step-by-Step Plan to Disconnect Glued PVC
Beginning with a clear workspace and the right tools guarantees a safer, faster disconnection of glued PVC joints. A concise plan reduces mistakes and limits damage: inspect the joint, isolate fluid, and choose heat, solvent, or mechanical methods. Follow a measured sequence and confirm parts fit before reassembly.
- Turn off and drain system; mark orientation.
- Protect surrounding surfaces; wear gloves and eye protection.
- Apply chosen method (heat, PVC solvent, or cutting) with controlled force.
- Clean mating surfaces, deburr, test fit, and re-glue or cap as needed.
Conclusion
When tackling glued PVC, careful technique and safety cut repair time and waste while protecting the system. About 30% of DIY plumbing failures stem from improper joint removal, so following correct shutoff, drainage, and cutting or heat methods greatly reduces leaks and rework. Dispose of solvents responsibly and call a pro for complex or high-pressure systems. With routine inspection and proper primer/cement use, future glued-joint problems are far less likely.