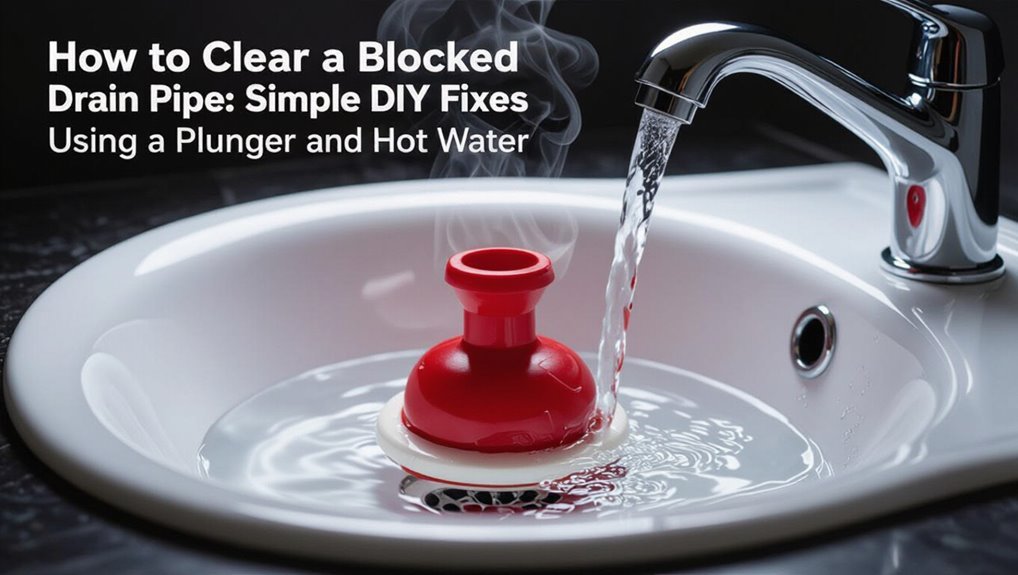
How to Clear a Blocked Drain Pipe Fast: Simple DIY Fixes
Key Takeaway: Quick Steps to Clear a Blocked Drain Pipe
To quickly clear a blocked drain pipe, first confirm the blockage by checking for slow or standing water in nearby fixtures. Here’s a simple step-by-step approach:
- Remove Visible Debris: Start by clearing any visible obstructions in the drain.
- Use a Plunger: Employ a cup or flange plunger, applying steady pumps to create suction.
- Flush with Hot Water: After plunging, follow up with hot water to help dislodge any remaining blockage.
- If Plunging Fails: Use a hand snake or hair auger to reach into the trap, extract any debris, and retest the drain.
- Safety First: Always wear gloves, protect surrounding surfaces, and avoid harsh chemicals, especially on older pipes.
If these steps do not resolve the issue, it may be time to consult a professional plumber for further assistance.
Quick Test: Is Your Drain Actually Blocked?

How can one tell whether a slow sink or toilet is truly blocked or merely experiencing reduced flow? One observes water behavior: a full basin that drains extremely slowly suggests a partial blockage; gurgling sounds or bubbles when another fixture runs indicate trapped air from a clog.
Flows that worsen only at certain times point to gradual buildup rather than a sudden obstruction.
For toilets, persistent low flush power and backing up into the bowl signal a clog. Testing with a plunger or pouring a measured amount of water reveals response: rapid, steady drainage implies reduced flow; standing water confirms a blockage.
The Fastest DIY Fix to Try First
First, the person checks for visible clogs at the drain opening and removes any hair or debris by hand or with gloves.
If that fails, a plunger is used to create pressure and dislodge the blockage.
As a next step, a drain snake is fed into the pipe to break up or extract deeper obstructions.
Check For Visible Clogs
Inspect the drain opening visually and with a flashlight to spot hair, soap scum, food debris, or other obvious obstructions that can be removed by hand or with simple tools like tweezers or a gloved finger.
Work methodically: clear visible debris, pulling straight to avoid pushing material further in. Use needle-nose pliers for stubborn clumps and a plastic pick for narrow gaps. Collect removed matter in a disposable container or paper towel.
Rinse periodically with hot water to check flow progress. If water drains slowly after visible debris is cleared, proceed to the next, slightly more involved remedy.
Use A Plunger
Grab a plunger and place it firmly over the drain to create a tight seal; the pressure changes produced by vigorous, controlled thrusts often dislodge common blockages like hair, grease, and soap scum.
The person using it should make certain nearby overflow openings are sealed or covered to maximize suction.
Use steady, rhythmic plunges rather than wild jerks; test progress by removing the plunger briefly to see if water drains.
For sinks, block the secondary drain.
If gurgling or slow drainage improves, run hot water to flush remaining debris.
Clean and disinfect the plunger after use.
Try A Drain Snake
Often the quickest DIY remedy is a drain snake: a flexible auger that can reach and extract clogs beyond the trap where plungers can’t.
The user feeds the snake into the drain, rotates its handle to catch debris, then withdraws the tool slowly.
Manual snakes suit sinks and tubs; longer power or drum snakes handle deeper blockages in main lines.
Wear gloves, eye protection, and avoid forcing the cable to prevent pipe damage.
After removal, flush with hot water to clear residue.
Clean and dry the snake before storage.
If resistance persists or plumbing is damaged, contact a professional plumber.
Quick Decision Guide: Plunger, Snake, or Call a Pro
The guide distinguishes situations suited to a plunger from those that require a professional. A plunger is recommended for simple clogs in sinks or toilets caused by hair or soft debris, while persistent backups, foul odors, or repeated blockages indicate a deeper problem.
When basic tools fail or sewer-line issues are suspected, calling a pro is the safer, faster option.
When To Use A Plunger
Decide quickly whether a plunger is the right tool by checking how the drain behaves: if water drains slowly or stops entirely but the blockage is limited to a single fixture (toilet, sink, or shower) with visible standing water, a plunger is the simplest first attempt.
Use a flange plunger for toilets and a cup plunger for sinks/showers. Make sure a tight seal, add enough water to cover the cup, and plunge vigorously in short bursts for 15–20 seconds. Test drainage; repeat up to three times.
If water remains stagnant or drains poorly after attempts, switch to a snake or consider other remedies.
When To Call A Pro
Weigh tool effectiveness against risk and time: use a plunger for single-fixture clogs with standing water, reach for a hand auger (snake) when plunging fails or clogs lie farther down the trap or drain line, and call a professional when multiple fixtures back up, there are recurring clogs, sewage smell or backups occur, visible pipe damage exists, or attempts at DIY have not cleared the blockage within a short, safe window.
A pro is appropriate when the cause is unknown, when sewer lines or tree roots are suspected, when specialized cameras or hydro-jetting are needed, or when liability, building codes, or warranty concerns make DIY inadvisable.
Tools to Gather Before You Start
Before beginning any drain-clearing task, gather a concise set of tools to guarantee the job proceeds smoothly: rubber gloves, a plunger suited to the fixture, a drain snake or auger, adjustable pliers, a bucket, and safety glasses.
Include a flashlight for inspection and replacement washers or a small parts container for removed hardware. Keep a wrench set and pipe tape nearby for minor disassembly and resealing.
Have paper towels or rags for quick cleanup. If using chemicals, place them aside until mechanical methods are tried.
Confirm all tools are clean, functional, and within easy reach before starting work.
Protect Your Hands and Surfaces
When working on a clogged drain, protecting hands and surrounding surfaces reduces injury and cleanup time: wear chemical-resistant gloves for any exposure to cleaners or sewage, and use a long-sleeved shirt or disposable coveralls to shield skin; lay down old towels or waterproof drop cloths around the fixture and place a shallow tray or bucket beneath joints before loosening them to catch drips.
Gloves should fit snugly; change torn pairs immediately. Eye protection prevents splashes. Clean tools after use and disinfect work surfaces. Dispose of contaminated towels properly. Keep pets and children away until the area is cleaned and ventilated.
- Wear chemical-resistant gloves
- Use eye protection
- Cover clothing and skin
- Protect floors with towels or cloths
- Contain and dispose of waste safely
Use Boiling Water Safely on a Clog
After protecting hands and surfaces, attention can shift to a simple, effective method: pouring boiling water into the clogged drain. Boiling water can dissolve grease and loosen mild soap scum or organic buildup.
Pour slowly in stages: pour one to two kettles, wait several minutes, then test flow. Repeat once if needed. Avoid use on PVC connections glued recently, fragile fixtures, or near caustic chemicals already applied.
Make sure the kettle is steady and splashes are prevented. If drainage does not improve after two attempts, stop and consider mechanical clearing or professional assessment to prevent damage or ineffective treatment.
Use Baking Soda + Vinegar to Flush a Clog
The baking soda and vinegar reaction loosens and lifts organic buildup by producing bubbling carbon dioxide and a mild acidic rinsing action.
To use it, a measured amount of baking soda is poured down the drain, followed by vinegar and a brief wait to allow the fizzing to act.
A final flush with hot (not boiling) water clears dislodged debris and rinses residue away.
How It Works
How does the baking soda and vinegar method clear a drain? The reaction produces carbon dioxide bubbles and effervescence that agitate soft blockages. Mild alkalinity from baking soda helps loosen greasy residue while vinegar’s acidity breaks down mineral deposits. Together they change texture and reduce adhesion, making debris easier to dislodge and flush with water. This is a gentle chemical-mechanical action rather than a forceful solvent. It’s most effective on fresh, organic clogs and as a maintenance measure to slow buildup over time.
- Fizzy bubbles lift and separate debris
- pH change loosens grease
- Mild acidity dissolves minerals
- Safe for most pipes when used sparingly
- Best for light, recent clogs
Step-By-Step Method
With the basic chemistry and typical effectiveness explained, practical steps follow to apply the baking soda-and-vinegar method safely and effectively.
Begin by removing standing water with a cup or bucket so the sealant and fizz contact the clog. Pour 1/2 cup baking soda directly into the drain, then add 1 cup white vinegar slowly. Cover the drain immediately to force reaction downward; wait 15–20 minutes. Boil one to two cups of water and pour it down to flush loosened debris. Repeat once if necessary. Finish by running hot tap water for several minutes to clear residues.
How to Plunge a Sink or Shower Effectively
Start by selecting the right plunger—cup plungers for sinks and flange plungers for showers and tubs—to guarantee a tight seal and efficient pressure transfer.
Position the plunger over the drain, make sure water covers the plunger lip, and form a firm seal.
Use steady, vigorous pumps: five to ten compressions, ending with a sharp pull to break the blockage.
Repeat as needed, checking flow between attempts.
Clean and disinfect the plunger afterward.
- Make sure adequate water depth for suction
- Block overflow or secondary drains first
- Maintain vertical alignment
- Limit aggressive force to avoid damage
- Test flow and repeat if necessary
Use a Manual Drain Snake (Hair Auger)
When a plunger fails to clear a clog, a manual drain snake (hair auger) provides direct access to trapped hair and debris by threading a flexible, coiled cable into the drain and mechanically retrieving or breaking the obstruction.
The user inserts the auger until resistance is felt, then rotates the handle to catch material.
Gentle push-pull motion helps dislodge buildup without damaging pipes.
Withdraw slowly, clearing debris from the coil into a disposable wipe or container.
Rinse the drain with hot water afterward.
For persistent or deep clogs, repeated passes may be necessary, but avoid forcing the auger against strong resistance.
When to Try a Wet/Dry Vacuum on a Clog
Curious whether a wet/dry vacuum can clear a stubborn clog? A wet/dry vacuum is appropriate when standing water is present, the clog feels loose (hair, debris), and access to the trap or grate is possible.
It’s less useful for deep pipe blockages or grease buildup. Use a vacuum with a tight seal, appropriate wet setting, and coarse filter or collection bag.
Exercise caution with electrical safety and avoid chemical residues. Indicators of likely success include recent slow drains, visible debris near the opening, and prior mechanical attempts that dislodged material.
- Standing water present
- Visible or near-surface debris
- Tight vacuum seal achievable
- No chemical cleaners used
- Not suitable for deep grease buildup
Remove and Clean a Sink Pop‑Up Stopper
If the vacuum approach fails or the clog appears near the sink drain, attention should turn to the pop-up stopper, a common trap for hair and gunk.
First, inspect the stopper: many unscrew or lift out after removing a retaining nut beneath the sink. Support the stopper while loosening linkages to prevent dropping.
Withdraw the stopper and clear accumulated debris with a brush, cloth, or needle-nosed pliers. Rinse parts and check the seat for buildup; use a cloth or mild brush to clean the drain opening.
Reassemble linkages, test movement and drainage, and tighten fittings without overtightening.
Clear a P‑Trap (Sink Trap) Step by Step
The writer lists the basic tools and safety gear needed before beginning work on a P‑trap, including gloves, eye protection, a bucket, and adjustable pliers.
Next, the procedure for removing the trap is described step by step, from shutting off water and loosening slip nuts to emptying and inspecting the U‑shaped pipe.
Finally, instructions cover cleaning and reassembling the trap, checking seals and testing for leaks.
Tools And Safety Gear
Before starting work on a P‑trap, assemble a compact set of tools and appropriate safety gear to avoid delays and hazards: slip‑joint pliers, a bucket, adjustable wrench, plumber’s tape, a small wire brush or old toothbrush, nitrile gloves, and safety goggles.
The helper guarantees workspace protection (towels or plastic), adequate lighting, and ventilation.
Tools should be within reach and checked for condition.
Safety gear is used whenever loosening fittings or handling debris.
Prepare a trash bag for waste and set aside replacement washers or seals to expedite reassembly if needed.
- Slip‑joint pliers
- Bucket and towels
- Adjustable wrench
- Nitrile gloves
- Safety goggles
Remove And Clean Trap
Loosen the slip nuts on the P‑trap and lower it carefully into the prepared bucket to catch water and debris. The technician inspects the trap for hair, grease, and buildup, removing clogs with pliers or a brush. Rinse the trap thoroughly, checking seals and threads for wear; replace washers if damaged. Reassemble, hand‑tightening slip nuts, then test with water for leaks. If flow remains slow, snake the tailpiece or clean the drain arm. Dispose of waste properly and sanitize the area.
| Task | Tool | Tip |
|---|---|---|
| Remove trap | Bucket | Catch water |
| Clean inside | Brush | Scrub sides |
| Inspect seals | Flashlight | Replace if cracked |
| Reassemble | Hands | Avoid overtightening |
| Test | Running water | Check leaks |
Unblock a Shower Drain Clogged With Hair
Clearing hair from a shower drain requires a focused approach that minimizes mess and avoids pipe damage.
A person first removes the grate, inspects visible hair, and uses a drain hook or needle-nose pliers to extract tangles. If blockage persists, a wet/dry vacuum or a biodegradable enzyme cleaner can dislodge remaining material. Avoid harsh chemical drain cleaners and aggressive tools that can harm pipes.
- Remove grate and assess blockage
- Pull hair gently with a hook or pliers
- Use a wet/dry vacuum for deeper clogs
- Apply enzyme cleaner overnight if needed
- Reassemble and run hot water to test
Clear a Bathtub Overflow and Overflow Plate Clog
With the tub’s overflow hole often hidden behind the decorative plate, sediment, hair, and soap scum can accumulate and restrict drainage; resolving this requires removing the overflow plate to access the channel and trap area.
Begin by turning off water, then unscrew or pry off the plate; keep screws safe.
Inspect with a flashlight and use needle-nose pliers or a flexible pick to extract debris from the overflow channel.
Flush the passage with hot water or a vinegar solution to dissolve buildup.
Reassemble the plate, test drainage, and repeat clearing if slow flow persists.
Replace corroded parts if needed.
Free a Toilet Drain That Won’t Flush
First, the water level in the bowl should be checked to determine if the blockage is partial or complete.
If the level permits, a plunger can create the pressure needed to dislodge most clogs. For stubborn obstructions, a toilet snake can reach and break up material further down the drain.
Check Water Level
In the event of a toilet that won’t flush, the homeowner should note the bowl’s water level before attempting plunging or other fixes. Evaluating the water level indicates whether the trap is full, partially blocked, or draining slowly. Low water suggests a partial siphon or leak; high water warns of a near‑blockage and risk of overflow. Observations guide safe next steps and whether to remove excess water first.
- Record whether water is low, normal, or high
- Check for slow surface drainage after stirring
- Smell for sewage odors as a clue
- Note recent toilet usage patterns
- Avoid adding more water if high
Use A Plunger
If the water level indicates a partial blockage rather than a leak or full obstruction, the next step is to use a plunger to clear the toilet drain.
A flange plunger fits toilets; position it over the bowl outlet creating a tight seal. Work steadily: push down gently to expel air, then pull up sharply to dislodge the clog. Maintain the seal and repeat 8–15 times, checking progress by allowing a small flush of water occasionally.
If water begins to drain, finish with a full flush. Disinfect the plunger and surrounding area after success to prevent bacterial spread and odors.
Try A Toilet Snake
When a plunger fails to clear the toilet, a toilet snake (also called an auger) is the next practical tool to reach and break up deeper obstructions; its flexible cable can navigate the trap and push through or retrieve the clog without removing the toilet.
The user feeds the cable into the bowl, rotates the handle to advance and break material, then retracts slowly to extract debris. Use gloves, eye protection, and gentle force to avoid porcelain damage. Clean the auger after use and disinfect the bowl. If resistance persists, call a professional.
- Choose the right length and head type
- Protect floors and hands
- Feed cable slowly, rotate steadily
- Pull back to retrieve debris
- Disinfect tool and bowl afterward
Use Enzyme Drain Cleaners Safely
Often chosen for kitchens and older plumbing, enzyme drain cleaners use biological catalysts to break down organic buildup without harsh chemicals. Instructions advise matching product to the clog type, following label dosing, and allowing several hours or overnight action. Use at recommended temperatures, avoid mixing with other cleaners, and store out of reach of children. Repeat treatments may be needed for persistent build-up. Protective gloves are suggested when pouring. Disposal should follow local guidance.
| Product type | Best for | Frequency |
|---|---|---|
| Liquid | Grease | Weekly |
| Powder | Hair | Monthly |
Why Avoid Harsh Chemical Drain Cleaners
While enzyme cleaners are gentler on pipes and safer for household use, many homeowners still reach for caustic chemical drain cleaners for speed or perceived effectiveness.
These products can corrode metal pipes, damage seals, and weaken PVC joints over time. They also pose acute hazards: skin burns, toxic fumes, and dangerous reactions if mixed with other household chemicals.
- Can damage plumbing materials and shorten system lifespan
- Risk severe chemical burns on contact
- Produce harmful vapors in confined spaces
- Interact dangerously with other cleaners (e.g., ammonia)
- Complicate professional repairs by altering residues
Remove Stubborn Kitchen Grease Clogs
Tackle kitchen grease clogs by breaking down the fatty buildup with heat, mechanical agitation, and solvent action rather than relying on harsh chemicals.
Begin by pouring boiling water in stages to soften grease, then use a plunger to dislodge semi-solid residues.
Remove and clean the trap to access concentrated deposits; scrape and wipe with paper towels.
For persistent buildup, apply a baking soda and vinegar reaction, follow with hot water, or use an enzyme-based degreaser that digests fats.
Finish by flushing with very hot water and running the disposal briefly if present.
Regular hot-water rinses prevent recurrence.
Handle Foreign Objects Lodged in Pipes
Identify the obstruction quickly and assess its location and size before attempting removal.
The homeowner should avoid plunging blindly; visible items near a trap can be removed with gloves and needle-nose pliers.
For deeper obstructions, a drain snake or a wet/dry vacuum may retrieve toys, jewelry, or toiletries without chemicals.
If retrieval fails, shut off water and remove the trap or call a plumber to prevent pipe damage.
Note signs of sharp or fragile items that could break and worsen the clog.
- Use gloves and eye protection
- Try pliers for reachable objects
- Snake for deeper reaches
- Wet/dry vacuum for suction retrieval
- Call a professional when unsure
Simple Venting Checks Homeowners Can Run
After removing or confirming that no foreign object is blocking a trap, the homeowner can move on to simple venting checks to guarantee proper airflow in the drainage system.
Inspect roof vents for visible obstructions like leaves, nests, or debris; use binoculars or a ladder safely. Listen for gurgling when fixtures drain, which suggests vent restriction. Open attic vent connectors to check for blockages where accessible. Run water in multiple fixtures simultaneously; persistent slow drainage in several fixtures indicates venting rather than isolated clog. If a vent appears blocked and inaccessible, contact a plumber rather than attempting risky rooftop removal.
Test Whether the Blockage Is Local or in the Main Line
Determine whether the obstruction affects a single fixture or the whole system by comparing how multiple drains behave when used together. One-by-one testing reveals scope: if only one sink backs up, the issue is local; simultaneous backups or slow drains throughout signal a main-line problem.
Observe water levels, gurgling, and toilet behavior during testing. Note times when symptoms appear, as intermittent clogging can still indicate a shared line. If multiple fixtures are affected, stop using water and call a professional.
- Run sinks separately and together
- Flush each toilet once
- Fill then drain tubs briefly
- Listen for gurgles
- Record which fixtures show issues
Inspect Your Drain With a Phone or Camera
A homeowner can use a phone camera or a small inspection camera to peer into accessible sections of the drain and identify visible blockages like hair, grease, or foreign objects.
Recording the footage helps confirm the blockage location and assess pipe condition, including cracks or corrosion.
Keeping periodic records makes it easier to spot changes over time and decide when professional inspection is needed.
Check With Phone Camera
How can a phone camera reveal the source of a blockage? A phone camera, ideally with a flashlight or a simple inspection scope attachment, lets a user peer into accessible pipes, traps, and around bends to locate obstructions without disassembly. It records images or video for closer review and to show if tools reached the clog. Users should avoid forcing the phone into tight fittings and sanitize afterward.
If visibility is poor, a small mirror or extra light helps. Findings guide next steps: plunging, snaking, or calling a pro.
- Use flashlight mode for better detail
- Record video for slow review
- Keep lens clean and dry
- Don’t force the phone into narrow pipes
- Note exact pipe location for repairs
Look For Visible Blockages
Where can a blockage be spotted visually, and what clues indicate its nature? The observer uses a phone camera or inspection scope to scan accessible traps, cleanouts, and visible pipe sections. Grease appears as a glossy film or congealed mass; hair forms mats; foreign objects show edges and shadows. Note odor and slow drainage as corroborating signs. Photograph each finding and mark depth from the access point. Avoid forcing the camera past resistance.
| Location scanned | Likely visual clue |
|---|---|
| Sink trap | Hair, soap scum |
| Cleanout access | Solid debris, objects |
| Exposed pipe | Grease coating, scale |
Record Pipe Condition Regularly
Regularly scheduled inspections with a phone camera or inspection scope document pipe condition over time and reveal gradual changes before they become blockages. The observer notes buildup, corrosion, hair, grease rings, and joint shifts, capturing timestamps and locations for each find.
Short videos and photos compare past and present, guiding targeted cleaning or timely repairs. Regular records reduce emergency calls and unnecessary replacements by distinguishing transient debris from structural issues.
Simple logs paired with imagery help prioritize interventions and communicate clearly with plumbers when professional help is needed.
- Take a clear photo or short video every few months
- Note date, location, and depth
- Compare images side-by-side
- Flag narrowing or new debris
- Share records with a professional
Clear Outdoor Drains and Gutter Blockages
When leaves, twigs, and sediment accumulate in outdoor drains and gutters, water flow is impeded and structures become vulnerable to overflow and damage.
Inspect gutters and drains after storms; remove visible debris with a gloved hand or gutter scoop.
Flush downspouts with a garden hose to confirm clear flow; use a nozzle to increase pressure or a plumber’s snake for compacted blockages.
Make certain drain grates are free and secure; replace damaged guards to prevent recurrence.
Dispose of organic waste responsibly.
Recheck during heavy rain to verify effectiveness and schedule seasonal cleanings to reduce emergency clogs and water-related harm.
Protect Older Pipes During DIY Clearing
After clearing outdoor drains and gutters, attention should shift to protecting older pipes during DIY clearing to avoid cracks, corrosion, and joint failure.
The homeowner should inspect visible piping for thin walls, rust, and loose fittings before applying forceful tools or chemicals. Use gentle methods: manual scooping, low-pressure water flushes, and biodegradable enzyme treatments. Pad contact points when using plungers or snakes, and limit metal auger use near joints. If corrosion or hairline cracks appear, stop and consult a professional to prevent collapse or leaks.
- Inspect for rust and loose fittings
- Favor gentle clearing methods
- Protect joints with padding
- Avoid metal augers on fragile sections
- Call a pro if damage shows
How to Document a Stubborn Clog for a Plumber
Before contacting a plumber, the homeowner should assemble clear, specific evidence of the stubborn clog: location and symptoms (slow drain, gurgling, backups), how long it has persisted, what clearing attempts were made and when, any visible signs (standing water level, odors, rust stains), and photos or short videos showing the problem and access points. The homeowner should label items, note dates/times, and describe tools or chemicals used. A concise summary speeds diagnosis. Example quick log:
| Item | Detail | Time/date |
|---|---|---|
| Location | Kitchen sink tailpiece | 2026-02-10 09:15 |
| Symptom | Gurgling, slow drain | Persistent 2 weeks |
When to Stop and Call a Professional Plumber
With the documentation prepared, the homeowner should recognize clear stopping points for DIY efforts and summon a professional when risks, time, or expertise exceed what reasonable home methods can address.
Persistent backups after reasonable attempts, foul odors suggesting sewer issues, visible pipe damage or leaks, recurring clogs within days, or reliance on excessive chemical cleaners all signal the need for a plumber. Professionals offer diagnosis tools, safe repairs, and liability coverage. Promptly calling prevents property damage, health risks, and higher repair costs. Keep notes and photos ready to speed service and confirm clear communication about prior steps taken.
- Persistent backups after attempts
- Strong sewage odors
- Visible leaks or damage
- Repeated clogs shortly after fixes
- Heavy chemical use without success
How Much Time Common DIY Methods Typically Take
In general, common DIY drain-clearing methods take from a few minutes to a couple of hours depending on the technique and severity of the clog.
Superficial blockages cleared with plungers or manual removal often finish within 5–20 minutes.
A sink or shower snake typically requires 15–45 minutes, including retrieval and testing.
Chemical or enzyme treatments may act over several hours to overnight; active effort is brief but full effectiveness can take 4–12 hours.
Baking soda and vinegar cycles usually need 30 minutes to a few hours.
Persistent or deep obstructions can escalate time and may ultimately demand professional intervention.
How to Minimize Mess and Odors While Working
Before beginning any drain-clearing task, the operator should put on durable protective gloves to prevent contact with contaminated water and debris.
Surrounding surfaces and vents can be temporarily sealed with plastic sheeting and tape to contain splashes and limit aerosol spread.
An appropriate odor neutralizer or baking soda solution may be used to reduce unpleasant smells during and after the work.
Wear Protective Gloves
Always wear durable, chemical-resistant gloves when tackling a blocked drain to protect skin from bacteria, harsh cleaners, and sharp debris.
They reduce direct contact with grime and neutralize odors by preventing skin absorption of residues.
Gloves also improve grip on slippery tools and fittings, making quick work safer.
After the job, remove gloves carefully to avoid contamination, rinse them outside the work area, and let them air-dry.
Replace disposable gloves after heavy contamination and inspect reusable pairs for tears.
- Choose nitrile or neoprene for chemical resistance
- Fit matters: snug but flexible
- Use textured palms for grip
- Dispose if punctured
- Sanitize hands after removal
Seal Off Surrounding Area
Wearing protective gloves, the person next prepares the work area to limit mess and odors by isolating the immediate surroundings. Lay down absorbent towels or plastic sheeting around the sink or drain, extending far enough to catch splashes.
Seal cabinet gaps with painter’s tape and crumpled paper to prevent debris falling into storage. Prop a small tray beneath fixtures to collect drips. Keep trash bags and a covered container nearby for removed material.
Open windows for ventilation, and close interior doors to contain any smells. Limit tools on the work surface to reduce accidental spills and simplify cleanup.
Use Odor Neutralizers
How can lingering smells be kept from overwhelming the workspace? Neutralizers reduce odors quickly and safely while repairs proceed. Professionals recommend choosing products labeled for drains and ensuring adequate ventilation.
Spray or gel neutralizers mask and chemically neutralize smells without harsh fumes. Natural options like vinegar or baking soda can be used when chemical sensitivity is a concern.
Placement and timing matter: apply before opening the pipe and reapply as needed.
- Use enzyme-based drain neutralizer for organic odors
- Keep windows open and fans on low
- Place activated charcoal nearby
- Avoid mixing cleaners with neutralizers
- Reapply after flushing the drain
Dispose of Removed Debris and Waste Safely
After debris and sludge are removed from the drain, personnel should segregate solids, greasy residues, and chemical contaminants into separate, clearly labeled containers to prevent cross-contamination and simplify disposal.
Solids and organic matter can be bagged and sealed for municipal waste where allowed; oily residues require absorbent pads or dedicated oily-waste bins.
Neutralized or diluted household cleaners must be stored apart and disposed per local hazardous-waste guidelines.
Avoid rinsing concentrated waste back into drains.
Use gloves and protective gear while handling containers, and transport wastes to approved collection points promptly.
Document disposal actions and retain receipts when required by local regulations.
Prevent Recurring Clogs With Simple Habits
Regularly adopting a few simple habits can greatly reduce the chance of future clogs and extend the life of plumbing systems.
A homeowner can prevent buildup through consistent, low-effort actions: scrape plates into trash, use hair traps in showers, run hot water after washing greasy dishes, avoid flushing non-degradable items, and inspect visible drain fittings monthly.
Small routines minimize interventions and save time.
When minor blockages appear, prompt attention prevents escalation.
Consistency matters more than occasional deep cleaning; these habits maintain flow, reveal early problems, and reduce reliance on mechanical or chemical methods while keeping plumbing functioning reliably.
Choose the Right Drain Maintenance Products
Preventive habits reduce the frequency of clogs, but choosing appropriate maintenance products completes a practical routine by addressing buildup that routines miss. Select enzyme-based cleaners for organic residue and mild odors; they work slowly but safely. Use biodegradable liquid degreasers for kitchen drains where fats accumulate. Avoid frequent use of harsh chemical caustics that can damage pipes and finish. A simple kit — plunger, flexible drain snake, and enzyme treatment — covers most needs.
| Product Type | Best Use |
|---|---|
| Enzyme cleaner | Organic buildup |
| Degreaser | Kitchen grease |
How Often to Perform Preventive Drain Cleaning
Typically, homeowners should schedule preventive drain cleaning every three to six months for high-use fixtures (kitchen sinks, shower/tub drains) and every six to twelve months for lower-use drains (guest bathrooms, basement floor drains).
Regular intervals reduce clogs, odors, and emergency repairs. Frequency depends on household size, hair or grease buildup, and appliance use.
Seasonal checks before holidays or after heavy use are prudent. Professional inspections once a year catch hidden issues early.
- Small households: lean toward yearly checks
- Large families: follow quarterly routines
- Homes with pets: increase frequency
- Rental properties: inspect between tenants
- After renovations: schedule a cleaning
Fix Slow Drains Caused by Mineral Buildup
When mineral deposits accumulate, they narrow pipe passages and slow water flow, often causing persistently sluggish drains despite routine clearing of hair and grease.
Mineral scaling from hard water adheres to metal and PVC, reducing diameter and increasing resistance.
A practical approach uses vinegar and baking soda: pour baking soda, follow with vinegar, wait 30–60 minutes, then flush with hot water to dissolve soft scale.
For tougher buildup, repeat or apply diluted muriatic acid cautiously, wearing protection and ensuring ventilation.
Consider a descaling chemical or consult a plumber for mechanical descaling or pipe replacement when chemical methods fail.
Conclusion
He stands over the sink like a tiny coronation judge, declaring war on filmy hair and rebel grease with a plunger as scepter. Pipes, portrayed as sulking serpents, grudgingly yield to the proper tools and elbow-grease diplomacy. A bemused mop applauds. Preventive rites—mesh guards, monthly scrubs, and sensible pouring—are sworn oaths. If the serpent snarls still, summon the plumber, the kingdom’s merciful executioner of stubborn blockages.