How to Clean Toilet Drain Pipe: Easy DIY Steps & Prevent Clogs
To effectively clean a toilet drain pipe and prevent future clogs, follow these straightforward DIY steps:
- Stop the Water: Shut off the water supply to the toilet to avoid overflow.
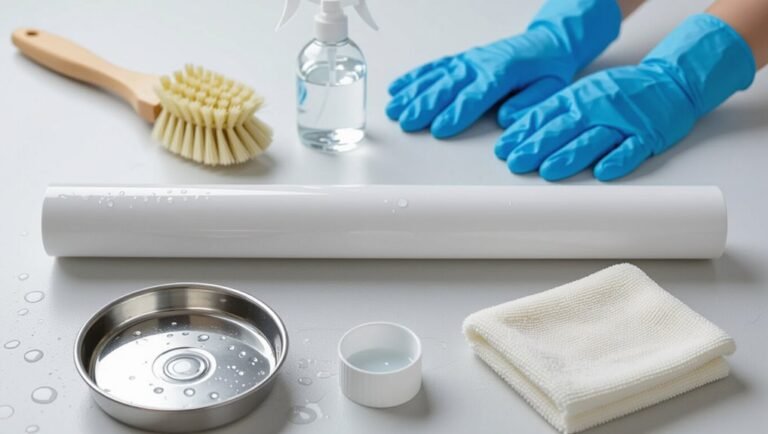
- Protect Your Space: Wear gloves and cover the floor to prevent any mess.
- Use a Flange Plunger: Start with a flange plunger, applying steady, controlled strokes. Test flush intermittently to check if the blockage is clearing.
- Add Dish Soap and Hot Water: If the drain is still slow, pour a cup of dish soap followed by hot (not boiling) water to help break down debris.
- Employ a Closet Auger: If the clog persists, carefully use a closet auger to break up or retrieve the blockage.
- Sanitize Tools: After clearing the drain, sanitize any tools used to maintain hygiene.
- Prevent Future Clogs: Consider using enzymatic cleaners and schedule routine snaking of the drain as preventative measures.
Key Takeaway: Regular maintenance and immediate action at the first sign of a clog can keep your toilet drain flowing smoothly. If problems persist, it may be time to consult a plumber for professional help.
Quick Fixes: Unclog Your Toilet in 5 Minutes
In minutes, a clogged toilet can be restored using a few simple techniques: a firm plunger, a handheld auger, or a quick hot-water flush often resolves common blockages without tools.
The person assesses water level, protects flooring with towels, and uses controlled plunges to dislodge obstructions.
If plunging fails, a compact auger reaches the trap to break up or retrieve material.
Pouring hot (not boiling) water can soften organic clogs.
After clearing, test several flushes and inspect for slow drainage or residue. Waste should be disposed of properly, and tools cleaned and dried before storage.
How to Tell If Your Toilet Drain Needs Cleaning
Regularly, homeowners can spot signs that a toilet drain needs cleaning by observing changes in flushing performance and water behavior.
Slow draining, partial flushes, and lingering water in the bowl signal restricted flow.
Gurgling noises during or after flushing indicate trapped air caused by blockages further down the drain.
Recurrent clogs, especially after simple fixes, suggest buildup on the pipe walls.
Foul or persistent odors near the toilet can point to trapped waste or biofilm.
Water backing into nearby fixtures when the toilet is used reveals a shared drain obstruction.
Noting these objective symptoms guides timely cleaning before major repairs.
Quick Safety Checks: Shut-Off Valve, PPE, and Water Control
Before any work begins, confirm the toilet shut-off valve functions, don appropriate personal protective equipment, and control water flow to reduce risk and simplify the job. The valve should turn smoothly; if stuck, stop and seek repair to avoid flooding.
PPE includes goggles, waterproof gloves, and a mask if mold or strong cleaners are present. Close the shut-off, flush to empty the bowl and tank, then hold the handle down to drain residual water.
Place absorbent towels around the base. Verify water remains off by running a quick refill check. Proceed only when supplies and safety steps are confirmed.
Tools to Unclog a Toilet Drain (Plunger, Auger, Gloves)
A selection of tools determines the effectiveness of an unclogging attempt: cup and flange plungers suit different trap shapes, while sink-style plungers are generally ineffective on toilets.
A toilet auger allows targeted reach past the trap without scratching porcelain, but correct technique is required to avoid damage.
Protective gloves and simple care practices prevent contamination and extend tool life.
Plunger Types And Use
Plungers come in several designs—cup, flange, and accordion—each matched to specific toilet shapes and clog types, so selecting the right one improves sealing and force transfer.
The cup fits flat-bottomed drains, creating a broad seal for partial blockages.
The flange extends into the outlet, ideal for standard toilets by preventing air escape.
The accordion delivers stronger, focused thrusts for stubborn clogs but requires careful control to avoid splashing.
Use firm, steady pumps with a sealed fit; avoid excessive force.
Sanitize the plunger after use and store it upright.
Replace worn rubber to maintain effectiveness.
Toilet Auger Techniques
Using an auger properly keeps most toilet clogs from escalating into costly plumbing calls.
A toilet auger, or closet auger, features a protective boot and long flexible cable designed to reach bends without scratching the bowl.
Insert the boot into the bowl, feed the cable slowly, then crank the handle to navigate the trap and dislodge obstructions.
When resistance is felt, extend and retract gently to break or hook debris, then pull material back out.
After clearing, flush to confirm flow.
Clean and dry the cable and boot before storage to prevent corrosion and odor.
Protective Gloves And Care
Often overlooked, protective gloves are essential when clearing a toilet drain because they shield hands from bacteria, chemicals, and sharp debris while providing grip and comfort during prolonged work.
Gloves should be chemical-resistant—nitrile or heavy-duty rubber—rather than thin latex, for puncture resistance and solvent protection.
Inspect gloves for holes before use and replace them if compromised.
After clearing, rinse gloves outside the bathroom, then wash with soap and water; consider disinfecting with diluted bleach if exposed to sewage.
Store gloves dry and away from sunlight to prevent degradation.
Proper glove selection and care extend usability and reduce contamination risk.
First-Line Unclog Methods: Plunger, Hot Water, Dish Soap
The first-line response to a clogged toilet typically starts with proper plunger technique to create a tight seal and apply steady pressure.
If plunging is ineffective, pouring carefully controlled hot (not boiling) water can help break up and move the obstruction. Adding a small amount of dish soap beforehand can lubricate the blockage and improve flow.
Plunger Technique Basics
A basic plunger technique is the quickest, least invasive first response to a partially clogged toilet. The user selects a flange plunger, makes certain of a water seal, and positions the rubber cup over the drain.
Gentle, steady pushes and pulls create pressure differentials rather than harsh jerks, preserving plumbing and avoiding splashes. Maintain the seal for several series of 10–15 strokes, pausing to check drainage between sets.
If water begins to move, continue until flow is normal. Clean and disinfect the plunger and surrounding area after use. If resistance persists, escalate to other methods or professional help.
Hot Water Method
Using hot water as a follow-up to plunging softens and loosens organic blockages, making them easier to flush without harsh tools.
After several firm plunges, pour a kettle of hot (not boiling) water into the bowl from waist height to add force and heat.
Allow it to sit several minutes so warmth penetrates the clog and pipe.
Repeat pouring if progress is slow, then attempt another plunge or flush gently.
Hot water reduces grease and tissue buildup that resists cold flow.
Exercise caution with porcelain and plastic components; avoid scalding temperatures to prevent cracks or damage.
Dish Soap Lubrication
Complemented by hot water, dish soap acts as a simple lubricant that breaks surface tension and helps greasy or fibrous obstructions slide through the trap. A measured amount (about a quarter to half cup) poured into the bowl coats clog material, reducing adhesion to porcelain and pipes.
After allowing several minutes for penetration, follow with a kettle of hot — not boiling — water poured from waist height to add force and heat. This combination often dislodges organic buildup and small paper or hair accumulations. If flow improves, flush to confirm clearance; repeat once if necessary before escalating to a plunger or snake.
Plunge the Toilet Correctly: Step-by-Step
With the plunger positioned properly over the drain opening, clear, purposeful strokes are most effective for dislodging clogs; the operator should form a tight seal, maintain steady pressure, and work in controlled pushes and pulls until water drains freely.
Begin with moderate plunges to avoid splashing, then increase force if resistance remains. Alternate between compressing and allowing suction to pull debris loose.
Check water level periodically to make certain adequate coverage for seal integrity. When flow resumes, finish with several gentle plunges to clear remnants.
Rinse the plunger, sanitize contact surfaces, and wash hands thoroughly after completing the task.
Use a Toilet Auger Like a Pro (When and How)
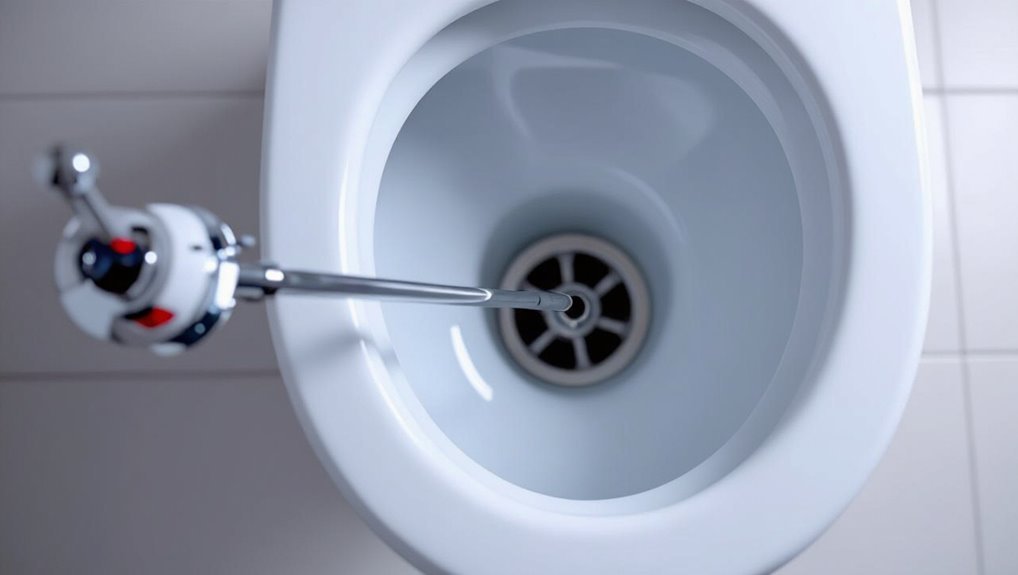
Often reserved for stubborn clogs that resist plunging, the toilet auger is a specialized tool designed to reach and break up obstructions within the trap and lower drain without damaging porcelain.
The user guides the rubber boot into the bowl, centers the tube, then feeds the coiled cable slowly while rotating the handle clockwise.
When resistance is felt, gentle in-and-out motions and continued rotation help snag or dislodge debris.
Withdraw the cable carefully to avoid splatter, wiping coils as they emerge.
Sanitize the auger and work area afterward.
Use gloves, eye protection, and patience; excessive force can harm the tool or pipe.
If the Auger Fails: Next Steps Before Removing the Toilet
When an auger fails to clear a blockage, proceed methodically before resorting to toilet removal: confirm water level and venting, try a longer or power-assisted cable if available, test the trap with enzyme or enzyme-free drain treatments that won’t harm porcelain, and use a wet-dry vacuum or a plumber’s inspection camera to localize the obstruction.
Next, attempt repeated gentle augering from varied angles and extract debris with a hooked grabber or disposable glove to avoid pushing the clog deeper. If chemical options are used, follow manufacturer guidance.
Document findings and photos for a plumber if professional help becomes necessary.
Remove a Toilet Safely for Deep Drain Cleaning
Before lifting the toilet for deep drain cleaning, the water supply must be shut off and the tank drained to prevent spills.
Next, the supply line is disconnected and the mounting bolts at the base are removed.
These steps allow safe access to the drain flange and trap for thorough cleaning.
Turn Off Water Supply
Shut off the toilet’s water supply at the shutoff valve to prevent tank and bowl refilling during removal.
The person verifies the valve is fully closed by turning clockwise until resistance is felt.
Next, flush the toilet to drain most water from the tank and bowl; remaining water can be removed with a sponge or small pump.
Place a towel and bucket beneath the tank to catch residual drips.
Inspect the supply line connection for tightness and close any secondary shutoffs if present.
Label the valve position if needed so it can be returned correctly after reinstallation and testing.
Disconnect Toilet Bolts
Loosen and remove the toilet’s floor bolts to free the fixture for lift-out; working from one side to the other, first remove the caps covering the bolts, then use a wrench to hold the nut while turning the bolt head or vice versa if access dictates.
After both bolts are disengaged, gently rock the toilet to break the wax seal, then lift straight up with two people to avoid cracking porcelain.
If bolts seize, apply penetrating oil and wait, or cut through studs as a last resort.
Keep bolts, nuts, and caps labeled for reassembly and set the toilet aside on cardboard.
Clean the Trap and Short Drain Sections by Hand
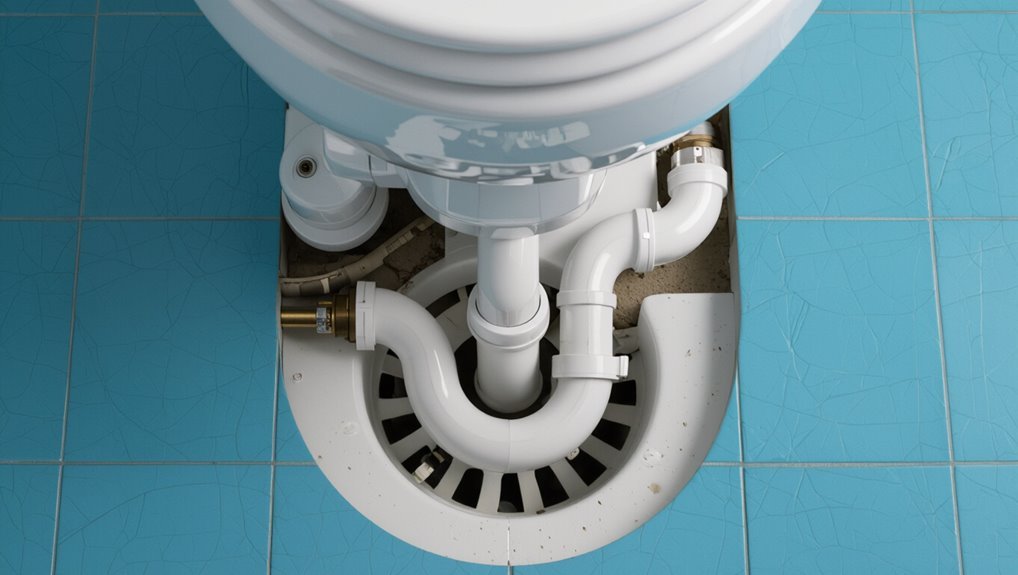
With the water supply secured and the tank emptied, attention turns to the trap and short drain segments beneath the bowl; these sections often harbor the hair, mineral deposits, and paper fragments that cause recurring clogs.
Wearing gloves, one inspects visually and removes visible debris by hand or with a small plastic scraper, placing waste into a disposable bag.
Stubborn deposits are loosened with a stiff brush or plumber’s snake tip, taking care not to damage porcelain.
After clearing, rinse the area with clean water, test flow by briefly refilling the bowl, and recheck for residual obstructions before reassembling.
Use Enzymatic Cleaners Safely (What Works and What to Avoid)
After manually clearing accessible debris from the trap and short drain, attention turns to enzymatic cleaners as a gentler alternative to caustic chemicals.
They use bacteria or enzymes to digest organic buildup—hair, grease, and toilet paper—without damaging porcelain, seals, or older plumbing.
Choose products labeled for drains and follow dosage and dwell-time instructions; many require overnight action.
Avoid mixing with bleach, acids, or lye-based cleaners, which kill enzymes and create hazardous reactions.
Do not expect instant results; repeat treatments may be necessary.
Store out of reach of children and pets and discard per label directions to maintain safety and effectiveness.
Clear Persistent Blockages in Main Soil Stacks (Multi-Story Tips)
When dealing with persistent blockages in main soil stacks of multi-story buildings, the first step is gaining safe access to clean-out points and inspection hatches.
Technicians then use appropriate tools—augers, high-pressure water jets, or sectional rodging—to remove compacted waste and roots without damaging pipe joints.
Finally, regular inspections and enzymatic or mechanical maintenance scheduled for the stack help prevent future buildups.
Accessing The Soil Stack
Accessing the soil stack in a multi-story building requires locating the cleanout or access point nearest the blockage and ensuring safe entry to prevent further backups or contamination. Technicians verify building plans, shut off relevant fixtures, and ventilate the area. Personal protective equipment and containment prevent sewage exposure.
Once the access is opened, inspection tools and cameras assess the issue without immediately engaging aggressive removal. Coordination with occupants and building management reduces risk.
Practical steps include:
- Confirming the correct cleanout and its orientation
- Isolating water sources on affected floors
- Using inspection cameras before probing
- Securing the area against odors and spills
Removing Stubborn Blockages
Clearing persistent blockages in a main soil stack demands a methodical, safety-first approach that minimizes disruption to multiple floors.
Professionals begin by isolating affected fixtures and protecting lower-level fittings. Mechanical rodding with a flexible, correctly sized drain auger removes dense obstructions; rotations should be steady to avoid pipe damage.
For severe clogs, sectional inspection via a compact sewer camera locates the blockage and informs tool choice. When chemical agents are considered, only low-corrosive, approved products are used sparingly and flushed thoroughly.
If resistance persists or structural concerns arise, stopping and calling a licensed plumber prevents costly mistakes and health risks.
Preventing Future Buildups
Regularly scheduled inspections and simple preventive measures markedly reduce the risk of recurrent blockages in multi-story soil stacks. Technicians recommend routine checks at access points, periodic rodding, and monitoring water flow from upper units to catch slow buildup early.
Building managers should track complaints, enforce proper disposal rules, and schedule preventive maintenance before problems escalate. For persistent blockages, coordinated flushing of the stack and targeted chemical treatment under professional guidance can restore function without invasive work.
Suggested preventive actions include:
- Inspect access points quarterly
- Educate residents on waste disposal
- Schedule annual professional rodding
- Record and respond to flow irregularities promptly
Prevent Clogs: Simple Maintenance Habits and Upgrades
Often overlooked, simple habits and modest upgrades can greatly reduce the likelihood of toilet drain clogs by preventing debris buildup and improving flow.
Regularly flushing with hot (not boiling) water and occasionally using a biological enzyme cleaner keeps organic matter breaking down. Avoid flushing non-degradable items and place a small trash bin nearby.
Install a high-efficiency or pressure-assisted toilet to improve waste transport, and fit a quality toilet seat and flapper to prevent leaks that separate solids.
Periodically inspect the bowl and accessible trap for slow drains, and run a plumber’s snake annually to remove early deposits before they become stubborn blockages.
When to Call a Plumber and What Details to Give Them
When should professional help be sought for a toilet drain issue? A plumber is recommended for persistent backups, foul odors without visible cause, sewage leaks, or repeated temporary fixes. Provide clear, concise details to speed diagnosis and repair.
- Exact symptoms (overflowing, gurgling, slow drain)
- Timeline and frequency of occurrences
- Recent changes or DIY attempts (chemicals, snaking)
- Visible damage or water around fixtures
Include property type, number of affected fixtures, and accessibility notes. Mention any sewage smells or health hazards. Clear photos or short videos further assist remote triage and proper dispatching of tools and parts.
Conclusion
After a jaunt through plungers, soap, and heroic hot-water pours, the reader is reminded that toilets are stubbornly literal: they accept only what belongs in them. Ironically, the simplest defenses—common sense, occasional enzyme treatments, and a polite respect for the shut-off valve—outperform dramatic DIY heroics. If clogs persist, calling a plumber is the mature climax. In short: be practical, be preventive, and accept that pipes demand fewer theatrics and more routine care.