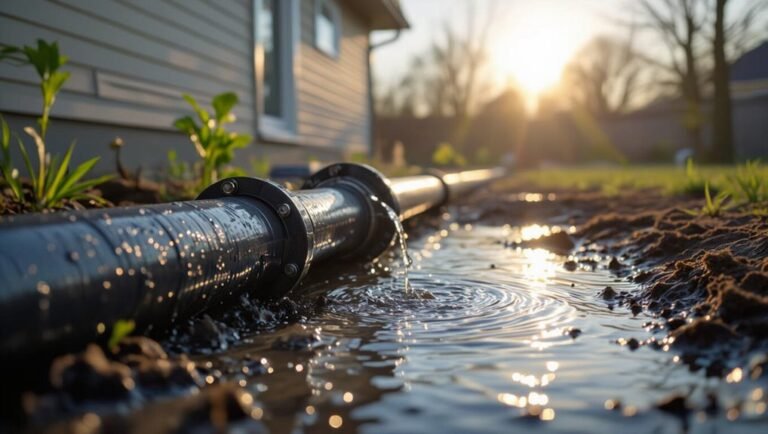
How to Clean Stove Pipes From Wood Burning Stove €” Quick Guide
To effectively clean stove pipes from a wood-burning stove, follow these key steps for a quick and safe process:
- Safety First: Allow the stove to cool completely. Protect your floors with a drop cloth and wear gloves, eye protection, and an NIOSH respirator to guard against dust and debris.
- Disassemble the Pipes: Carefully remove the lower sections of the stove pipe.
- Brush Cleaning: Use a correctly sized flexible wire brush attached to extension rods to scrub the interior of the pipes, removing loose creosote, ash, and any blockages.
- Vacuum Debris: Utilize a HEPA-rated ash vacuum to clean up any remaining debris from the stove and surrounding area.
- Inspect and Repair: Check all joints and seals for damage. Reseal or replace any compromised sections to ensure a proper seal.
- Test the System: After cleaning, light a small fire in the stove to test the draft and ensure everything is functioning correctly.
By following these steps, you can maintain your stove pipes, enhance draft efficiency, and reduce the risk of fire hazards.
What This Guide Covers and Who It’s For
This guide explains safe, effective methods for inspecting, cleaning, and maintaining stove pipes used with wood-burning and pellet stoves, and it identifies when professional service is necessary. It targets homeowners, caretakers, and DIY-minded maintenance personnel seeking concise, practical instructions and safety priorities.
Coverage includes basic inspection steps, tools and protective gear, creosote removal techniques suited to common stove pipe types, debris disposal, and post-cleaning checks. Excluded are advanced chimney reconstruction, commercial or industrial systems, and regulatory compliance beyond general safety.
Readers are advised to assess their comfort level and call certified technicians for unclear conditions or signs of structural damage.
When Stove Pipe Cleaning Is Necessary
Having covered who should perform stove pipe maintenance and what the guide includes, the next focus is on recognizing when cleaning is needed.
Indicators include visible creosote buildup inside the pipe, a strong smoky odor in the room, reduced draft or sluggish fire, and frequent chimney smoke backflow.
Regular inspection after heavy use seasons, following intensive burns or wet wood use, and after long idle periods helps determine timing.
Small flakes or light deposit may wait, but hardened, tarry layers or sparks during operation require prompt cleaning.
Prioritize safety: clear signs warrant immediate action to prevent fire hazards and poor ventilation.
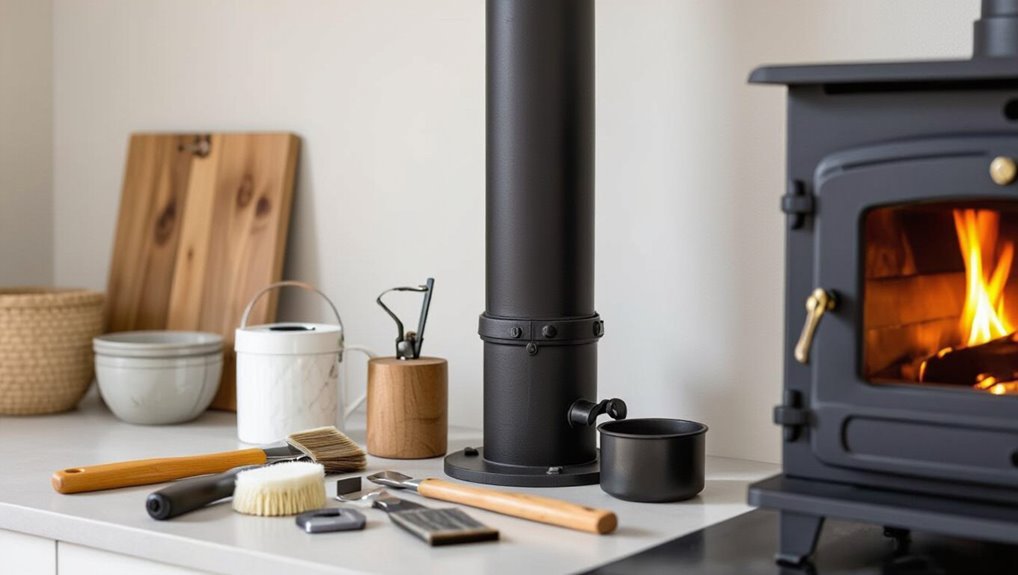
Tools and Materials You’ll Need
Before beginning stove pipe cleaning, assemble a compact kit of essential tools and safety gear so work proceeds efficiently and without interruption. Include a stiff wire chimney brush sized to the pipe diameter, extension rods to reach the full length, and a flexible brush head for bends.
Add a sturdy ash shovel, metal bucket with lid, and disposable drop cloths to protect flooring. Keep a hand broom and dustpan, heavy-duty garbage bags, and heat-resistant gloves for handling components (avoid listing full personal protective equipment here).
Include a flashlight, small pry bar, and a vacuum designed for ash to finish debris removal.
Safety Gear You Must Wear
Before beginning any stove pipe cleaning, appropriate personal protective equipment is essential.
A protective eye and face shield guards against flying ash and soot, while heat-resistant gloves protect hands from hot surfaces and sharp edges.
Together these items reduce the risk of injury and should be inspected for damage before use.
Protective Eye And Face Shield
Typically, anyone cleaning stove pipes should wear a fitted protective eye and face shield to guard against flying ash, creosote flakes, and sudden sparks. The shield should seal around the face, resist heat, and allow clear visibility for inspection and brushing. Regularly inspect for scratches or cracks; replace when compromised. Clean the visor after each use to maintain clarity. Store shields away from direct heat and solvents. Use models meeting safety standards and make sure compatibility with other protective equipment.
| Feature | Benefit | Recommendation |
|---|---|---|
| Full-face visor | Full coverage | ANSI/EN rated |
| Anti-fog coating | Clear view | Reapply as needed |
| Replaceable visor | Longevity | Swap when scratched |
| Comfort padding | Extended use | Washable pads |
Heat-Resistant Gloves
Wear heat-resistant gloves to protect hands and forearms from high temperatures, sparks, and hot creosote when cleaning stove pipes.
Gloves should be rated for heat exposure, made of leather or specialized aramid fibers, and extend past the wrist to cover the forearm.
They must fit snugly to preserve dexterity for handling brushes, rods, and seals.
Inspect gloves before use for tears, thinning, or contamination by oil or creosote, replacing them if compromised.
Clean or dispose according to manufacturer guidance.
Using proper gloves reduces burn risk, prevents chemical exposure, and improves confidence and control during pipe maintenance.
Preparing the Stove and Room for Cleaning
With all fuel fully burned down and the stove cool to the touch, the operator should clear the immediate area, remove rugs or flammable materials, and lay a drop cloth to catch soot and ash. The operator opens vents for ventilation, wears heat-resistant gloves and eye protection, and positions a sturdy ladder if pipe sections are high. Tools and disposal containers are organized nearby to minimize movement during cleaning. A helper remains available to assist or call for aid. The room’s doors are propped open to prevent dust buildup and to allow fresh air flow.
| Item | Purpose | Location |
|---|---|---|
| Drop cloth | Catch debris | Floor |
| Gloves | Hand protection | Nearby |
| Bucket | Collect ash | At work area |
Inspecting Stove Pipes for Creosote and Damage
Once the workspace is set and safety measures are in place, attention turns to a systematic inspection of the stove pipes for creosote buildup and physical damage.
The inspector uses a flashlight and mirror or removable sections to view interior surfaces, noting flaky, tarry, or glossy black deposits that indicate creosote stages.
External seams, joints, and support brackets are examined for corrosion, warping, holes, or loose fasteners.
Pay special attention to bends and elbows where deposits accumulate.
Record locations and severity of buildup or defects to prioritize cleaning and repairs.
Proper documentation guides safe, effective maintenance without unnecessary disassembly.
When to Call a Professional
When inspections reveal heavy creosote accumulation that cannot be removed with routine brushing, professional intervention is recommended.
Likewise, visible structural damage to the stove pipe or signs of chimney deterioration warrant an expert assessment.
A trained technician can safely remove severe deposits and repair or replace compromised components.
Severe Creosote Buildup
Severe creosote buildup appears as thick, glossy black or tar-like deposits lining the stove pipe and presents a significant fire hazard that usually requires a professional inspection and cleaning.
A homeowner should not attempt aggressive removal when deposits are hard, greasy, or layered; professionals use proper tools, containment, and inspection protocols.
Skilled technicians can assess risk, clean safely, and test for hidden hotspots or blockages.
Timely professional intervention prevents chimney fires and carbon monoxide risk while preserving stove performance.
Consider calling a certified chimney sweep when visibility is poor, odors persist, or deposits resist basic brushing.
- Risk assessment and decision-making
- Safe removal techniques
- Post-cleaning verification
Structural Or Chimney Damage
Extensive creosote accumulation can mask or accelerate structural defects in stove pipes and chimneys, so visible damage or any signs beyond surface deposits warrant professional evaluation.
Cracked flue liners, rusted or warped pipe sections, loose mortar, and masonry spalling indicate compromised containment and increased fire or carbon monoxide risk.
Professionals inspect with cameras, measure clearances, test draft, and assess liner integrity, recommending repair, relining, or chimney rebuilding where necessary.
DIY fixes cannot reliably address internal deterioration or code compliance.
Prompt consultation prevents escalation, secures safe operation, and preserves insurance validity; document findings and follow licensed contractor guidance for corrective action.
How Often to Clean: Schedule by Use and Fuel
Regularly evaluating stove pipe cleaning frequency depends primarily on how often the stove is used and what fuel is burned.
Usage intensity, fuel moisture, and type determine creosote buildup rates; frequent, wet-wood fires require shorter intervals than occasional, well-seasoned hardwood use.
Inspect after heavy seasons and schedule based on observed deposit levels rather than fixed dates.
Professional inspection annually is recommended for moderate use; more often if smoky firing occurs.
- Light use with seasoned hardwood: inspect and clean annually.
- Regular use or mixed fuels: inspect mid-season; clean every 6 months.
- Heavy use or damp wood: inspect monthly; clean as needed.
Removing Stove Pipe Sections, Step by Step
The section outlines required tools and safety gear before any work begins, emphasizing gloves, eye protection, and a sturdy ladder.
It then describes how to disconnect pipe joints methodically to prevent damage and maintain alignment.
Finally, it covers removing individual sections for close inspection and notes what to look for when evaluating wear, creosote buildup, or corrosion.
Tools And Safety Gear
Before beginning to remove stove pipe sections, assemble only the essential tools and safety gear: leather gloves, eye protection, a fitted NIOSH-rated respirator (or N95 if the former is unavailable), a flashlight, a pipe wrench or pliers sized for the joints, a pry bar or screwdrivers for fasteners, a drop cloth, and a rigid dustpan or small shop-vac with a fine filter.
The operator should confirm fit and function, clear the work area, and plan waste containment.
Use sturdy footwear and avoid loose clothing. Keep a phone nearby for emergencies and follow manufacturer guidance.
- Inspect tools and PPE for damage.
- Position drop cloth and containment.
- Test flashlight and respirator seal.
Disconnecting Pipe Joints
Wear gloves and respirator, then stand clear of the stove while loosening the lowest accessible joint first to prevent ash and creosote from falling onto heated surfaces. The technician works methodically: support each section, unfasten screws or crimps, twist and pull straight down, and set removed pieces on a drop cloth. Note tight spots, rust, or warped seams but defer detailed inspection. Label sections to preserve order. Move upward only after lower pieces are free. Use two people for heavy pipes. Clean workspace and seal openings temporarily.
| Step | Action | Note |
|---|---|---|
| 1 | Loosen lowest joint | Prevent spills |
| 2 | Support pipe | Avoid drop |
| 3 | Remove section | Place on cloth |
| 4 | Label pieces | Keep order |
Removing And Inspecting Sections
After lower sections are loosened and set aside, attention shifts upward to removing and inspecting each remaining stove pipe segment.
The operator works methodically from top to bottom, supporting pipes to prevent falls. Each joint is eased, sections are lowered vertically, and seals are examined for corrosion, creosote build-up, and deformation. Necessary tools include gloves, ladder, and a soft mallet.
Components found damaged are tagged for replacement; heavy deposits are noted for deeper cleaning. Record location of defects and photograph for reference.
Final step guarantees all removed pieces are placed on protective coverings before continuing interior chimney inspection.
- Loosen, support, lower
- Inspect seals, surfaces
- Tag, record, protect
Brushing Straight Pipe Runs Effectively
A firm, systematic approach guarantees straight stove pipe runs are brushed thoroughly and safely.
The cleaner prepares appropriate brush size, secure extension rods, and a stable ladder or platform.
From the stove outward, the brush is fed slowly, rotated to loosen creosote, then withdrawn and inspected frequently.
Each pass removes loosened deposits; repeated passes continue until swarf and soot diminish.
Avoid forcing the brush or sudden jerks that could damage joints.
Collected debris is captured with a vacuum rated for fine particles and disposed of outdoors.
Final inspection confirms clear bore and resealed joints before reinstalling components.
Cleaning Elbows and Offsets Without Damage
When approaching elbows and offsets, the technician first inspects joints carefully to identify weak seals or creosote buildup that could be disturbed.
Flexible brushes are recommended to navigate bends without forcing rigid tools that might deform the pipe.
Attention to joint condition and gentle, adaptable brushing minimizes the risk of damage.
Inspect Joints Carefully
Regularly inspect joints—especially elbows and offsets—before and during cleaning to prevent damage and guarantee tight seals. The inspector notes creosote buildup, corrosion, and loosened fasteners, documenting issues that require repair rather than forceful cleaning. Gentle tactile checks and visual inspection under good light reveal hairline gaps or warped seams.
When seams appear compromised, cleaning is paused and corrective measures are planned to avoid worsening leaks. Proper inspection preserves draft performance and reduces fire risk.
Use the following checklist to maintain consistency and safety during every cleaning session:
- Visual condition: rust, gaps, creosote layers.
- Mechanical: loose screws, dents, misalignment.
- Action: repair need, postpone cleaning, note parts.
Use Flexible Brushes
Using flexible brushes designed for stove pipes allows thorough cleaning of elbows and offsets without forcing rigid tools into delicate seams.
The brushes bend to follow curves, removing soot and creosote from hard-to-reach areas while minimizing pressure on joints and sheet-metal seams.
Select brush diameter to match pipe size and choose stiffness appropriate for buildup — softer for thin creosote, firmer for compacted deposits.
Operate with steady, controlled strokes from both ends when possible, and inspect residue after each pass.
Clean brushes after use to avoid redepositing debris.
Replace frayed or damaged brushes to prevent bristles catching on seams.
Cleaning a Chimney Connector vs. a Masonry Chimney
Between the stove and the flue, the chimney connector and the masonry chimney require different cleaning approaches because their construction, access, and soot buildup patterns differ markedly.
The connector—usually smooth metal sections—accumulates loose creosote and ash, is accessible from stove or attic, and benefits from hand or rod brushing.
The masonry chimney collects harder, layered creosote and may hide deposits in mortar joints; inspection and tougher scraping are often required.
Consider safety, access points, and material fragility when choosing tools and methods.
- Inspect: assess build-up type and access.
- Tools: rods/brushes for connector; scrapers/brushes for masonry.
- Cleanup: contain debris and inspect after cleaning.
Using a Rotary Cleaning System Safely
Operating a rotary cleaning system demands careful preparation and attention to procedure to prevent damage to the flue, injury, or excessive mess.
The operator should inspect rods, brushes, and motor for wear, secure access points, and wear eye, hand, and respiratory protection.
Feed the rod assembly steadily—never force—monitor brush contact to avoid gouging, and use the correct brush size and stiffness for pipe diameter and creosote condition.
Pause periodically to retract, clear debris, and check for obstructions.
Work from the cleanest access upward when possible.
After cleaning, wipe internal surfaces, inspect seals and joints, and dispose of waste safely.
Dry Vacuuming Creosote Without Spreading Dust
Begin by selecting a dry vacuum specifically rated for fine particulates and fitted with a HEPA or equivalent filter to capture creosote dust without releasing it back into the room.
Protective gear, such as an N95 mask, gloves, and eye protection, is mandatory.
Work slowly to avoid stirring settled flakes; use soft brush attachments and low suction to dislodge deposits gently.
Seal removed debris in heavy-duty bags and dispose of outdoors.
- Inspect seals and joints before vacuuming to minimize leaks.
- Vacuum in short passes, checking the filter and canister frequently.
- Clean or replace the HEPA element after each session.
Cleaning From the Stove End vs. the Chimney Top
Cleaning from the stove end offers easier access and finer control for removing loose soot and creosote.
Working from the chimney top presents challenges such as weather exposure, fragile caps, and the need for secure roof access.
Proper safety measures and preparation—fall protection, tools arranged, and stove isolation—are essential regardless of direction.
Stove-End Access Advantages
Why access the stove end? Cleaning from the stove end offers direct, controlled contact with the pipe, allowing routine maintenance without roof work. It minimizes equipment needs and reduces exposure to weather and heights. The following highlights key advantages.
- Easier setup: Tools fit indoors, access is immediate, and preparation time is short.
- Better debris control: Soot and creosote fall into the stove or onto a protected floor, simplifying cleanup and preventing outside mess.
- Increased safety: No ladder work, lower fall risk, and the operator remains in a stable, well-lit environment, improving overall procedure safety.
Chimney-Top Challenges
While stove-end access reduces setup time and risk, certain situations still require work from the chimney top, and those approaches present distinct challenges.
Chimney-top cleaning addresses blockages, creosote layers, and bird nests unreachable from below.
Workers contend with roof access, limited footing, and wind exposure that complicate tool control and debris capture.
Brushes and rods must extend fully and may flex, reducing scrubbing effectiveness.
Debris can fall into the flue or onto the roof; containment and careful lowering are essential.
Visibility is often poorer, requiring verification both at the top and inside the stove to confirm thorough cleaning.
Safety And Preparation
Typically, preparing for stove-pipe cleaning requires a methodical safety check and clear task allocation before any tools are inserted or anyone climbs to the roof. The person overseeing assesses structural soundness, weather, and ventilation, then chooses whether to brush from the stove end or from the chimney top.
Each approach demands specific PPE, secure ladders or floor protection, and an emergency plan. The decision balances accessibility, creosote condition, and homeowner skill, minimizing risk and mess.
- Inspect: check pipe joints, cap, flashings, and nearby combustibles.
- Equip: gloves, eye protection, mask, drop cloths, ladder safety.
- Plan: assign roles, communication, and fall contingency.
Handling Heavy, Tarry (Stage 3) Creosote Buildup
Encountering stage 3 creosote—hard, glossy, and tar-like—requires immediate, careful intervention because it poses a high risk of chimney fires and significant draft obstruction.
Professionals recommend evaluating extent visually and sensing for odor or heat damage.
Mechanical removal with heavy-duty rotary brushes and chisels, used gently to avoid pipe damage, is typical; work from both ends if accessible.
Creosote vacuums with HEPA filtration capture debris.
After removal, inspect for corrosion, warping, or hot spots; replace compromised sections.
Dispose of waste in sealed metal containers.
Until cleared, limit stove use and consider hiring certified chimney technicians for safety.
Reassembling and Sealing Stove Pipe Joints
After cleaning and inspecting the sections, reassembling and sealing stove pipe joints requires careful alignment, correct fasteners, and suitable gaskets or sealants to guarantee a safe, draft-tight system.
Components are fitted in sequence, male ends toward the stove, and each joint checked for full engagement.
Fasteners such as stove screws or rivets are used sparingly to secure overlapping sections without distorting metal.
High-temperature gaskets or furnace cement are applied where factory joints are worn.
Seals are smoothed and excess removed.
Final visual inspection confirms straight runs and proper clearances before restoring stove operation.
- Align and connect
- Secure with appropriate fasteners
- Seal with high-temperature materials
Testing Draft and Checking for Leaks After Cleaning
Verify draft performance and inspect joints for leaks before returning the stove to regular use.
Light a small, controlled fire and observe smoke behavior at the pipe joints and stove connection. A steady upward draw indicates adequate draft; smoke spillage or sluggish draw signals obstruction or improper clearance.
While fire burns, feel (carefully, with a gloved hand) around joints for warm air leaks and watch for visible smoke escaping seams. Tighten fasteners, realign sections, or reapply high-temperature sealant where gaps appear.
Repeat tests until draft is consistent and no leaks are detected, ensuring safe, efficient operation.
Disposing Creosote and Ash Safely
Once draft and joint integrity are confirmed, attention should turn to removing and disposing of creosote and ash safely.
Creosote and cold ash are treated as combustible and potentially hazardous: handle with gloves, eye protection, and a dust mask.
Allow residues to cool fully; use metal tools and containers with tight lids.
Seal creosote flakes in metal or heavy-duty, labeled containers for municipal hazardous-waste disposal; never burn creosote in trash.
Transport ash in sealed metal cans, storing outside on noncombustible surfaces until collection.
Follow local regulations for hazardous materials, and document disposal if required.
- Cool, contain, label
- Use metal tools/containers
- Follow local disposal rules
Monthly Maintenance Tasks Between Deep Cleanings
Regularly, homeowners should perform a concise set of monthly checks to keep stove pipes and the connected system functioning safely between deep cleanings. Inspect joints for leaks, look for loose fasteners, verify clearances, and confirm proper draft. Remove light ash buildup from firebox and vacuum around pipe entry. Check chimney cap and flashing for damage, and make certain no animal nests. Test smoke and CO detectors. Document conditions and any minor repairs to track trends.
| Task | Action |
|---|---|
| Joint check | Tighten/replace gaskets |
| Ash control | Vacuum light deposits |
| Cap inspection | Clear debris |
| Detector test | Replace batteries |
| Record keeping | Note issues and dates |
Seasonal and Weather Effects on Cleaning Frequency
Seasonal temperature changes substantially influence creosote formation, with cooler, damp months tending to accelerate buildup.
Consequently, cleaning frequency should be adjusted to account for heavier deposits after cold, humid periods and reduced use in warmer seasons.
Regular inspection schedules that reflect seasonal and weather patterns help prevent hazardous accumulation.
Seasonal Creosote Build-Up
How does changing weather influence creosote accumulation in stove pipes? Cooler outdoor temperatures and damp air cool flue gases faster, promoting condensation of tarry creosote on pipe walls. Variations in humidity and temperature swings during shoulder seasons also encourage sticky deposits. Windy conditions affect draft, intermittently reducing combustion efficiency and increasing soot.
- Autumn: Cool nights plus frequent starts yield rapid creosote layering.
- Winter: Steady burns can char deposits, but prolonged cold maintains buildup risks.
- Spring: Temperature fluctuations and occasional dampness enable renewed condensation and loosening of previously formed creosote.
Weather-Driven Cleaning Frequency
Often influenced by weather patterns, the recommended cleaning frequency for stove pipes adjusts according to temperature, humidity, and wind conditions that alter creosote formation and draft performance.
Colder, damp periods accelerate tarry creosote accumulation; more inspections and earlier-season cleanings prevent dangerous buildup.
Rapid temperature swings encourage condensation, increasing soot adherence and necessitating midseason checks.
Prolonged dry, hot conditions slow formation but raise chimney fire risk if intermittent high-burning occurs, so post-high-use cleaning is advised.
Windy locales can disrupt draft, causing soot to settle unevenly and requiring targeted cleaning.
Adjust schedules based on local weather trends and observable stove behavior.
How Fuel Type and Burning Habits Affect Buildup
Different fuels and burning behaviors markedly influence the rate and composition of residue that accumulates in stove pipes. Dry, seasoned hardwood yields less sticky creosote and particulate than damp or resinous wood, while unseasoned timber and treated lumber produce tarry deposits and soot.
Smoldering fires encourage thick, layered buildup; hot, oxygen-rich fires produce finer ash and fewer adhesives. Variations in pellet, coal, or cordwood also change chemical residues and corrosion risk. Regularly observing burn characteristics helps predict cleaning needs.
- Fuel moisture and type determine deposit stickiness and chemical makeup.
- Combustion temperature alters particle size and accumulation speed.
- Smoldering increases layered, hard-to-remove creosote.
Reducing Future Creosote With Better Fires
Using hot, well-seasoned wood and maintaining strong combustion markedly reduces creosote formation in stove pipes.
Consistent air supply and proper damper settings help sustain higher temperatures and more complete burning.
These practices together minimize soot buildup and extend the intervals between cleanings.
Burn Hot, Dry Wood
Burning hot, well-seasoned wood is the single most effective way to minimize creosote buildup in stove pipes; higher combustion temperatures and low moisture content produce more complete combustion, fewer volatile tars, and less sticky residue.
Seasoned hardwoods cut creosote formation and burn longer with steadier heat.
Properly split and stored wood reaches below 20% moisture, limiting smoke and soot.
Avoid burning green wood, scraps with paint, or damp kindling that cools the fire and increases condensation in the pipe.
Consistent, vigorous fires reduce deposits and make cleaning less frequent.
- Choose seasoned hardwoods.
- Store wood dry and ventilated.
- Avoid green or treated wood.
Improve Airflow Control
How can airflow adjustments reduce creosote buildup? Controlling primary and secondary air keeps combustion temperatures high and smoke residence time low, minimizing tar and soot production.
Slightly opening dampers during startup and feeding encourages complete ignition; once established, regulating air maintains steady flames without smoldering. Avoid starved-oxygen burns that produce dense, creosote-prone exhaust.
Regularly inspect and calibrate vents, ensuring seals and baffles function so airflow follows manufacturer guidelines. Use a stove thermometer to target ideal flue temperatures.
Improved draft management reduces condensable volatiles, lowering the frequency of pipe cleaning and enhancing safety and efficiency.
Protecting Painted or Finished Walls During Cleaning
When cleaning stove pipes near painted or finished walls, take steps to prevent soot, heat stains, and abrasive damage by creating a barrier and working with care.
The technician prepares the area by removing loose objects and evaluating finish sensitivity.
Protective layers and careful technique minimize risk.
- Lay a non-abrasive drop cloth or cardboard against the wall, taped at edges to catch soot and debris without scratching paint.
- Use soft-bristled brushes and vacuum attachments to control particles; avoid scraping that can mar finishes.
- Keep a damp microfiber cloth and mild cleaner ready for immediate, gentle spot cleaning of accidental deposits.
Upgrading Pipes and Connectors for Easier Cleaning
The article notes that swapping fixed fittings for removable tee sections can simplify access to creosote buildup and make periodic brushing faster.
It also recommends installing cleanout adapters at low points to collect debris and allow quick inspection without disassembly.
These targeted upgrades reduce cleaning time and lower the risk of disturbing seals during maintenance.
Use Removable Tee Sections
Many homeowners upgrade stove piping by installing removable tee sections to simplify soot and creosote removal. These tees create access points where the cross piece detaches, allowing brushes and inspection tools to reach elbows and vertical runs. Properly fitted removable tees maintain draft while providing practical serviceability.
- Select a listed tee size matching the flue, ensuring tight joints and compatible gasket types for a sealed connection.
- Position tees at accessible heights, typically near the stove or along horizontal runs, to minimize ladder work during cleaning.
- Use stainless components rated for creosote exposure and follow manufacturer torque or locking specifications.
Install Cleanout Adapters
After installing removable tee sections for access, attention shifts to cleanout adapters that provide dedicated, sealed access points for ash, soot, and creosote removal.
Cleanout adapters fit between stove pipe segments or at base runs, featuring threaded or gasketed caps to prevent leaks and odors. They allow targeted sweeping and vacuuming without disassembling longer runs.
Install adapters at low points and before horizontal stretches where deposits accumulate. Choose stainless or galvanized models rated for stove temperatures and match diameters.
Secure connections with high-temperature sealant and periodic cap inspections. Proper placement and quality adapters simplify maintenance and improve system safety.
Spotting and Fixing Corrosion or Metal Fatigue
Inspecting stove pipes for corrosion or metal fatigue begins with a focused visual and tactile survey of joints, seams, and the inner flue where heat and combustion byproducts concentrate.
The observer notes pitting, thinning, discoloration, and any soft or brittle areas.
Small holes and warped sections indicate replacement; surface rust can be wire-brushed and treated.
Fasteners and support brackets receive scrutiny for stress cracks.
Repairs prioritize safety and proper sealing; temporary patching uses high-temperature-rated materials only until replacement is possible.
Professional assessment is advised when structural integrity is compromised or when repair extends beyond simple surface treatment.
- Identify damaged areas precisely.
- Clean and treat surface rust.
- Replace compromised sections promptly.
Troubleshooting Common Problems After Cleaning
How should one proceed when a cleaned stove pipe still shows problems?
The technician inspects joints, seals, and supports for looseness or misalignment, then tests draft with a smoke pencil or incense.
If smoke or odors persist, soot buildup in inaccessible sections or an obstructed chimney is suspected; camera inspection or a secondary sweep is recommended.
Creosote that reaccumulates quickly suggests burning wet wood or inadequate airflow; fuel and damper adjustments are advised.
For persistent corrosion, metal replacement or professional evaluation is required.
Any signs of leaks, cracks, or structural failure prompt immediate cessation of use and contact with a qualified stove professional.
Documenting Cleanings for Safety and Insurance
Recordkeeping is essential for demonstrating that stove pipe and chimney maintenance was performed to safety standards and for meeting insurance requirements. The owner should log dates, scope of work, observations, and any photos.
Certified technician reports and receipts strengthen claims and document compliance. Clear records simplify inspections and liability assessments after incidents.
- Note date, technician name, contact, and license or certification number.
- Record tasks completed, parts replaced, measurements, and soot/creosote levels; attach photos.
- Keep invoices, service reports, and warranty documents in physical and digital formats for easy retrieval.
Typical Professional Cleaning Costs and What’s Included
Typically, homeowners can expect a professional stove pipe and chimney cleaning to range from modest to moderate expense depending on complexity and region; a basic inspection and sweep often costs between $100–$250, while full cleanings with creosote removal, soot containment, and minor repairs commonly run $200–$500. Professionals itemize services: inspection, sweeping, creosote removal, containment/cleanup, and minor repairs or replacement parts. Costs vary with access difficulty, length of run, and required remediation. Comparative table summarizes common components and typical inclusion.
| Service | Typical Inclusion |
|---|---|
| Inspection | Visual, camera |
| Sweep | Brushes, debris |
| Creosote removal | Chemical/mechanical |
| Containment | Drop cloths, vacuum |
| Repairs | Seals, caps, patch |
Checklist: A Quick Pre‑Clean and Post‑Clean Walkthrough
After summarizing professional cost components and services, attention turns to a concise checklist homeowners and technicians can use before and after cleaning to guarantee safety and completeness.
The checklist frames tasks into preparatory safety checks, methodical cleaning steps, and final inspections. It emphasizes personal protective equipment, appliance cool-down, and clear access.
During post-clean, it highlights leak checks, ash disposal, and soot stains.
Records of condition and any repairs are advised.
This compact routine reduces risk and documents results, aiding follow-up maintenance or professional handoff.
- Pre-clean: cool stove, PPE, clear area, inspect joints.
- During: brush flue, collect debris, monitor smoke.
- Post-clean: seal checks, ash removal, document condition.
Conclusion
The guide closes by underscoring practical, safety-first stove pipe maintenance: timely cleaning prevents creosote buildup, reduces fire risk, and prolongs stove life. Readers are reminded to use proper tools, PPE, and documented records for insurance and inspections. If problems persist, consult a professional; typical fees cover inspection, sweeping, and minor repairs. Even a Victorian would nod approvingly at routine care—don’t delay scheduled maintenance to keep hearth and home safe.