Fix a Clogged Washing Machine Drain Pipe: Easy DIY Steps & Tips
Key Takeaway: A clogged washing machine drain pipe can be easily fixed with basic checks and tools.
To resolve this issue effectively, follow these steps:
- Safety First: Unplug the washer and turn off the water supply.
- Inspect the Drain Hose: Look for kinks in the hose and straighten it out if necessary.
- Remove Standing Water: Clear any water that has accumulated in the drum or the drain.
- Check the Pump: Look for any debris that may be obstructing the pump.
- Disconnect the Hose: Carefully detach the drain hose from the machine.
- Clear the Standpipe: Use a plumbing snake or brush to remove any clogs in the standpipe or trap.
- Reattach the Hose: Once cleared, reattach the hose securely.
- Test the System: Run a cycle to ensure everything is functioning properly.
Important Note: Use enzyme cleaners only as a last resort and avoid harsh chemicals to prevent damage. For ongoing maintenance, regularly check the hose and pump to prevent future clogs.
Quick Checklist: First Steps When Your Washer Won’t Drain
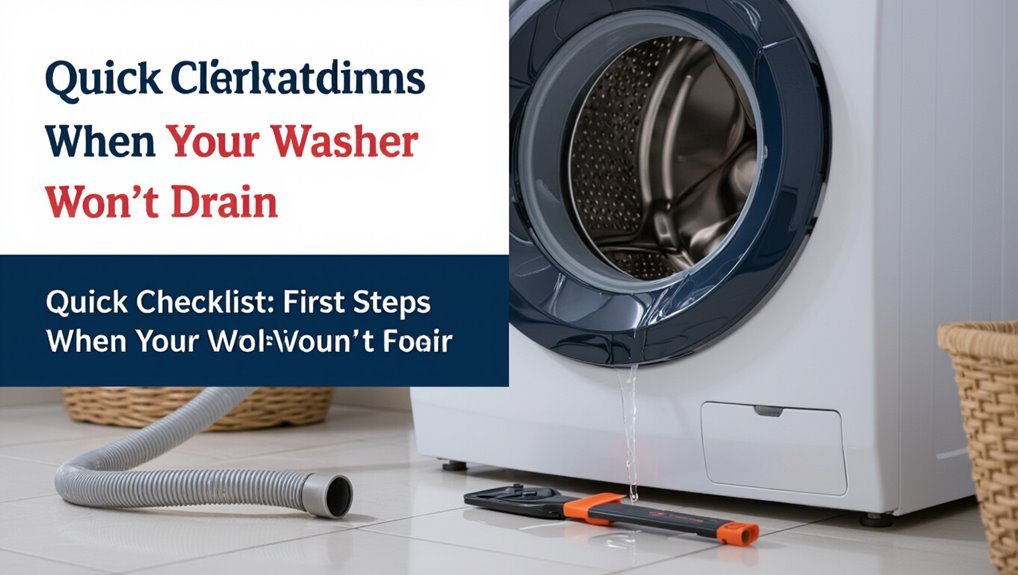
Check these basic items before opening the machine: make sure the washer is unplugged or the circuit breaker is off, confirm the drain hose is properly seated and not kinked, inspect the lid or door switch for obvious damage, and verify the drain itself is not blocked by a visible obstruction.
Then, confirm the washer completed its cycle and wasn’t paused, note any error codes displayed, and remove standing water with a shallow container to reduce mess.
Gather basic tools—gloves, towels, pliers, bucket—and prepare a flashlight.
Record model and serial numbers for reference before attempting further troubleshooting or parts replacement.
Is the Washer Drain the Problem? How to Check
To determine whether the washer drain is causing the issue, the technician first checks water flow during the drain cycle for weak or intermittent discharge.
Next, the drain hose is inspected for kinks, clogs, or improper installation that could restrict flow. These steps quickly distinguish a hose or drain problem from internal pump or electrical faults.
Check Water Flow
Before assuming the washer drain is the culprit, observe how water enters and exits the machine during a cycle.
Note fill speed, whether water stops mid-cycle, and if the tub empties completely during drain and spin phases.
Listen for pump noise and watch for water pooling in the drum or visible backflow at the standpipe.
Measure drain time by timing from pump activation to dry drum; long delays suggest restricted flow.
Compare hot and cold fills for consistency.
Document any error codes or unusual smells.
These observations help distinguish internal pump or inlet valve faults from external drainage issues.
Inspect Drain Hose
Inspect the drain hose for kinks, clogs, improper routing, or loose fittings that can restrict flow and mimic pump failure.
The washer is examined visually and by hand; the hose is detached at the machine and outlet to check for blockages, debris, or damage.
Flow is tested by running water through the hose into a bucket; slow or no flow indicates obstruction or collapse.
Replace any cracked, flattened, or porous hose and make certain the hose is secured with a clamp and routed with a gentle, sustained curve to prevent siphoning or pinching.
- Remove hose
- Visually inspect
- Flush with water
- Replace if damaged
Safety Steps Before You Start DIY Plumbing
Before any repairs begin, the water supply to the washing machine should be shut off to prevent flooding.
The machine must also be unplugged to eliminate the risk of electrical shock while working near water.
These basic precautions protect both the home and the person performing the repair.
Turn Off Water Supply
Shutting off the washing machine’s water supply is the essential safety step that prevents unexpected flooding and reduces the risk of water damage during any drain-pipe work.
The person locates the machine’s shutoff valves—usually behind the appliance or at a nearby utility box—and turns both hot and cold valves clockwise until fully closed.
If there is a single household valve, it is shut to isolate the appliance.
After closing valves, the person opens the machine’s faucet or runs a short drain cycle to relieve residual pressure and confirm water flow has stopped.
- Locate valves
- Close hot and cold
- Verify isolation
- Release residual pressure
Unplug The Machine
Once the water supply is secured, the person disconnects the washing machine from its electrical source to eliminate the risk of shock while working on the drain pipe.
They unplug the unit at the wall outlet or switch off the dedicated circuit breaker, confirming power is off by attempting a short cycle and watching for motor or panel activity. If the machine is hardwired, a qualified electrician should isolate the circuit. After power removal, they leave the plug accessible and document the breaker position to guarantee proper reconnection.
This precaution reduces electrocution risk and protects internal components during inspection and repairs.
Gather Tools and Supplies to Clear a Washer Drain
A small, well-chosen set of tools and supplies makes clearing a washer drain faster and safer. The writer recommends assembling necessary items before beginning: basic hand tools, a bucket, rags, and appropriate cleaners.
Protective gear prevents injury and limits mess. Choosing a drain snake or auger sized for household plumbing avoids damage.
A narrow flashlight or inspection mirror helps locate blockages. Have disposable gloves and a small container for removed debris.
Prepare a mild, enzyme-based drain cleaner only if mechanical removal fails. Keep everything within reach to minimize interruption and reduce the chance of accidental water spills.
- Gloves and eye protection
- Bucket and rags
- Drain snake or auger
- Flashlight and inspection mirror
How to Disconnect the Washing Machine Safely
Before disconnecting any hoses or power, the person should cut off the washer’s water supply and unplug it from the electrical outlet to eliminate shock and flooding risks.
Next, they should turn off both hot and cold shutoff valves, then run a short rinse cycle to relieve pressure and drain residual water.
Wearing gloves, place towels and a shallow pan under hose connections.
Loosen hose clamps with pliers or a screwdriver, then gently twist and pull hoses free, allowing trapped water to collect in the pan.
Cap or fold hose ends to prevent drips, and move the machine only after securing loose lines.
Access the Drain Pipe and Standpipe Safely
With the hoses removed and the area prepared, the technician should locate the standpipe and drain pipe opening, verify that the washing machine is moved far enough forward to allow clear access, and put on safety goggles and gloves to guard against splashes and debris.
The technician inspects the standpipe height, confirms the drain coupling is visible, and checks for water on the floor. Good lighting and a small mirror help view recessed openings. If odors or standing water are present, keep a bucket ready. Make certain electrical supply remains disconnected before reaching into the drain.
- Confirm clear workspace
- Wear PPE
- Use light/mirror
- Keep a bucket nearby
Remove Visible Lint and Debris From the Drain Pipe
The technician reaches into the standpipe opening and clears away any visible lint, clumps of detergent, and small debris using gloved hands or a long grabber tool; removing these obstructions first prevents larger blockages from forming further down the line and makes subsequent inspection easier.
After initial removal, a flashlight helps identify remaining material on pipe walls.
Soft-bristled brushes and disposable wipes remove residue without damaging PVC.
Collected debris is placed in a trash bag to avoid recontamination.
The technician repeats visual checks until water drains freely from the standpipe, documenting observations and noting if professional assistance may be required.
Clear Deeper Blockages With a Plumbing Snake
If hand removal and brushing did not restore full flow, a plumbing snake is used to reach and break up deeper blockages farther down the drain line. The technician feeds the flexible auger into the hose or standpipe until resistance is felt, then rotates and advances to fragment accumulated lint, soap scum, or small obstructions.
After loosening material, withdraw slowly while running water to flush debris. Clean the snake and inspect the hose for damage; replace if compromised. Repeat as needed, using appropriate snake size to avoid harming fittings. Wear gloves and eye protection; dispose of removed material responsibly.
- Feed carefully
- Rotate and advance
- Flush while withdrawing
- Inspect and replace damaged parts
Flush the Washer Drain With Hot Water and Detergent
Next, the guide explains how to prepare and use hot water and detergent to flush the washer drain.
It outlines preparing sufficiently hot (but safe) water, choosing a low-foaming detergent or degreaser, and the step-by-step flushing procedure.
Clear, concise instructions cover water temperature, detergent amount, where to pour the mixture, and how long to let it work before rechecking the drain.
Hot Water Preparation
Run hot water and a measured amount of liquid detergent into the washer’s drain to dissolve greasy residue and loosen trapped debris.
Preparation focuses on water temperature, safe volumes, timing, and protective measures.
Make certain water reaches near-boiling only if the machine and hoses tolerate it; otherwise use the hottest safe setting.
Measure detergent per label to avoid suds overflow.
Pre-run a short spin to expose the drain inlet.
Keep a bucket and towels ready for spills.
Verify floor drain clearance before flushing.
Afterward, allow a cooling interval and inspect for improved flow or signs of remaining blockage.
- Check temperature limits
- Measure detergent
- Protect surrounding area
- Inspect flow afterward
Detergent Selection Tips
After preparing the washer with hot water and the proper safety measures, selecting the right detergent for flushing the drain helps break down grease without causing excess suds or damage.
Choose a low-sudsing, enzyme-based laundry detergent or a mild, grease-cutting dish detergent diluted per label instructions. Avoid high-foaming detergents, fabric softeners, or bleach concentrates that can create clogs, harm hoses, or corrode seals.
Use measured amounts—no excess—and confirm compatibility with machine seals and drain materials. For persistent oily residues, consider a biodegradable degreaser rated safe for plumbing.
Store detergents safely and label any mixture for short-term use only.
Flushing Procedure Steps
When the washer is prepared and the appropriate low-sudsing detergent has been measured, begin the flush by introducing hot water into the drum or drain line to soften and mobilize grease and buildup. The technician allows the solution to sit briefly, then engages a gentle agitate or drain cycle to carry loosened debris toward the exit. If flow improves, repeat once more; persistent clogs require manual inspection.
After flushing, run a cold rinse to clear residual detergent and confirm unobstructed flow. Record observations and schedule preventive maintenance if residues recur.
- Preheat water
- Add low-sudsing detergent
- Agitate/drain cycle
- Rinse and verify
When to Use a Bio-Safe Drain Cleaner (And How)
In situations where mechanical clearing fails or a slow drain persists, a bio-safe drain cleaner offers a gentle chemical option that dissolves organic buildup without harsh fumes or corrosive residues.
It is appropriate when water pools despite visible trap cleaning and plunging, or after flushing with hot water and baking soda/vinegar proved insufficient.
Users should choose enzyme or bacterial formulations labeled safe for plumbing and septic systems, follow dosage and contact time instructions, wear gloves, and avoid mixing with other chemicals.
Allow the recommended dwell time, then flush thoroughly with hot water.
Repeat only per product guidance to prevent overuse.
Clear a Clogged Washer Drain Hose (Machine-Side)
Disconnect the washer from power and water, then pull the machine away from the wall to access the drain hose connection on the back.
The hose can clog with lint, small garments, or detergent residue.
Detach the hose clamp and remove the hose end; inspect visually and run water through it.
If obstructed, use a flexible brush or coat hanger to dislodge debris, flush with a garden hose, then dry and reattach securely.
Test with a short drain cycle and watch for leaks.
- Turn off power and water.
- Remove clamp carefully.
- Clear debris manually.
- Flush and test.
Clear a Blocked Standpipe and Laundry Trap
After checking the washer-side hose, attention should shift to the standpipe and laundry trap, where clogs often form from lint, soap scum, and accumulated debris.
The technician removes the hose from the standpipe, inspects for visible blockages, then uses a plumbing snake or flexible brush to clear the vertical pipe.
For traps with removable cleanouts, the cap is carefully opened over a bucket to catch water and debris.
Persistent buildup may require flushing the standpipe with hot water and a diluted vinegar solution.
After clearing, components are rechecked for obstructions before proceeding to reconnecting the hose.
Reattach Parts and Test the Washer for Leaks
Reconnect the washing machine hose and any removed trap caps, ensuring hose clamps are tight and the hose seats fully inside the standpipe to prevent leaks. Once reassembled, run a short wash cycle with cold water and observe connections for drips.
Check beneath the machine and around the trap; use a dry paper towel to detect slow weeps. Tighten fittings if moisture appears, then retest. If leaks persist, power down and reseat connections or replace damaged hoses or clamps.
- Inspect visible joints closely.
- Use gentle force when tightening.
- Test with full and rinse cycles.
- Replace faulty parts promptly.
Common Mistakes That Make Washer Clogs Worse
Even after confirming leak-free reassembly and successful test cycles, certain common mistakes can still make washer drain clogs worse.
Overzealous use of chemical drain cleaners can corrode hoses and seals, worsening blockages.
Running multiple rinse cycles without addressing the obstruction compacts debris deeper into the trap.
Detaching hoses improperly or forcing parts can dislodge gasket fragments that migrate into the drain.
Ignoring lint and filter inspection after clearing a clog allows repeat buildup.
Rerouting a drain hose to compensate for a persistent restriction masks the problem and increases pressure on connections.
Failure to secure clamps permits leaks that invite sediment accumulation.
Preventive Maintenance to Stop Future Washer Clogs
Regularly performing simple maintenance tasks prevents most washing machine drain clogs before they start. The owner should inspect hoses, traps, and the lint filter monthly, remove visible debris, and run a cleaning cycle with vinegar or enzyme cleaner quarterly.
Using mesh laundry bags for small items and wiping pockets before washing reduces fiber and object buildup. Ensuring the washer stands level and hoses are properly secured prevents kinks and slow drains.
- Check and clean inlet/outlet hoses monthly
- Use mesh bags for delicates and items with loose fibers
- Run a monthly hot-water cleaning cycle with cleaner
- Keep the washer level and hoses untwisted
When You Should Call a Plumber (Red Flags)
Occasionally, a clogged washing machine drain presents signs that simple homeowner fixes cannot safely or effectively address; when water backs up into the washer or adjacent drains, foul odors persist after cleaning, visible leaks appear around fittings, or repeated clogs occur despite preventive measures, a professional plumber should be contacted to diagnose and repair the underlying problem. Emergency situations, structural pipe damage, or sewage exposure require immediate professional attention. Persistent or worsening symptoms, failed DIY attempts, and unclear blockage locations are red flags. Table summarizes typical red flags and recommended action.
| Red Flag | Severity | Action |
|---|---|---|
| Backflow | High | Call plumber |
| Sewage smell | High | Call plumber |
| Visible leak | Medium | Call plumber |
Time and Cost Estimates: DIY vs. Professional Repair
Compare likely time and cost outcomes before deciding whether to tackle a clogged washing machine drain privately or hire a professional. A simple clog often takes 30–90 minutes and minimal tools; parts cost $5–$30.
Complex blockages, diagnostics, or odor issues can require several hours and specialty tools. A plumber visit typically ranges $100–$300 for diagnosis and basic clearing, rising to $200–$600 for camera inspection or pipe repair.
- DIY: 30–90 minutes, $5–$30.
- DIY complex: several hours, possible $50–$150.
- Pro basic: 1–2 hours, $100–$300.
- Pro advanced: multiple hours, $200–$600.
Conclusion
To conclude, resolving a clogged washing machine drain can often be handled at home with basic tools and precautions. Notably, approximately 20% of household plumbing calls are for appliance drains, showing how common—and preventable—these issues are. By following safety steps, checking the drain first, avoiding common mistakes, and performing simple maintenance, many homeowners will save time and money; however, persistent problems or signs of sewage backup warrant a professional plumber.