How to Cut Galvanized Pipe Safely: Tools, Tips & Step-by-Step Guide
To safely cut galvanized pipe, follow these key steps:
- Choose the Right Tool: Use a tube cutter, hacksaw, reciprocating saw, or angle grinder based on the pipe size and access.
- Prepare for Safety: Secure the pipe and wear protective gear, including a respirator, eye protection, hearing protection, gloves, and cut-resistant clothing.
- Cut Carefully: Be mindful of zinc fumes and sharp edges while cutting.
- Finish the Edges: Deburr the cut ends and coat them with a zinc-rich compound to prevent corrosion.
By adhering to these guidelines, you can cut galvanized pipe safely and effectively.
What Is Galvanized Pipe and Why Special Care Matters
Galvanized pipe is steel or iron coated with a layer of zinc to resist corrosion; this protective finish alters how the pipe reacts to cutting, welding, and disposal.
The zinc coating prevents rust but generates toxic fumes and particulates when disturbed, so handling requires awareness of chemical and physical hazards.
Threads and fittings may conceal degradation despite intact appearance, and older installations can harbor lead-containing solder or paint.
Mechanical cutting can strip zinc unevenly, promoting local corrosion if not protected.
Proper disposal must consider environmental rules for metal and coatings.
Understanding these factors guides selection of precautions and appropriate methods.
Quick Steps to Cut Galvanized Pipe Safely
The guide outlines a concise workflow for cutting galvanized pipe, beginning with selecting proper tools and personal protective equipment.
It emphasizes choosing a saw or cutter suited to pipe diameter and wearing gloves, eye protection, and a respirator.
Precise measuring and clear marking of the cut line are highlighted as essential preparatory steps.
Tools And Safety Gear
One set of appropriate tools and safety gear is essential before cutting galvanized pipe to prevent injury and limit exposure to hazardous particles.
Necessary tools include a pipe cutter, reciprocating saw with a metal-cutting blade, or angle grinder with a cutoff wheel, plus a vise or sturdy pipe clamp.
Safety gear: NIOSH-rated respirator or P100 mask, safety goggles or face shield, cut-resistant gloves, long sleeves, and hearing protection.
Verify work area ventilation and use a fire-resistant surface or tray for sparks.
Keep a metal brush for deburring and a magnetic tray for collecting metal shavings and fasteners.
Marking And Measuring
Accurate measuring and clear marking are essential before any cut to confirm fit and minimize rework; measure twice, mark once, and account for fittings or thread allowances.
The technician confirms measurements with a reliable tape, marks cut lines with a permanent marker or scribe, and notes thread setback.
Clamps and a square guarantee perpendicular cuts. Allow for saw blade kerf and deburring.
Rechecking prevents waste, safety risks, and delays. Emotional reassurance comes from precision and control—confidence replaces anxiety when measurements are verified.
Safety Risks: Zinc Fumes, Sparks, and Sharp Edges
Cutting galvanized pipe introduces three primary hazards: inhalation of zinc fumes, airborne and hot sparks, and sharp cut edges that can lacerate skin.
Zinc-coated pipe heated by torches or high-speed grinders releases zinc oxide fumes that irritate lungs and can cause metal fume fever with flu-like symptoms.
Grinding and cutting throw sparks and hot particles that can ignite flammable materials or burn exposed skin.
Fresh cuts leave burrs and jagged edges that easily slice hands or clothing.
Work areas should be organized to limit ignition sources and bystanders.
Immediate first aid and wound cleaning reduce infection risk if injuries occur.
PPE You Must Wear When Cutting Galvanized Pipe
Because the hazards of zinc fumes, sparks, and sharp edges are immediate, appropriate personal protective equipment is essential when cutting galvanized pipe.
The writer recommends gear that protects lungs, eyes, hands, and skin while allowing mobility and visibility. Respiratory protection must filter metal fumes; eye protection should resist high-velocity particles; cut-resistant gloves and long sleeves prevent lacerations from burrs.
Hearing protection reduces noise exposure during powered cutting. Footwear with toe protection and non-slip soles guards against dropped pipe and worksite hazards.
- NIOSH-rated respirator (P95 or better)
- Safety goggles + face shield
- Cut-resistant gloves and protective clothing
Best Tools for Galvanized Pipe: Cutter, Saws, Grinders
A clear review of cutting tools helps determine the safest and most efficient method for each job.
The section compares pipe cutter options, contrasts saw types for speed and finish, and outlines grinder safety tips for cutting and deburring.
Readers are guided to match tool choice to pipe size, access, and required edge quality.
Pipe Cutter Options
Selecting the right tool for cutting galvanized pipe depends on pipe diameter, the required cut quality, access limitations, and the user’s comfort with sparks and metal dust.
Manual tube cutters suit small diameters, give burr-free edges, and require minimal cleanup.
Reciprocating or circular saws handle thicker walls and confined spaces but produce swarf and heat.
Angle grinders cut quickly for larger pipes, though they demand secure clamping and PPE.
- Manual tube cutter: clean, precise, limited to thinner pipes
- Compact saws: versatile, moderate finish, accessible in tight spots
- Angle grinder: fast, aggressive, higher debris and spark risk
Saw Types Compared
Tools for cutting galvanized pipe fall into clear categories—manual cutters, compact power saws, and angle grinders—each offering distinct trade-offs in speed, cut quality, and safety requirements.
Manual ratchet cutters yield burr‑free, controlled cuts for narrow diameters but are slow. Compact reciprocating and circular saws make fast, straight cuts with proper blades; they excel on thicker walls and long runs.
Angle grinders cut quickly and access tight spots but produce heat, sparks, and rough edges requiring deburring. Blade choice, RPM, and clamping method determine finish and efficiency.
Selection balances project scale, required precision, and operator experience.
Grinder Safety Tips
When using an angle grinder on galvanized pipe, operators must prioritize containment of sparks, control of heat, and minimization of inhalation hazards.
Operators should use correct wheel type, inspect guards, and maintain steady, controlled motions to avoid gouging or slipping. Respiratory protection and local exhaust capture zinc fumes; wet cutting where feasible reduces airborne particles.
Secure the pipe in a vice and clear flammable materials from the work area. Follow manufacturer RPM and abrasive specifications; replace damaged discs immediately.
- Use eye, face, and hearing protection rated for grinding.
- Employ a respirator and ventilation for fumes.
- Check guards and wheel integrity before each use.
Choose the Right Tool by Pipe Size and Situation
Because pipe diameter, location, and the desired finish determine cutting needs, the appropriate cutting method varies by situation.
For thin-walled, small-diameter pipe in tight spaces, a tubing cutter or mini reciprocating saw offers control and minimal burrs.
Medium-diameter pipe often suits a hacksaw or powered reciprocating saw for balance of speed and accessibility.
Large-diameter or thick-walled pipe may require an angle grinder with a metal cutting disc or a portable band saw for straight, powerful cuts.
Consider surrounding materials, clamp availability, and noise or spark restrictions when selecting a tool to minimize risk and rework.
How to Measure and Mark Galvanized Pipe Accurately
Accurate measurement and clear marking are essential to guarantee each galvanized pipe piece fits the planned layout and avoids costly rework. Measurements should reference fixed points, compensating for fittings and threads. A tape measure and caliper confirm length; a square ascertains perpendicularity. Mark with a fine-tip permanent marker or scribe for visibility. Verify twice before progress.
- Use a reliable tape measure, noting fittings and overlap.
- Transfer marks with a carpenter’s square to ascertain a true 90° cut line.
- Re-check measurements by measuring from both ends to avoid cumulative error.
Document dimensions and confirm alignment prior to cutting.
Secure and Support the Pipe Before Cutting
Clamp the pipe firmly and provide continuous support along its length to prevent movement, vibration, or sagging during cutting. Use a sturdy workbench, pipe vise, or adjustable stands.
Place padded supports near the cut to avoid damaging the galvanizing. Position clamps so they do not obstruct the saw blade or cutting path. For long runs, add intermediate supports every few feet to maintain alignment and prevent deflection.
Verify the pipe is level and the marked cut line is accessible. Recheck clamping tightness after a brief test run of the tool.
Stable workholding reduces kickback and guarantees a straight, controlled cut.
Cutting Thin‑Walled Galvanized Pipe With a Pipe Cutter
Use a ratcheting or rotary pipe cutter sized for thin‑walled tubing to make clean, square cuts without deforming the galvanizing.
The operator secures the pipe, aligns the cutter mark, and rotates the tool gradually, tightening between passes to avoid crushing the wall. After separation, a deburring tool removes sharp edges to preserve thread fit and coating integrity.
- Choose a cutter with smooth rollers and a sharp wheel.
- Tighten incrementally; never force a single heavy cut.
- Deburr inside and outside to prevent corrosion or injury.
This method minimizes distortion and maintains protective zinc coverage.
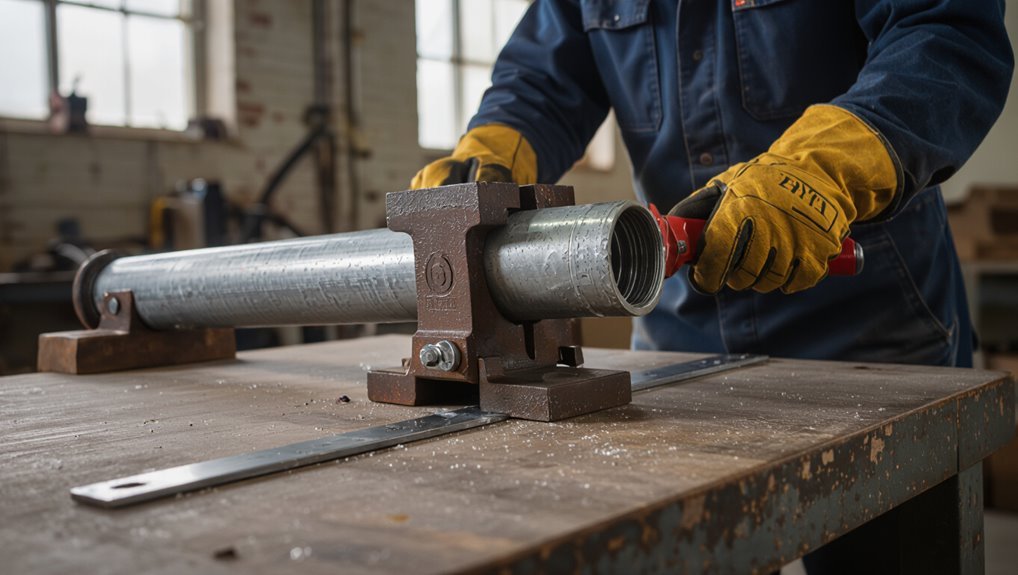
Cutting Thicker Galvanized Pipe With a Hacksaw
When cutting thicker galvanized pipe with a hacksaw, the operator selects a high‑tension frame and a bi‑metal blade rated for coarse metal to guarantee steady, efficient cutting through the heavier wall.
The pipe is securely clamped in a vise with padding to prevent crushing and aligned so the cut line is accessible. Short, controlled strokes maintain blade engagement and reduce binding; periodic lubrication with cutting oil cools the blade and clears swarf.
Every few minutes the operator inspects blade teeth for wear and replaces if dulled. After cutting, burrs are removed with a file and the ends are cleaned before installation.
Using a Reciprocating Saw or Angle Grinder Safely
Before using a reciprocating saw or angle grinder, appropriate safety gear should be put on, including eye, ear, and respiratory protection.
The pipe must be firmly clamped to prevent movement during cutting.
Careful control of sparks and prompt removal of burrs will protect surrounding materials and guarantee a clean, safe finish.
Safety Gear First
A few essential pieces of personal protective equipment greatly reduce injury risk when cutting galvanized pipe with a reciprocating saw or angle grinder. The operator should don eye protection, respiratory protection, and cut-resistant gloves before energizing tools.
Hearing protection and sturdy footwear further mitigate hazards from sparks, metal shards, and dropped pipe. Ascertain PPE fits properly and is in good condition; replace damaged items.
Keep a fire extinguisher nearby when grinding. Inspect tools and cords for defects, and verify guards are in place. Maintain awareness of bystanders and remove loose clothing or jewelry to prevent entanglement.
- Safety glasses or face shield
- N95 respirator or better
- Cut-resistant gloves
Secure The Pipe
After donning appropriate PPE and confirming tools are in safe working order, the workpiece must be firmly secured to prevent movement that could bind the blade or wheel.
A heavy-duty vise or pipe clamp attached to a stable bench is recommended; position the pipe so the cutting zone extends clear of jaws and supports.
For reciprocating saw use, prevent twisting by clamping near the cut and adding a sacrificial block between clamp and pipe to avoid deformation.
For angle grinder operations, secure the pipe horizontally and guarantee the grinder’s guard is correctly oriented.
Recheck stability before starting the tool.
Control Sparks And Burrs
Control sparks and remove burrs deliberately to protect the work area and the operator: direct the reciprocating saw or angle grinder so sparks are contained toward a noncombustible surface, maintain a steady, light pressure to avoid blade or wheel grabbing, and intermittently pause to clear metal filings.
The operator wears eye, face and hearing protection, and uses gloves and a respirator for galvanized dust. After cutting, de-burr the edge with a file, deburring tool, or flap wheel until smooth. Inspect for hot spots and cool with compressed air or water only if safe.
- Contain sparks
- Use PPE
- Deburr thoroughly
Reduce Zinc‑Fume Exposure During Cutting
Reduce zinc-fume exposure by using methods that minimize airborne particles and by providing appropriate ventilation and respiratory protection.
Workers should prefer mechanical cutting that produces larger chips rather than high-heat methods like torching or abrasive cutting, which generate fine fumes.
Establish local exhaust ventilation or use portable fume extractors at the cutting point.
When ventilation is insufficient, require NIOSH-approved respirators with P100 or N95 filters appropriate for metal fumes.
Monitor air quality during extended work and rotate tasks to limit individual exposure.
Maintain hygiene: wash hands, change contaminated clothing, and keep food and drink away from the work area.
Deburr and Clean Cut Edges for Fit and Safety
After cutting, the workpiece should be inspected and any metal burrs removed with a file or deburring tool.
Sharp edges are then smoothed to guarantee proper fit and to prevent injury during handling or assembly.
Finally, the cut area should be wiped with a suitable solvent to remove metal dust, oil, and residue before joining or finishing.
Remove Metal Burrs
Deburring the freshly cut end removes sharp metal slivers that can cause injury, impede threading, or prevent a snug fit with fittings.
After cutting, the edge is inspected and burrs are removed using appropriate tools to preserve pipe geometry and galvanization. The process prevents leaks and eases assembly.
- Use a round file or deburring tool, running full circumference to remove inner and outer burrs.
- Rotate the pipe while applying light, even pressure to avoid creating flats or unevenness.
- Clean the area with a wire brush and wipe with a cloth to remove metal filings and residues.
Smooth Sharp Edges
When a galvanized pipe has been cut, smoothing the sharp edges guarantees both safe handling and a precise fit with fittings or threads. This step removes burrs, evens the mating surface, and preserves the pipe’s geometry.
A round or flat file removes raised metal and sharp lips; hold the pipe securely and stroke away from the cut edge to avoid catching. A deburring tool or chamfering bit on a drill produces a clean bevel for seating threads or fittings.
Finish with fine-grit sandpaper for a uniform surface. Inspect edges visually and by touch, ensuring no snags remain before assembly or coating.
Clean With Solvent
Clean the cut end with a suitable solvent to remove metal dust, oils, and cutting residues that interfere with fit and coating adhesion.
After deburring, the technician inspects threads and mating faces, applying solvent sparingly to avoid over‑wetting. Wiping with a clean, lint‑free cloth exposes imperfections and guarantees proper sealing when joined or painted.
- Use isopropyl alcohol or acetone for fast evaporation.
- Agitate with a nylon brush on stubborn residue.
- Allow full evaporation before priming, sealing, or threading.
Proper cleaning reduces corrosion risk and improves joint integrity, supporting safe installation and long‑term performance.
Protect Cut Ends From Corrosion Afterward
After cutting galvanized pipe, the exposed edges lose their protective zinc coating and become vulnerable to rust and galvanic corrosion.
It is important to treat those ends promptly to restore protection and extend service life. Dry the cut thoroughly, remove burrs, and apply a zinc-rich cold galvanizing compound or brush-on zinc primer to recoat raw metal.
For threaded ends, use zinc grease or anti-seize after coating to protect threads. Allow proper cure time per product instructions.
For buried or outdoor fittings, consider additional corrosion tape or sealing compounds. Inspect periodically and reapply as needed to maintain protection.
Common Mistakes That Ruin Cuts or Create Hazards
Cutting galvanized pipe requires attention to technique and tool choices; common mistakes—dull blades, incorrect saw speeds, inadequate clamping, and poor alignment—lead to ragged edges, binding, or kickback that can damage the pipe or injure the operator.
Operators often underestimate vibration, forcing improper cuts or tool drift. Failure to clear chips causes overheating and blade wear. Incorrect blade type scores rather than severs, creating burrs and metal shards.
- Using excessive feed rate that stalls the blade and induces binding.
- Neglecting secure, perpendicular clamping that allows movement during cutting.
- Ignoring PPE and guards when sparks or fragments are likely.
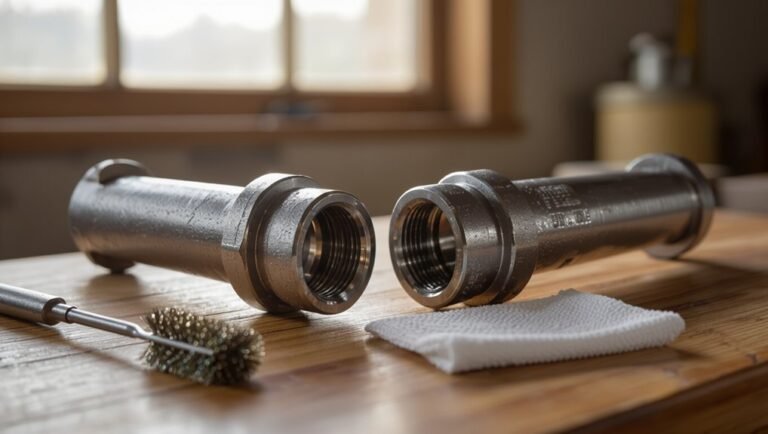
Cutting Threaded Galvanized Pipe Without Damaging Threads
When cutting threaded galvanized pipe, preserving the integrity of the threads requires deliberate setup and technique rather than brute force.
Clamp the pipe in a padded vise or use soft-jaw pipe clamps to avoid crushing threads. Mark the cut clearly, then back the pipe out of the clamp so several threads extend free; protect exposed threads with a short coupling or a sacrificial nut tightened onto the end to absorb clamp pressure.
Use a fine-tooth saw or tubing cutter suited to galvanized steel, cut slowly to minimize vibration, and deburr lightly with a round file, avoiding the threaded section itself.
Cutting On‑Installed Pipes and in Tight Spaces
When cutting galvanized pipe that remains installed or sits in a confined area, select compact tools such as mini hacksaws, ratcheting tube cutters, or oscillating saws with metal blades.
The pipe should be firmly supported with clamps or a strap wrench to prevent movement and distortion during cutting.
After the cut, remove burrs and apply protective coatings or tape to exposed edges to prevent corrosion and protect surrounding materials.
Space-Constrained Tools
Several situations call for cutting galvanized pipe in place, particularly in cramped mechanical closets, between wall studs, or beneath fixtures where full-length tools won’t fit.
Practitioners choose compact, low-vibration tools to maintain control and protect surrounding finishes. Portable options permit accurate cuts without removing piping.
- Mini pipe cutters: ratcheting or chain types for tight circumferences and limited swing.
- Battery-powered reciprocating saws with short blades: for fast cuts where access depth is shallow.
- Tubing cutters and hacksaw kits with angled handles: for precision when clearance and visibility are poor.
Appropriate blade selection and steady support reduce burrs and fitting issues.
Pipe Support Techniques
Proper support is essential before cutting galvanized pipe that remains installed or situated in confined spaces to prevent movement, misalignment, and damage to nearby structures.
Temporary pipe supports — padded saddles, adjustable clamps, or chain vices — stabilize the run and distribute forces. Use blocking or shims between pipe and framing to maintain alignment when supports attach to uneven surfaces.
For vertical runs, secure both above and below the cut to control drop. When access is limited, employ low-profile straps or magnetic clamps and a helper to steady the line.
Verify stability after each incremental cut before proceeding further.
Deburring And Protection
Finish cuts cleanly and promptly remove burrs and sharp edges to prevent injury, guarantee proper fitment of fittings, and protect internal flow.
In tight spaces or on installed runs, access limits demand compact tools and controlled strokes. A deburring tool, small file, or rotary bit should be used with steady pressure; remove only enough material to round edges without altering diameter.
After deburring, coat cut ends with a zinc-rich cold galvanizing compound or primer to inhibit corrosion where factory coating was removed.
Finally, inspect for metal shavings and wipe interior and exterior before reassembly.
- Use compact deburring kit
- Apply zinc-rich coating
- Inspect and clean thoroughly
When to Hire a Pro Instead of DIY
When should a homeowner call a professional instead of attempting to cut galvanized pipe themselves?
A pro is advisable when the job involves concealed plumbing, pressurized systems, or gas lines where mistakes risk leaks, contamination, or code violations.
Hire an expert if the cut must align with fittings in tight or structural spaces, or if corrosion, asbestos, or lead paint complicates access.
Choose a professional for multi-connection reroutes, permits, or inspections.
Lack of proper tools, experience with thread sealing, or confidence in achieving watertight joints also warrant hiring.
Safety, code compliance, and long-term reliability guide that decision.
Blade Selection and Tool Maintenance for Clean Cuts
Although blade choice and tool upkeep are often overlooked, they determine whether a galvanized pipe cut is clean, safe, and easy to thread or join. Proper blade selection favors carbide-tipped or abrasive discs rated for ferrous metals; thin kerf blades reduce burrs.
Regular maintenance—cleaning, sharpening, and replacing worn parts—preserves cut quality and tool safety. Inspect guards, brushes, and collets before use. Store blades dry to prevent corrosion. Lubricate moving parts per manufacturer instructions.
Balance blade life with safety: replace at first sign of chatter or warping. Consistent upkeep minimizes deformation and facilitates leak-free connections.
- Choose carbide or metal-cutting abrasive blades
- Inspect and replace worn components
- Clean and lubricate tools routinely
Troubleshooting Common Problems and Quick Fixes
Address common cutting issues promptly to prevent wasted material and safety hazards.
When burrs form, recommend deburring with a file or rotary deburring tool to guarantee smooth edges and proper fittings.
If blades bind, advise checking alignment, replacing dull blades, and securing the pipe firmly in a vice or clamp.
For uneven cuts, suggest verifying blade type and feed rate, and marking a clear cut line.
When corrosion flakes or galvanizing dust accumulate, instruct using a vacuum and wearing a respirator.
For tool overheating, recommend slowing the cut, using lubricant, or allowing cooling breaks to preserve blade life.
Conclusion
Cutting galvanized pipe need not intimidate even cautious homeowners. With proper PPE, the right cutting method and attention to zinc fume risks, most cuts are safe and clean. If someone worries it’s too technical or hazardous, they should note that following simple steps—choosing the correct tool, ventilating the area, and using a respirator—reduces risk dramatically; when uncertainty remains, hiring a qualified tradesperson is a straightforward, sensible alternative.