How to Connect Copper Pipe: Easy DIY Guide for Secure, Leak-Free Joints
Connecting copper pipe can be achieved through three primary methods: solder, compression, or push-fit joints. Each method requires precise preparation, including clean, square cuts, deburred ends, and appropriately sized fittings for the pipe type (K, L, or M).
Key Takeaways:
- Soldered Joints: Provide permanent seals but require flux and heat.
- Compression and Push-Fit Joints: No solder needed, ideal for tight spaces or repairs.
- Safety and Code Compliance: Always adhere to building codes for gas or hidden installations. For complex systems or leaks behind walls, consult a plumber.
By following these guidelines, you can ensure secure and leak-free connections in your copper piping projects.
Quick Overview: Choosing a Connection Method
When deciding how to join copper pipe, the choice hinges on pressure demands, application (water, gas, refrigeration), skill level, and whether the connection must be permanent or serviceable; common options include sweat (soldered) joints for durability, compression fittings for tool-free installations, push-fit fittings for speed and minimal skill, and flare or brazed joints for high-pressure or HVAC work.
Selection weighs leak resistance, code compliance, and accessibility. Sweat and brazing offer longevity but require heat and practice.
Compression and push-fit simplify repairs and retrofits but may cost more and occupy more space. Flare fittings suit soft copper tubing and gas lines.
When to DIY vs. Hire a Plumber
How can a homeowner decide whether to tackle a copper-pipe job or call a professional?
Assess scope, skill, and risk: small repairs, simple replacements, or visible joints in accessible areas suit experienced DIYers comfortable with soldering or push-fit fittings.
Hire a plumber for leaks involving hidden piping, complex reroutes, multi-connection systems, gas lines, or where local codes require licensed work.
Consider time, tools, and warranty implications; professional work often includes guarantees and permits.
When water shutoff, drainage, or structural alterations are needed, or when uncertainty exists about pressure or corrosion, choosing a licensed plumber minimizes damage and guarantees code compliance.
Tools for Connecting Copper Pipe
A clear list of essential hand tools—pipe cutters, deburring tools, adjustable wrenches, and flux brushes—prepares a homeowner for most copper pipe connections.
Proper safety gear, such as gloves and eye protection, and surface prep like cleaning and de-greasing fittings are equally important.
The following section outlines the specific tools and safety steps needed for soldered and compression joints.
Essential Hand Tools
Essential hand tools for connecting copper pipe include cutters, reamers, fittings wrenches, soldering gear, and measuring devices, each chosen to guarantee clean cuts, proper fit, and leak-free joints.
A rotary tubing cutter scores and severs pipe accurately; a deburring tool or reamer removes burrs and guarantees smooth inner edges. Adjustable wrenches and basin wrenches help tighten compression fittings and nuts without marring surfaces.
A propane torch, flux brush, and lead-free solder form reliable sweat joints when used correctly. Tape measure, combination square, and marker provide precise lengths and alignment.
Cloths and a wire brush complete cleanup and prep.
Safety And Prep
Before striking a torch or tightening a fitting, the installer must establish a safe, organized workspace and perform basic preparatory checks.
Required PPE includes safety glasses, flame-resistant gloves, and hearing protection when cutting. A fire extinguisher and a heat shield should be on hand for soldering or brazing.
Verify gas and water supplies are shut off and drain lines to prevent spills. Measure and mark pipe runs, deburr cut ends, and clean fittings with appropriate abrasives.
Use a wire brush or emery cloth for fluxing surfaces. Confirm ventilation when using chemicals or torches and keep a clear exit path.
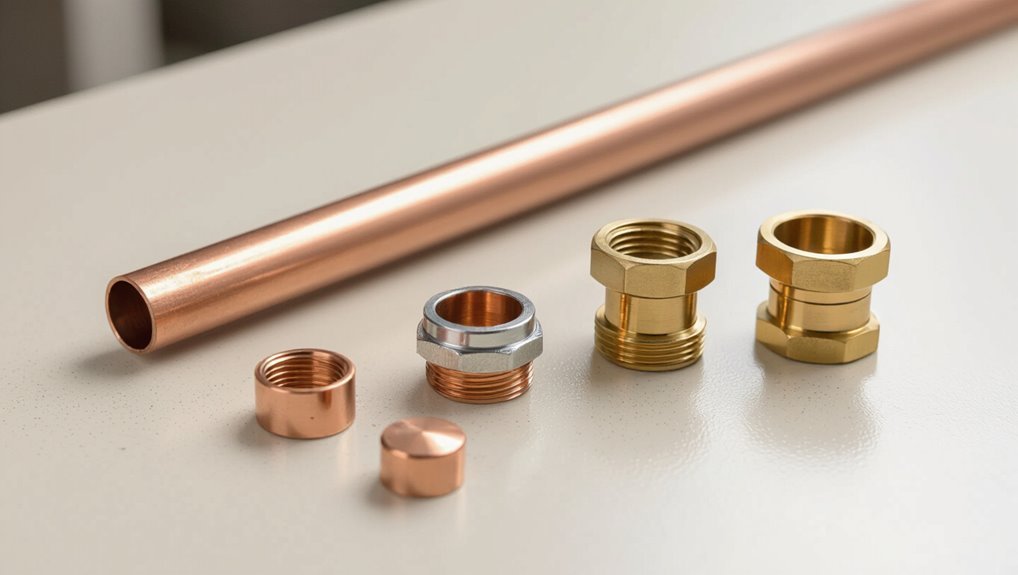
Copper Pipe Types and Fittings Explained
Copper piping comes in several alloys and sizing standards, each suited to specific applications and joining methods. The overview distinguishes Type K, L, M, and soft vs. hard temper, plus fittings: elbows, tees, couplings, and adapters.
Material choice affects pressure rating, flexibility, and corrosion resistance.
- Type K: thickest wall, underground/service mains.
- Type L: moderate wall, common for interior plumbing.
- Type M: thinner wall, residential low-pressure use.
- Fittings: sweat, compression, flare, and brazed-compatible designs matched to pipe temper and diameter to guarantee proper fit and longevity.
Which Is Best : Solder, Compression, or Push‑Fit?
The article compares soldered joints, compression fittings, and push‑fit connectors by weighing their practical advantages and drawbacks.
Solder provides permanent, leak‑resistant seals but requires skill and a heat source, while compression offers a mechanical seal without soldering at the cost of occasional retightening.
Push‑fit excels for speed and ease of use but may be pricier and less suitable for long‑term buried or concealed installations.
Solder Joint Pros/Cons
Choosing the right method for joining copper pipe—solder, compression, or push‑fit—depends on factors like durability, skill level, cost, and application.
Solder joints offer strong, permanent seals when properly executed, resisting vibration and long-term leaks but require heat, solder, flux, and some practice. They are ideal where permanence and pressure rating matter.
Downsides include fire risk, longer installation time, and difficulty in tight spaces. Consider maintenance access and skill availability before choosing solder over alternatives.
- Very durable and long-lasting
- Requires torch, flux, and practice
- Not ideal near combustibles
- Harder to disassemble
Compression Vs Push‑Fit
A comparison between compression and push‑fit fittings focuses on ease of installation, reliability under different conditions, and suitability for permanent versus temporary connections.
Compression fittings require a nut and olive, offer strong mechanical seals without heat, and suit accessible joints and long-term use if properly tightened.
Push‑fit fittings snap on, allowing rapid, tool-free installation and easy removal for repairs or alterations, but can be bulkier and more expensive.
Choice depends on skill, access, and permanence: compression is preferred for concealed, durable work; push‑fit is ideal for quick repairs, tight spaces, or where soldering and tools are impractical.
How to Pick the Right Method for Your Job
Because project requirements and skill level vary, selecting a copper-joining method should be based on pipe size, system pressure, accessibility, local code, and whether the joint must be soldered, brazed, crimped, or joined with press fittings.
The decision balances reliability, tools, and future serviceability. Contractors favor brazing for high heat and pressure; homeowners often choose solder or push‑fit for simplicity; press and crimp suit confined spaces where heat is undesirable.
Consider longevity, leak resistance, and compatibility with existing materials when choosing.
- Longevity and leak resistance
- Required tools and training
- Site accessibility and heat restrictions
- Code and material compatibility
Measuring, Cutting, and Deburring Copper Pipe
Before making any cuts, measurements should be confirmed to avoid mistakes: measure twice, cut once.
The proper cutting tool—such as a tubing cutter or fine-tooth saw—should be selected for pipe diameter and access.
After cutting, all burrs and rough edges must be removed so joints seat properly and flow is unobstructed.
Measure Twice, Cut Once
When preparing to cut copper pipe, precise measurement and clean edges are essential to confirm a proper fit and leak-free joints. A disciplined approach reduces rework and prevents leaks.
Mark twice, align fittings, and allow for wall thickness when measuring. After cutting, remove burrs and chamfer the inside and outside to guarantee smooth seating and proper flux/solder flow.
- Verify measurements against the layout and mark clearly.
- Re-check alignment with fittings before committing to a cut.
- Deburr using a file or reamer until edges are smooth.
- Clean cut surfaces to remove debris and oxidation before joining.
Choosing The Right Cutter
Having verified measurements and prepared clean edges, attention turns to selecting the proper cutter for the pipe size and job conditions. Choice hinges on pipe diameter, access, and finish quality. A compact tubing cutter fits tight spaces; a heavy-duty wheel suits thicker walls; a hacksaw can serve in rough cuts but risks uneven edges. Consider blade condition, grip comfort, and adjustability. Preview cut alignment and score lightly before rotating. Maintain steady pressure and full rotations to avoid flats. Replace worn wheels promptly to preserve roundness. Visualize options with this quick comparison:
| Tool | Best For | Note |
|---|---|---|
| Tubing cutter | Tight spaces | Smooth finish |
| Heavy-duty cutter | Thick walls | Robust wheel |
| Hacksaw | Emergency use | Requires care |
Deburr For Smooth Ends
Deburr the cut copper to guarantee a clean, square edge and prevent flow restrictions or seal failures. After cutting, remove burrs and sharp edges with a deburring tool or round file, working inside and outside the tube until smooth.
Inspect the end for nicks or distortion; re-cut if the face is uneven. Proper deburring improves joint fit, solder flow, and compression seat integrity.
- Use a dedicated hand deburring tool for speed and consistency.
- Rotate the tool gently to avoid enlarging the bore.
- Remove metal shavings thoroughly before assembly.
- Verify squareness with a brief visual check and feel.
Cleaning & Fluxing for Soldered Joints
Before soldering, both pipe ends and fitting interiors must be thoroughly cleaned and properly fluxed to guarantee a strong, leak-free joint. Cleaning removes oxidation and debris; use a wire brush or abrasive pad until bare copper shines. Apply flux evenly inside the fitting and around the pipe end to promote solder flow and prevent oxidation during heating. Avoid excess flux which can drip inside the system. Wear gloves and eye protection. Inspect surfaces before assembly. Clean tools after use.
| Tool | Purpose | Tip |
|---|---|---|
| Brush | Remove oxidation | Replace when worn |
| Abrasive pad | Final polish | Fold for edges |
| Flux brush | Apply flux | Use sparingly |
Soldering: Step‑by‑Step to a Leak‑Free Joint
Heat the joint evenly until the flux bubbles and the solder melts on contact, indicating proper temperature and readiness for capillary action.
The craftsman holds the flame to the fitting, feeds solder to the heated seam, and watches the bead draw into the gap.
After cooling, excess solder is wiped and joints inspected for continuity and smoothness.
Key steps emphasize control, cleanliness, and safety:
- Use a clean, fluxed surface for reliable wetting.
- Heat both parts, not the solder directly, for capillary flow.
- Feed solder steadily to form an even fillet.
- Allow joints to cool naturally before testing.
Using Compression Fittings: Quick Non‑Solder Joints
Compression fittings offer a fast alternative to soldering when properly prepared pipe ends and correct nut tightening are observed.
The pipe must be cut square, deburred, and cleaned to guarantee the ferrule seats evenly. Nuts should be hand‑started and then tightened to the manufacturer’s specified turns with a wrench to prevent leaks without overcompressing the ferrule.
Preparing Pipe Ends
Prepare pipe ends by cutting squarely, deburring, and cleaning to guarantee a reliable compression seal. The installer inspects tubing for burrs, nicks, and distortion; smooths edges with a file or reamer; and wipes surfaces with a clean cloth and solvent to remove oils and debris.
Correct preparation assures the ferrule seats evenly and prevents leaks or premature failure. Attention to tube roundness and length prevents over‑insertion.
Follow these steps:
- Cut square with a tubing cutter, avoiding crushed edges
- Remove all burrs and sharp edges inside and out
- Clean with appropriate solvent and lint‑free cloth
- Verify tube end is round and free of dents
Tightening Nuts Correctly
With the tubing ends square, deburred, and clean, attention turns to tightening the nuts that secure the ferrules and create the seal.
The nut is hand-tightened first until it seats; then a wrench is used to turn an additional half to three-quarter turn, or as manufacturer specifies.
One wrench holds the fitting body stationary while a second applies torque to the nut to prevent twisting the pipe.
Over-tightening can deform ferrules and crack fittings; under-tightening risks leaks.
After pressurizing the system, inspect joints for drips and retighten a fraction of a turn if needed.
Recheck after several hours.
Using Push‑Fit (SharkBite): When and How
Choose push‑fit fittings like SharkBite when speed, ease, and minimal tools are priorities—they join copper, CPVC, or PEX quickly by simply pushing pipe into the fitting’s o‑ring and stainless steel teeth.
The method suits repairs, tight spaces, and temporary or permanent connections where soldering or crimping is impractical. Preparation and verification remain essential: clean and deburr pipe, mark insertion depth, and test for leaks under normal pressure.
- Clean and deburr pipe end
- Mark insertion depth with a marker
- Push fully until the mark meets the fitting shoulder
- Pressure‑test and inspect for leaks
Joining Copper to PEX, PVC, and CPVC
Changes between copper and plastic plumbing require specific fittings and techniques to guarantee a secure, code‑compliant joint.
Options include crimp or push‑fit fittings for copper to PEX, mechanical or solvent‑cemented adapters for copper to PVC, and threaded or solvent‑bonded adapters for copper to CPVC.
Proper selection and installation prevent leaks and accommodate differing thermal expansion and pressure ratings.
Copper To PEX Connections
When integrating copper piping with PEX, PVC, or CPVC, the installer must select compatible fittings and joining methods that maintain a watertight, code-compliant connection while accounting for differences in material rigidity, thermal expansion, and solvent- or heat-sensitivity.
Copper-to-PEX connections commonly use crimp, clamp, or push-fit adapters rated for mixed materials. Proper pipe preparation, correct ring placement, and pressure testing are essential. Connection fittings must match system pressure and local code.
Avoid heat-based soldering adjacent to PEX. Consider expansion allowances and support spacing to prevent stress at joints.
- Use listed copper-to-PEX adapters
- Deburr and clean copper
- Follow crimp/clamp torque specs
- Pressure-test after installation
Copper To PVC Transitions
Connecting copper to PVC requires selecting compatible fittings and joining methods that preserve a watertight, code-compliant seal while accounting for differences in material properties such as stiffness, thermal expansion, and tolerance to heat and solvents. Changeover options include mechanical couplings, dielectric unions, and push-fit adapters; solvent welding is for PVC-to-PVC only, so adapters that isolate copper from solvent cement are required. Use proper primers, cleaners, and thread sealant where applicable. Consider pressure rating and local code. Inspect for galvanic corrosion and add dielectric fittings or tape. Maintain accessible junctions for future servicing.
| Method | Pros | Cons |
|---|---|---|
| Mechanical coupling | Reversible, no heat | Bulkier |
| Dielectric union | Prevents corrosion | Costly |
| Push-fit adapter | Quick install | Temperature limits |
Copper To CPVC Adapters
Because copper and CPVC differ in thermal expansion and joining methods, adapters that reliably bridge the two are selected for compatibility, pressure rating, and service conditions.
The text explains common adapter types, suitability, and installation notes for secure connections.
Solvent-weld CPVC to CPVC sections paired with a bronze or brass female threaded adapter avoid direct solvent-to-metal joints.
Compression and push-to-connect fittings offer simplicity but require correct material ratings and seating.
Consider dielectric unions where electrochemical corrosion is a concern, and allow for movement to prevent stress.
- Brass threaded adapters (female/male)
- Push-fit connection fittings
- Dielectric unions
- Solvent-weld with threaded adapter
Working in Tight Spaces: Tools and Tricks
Tight quarters demand compact solutions and deliberate technique; installers often rely on right-angle fittings, offset bends, and low-profile tools to maneuver copper pipe where full strokes and standard wrenches won’t fit.
In cramped cabinets and between joists, tubing cutters with swivel heads, mini pipe benders, and compact flaring tools enable accurate cuts and bends.
Use ratcheting compression tools or crowsfoot adapters on torque wrenches for tight nuts.
Magnetized flashlights and mirror inspection help verify joints.
Measure twice, plan access panels, and prefabricate short assemblies when possible to minimize in-place work and reduce risk of leaks or damage.
Laying Out Elbows, Tees, and Reducers
Several key considerations guide the layout of elbows, tees, and reducers to guarantee proper alignment, flow, and serviceability. The planner assesses routing, space, and future access, marking precise cut lengths and orientations.
Offsets are calculated to avoid strain; sweep elbows minimize friction where possible. Reducers are placed to maintain flow direction and allow accessible connections. Support spacing follows code to prevent sagging. Drain and service access are prioritized.
- Determine exact angles and measure twice before cutting
- Choose long-radius elbows for smoother flow when space allows
- Position tees for convenient branch access
- Align reducers to preserve consistent flow paths
Pressure Testing Your New Joints
Typically, the installer pressurizes the completed assembly to verify joint integrity before burying or insulating the pipe. A pressure gauge and pump or compressed air source bring the system to the specified test pressure, often a safe margin above operating pressure.
All fixtures and vents are isolated; drains are closed. The installer monitors pressure for a prescribed duration, watching for drops that indicate leaks. Visual inspection complements pressure readings—inspect joints and fittings for moisture or hissing.
After successful testing, the system is slowly depressurized, documented, and marked as tested. Safety precautions prevent overpressure and hazards during the test.
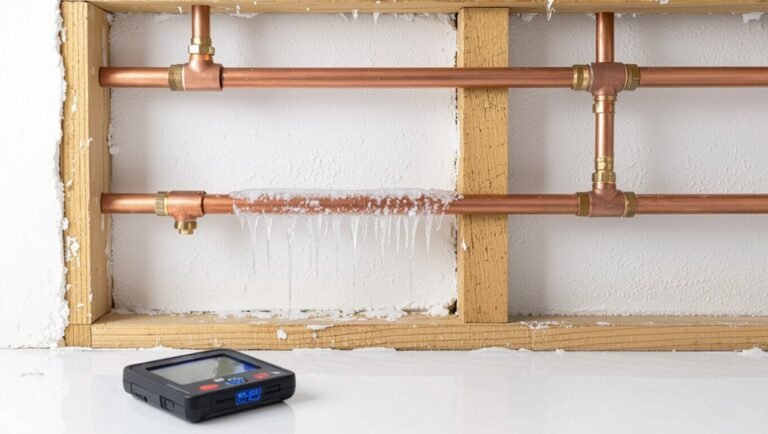
Common Leaks and How to Fix Them
Many common leaks in copper piping stem from a handful of recurring faults—poorly cleaned joints, insufficient solder flow, loose compression fittings, corroded sections, and damaged seals.
Identifying the source begins with drying and inspecting joints under pressure; hairline drips reveal solder or pinhole failures, while steady seepage often signals loose fittings or degraded washers.
Repairs range from reheating and adding solder, tightening or replacing compression nuts, to cutting out and replacing short pipe sections.
Temporary measures like pipe dope or epoxy can buy time but are not permanent.
- Reflow solder on bad joints
- Replace compression components
- Cut out pinholed sections
- Swap damaged seals
Corrosion, Galvanic Action, and Long‑Term Care
Although often gradual, corrosion and galvanic action can quietly undermine copper piping, causing thinning, leaks, and joint failure if left unaddressed.
Electrochemical reactions occur where dissimilar metals contact or where aggressive water chemistry exists. Mineral-rich or acidic water accelerates pitting; stray electrical currents promote erosion.
To mitigate, isolate dissimilar connections with dielectric fittings, use appropriate fluxes and solders, and select compatible metals.
Regular inspection targets greenish stains, pinholes, or weakened fittings. Flush systems after repairs to remove debris.
Proactive maintenance, water-treatment adjustments, and timely replacement of compromised sections extend service life and preserve joint integrity.
Code, Clearances, and Safety Rules
Addressing corrosion and galvanic risks naturally leads to contemplation of the regulations and clearances that govern copper piping installations.
Codes dictate material choices, joint methods, and allowable proximities to combustibles and live electrical conductors. Installations must respect thermal expansion, support spacing, and accessibility for inspection.
Proper bonding and grounding prevent stray currents and reduce corrosion risk. Required clearances minimize fire and service interference hazards.
- Follow local plumbing and mechanical codes; national standards provide baseline requirements.
- Maintain specified distances from electrical wiring and heat sources.
- Use approved supports and hangers at code intervals.
- Guarantee accessible shutoffs and inspection points.
Cost & Maintenance: Choosing the Right Long‑Term Option
Longevity and life‑cycle cost should drive the choice between copper types, joining methods, and protective measures when planning a plumbing installation. Decisions balance upfront material and labor against maintenance frequency, repair ease, and corrosion risk. Soldered joints are cost‑effective but require skill; compression fittings cost more yet simplify repairs. Consider water chemistry, insulation needs, and accessibility for inspections.
| Option | Consideration |
|---|---|
| Type L | Higher cost, durable |
| Type M | Lower cost, thinner wall |
| Soldered | Low material, skilled labor |
| Press/Compression | Higher material, easier maintenance |
Conclusion
After a brisk tour through fittings, flux, and the comforting hiss of a propane torch, the reader can admire the irony: copper—once prized for beauty—now plays plumber, bond and barrier against domestic leaking. With soldered seams, compression nuts, or push‑fit miracles, the house holds its breath while shiny pipes whisper promises. If rust or roving currents betray that trust, a wrench and patience will remind humanity that permanence is only ever an illusion.