How to Clean PVC Pipe: Easy Steps for Safe, Sparkling Results
To effectively clean PVC pipes, follow these essential steps for safe and sparkling results:
- Inspect and Shut Off Flow: Begin by examining the pipes and turning off the water supply.
- Flush Out Debris: Clear any debris by flushing the pipes with water.
- Apply Cleaning Solution: Use a mild detergent or a vinegar solution to clean the surfaces.
- Scrub Joints and Interiors: Utilize soft brushes or flexible snakes to scrub the joints and interiors of the pipes.
- Rinse Thoroughly: Continue rinsing until the water runs clear and has a neutral pH.
- Wear Protective Gear: Always wear nitrile gloves, eye protection, and ensure proper ventilation while cleaning.
- Use Plastic Scrapers: For stubborn scale, use plastic scrapers and gentle descalers, avoiding harsh solvents.
- Dry Properly: Allow the pipes to dry adequately and schedule regular flushing to prevent future buildup.
By following these straightforward steps, you can maintain clean and functional PVC pipes.
Quick Answer: Step-by-Step PVC Pipe Cleaning
A concise, step-by-step method helps restore flow and remove buildup from PVC pipe systems: inspect for damage, shut off water, flush debris, apply a mild cleaner or vinegar solution, scrub joints and interior with a brush or flexible snake, rinse thoroughly, and reassemble, testing for leaks.
The procedure emphasizes safety and minimality: wear gloves and eye protection, work in ventilated spaces, and avoid harsh solvents.
Target visible blockages first, then follow with full-length brushing. For threaded or glued fittings, loosen or cut as needed.
Recheck seals and water pressure after restarting supply to confirm proper operation.
What Results to Expect From Cleaned PVC
Improved flow and reduced odor are the most immediate, reliable outcomes after PVC cleaning: water should run with restored pressure, visible sediment and biofilm will be removed, and small scale mineral deposits or grease should be diminished.
Pipe interiors appear cleaner when inspected, with smoother surfaces that inhibit rapid reaccumulation. Fixtures often perform more consistently; filters and strainers collect less debris.
Cleaning can extend component life by reducing corrosion-prone residues on metal fittings and by preventing blockages that cause pressure surges. Results vary by severity and method used, but routine, appropriate cleaning reliably improves hydraulic performance and reduces maintenance frequency.
When to Clean PVC: Common Signs of Buildup
When should PVC be cleaned?
Visible discoloration, slimy residue, or white powder (efflorescence) indicate buildup. Reduced water flow, increased pressure loss, or irregular drainage suggest internal deposits. Foul or musty odors signal organic growth inside lines or fittings. Stiffening or surface pitting points to chemical or mineral attack requiring attention.
Frequent clogs or repeated need for descaling are signs maintenance intervals should be shortened. Visual inspection after seasonal changes, heavy use, or renovation can reveal hidden buildup.
Cleaning should be scheduled when any of these signs appear to restore function and prevent further deterioration.
Safety Gear for Cleaning PVC
Before beginning any cleaning, appropriate personal protective equipment should be selected to prevent chemical burns and physical injury.
Gloves with extended sleeves, goggles or a face shield, and a suitable respirator are recommended based on the cleaners and ventilation present.
The following section outlines when each type of protection is necessary and how to use it safely.
Protective Gloves And Sleeves
Several types of protective gloves and sleeves are recommended to shield hands and forearms from solvents, abrasives, and sharp edges encountered when cleaning PVC.
Nitrile gloves resist solvents and provide tactile control for scrubbing and applying cleaners. Neoprene or chemical-resistant gauntlets suit stronger solvents or prolonged exposure.
Cut-resistant liners protect against shards when cutting or deburring pipe; they pair with outer chemical-resistant gloves when needed.
Disposable nitrile or vinyl covers help prevent cross-contamination during light tasks. Long sleeves or detachable forearm guards add abrasion protection.
Gloves should fit well, be inspected before use, and be replaced if compromised to maintain safety.
Eye And Face Protection
Hand and forearm protection reduces many risks, but protection for the eyes and face addresses separate hazards posed by splashes, flying debris, and chemical vapors during PVC cleaning.
Safety glasses with side shields protect against liquid and particulate contact; for stronger splash or chemical exposure, a full-face shield over goggles provides broader coverage.
Choose impact-rated eyewear (ANSI Z87.1 or equivalent) and guarantee a snug fit without gaps.
Inspect lenses for scratches or residues that impair vision and replace damaged gear.
After cleaning, decontaminate or dispose of protective equipment per manufacturer guidance to prevent cross-contamination and maintain effectiveness.
Respiratory Protection Options
Respiratory protection is essential when cleaning PVC because solvents, primers, and heated plastic can release vapors and particulates that irritate or damage the respiratory system.
Workers should choose protection based on exposure: disposable N95 or P100 respirators for dust and light particulates; elastomeric half-face respirators with appropriate organic vapor cartridges for solvent fumes; and full-face respirators when both eye protection and higher-level seal are needed.
Guarantee proper fit testing and seal checks, replace filters per manufacturer guidance, and store gear cleanly.
In confined spaces, use supplied-air systems or SCBA.
Ventilate work areas and follow product safety data sheets for specific limits.
Essential Tools for PVC Cleaning
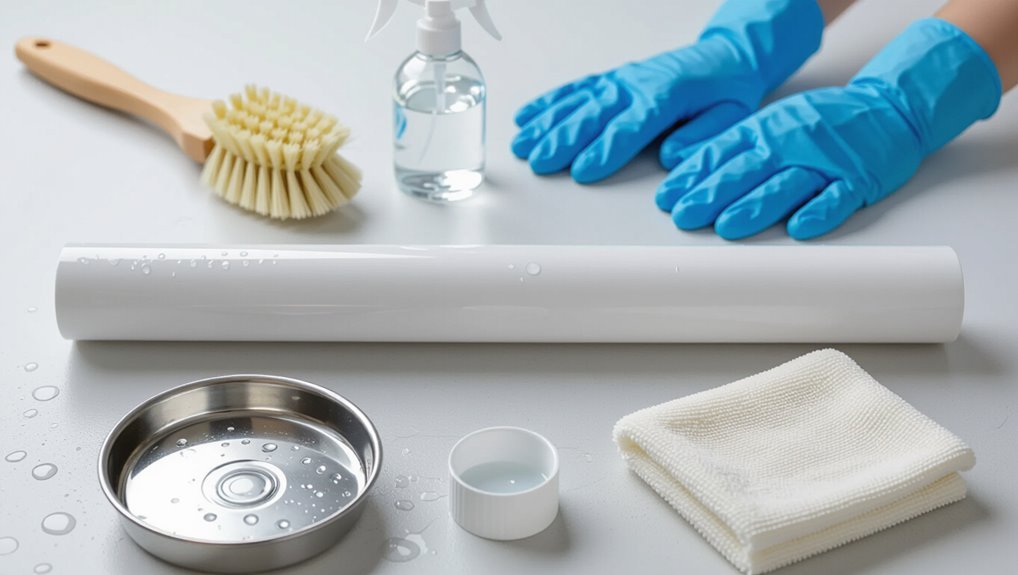
The section outlines the basic cleaning tools needed for PVC maintenance, such as brushes, rags, mild detergents, and a bucket for rinsing.
It also reiterates the protective safety gear already introduced—gloves, eye protection, and masks—emphasizing their role when using cleaners or scrubbing.
Practical recommendations focus on selecting tools that are effective without damaging the pipe surface.
Basic Cleaning Tools
A few basic tools make PVC cleaning efficient and safe: a soft-bristle brush for removing loose debris, a lint-free cloth for drying and polishing, a plastic scraper for adhesive or paint residue, a utility knife for cutting away stubborn buildup, and a mild detergent or PVC-safe cleaner to break down grime.
The selection emphasizes nonabrasive, plastic-friendly implements and readily available cleaners. Proper tool choice reduces surface damage and speeds tasks.
Attention to tool condition—clean, undamaged brushes and sharp but controlled knives—improves results. Compact, multiuse items are preferred for routine maintenance.
- Brushes
- Cloths
- Scrapers
- Cleaners
Protective Safety Gear
Following selection of appropriate brushes, cloths, scrapers, and cleaners, attention should turn to protective safety gear that limits exposure to dust, chemical residues, and sharp edges encountered during PVC cleaning. The writer notes that gloves, eye protection, and masks reduce acute risks; durable clothing and closed-toe shoes protect against spills and dropped tools. Proper ventilation complements respiratory protection when solvents are used. Inspect gear before use and replace damaged items. Store safety equipment separately from cleaning chemicals. Regularly review manufacturer safety data sheets to match gear to specific cleaners and tasks, ensuring efficient, low-risk maintenance.
| Item | Purpose | When to Use |
|---|---|---|
| Nitrile gloves | Chemical resistance | Solvent cleaning |
| Safety glasses | Eye splash protection | Scraping, solvent use |
| Respirator mask | Filter vapors/particles | Poor ventilation |
| Protective clothing | Skin protection | Large spills |
Household Cleaners That Are Safe on PVC
When selecting household cleaners for PVC, homeowners should choose products that remove grime without degrading the plastic’s surface or joint adhesives.
Mild dish soap diluted in warm water effectively lifts dirt and residues. Isopropyl alcohol (70%) works for sticky spots and light grease, evaporating without leaving film.
A baking soda paste provides gentle abrasion for stubborn stains when rinsed thoroughly. White vinegar diluted with water can brighten discolored sections and remove mineral buildup when used sparingly.
- Mild dish soap solution
- Isopropyl alcohol (70%)
- Baking soda paste
- Diluted white vinegar
Chemicals That Damage PVC (What to Avoid)
Harsh solvents and strong acids can quickly weaken PVC, causing surface crazing, softening, or joint failure; consequently substances such as acetone, methylene chloride, concentrated sulfuric or hydrochloric acid, and paint strippers should be avoided.
Chlorinated solvents, aromatic hydrocarbons (toluene, xylene), and aggressive degreasers also compromise material integrity and fittings. Solvent-based adhesives not formulated for PVC can dissolve surfaces and impair seals.
Bleach at high concentrations and prolonged exposure may embrittle PVC; alcohols used repeatedly can dull finishes.
For maintenance, select cleaners labeled safe for PVC, follow manufacturer guidance, rinse thoroughly after contact, and avoid unknown industrial chemicals or undocumented mixtures.
Surface Cleaning: Remove Dust and Dirt From PVC
After avoiding chemicals that can damage PVC, attention turns to routine surface cleaning to remove dust and dirt.
The process uses soft tools and mild cleaners to protect the material and preserve fittings. Begin by dry-brushing loose grit, then follow with a damp cloth; avoid abrasive pads.
Rinse residues thoroughly and allow full air drying before reassembly or painting. Inspect joints and threaded sections for trapped particles.
- Use a soft-bristle brush.
- Wipe with a microfiber or lint-free cloth.
- Clean with mild soap and water.
- Rinse and air dry completely.
Wiping Away Grease and Oil From PVC
Lift heavy residues first with a paper towel or soft cloth, then treat remaining oil with a mild degreasing solution to prevent long-term staining or slippery surfaces.
The technician applies a diluted dish soap or commercial PVC-safe degreaser, gently scrubbing with a soft brush or nonabrasive pad. After loosening grease, rinse thoroughly with warm water to remove residues that could attract dirt or degrade joints.
For persistent spots, repeat application briefly rather than using stronger chemicals that may soften PVC.
Finally, dry the pipe with a clean cloth and inspect fittings for trapped oil in crevices, repeating as needed.
Removing Hard-Water Scale From PVC
Hard-water scale on PVC appears as white, chalky deposits that can restrict flow and adhere stubbornly to fittings.
Recommended treatments include mild acidic cleaners (properly diluted and rinsed) or commercially formulated descalers compatible with PVC.
Stubborn deposits may require gentle mechanical removal with plastic scrapers or soft-bristle brushes to avoid scratching the pipe.
Identify Scale Buildup
Scale buildup on PVC appears as chalky white or pale gray deposits that cling to pipe interiors and fittings, often forming rough, crumbly layers or nodules.
The observer notes reduced flow, uneven surfaces, and a gritty texture when wiped.
Visual inspection with a flashlight reveals streaking and localized thickening near joints or bends.
Tapping or scraping with a plastic tool dislodges flakes, confirming mineral accumulation rather than mold or adhesive residue.
Photographs document severity for comparison after cleaning.
- Look for color, texture, and location.
- Check flow reduction and pressure changes.
- Perform a gentle scrape test.
- Photograph affected areas.
Safe Chemical Options
Which cleaning agents are safe for removing mineral deposits from PVC?
Mild acidic solutions like diluted white vinegar (5–10% acetic acid) effectively dissolve calcium and lime without damaging PVC when rinsed thoroughly.
Commercial descalers labeled safe for plastics and diluted per manufacturer instructions can be used; verify compatibility.
Avoid strong acids (muriatic, hydrochloric) and concentrated solvents that soften or craze PVC.
Neutral pH cleaners and household detergents remove light residues.
Apply chemicals in well-ventilated areas, wear gloves and eye protection, and limit contact time.
Rinse completely with water after treatment to neutralize residues and restore pipe integrity.
Mechanical Removal Methods
Mechanical methods remove mineral buildup without relying on chemicals, using abrasion, scraping, or pressure to restore flow and surface condition.
Practitioners assess scale thickness, select gentle tools, and proceed cautiously to avoid gouging PVC. Manual scraping with plastic or brass scrapers dislodges crusts; nylon brushes reach interior curves.
Rotating brushes or pipe pigs attached to flexible rods clear longer runs. For stubborn deposits, low-pressure water blasting or vinegar-soaked paddings soften mineral bonds before mechanical action.
After removal, a visual inspection and rinse confirm cleanliness; light sanding can smooth rough spots prior to reassembly.
- Plastic or brass scrapers
- Nylon bottle brushes
- Pipe pigs on flexible rods
- Low-pressure water blasting
Removing Algae and Mold From Outdoor PVC
Outdoor PVC exposed to moisture and sunlight can quickly develop green algae and dark mold, which discolor the pipe and may degrade joint seals over time.
To remove growth, rinse the surface with water, then apply a diluted bleach solution (one part household bleach to four parts water) or a commercial algicide, avoiding nearby plants and metal fixtures.
Scrub gently with a soft brush to lift biofilm without scratching the PVC. Rinse thoroughly and allow to dry in sunlight, which helps inhibit regrowth.
For persistent colonies, repeat treatment or consult a professional to inspect seals and recommend long-term prevention.
Choosing Tools for PVC Interior Cleaning
The section reviews which brush types and diameters fit common PVC interiors to guarantee effective scrubbing without damage.
It also covers which cleaning agents are safe for PVC and how to avoid those that cause discoloration or degradation.
Finally, recommended protective gear and handling techniques are outlined to protect the cleaner and preserve pipe integrity.
Right Brushes And Sizes
Several sizes of brushes are needed to match common PVC diameters and interior shapes when planning pipe cleaning.
A selection tailored to pipe size and texture improves reach and reduces damage. Bristles should be firm enough to dislodge buildup yet soft enough to avoid scoring the PVC.
Long-handled and flexible-shaft options access bends and deep runs; cup and bottle brushes suit straight lengths. Replace worn brushes promptly to maintain effectiveness.
- Small-diameter bottle brushes for 1/2″–1″ pipes
- Medium spiral brushes for 1″–3″ runs
- Large cup brushes for 3″–6″ mains
- Flexible shaft brushes for bends and offsets
Safe Cleaning Chemicals
After selecting brushes that match diameter and bends, attention turns to which cleaning chemicals can be used safely inside PVC without softening, discoloring, or leaving harmful residues.
Mild, nonabrasive detergents mixed with warm water remove grime without affecting pipe integrity. A diluted bleach solution disinfects; use low concentration and rinse thoroughly afterward to prevent residue.
Avoid solvents like acetone, MEK, or strong aromatic hydrocarbons that can craze or weaken PVC. Baking soda paste lifts stains gently and rinses clear.
Enzyme-based drain cleaners digest organic build-up safely when labeled for PVC. Always follow manufacturer instructions and rinse completely after cleaning.
Protective Gear And Technique
Wear appropriate personal protective equipment and select tools sized and shaped for the pipe run before beginning interior PVC cleaning.
The technician assesses pipe diameter, length, bends, and access to choose brushes, rods, and flexible snakes that avoid gouging or overstressing joints.
Eye protection, nitrile gloves, and a respirator are recommended when solvents or biofilm are present.
Lighting and inspection cameras improve precision and reduce repeat passes.
Work proceeds slowly, using steady pressure and rotation to dislodge deposits; flush frequently to remove debris.
Clean tools after use and inspect for wear to prevent future damage.
- Measure pipe geometry
- Choose compatible brushes
- Use inspection camera
- Wear PPE
How to Clean Small-Diameter PVC Interiors
Cleaning small-diameter PVC interiors requires tools and techniques that navigate tight spaces without damaging the pipe; common options include flexible bottle brushes, pipe cleaners, and soft-bristled tubing brushes designed for PVC.
The procedure begins with a dry pass to remove loose debris, followed by gentle scrubbing with a mild detergent solution. Rotate brushes slowly to avoid scoring, and replace soiled tools frequently.
For stubborn residue, apply a diluted vinegar or baking soda paste, allow brief dwell time, then scrub. After cleaning, extract residual cleaner with absorbent cloth or a wet-dry vacuum on low.
Inspect interiors with a lighted probe before reassembly.
How to Flush and Rinse Long PVC Runs
Begin by isolating the run and securing both ends so flow can be controlled; this allows a systematic flush that removes loosened debris and residual cleaning solution.
The operator selects a steady low-pressure source, introduces clear water at one end, and vents air at the opposite end to prevent pockets. Flow continues until discharge runs clear and neutral pH is confirmed.
Final steps include drying or purging with compressed air if required and inspecting joints for residue.
- Establish containment and drainage.
- Use gentle continuous flow.
- Verify clarity and pH.
- Dry and inspect before reassembly.
Using a Bottle Brush Inside PVC Pipe
Selection of a bottle brush should match the pipe diameter and use stiff, non-abrasive bristles to avoid scratching the PVC.
The brush should be inserted straight and advanced with steady, rotating strokes while maintaining contact with the inner wall to dislodge buildup.
After brushing, the pipe should be flushed to remove loosened debris and inspected for remaining residue.
Choosing The Right Brush
A narrow, stiff bottle brush often provides the best combination of reach and scrubbing power for cleaning the inside of PVC pipe; its bristles should be firm enough to dislodge grime yet flexible enough to navigate bends without scoring the plastic.
Selection prioritizes diameter matching, bristle material, handle length, and corrosion resistance.
Nylon bristles resist chemicals and retain shape; avoid metal bristles that abrade PVC. A long, rigid handle improves reach but should allow slight flex.
Consider brush diameter to avoid excessive force. Replace worn brushes to prevent scratching. Proper choice balances effectiveness with protection of the pipe interior.
- Diameter fit
- Bristle material
- Handle length
- Durability
Proper Brushing Technique
With the appropriate brush chosen, attention turns to technique for effective, nonabrasive cleaning inside PVC pipe. The user should insert the bottle brush gently, rotate with light pressure, and avoid aggressive scrubbing that damages the surface. Work in short strokes, rinse frequently, and inspect progress with a flashlight. For long runs, clean in segments and allow drying between passes. Rinse with clean water and sanitize if needed. Store the brush dry to prevent contamination.
| Action | Pressure | Frequency |
|---|---|---|
| Insert gently | Low | Per segment |
| Rotate slowly | Light | Every few strokes |
| Rinse | Moderate flow | After pass |
Using a Plumber’s Snake Safely on PVC
Careful technique and the right tools minimize damage when using a plumber’s snake on PVC: the operator should feed the cable slowly, avoid forcing it against fittings or sharp bends, and use a soft-start mode or inline hand crank rather than aggressive power to reduce stress on the pipe.
The technician inspects entry points, selects a snake with appropriate diameter and a flexible head, and advances with controlled rotation. On encountering resistance, retract slightly and retry alignment to prevent scoring.
Clean the cable before and after use to avoid introducing grit.
- Inspect entry and pipe path
- Choose correct cable size
- Advance with controlled rotation
- Retract and realign when stuck
When to Use a Pressure Washer on PVC
After using a plumber’s snake, the technician considers whether a pressure washer is appropriate for further cleaning: high-pressure water can remove surface grime and internal residue but also risks stressing joints or softening seals if misapplied.
The technician evaluates pipe material, age, joint type, and nearby fittings; newer schedule 40 PVC tolerates moderate pressure, while older or glued joints require caution.
Use a wide fan nozzle, moderate PSI, and keep the wand moving to avoid focused stress.
Avoid pressure washing buried pipe or those with visible cracks.
When in doubt, opt for manual cleaning or consult a professional to prevent damage.
Removing Adhesive, Paint, and Sticker Residue From PVC
Removing adhesive, paint, and sticker residue from PVC requires choosing solvents that dissolve residues without attacking the plastic.
Mechanical methods such as soft scrubbing or plastic scrapers can lift stubborn material without scratching the surface.
After cleaning, applying a protective coating or waxing helps prevent future sticking and makes maintenance easier.
Safe Solvent Choices
Several common solvents can safely dissolve adhesive, paint, and sticker residue on PVC when chosen and used correctly.
The writer notes that solvent selection prioritizes PVC compatibility, low odor, and minimal plasticizing effect. Testing on an inconspicuous area is advised. Appropriate solvents remove residues without softening or whitening the pipe.
- Isopropyl alcohol (70–99%): effective for labels and light adhesives; fast-evaporating, low risk.
- Mineral spirits: good for paints and heavier adhesives; use ventilated area.
- Citrus-based cleaners: biodegradable, gentler on PVC, best for sticky residues.
- Commercial PVC-safe adhesive removers: formulated to balance effectiveness and material safety.
Gentle Mechanical Removal
A soft, methodical approach minimizes damage when lifting adhesive, paint, or sticker residue from PVC: start with gentle tools—plastic scrapers, rubber erasers, and non-abrasive cloths—and work gradually, testing pressure and motion on an inconspicuous spot to confirm the pipe’s finish remains unchanged.
Use light, consistent strokes parallel to the pipe, avoiding twisting that can gouge. For stubborn spots, soften residue with warm soapy water or a brief application of a safe solvent previously approved; allow penetration before mechanical action.
Remove loosened material frequently to prevent reabrasion. Finish by wiping dry and inspecting for remaining residues before repeating treatment.
Post-Cleaning Protection
After cleaning, applying a suitable protective step preserves the PVC’s finish and reduces future buildup of adhesive, paint, or sticker residue.
The surface should be fully dry and free of solvents before protection. Options include polymer-based sealants, silicone-free waxes, or thin coats of clear acrylic designed for plastics.
Test any product on an inconspicuous area. Reapply periodically, especially in high-contact or outdoor locations.
For labels, use removable adhesive liners or low-tack tapes to prevent strong bonding.
- Choose plastic-safe sealant.
- Test compatibility first.
- Apply thin, even coats.
- Reapply as maintenance.
Disinfecting PVC Used for Potable Water
Disinfecting PVC used for potable water guarantees the removal of harmful microorganisms after installation or repair, protecting public health and complying with plumbing codes.
The procedure begins with flushing debris, then preparing a chlorine solution sized to pipe volume (typically 50–200 ppm).
Introduce solution, allowing contact for the required dwell time per local guidelines, then thoroughly flush until chlorine is undetectable.
Use test strips to verify residual levels. Document concentrations, contact time, and flushing results for inspection.
Avoid introducing non-approved chemicals or materials.
If contamination persists, repeat disinfection or consult a licensed plumber to assess system integrity and source.
Deodorizing PVC With Lingering Smells
Lingering odors in PVC can originate from trapped organic matter, chemical residues, stagnant water, or biofilm buildup within joints and dead-ends.
Effective deodorizing begins with identifying the likely source so treatments target the cause rather than masking symptoms.
Common solutions include flushing and mechanical cleaning, dilute bleach or peroxide rinses, and odor-absorbing compounds such as activated carbon or baking soda depending on compatibility with the system.
Identify Odor Sources
A systematic inspection helps determine why a PVC pipe emits an odor: check for external contamination (oil, paint, mildew), internal build-up (biofilm, grease, trapped debris), ventilation issues that allow sewer gases to concentrate, and chemical residues from previous contents.
The assessor should note odor character (musty, rotten, chemical), location, persistence, and correlation with fixtures or weather.
Visual checks, sniff tests at junctions, and gentle probing with a flexible rod reveal clogs or trapped organics.
Record findings before treatment so remedies target causes rather than masking symptoms.
- Identify odor type and source location
- Inspect vents and traps
- Check for visible deposits
- Document observations
Deodorizing Solutions Overview
Several practical approaches exist for deodorizing PVC pipes with persistent odors, ranging from simple household rinses to targeted enzyme treatments.
Common methods include flushing with diluted vinegar or baking soda solutions to neutralize acids and bases, and using enzymatic cleaners that break down organic residues causing smells.
For chemical or mildew odors, a bleach rinse followed by thorough water flushing can disinfect and reduce scent, though compatibility with seals must be checked.
Activated charcoal or baking soda placed near vents absorbs residual odors.
Preventive measures—regular cleaning, proper drainage, and removing trapped debris—minimize recurrence and extend deodorizing effects.
Drying PVC to Prevent Microbial Regrowth
Because moisture left inside PVC creates a habitat for bacteria and mold, thorough drying is critical after cleaning to prevent microbial regrowth.
Attention to airflow and residual humidity reduces biofilm formation. Recommended practices prioritize complete desiccation without damaging fittings or seals. Controlled drying guarantees longevity and sanitary conditions.
- Use compressed air or a shop vac to expel pooled water from fittings and long runs.
- Follow with warm, dry air (not exceeding manufacturer temperature limits) to evaporate residual moisture.
- Allow adequate dwell time; confirm dryness with absorbent cloths or moisture meters.
- Store pipes in a dry, ventilated area to prevent rewetting.
Inspecting Cleaned PVC for Damage or Wear
After cleaning, the pipe should be given a methodical visual surface inspection for scratches, discoloration, or residue that could indicate compromised material.
Next, the cleaned sections must be assessed for structural integrity by checking for cracks, warping, soft spots, or loose fittings.
Any signs of damage should be documented and repaired or replaced before reinstallation.
Visual Surface Inspection
A careful visual surface inspection gauges whether cleaning removed contaminants without harming the PVC and identifies cracks, crazing, soft spots, warping, or chemical etching that could compromise function.
The inspector scans the entire exterior and accessible interior surfaces under good light, using magnification if needed. Attention focuses on changes in texture, discoloration, surface dulling, or raised areas that indicate chemical attack or abrasion.
Document findings with notes and photos, marking locations for monitoring. Minor surface residues may be re-cleaned; suspicious defects are recorded for follow-up testing.
- Inspect under bright, angled light.
- Use magnification for fine defects.
- Photograph and note locations.
- Re-clean minor residues.
Check For Structural Integrity
With surface inspection complete and any minor residues addressed, the inspector proceeds to evaluate structural integrity by analyzing for cracks, crazing, deformation, thinning, and other signs of mechanical or chemical weakening.
The inspector runs hands along lengths, flexes accessible sections gently, and uses a flashlight to reveal hairline fractures or stress whitening.
Joints and fittings receive extra scrutiny for solvent-weld failures, adhesive gaps, or corrosion at metal interfaces.
Measurements with calipers detect wall loss or ovality beyond tolerance.
Compromised segments are marked and documented with photos and notes; replacement or professional repair is recommended for any defect affecting pressure containment or alignment.
Repairing Scratches and Surface Abrasions on PVC
Repairing scratches and surface abrasions on PVC requires evaluating the damage, selecting appropriate abrasives and fillers, and following a careful finishing sequence to restore appearance and prevent moisture intrusion.
The technician inspects depth: light scuffs buffer with fine sandpaper, deeper scratches demand plastic filler or solvent-weld patches. Clean the area with isopropyl alcohol before repair, apply filler sparingly, cure per manufacturer instructions, then progressively sand with finer grits.
Finish with a UV-resistant paint or clear coat if exposed. Proper technique avoids over-sanding and guarantees a smooth, sealed surface that resists dirt and moisture.
- Assess depth and length
- Clean and prep
- Fill and cure
- Sand and finish
When to Replace PVC Instead of Cleaning
Although routine cleaning restores many PVC surfaces, replacement becomes necessary when structural integrity, chemical damage, or extensive UV degradation compromise function or safety.
Signs warranting replacement include visible cracks, deep gouges, severe warping, brittleness, persistent leaks after patching, and transverse fractures indicating stress failure.
Chemical etching, softening, or discoloration from solvent exposure that alters wall thickness or fitting fit also justify replacement.
When piping carries potable water, sewage, or pressurized systems, erring on replacement prevents contamination and ruptures.
Cost, accessibility, and frequency of recurrent failures guide decisions; replace rather than repeatedly repair when reliability and safety are at risk.
Cleaning PVC Fittings and Joints (Best Practices)
Begin by disassembling accessible fittings and wiping joints free of loose debris, since proper cleaning requires direct access to mating surfaces and crevices where grime, scale, or old adhesive can prevent a secure seal.
Examine mating faces, chamfers, and internal sockets for damage or residue. Use a soft brush, lint-free cloth, and isopropyl alcohol for stubborn deposits; avoid abrasive tools that scar sealing surfaces.
Ascertain parts dry completely before reassembly and apply compatible primer and solvent cement only where specified.
Test joints after curing for leaks and re-tighten mechanical fittings as needed.
- Inspect surfaces
- Clean gently
- Dry thoroughly
- Test seals
Cleaning PVC Irrigation and Sprinkler Lines
When servicing PVC irrigation and sprinkler lines, the first step is to flush the system thoroughly with clean water to remove sediment and debris.
After flushing, a measured bleach solution can be circulated briefly to disinfect internal surfaces and kill algae or bacteria.
The lines should then be flushed again with clean water to remove any residual bleach before returning the system to service.
Flush With Clean Water
Flushing PVC irrigation and sprinkler lines with clean water removes loose sediment, dislodged biofilm, and residual chemicals that can clog emitters and reduce flow. Running water at moderate pressure for several minutes through each zone guarantees particles are carried out of the system and into drains or a designated discharge area.
The operator should sequentially open zone valves, observe outlet clarity, and continue until flow runs clear. Inspect filters and strainers afterwards. Avoid high pressure that can damage fittings. Properly divert discharge to prevent erosion or contamination of sensitive areas.
- Open zones sequentially
- Run until clear
- Check filters
- Divert discharge
Disinfect With Bleach
To disinfect PVC irrigation and sprinkler lines, circulate a measured bleach solution through each zone to kill bacteria, algae, and biofilm that flushing alone may not remove. The technician calculates concentration (typically 50–200 ppm), isolates zones, and runs solution until all outlets show contact. Let stand 30–60 minutes, then flush thoroughly with clear water until odor is gone. Rinse collection points and filters. Use gloves, eye protection, and avoid mixing with acids. Record treatment details for maintenance schedules and safety.
| Step | Concentration | Contact Time |
|---|---|---|
| Prep | 50–200 ppm | 30–60 min |
| Rinse | Clear water | Until odor gone |
Cleaning PVC in HVAC Condensate Systems
Routine maintenance of HVAC condensate PVC focuses on preventing algae, mold, and mineral buildup that can clog drain lines and cause system backups.
Technicians inspect traps and joints, clear standing water, and flush lines with a mild vinegar solution or manufacturer-approved cleaner to dissolve deposits without harming seals.
Mechanical agitation with a brush or flexible snake removes biofilm; follow with a rinse and proper drying.
Scheduled treatment and inspection reduce odors and corrosion risk.
- Inspect traps and fittings.
- Flush with vinegar or approved cleaner.
- Agitate biofilm mechanically.
- Rinse and dry thoroughly.
Cleaning PVC Used in Aquariums and Ponds
Cleaning PVC used in aquariums and ponds requires careful removal of algae, biofilm, and mineral deposits while preserving aquatic life and beneficial bacteria.
Rinse detached pieces with dechlorinated water, gently scrub with a soft brush and nonmetallic pad to avoid scratches, and use diluted vinegar for mineral buildup.
For tougher biofilm, soak in a mild bleach solution (1:10), then rinse thoroughly and aerate treated PVC for 24–48 hours to off-gas residual chlorine before reintroduction.
Avoid soap, antibacterial agents, and abrasive tools. Quarantine cleaned items until safe; monitor water parameters and livestock for stress after returning PVC to the system.
Cleaning PVC Used for Outdoor Furniture and Decking
Expose outdoor PVC furniture and decking to a gentle wash before deep-cleaning: remove loose dirt and debris with a broom or low-pressure hose, then assess stains, mildew, and embedded grime to choose the appropriate detergent and tool.
Use mild detergent or diluted oxygen bleach for organic growth; test a hidden area first. Apply cleaner with a soft-bristle brush or sponge, agitate gently, then rinse thoroughly to avoid residue.
For stubborn stains, repeat treatment or use a plastic-safe non-abrasive cleaner. Always dry surfaces to inspect results and prevent streaking.
- Select cleaner and test.
- Agitate gently.
- Rinse completely.
- Dry and inspect.
Preventing Future Buildup on PVC Pipe
To reduce recurring deposits, a regular flushing schedule keeps flow clear and prevents sediment or algae from accumulating.
Periodic flushing should be paired with inspections to confirm effectiveness and catch early clogs.
Applying a compatible protective pipe coating can further inhibit buildup and extend maintenance intervals.
Regular Flushing Schedule
A consistent flushing schedule helps prevent mineral, biofilm, and sediment buildup inside PVC pipe by regularly dislodging deposits before they harden or accumulate.
Routine flushing frequency should align with water quality, usage patterns, and visible signs of reduced flow. Automated or manual flushes remove loose material and limit microbial colonization when performed at appropriate intervals.
Record keeping of flush dates, volumes, and observations supports timely adjustments. Prioritize accessible cleanouts and valves to streamline the process and minimize disruption.
- Assess frequency based on hardness and usage.
- Use high-velocity short-duration flushes.
- Log results and inspect visually.
- Adjust schedule after performance review.
Protective Pipe Coating
Beyond routine flushing, long-term prevention of mineral, biofilm, and sediment accumulation on PVC benefits from protective pipe coatings that reduce adhesion and ease cleaning.
Suitable options include food-safe silicone, fluoropolymer sprays, and specialized epoxy or polyurethane linings formulated for potable or non-potable systems. Coatings create smoother surfaces, limit microbial attachment, and slow scale formation, extending intervals between cleanings.
Proper surface preparation—cleaning, degreasing, and light abrasion—ensures adhesion. Application should follow manufacturer instructions for temperature, cure time, and compatibility with PVC solvents.
Periodic inspection verifies integrity; damaged coating must be removed and reapplied to maintain protection and system performance.
Best Cleaning Schedule for Household PVC Plumbing
Because regular maintenance preserves flow and prevents buildup, homeowners should adopt a simple, seasonal cleaning schedule for household PVC plumbing.
Inspections quarterly catch leaks, discoloration, or joint degradation early. Basic flushing and mechanical clearing of accessible traps and vents twice yearly reduce sediment and biofilm.
Annual thorough checks by a qualified plumber verify fittings, pressure, and hidden blockages. After major household projects or noticeable odor, perform an immediate targeted cleaning to remove debris.
- Quarterly visual inspection and minor cleaning
- Biannual flushing and trap clearing
- Annual professional inspection
- Immediate cleaning after renovations or odors
Eco-Friendly Cleaning Options for PVC
When choosing eco-friendly cleaning options for PVC, homeowners should prioritize noncorrosive, biodegradable solutions and mechanical methods that avoid harsh chemicals; these reduce environmental impact while protecting pipe integrity.
Gentle options include diluted vinegar, baking soda paste, and enzyme-based drain treatments formulated for PVC. Manual cleaning with soft brushes, nylon scrubbers, and plumber’s snakes removes buildup without solvents.
Cold-water flushing and periodic hot-water rinses help dislodge debris safely. Avoid acidic toilet bowl cleaners, acetone, or chlorinated solvents that can degrade PVC.
Proper disposal of rinse water and using only recommended concentrations further minimize ecological harm and maintain plumbing longevity.
Choosing a Commercial PVC Cleaner
How should a homeowner select a commercial PVC cleaner that balances effectiveness with material safety? A concise evaluation focuses on ingredients, compatibility, manufacturer guidance, and application method.
Choose cleaners labeled safe for PVC, avoiding strong solvents or ketones that can soften or craze the plastic.
Verify compatibility with pipe fittings, adhesives, and any coatings. Prefer clear usage instructions and recommended contact times to prevent overexposure.
Consider user safety: ventilation needs, protective gear, and disposal instructions. Test on an inconspicuous section when possible.
Maintain records of product name and batch for future reference and warranty concerns.
- Ingredients check
- Compatibility verification
- Safety requirements
- Small-area testing
Cost and Time Estimate for Typical PVC Cleaning Jobs
A typical residential PVC cleaning job generally takes 30–90 minutes and costs $10–$60 in materials or $60–$150 for professional service, depending on length of pipe, level of soiling, and required products or equipment. Costs vary with access difficulty, tools (brushes, cleaners), and disposal needs. Time reflects inspection, cleaning, rinsing, and drying. For budgeting, expect longer runs and heavy deposits to increase both time and price.
| Item | Typical range |
|---|---|
| DIY materials | $10–$60 |
| Professional service | $60–$150 |
| Time per job | 30–90 minutes |
Common Mistakes That Damage PVC During Cleaning
Because PVC is chemically resilient but physically vulnerable, improper cleaning methods can quickly cause cracks, warping, or surface crazing that weaken pipe integrity.
The section outlines common mistakes that shorten service life and create leaks. Avoid harsh solvents, abrasive pads, excessive heat, and mechanical shock. Use appropriate cleaners, soft cloths, moderate temperatures, and gentle handling.
Misuse often stems from assuming durability means immunity; clear guidance prevents damage.
- Using strong solvents like methylene chloride.
- Scrubbing with metal brushes or coarse scouring pads.
- Applying open flame or hot air above recommended temperatures.
- Dropping, bending, or striking pipes during cleaning.
Troubleshooting: Stubborn Stains and What to Try Next
When stains resist standard cleaning, assess their type and age before escalating treatment; oil-based, mineral, and organic stains respond to different approaches and some older discolorations may be permanent.
For oil or grease, apply a mild solvent-specific cleaner briefly, then rinse; avoid prolonged exposure.
Mineral deposits often yield to vinegar or a diluted acidic descaler with gentle scrubbing.
Organic stains (mold, algae) respond to diluted bleach or enzymatic cleaners; rinse thoroughly.
Test any product on an inconspicuous area first.
If staining persists, consider light sanding or professional evaluation rather than stronger chemicals that risk PVC damage.
How to Neutralize Chemical Spills on PVC Safely
Following methods for stubborn stains, attention shifts to handling chemical spills on PVC with safety and material integrity in mind.
The procedure emphasizes containment, neutralization appropriate to the chemical class, gentle rinsing, and inspection for damage. Protective gear and ventilation are required.
- Identify the spilled chemical and consult its SDS for neutralizer recommendations.
- Contain spread with absorbent pads or barriers; avoid abrasive scrubbing.
- Apply specified neutralizer sparingly; allow reaction time, then flush with plenty of water.
- Inspect PVC for softening, crazing, or discoloration; replace sections if structural integrity is compromised.
Quick Finish Checklist Before You Close the Job
Before leaving the site, a concise finish checklist confirms the PVC installation is safe, clean, and ready for handover. The technician checks joints, cleans residue, verifies labels, and documents tests. Remaining debris is removed, adhesive odors dissipated, and tools secured. A quick pressure test and visual inspection catch leaks; photos record completion. Client guidance is provided briefly about care and warranty. Final signs and barriers are taken down only after safety is guaranteed. Completion is logged with time, inspector initials, and any follow-up actions to confirm accountability and a smooth handover.
| Item | Action | Status |
|---|---|---|
| Joints | Inspect | Done |
| Clean | Wipe residue | Done |
| Test | Pressure | Done |
| Label | Mark lines | Done |
| Document | Photos/log | Done |
Conclusion
Like a hired gardener restoring a neglected hedge, the cleaner approaches PVC with steady, practiced care—tools ready, safety gear donned, and patience in hand. When grime yields and flow returns, the work feels quietly heroic rather than flashy. The finished runs gleam not from showmanship but from consistent technique and respect for the material. In the end, the pipe’s renewed clarity reflects the simple satisfaction of a well-kept duty completed.