How to Tell If Your Vent Pipe Is Clogged: 7 Signs and Quick Fixes
If you suspect your vent pipe is clogged, look for these signs: gurgling or bubbling drains, slow sinks or tubs, toilets that bubble or fail to refill, and persistent sewer odors. When multiple fixtures are sluggish or water backs up around fittings, it’s likely due to vent restrictions. On the roof, check for bird nests, debris, ice, or damp ceiling stains. To troubleshoot, inspect the roof, flush the vent, or carefully use an auger. For more detailed fixes, safety tips, and guidance on when to call a professional, continue reading.
How to Recognize a Clogged Vent Pipe Quickly
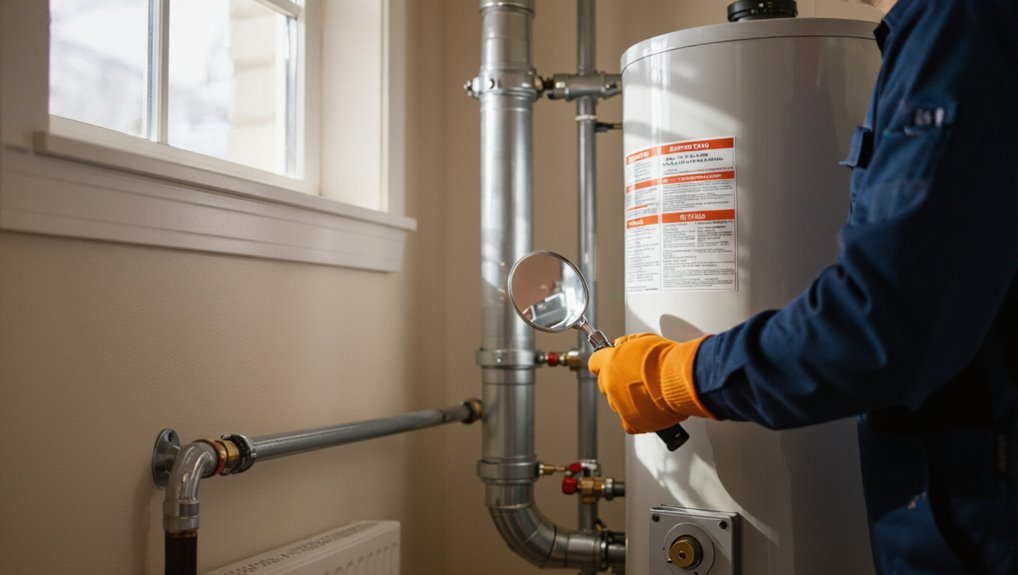
Audible signs such as gurgling, bubbling, or sewer odors often signal a vent pipe restriction.
Visible clues include water backing up around fixtures or debris and ice near roof penetrations.
Noting that multiple drains failing at once points to a vent issue helps distinguish it from a localized drain or sewer line problem.
Common audible signs (gurgling, bubbling, sewer smells)
How can one tell a vent pipe is blocked before water backs up? Observers ask how do I know if my vent pipe is clogged when hearing persistent gurgling from drains, bubbling in toilets, or intermittent sewer odors near fixtures.
These audible cues indicate trapped air and poor venting; they often precede slow drains or siphoning and warrant prompt inspection to prevent backups and odors.
Visible indicators around fixtures and roof penetrations
When a vent pipe is clogged, tangible signs often appear around fixtures and at roof penetrations that can be spotted before significant backups occur.
Discolored or damp ceilings and walls near bathroom fixtures, slow-draining sinks with no upstream blockage, persistent odors at roof vents, bird or debris nests visible at roof stacks, and icing or frost forming on roof flashings in cold weather all indicate restricted venting.
When multiple drains act up simultaneously
What should be inferred when several fixtures slow or gurgle at once?
Multiple sluggish drains and intermittent gurgling often indicate reduced vent airflow. Air trapped in the drainage system causes slow drainage, noise, and occasional sewer odor near fixtures.
This pattern across separate bathrooms or kitchen suggests a shared vent restriction rather than an isolated trap issue; inspect roof vents for blockage.
Distinguishing vent pipe issues from drain or sewer line problems
Can a few simple observations reveal whether sluggish fixtures stem from a clogged vent or a blocked drain or sewer?
The article notes vent problems cause gurgling, slow drainage across multiple fixtures, and strong sewer gas odors but rarely sewage backups.
Drain or sewer blockages cause localized backups, persistent slow drains despite vent clearing, and sewage surfacing.
Smelling raw sewage, repeated backups, or sewer line inspection confirm sewer issues.
What a Vent Pipe Does and Why It Matters
A vent pipe equalizes air pressure in the drainage system so wastewater flows freely and fixtures do not gurgle or siphon dry.
It also routes sewer gases outdoors to preserve trap seals and indoor air quality.
Typical vents run through roofs or exterior walls and are made from materials like cast iron, galvanized steel, or PVC, whose age and condition influence failure risk.
Role of vent pipes in plumbing pressure balance
When wastewater flows through drain lines, vent pipes equalize air pressure within the plumbing system so traps retain water seals and fixtures drain smoothly.
They admit air to replace volume lost by moving water, preventing negative pressure and slow drains.
They also allow pressure relief during surges, minimizing backflow risk and reducing gurgling, ensuring predictable flow rates and consistent fixture performance.
How vents prevent sewer gas and maintain trap seals
Most vent pipes serve a straightforward but critical role: they channel odors and sewer gases safely out of a building while preserving the water seals in plumbing traps.
Typical vent pipe locations and configurations in homes
Vent pipes typically run from fixtures through walls or floors and converge into vertical stacks that exit above the roofline. They branch near bathrooms, kitchens, and laundry areas, often pairing with soil stacks.
Configurations include individual vents, common vents serving multiple fixtures, and wet vents combining drain and vent functions.
Roof penetrations and attic runs are routine locations requiring clear airflow.
Materials and common ages that affect failure risk
Materials used for vent pipes and their age considerably influence failure risk: older homes often have cast iron or galvanized steel stacks prone to corrosion and joint leaks.
Mid‑20th century installations may use threaded black iron with similar deterioration patterns, while modern systems commonly employ PVC or ABS plastics that resist rust but can become brittle with prolonged UV or heat exposure.
Inspectors note seals, offsets, and changes.
Seven Clear Signs Your Vent Pipe Is Clogged
When a vent pipe is blocked, plumbing fixtures often show specific, repeatable symptoms that point to poor air flow and trapped gases. Recognizing these signs early helps identify vent issues before they cause major backups or damage.
The most common indicators are straightforward and observable during normal household use.
- Persistent gurgling in sinks, tubs, or toilets
- Slow draining across multiple fixtures
- Strong or recurring sewer odors indoors
- Toilets that bubble or don’t refill properly
- Backups when the washing machine drains
Persistent gurgling in sinks, tubs, or toilets
Persistent gurgling from sinks, tubs, or toilets often signals trapped air in the drain system caused by a partially blocked vent pipe.
The sound occurs when air pockets displace water during drainage, producing bubbling or coughing noises.
Intermittent or continuous gurgles near fixtures suggest restricted airflow in the vent stack.
Professional inspection or clearing of roof vents typically resolves persistent vent-related gurgling.
Slow draining across multiple fixtures
Noticeable slowing of water flow in multiple fixtures often indicates a vent pipe obstruction rather than isolated clogs.
When showers, sinks and toilets all drain sluggishly, airflow into the drain system is likely restricted, causing slow emptying and occasional backups.
This pattern distinguishes a venting issue from individual blockages and suggests inspection of roof vents, attic stacks, and vent terminations for debris or animal nests.
Strong or recurring sewer odors indoors
If a foul sewer smell repeatedly appears inside a home, it often signals a blocked vent pipe that prevents sewer gases from venting outdoors.
Persisting odors, especially near drains, basements, or attics, indicate trapped gas buildup.
Temporary masking means the issue remains.
A clogged vent requires inspection and clearing to restore proper airflow and stop health‑risk fumes from entering living spaces.
Toilets that bubble or don’t refill properly
One common sign of a clogged vent pipe is a toilet that bubbles, gurgles, or fails to refill properly after flushing.
Air trapped in the drain line prevents smooth flow, causing sputtering or slow refill.
Repeated occurrences across multiple fixtures point to venting issues rather than tank or valve faults.
Inspect roof vents for blockages and clear debris or animal nests promptly.
Backups when the washing machine drains
A washing machine that backs up or overflows during the drain cycle often indicates a vent pipe restriction.
Water may puddle in the appliance or spill into nearby drains as air cannot escape, slowing drainage and causing siphoning or gurgling.
Persistent backups despite clear hoses suggest venting issues rather than the machine itself; inspect vents for obstructions or consult a plumber.
Roof vent stacks with visible blockages or ice dams
Roof vent stacks capped with visible debris or rimmed in ice signal a compromised vent line that can restrict airflow and trap sewer gases.
Homeowners should inspect from ground level or via safe roof access for leaves, bird nests, snow or ice buildup.
Prompt removal and professional assessment prevent odor intrusion and pressure-related drainage issues; regular maintenance reduces recurrence and roof damage.
Unusual pressure changes or siphoning of traps
Noticeable pressure shifts within plumbing lines often indicate a blocked vent pipe interfering with air balance.
Water in traps may surge, gurgle, or siphon entirely when negative pressure pulls water out, allowing sewer gas into living spaces.
Slow drains combined with fluctuating water levels in adjacent fixtures further confirm venting issues.
Prompt inspection and clearing of the vent stack prevent odors, health risks, and compromised trap seals.
Quick DIY Checks You Can Do Safely
A homeowner can begin with simple, safe checks such as visually inspecting the roof vent from ground level and, if comfortable, from the roof while observing fall precautions.
Isolating the affected vent by testing individual drains, flushing the stack with a garden hose, or carefully using a plumber’s snake can help clear common blockages.
Special precautions are advised for winter ice and bird nests to avoid injury and further damage.
Inspecting the roof vent from ground level and roof safely
Begin by identifying the vent stack’s location from ground level, using binoculars if needed to examine the pipe, flashing, and surrounding shingles for obvious blockages, loose flashing, or bird nests.
If safe, use a stable ladder and wear non‑slip shoes; inspect caps, screen condition, and debris without dislodging materials.
Retreat if roof appears unstable and call a pro for risky situations.
Testing drains to isolate which vent is affected
Start by running simple, targeted tests at each fixture to determine which drains exhibit slow flow, gurgling, or sputtering—signs that point to a venting issue rather than a trap or clog in the drain line.
Flush toilets, run sinks and tubs individually, and note simultaneous symptoms.
Isolate affected fixtures by testing others nearby; consistent issues on grouped fixtures indicate a shared vent needing further inspection.
Using a garden hose to flush the vent stack
Flush the vent stack with a garden hose to clear leaves, bird nests, and minor debris that block airflow.
A steady, moderate flow from the roof down the vent dislodges light obstructions; avoid high pressure that could damage flashing.
Wear fall protection, remove loose caps first, and check runoff for trapped material.
If resistance persists, stop and consult a professional for safe inspection.
When and how to use a plumber’s snake through the vent
A plumber’s snake can clear deeper obstructions that a garden hose won’t reach, but it should be used cautiously: only when the vent opening is accessible from the roof, the snake length matches the vent run, and the operator is comfortable working at height with fall protection.
Feed the coil slowly, rotate clockwise to dislodge debris, withdraw periodically to clear buildup, and test airflow after completion.
Precautions for winter ice and bird nests
Because vents exposed on rooftops are vulnerable to ice buildup and nesting, homeowners should perform a few quick, safe checks before winter and after thawing periods.
From ground level, inspect for visible ice, icicles, or nests. Use binoculars; avoid roof access on ice.
Clear light debris with a long pole or call a pro for frozen blockages, damaged flashing, or active nests to prevent harm.
Step-by-Step DIY Fixes for Common Vent Blockages
The following steps outline practical DIY approaches for common vent blockages, including removing debris or bird nests from the vent opening and melting ice safely with hot water or roof-safe ice melt.
It also covers flushing the vent with controlled water pressure and using an auger through the vent stack, noting proper tools, techniques, and the method’s limits.
Finally, temporary measures to reduce odors and gurgling until a professional can assess the system are described.
Clearing debris and bird nests from the vent opening
Begin by visually inspecting the vent opening from ground level or rooftop access to confirm debris or a nest is present and to assess reach and safety needs.
Using gloves and eye protection, remove loose material with a long-handled grabber or gloved hand.
For stubborn nests, carefully dislodge with a plumber’s snake or telescoping pole, then clear remnants and install a wildlife-proof vent cap.
Melting ice blockages safely with hot water or roof-safe ice melts
After removing debris and wildlife barriers, attention should turn to ice forming around the vent pipe, which can restrict airflow and trap condensation.
Use hot (not boiling) water poured slowly to melt surface ice, protecting shingles and flashings. Alternatively, apply a roof-safe, low-corrosion ice melt per manufacturer instructions.
Clear melted slush, inspect seals, and repeat cautiously to avoid thermal shock or roof damage.
Flushing with water pressure: method and limits
One practical way to clear many vent obstructions is to flush the stack with pressurized water, using a garden hose or shop-vac water nozzle to dislodge accumulated debris and condensate.
The operator should feed water from the roof downward, use short bursts, and monitor flow from fixtures.
Limitations: low pressure, frozen sections, and fragile fittings may prevent success; stop if leaks or backflow occur.
Using an auger through the vent stack: tools and technique
Using an auger through the vent stack offers a direct mechanical way to break up and remove blockages that water flushing cannot shift.
The technician selects a manual or power auger with a flexible shaft sized for the vent, feeds it down carefully, rotates to dislodge debris, then retracts while clearing material.
Inspect the cable and repeat until flow is restored.
Temporary fixes to reduce odors and gurgling until pros arrive
Try simple, short-term measures to lessen odors and gurgling while waiting for a professional.
Flush traps with water to restore seals, pour diluted enzyme drain cleaner to break organic buildup, and run faucets briefly to equalize pressure.
Place baking soda bowls or activated charcoal near drains for odor control.
Avoid chemical plunging or forcing tools; these can worsen vent damage before pros arrive.
When to Call a Professional Plumber
When slow drains, multiple fixture backups, or foul sewer odors appear, these can indicate systemic sewer or mainline problems that exceed simple vent repairs.
Because rooftop access and heavy equipment carry safety and liability concerns, a licensed plumber should be hired for inspections and complex work.
Expect a professional to perform a camera inspection for diagnosis and recommend treatments such as snaking, hydro-jetting, or targeted repairs.
Signs of systemic sewer or mainline issues
If multiple fixtures throughout a building back up, drain slowly, or emit persistent sewage odors despite individual trap clearing, these are clear indicators of a systemic sewer or mainline problem that requires professional assessment.
Additional signs include widespread gurgling, toilets bubbling when other fixtures run, recurring backups after snaking, sudden lawn sinkholes, or sewage surfacing in drains.
Immediate plumber inspection and camera diagnosis are advised.
Risks of rooftop work and hiring licensed professionals
Climbing onto a roof to inspect or clear a vent pipe exposes untrained homeowners to falls, unstable surfaces, and hidden hazards like brittle shingles, skylights, or electrical lines.
These risks, combined with awkward tools and wet or icy conditions, can quickly turn a minor plumbing issue into a serious injury or costly roof damage.
Professionals carry safety gear, liability insurance, proper tools, and training to diagnose, repair, and prevent recurrence safely and legally.
What to expect: camera inspection and diagnosis
Requesting a professional camera inspection is the next logical step when a vent pipe shows persistent signs of blockage.
A plumber inserts a waterproof camera to locate obstructions, identify damage, and assess pipe orientation.
The inspection yields video evidence and a clear diagnosis, including size and location of the issue, needed access points, and a recommended action plan.
Pricing and timelines follow.
Typical professional treatments (snaking, hydro-jetting, repairs)
A professional tackles vent pipe blockages with targeted methods—mechanical snaking to break up and retrieve obstructions, hydro-jetting to scour pipe interiors with high-pressure water, and sectional or full repairs when corrosion, cracks, or collapsed segments are found.
Technicians select treatments based on inspection findings, pipe material, and severity; they document work, test ventilation after service, and advise on prevention and timelines for replacement if damage is extensive.
Preventive Measures to Keep Vents Clear
Preventive maintenance reduces the risk of vent pipe blockages and extends system longevity.
Regular inspections and a seasonal roof and vent-cap maintenance schedule, correct installation of mesh caps and bird guards, and winter-proofing measures to prevent ice dams keep vents functioning.
Proper landscaping and maintaining clearances around chimneys and vents further minimize debris and animal intrusion.
Routine roof and vent-cap maintenance schedule
Establishing a routine roof and vent-cap maintenance schedule greatly reduces the risk of vent clogs by ensuring debris, corrosion, and animal nests are caught before they obstruct airflow.
Inspect caps and flashing biannually, after storms, and in fall. Clear loose debris, remove corrosion, tighten fasteners, and document condition.
Promptly address minor repairs and schedule professional inspection every few years to prevent progressive deterioration.
Installing mesh caps and bird guards properly
Install mesh caps and bird guards so they fit securely and allow unobstructed airflow while keeping out birds and large debris.
Select corrosion-resistant materials sized to the vent opening, ensuring mesh openings are fine enough to block pests but large enough to prevent clogging.
Fasten with weatherproof clamps or screws, seal gaps with appropriate sealant, and inspect periodically for damage or accumulation.
Winter-proofing vents to prevent ice dams
After securing mesh caps and bird guards, attention shifts to winter-proofing vents to reduce the risk of ice dams forming on roofs and in vent openings.
Insulation and proper attic ventilation balance roof temperature, while heated cables near vulnerable penetrations and insulated vent collars prevent freezing.
Regular snow removal around vent outlets and timely roof maintenance further minimize ice buildup and guarantee continuous airflow.
Landscaping and chimney/vent clearance best practices
Several simple landscaping and clearance practices can greatly reduce blockages in chimneys and vent outlets.
Maintain a 3–6 foot radius free of overhanging branches, shrubs, and debris; trim trees seasonally.
Keep gutters and roof valleys clear to prevent leaf buildup.
Position vents away from dense plantings and secure caps or guards to deter animals and large debris, inspecting annually for obstructions.
Estimated Costs and Timeframes for Common Solutions
Homeowners can compare estimated costs, materials, time, and effectiveness of common DIY fixes against professional options to choose an appropriate response. The table below summarizes typical DIY tasks and professional services, including inspection, snaking, hydro-jetting, and repairs. Expected price ranges and timeframes vary by problem severity and local labor rates.
| Solution | Typical Cost / Time |
|---|---|
| Basic DIY (coat hanger, glove, household cleaner) | $0–$20; 15–60 minutes |
| DIY snake or hand auger | $20–$80; 30–90 minutes |
| Professional inspection | $75–$200; 30–120 minutes |
| Snaking by pro | $100–$300; 30–90 minutes |
| Hydro-jetting / repairs | $300–$1,000+; 1–4+ hours |
DIY methods: materials, time, and expected effectiveness
Begin by gathering basic tools—a ladder, rubber gloves, a garden hose or plumbing snake, and safety goggles—and allocating 1–3 hours depending on roof access and method.
Common DIY tactics include flushing with a hose (30–60 minutes, low cost, effective for debris), mechanical snaking (30–90 minutes, modest cost, better for obstructions), and manual clearing (variable time, free to low cost, limited reach).
Professional services: inspection, snaking, hydro-jetting, repairs
Call a licensed plumber or roofing contractor when DIY efforts fall short; professionals provide diagnostic inspections and targeted remedies with clearer timelines and predictable costs.
Typical services:
- inspection (camera) $100–$300
- snaking $150–$400 (30–90 minutes)
- hydro-jetting $300–$800 (1–2 hours)
- repairs or flashing replacement $200–$1,200+ (1–4 hours).
Emergency rates and access complexity can raise prices.
Signs You Might Be Facing a Bigger Plumbing Problem
If clogs return soon after clearing the vent, it may indicate a deeper obstruction in the plumbing system rather than a simple vent blockage.
More serious signs include sewage backing up into fixtures or multiple drains failing at once, which suggest widespread pipe or sewer line issues.
Visible structural or roof damage that compromises vent integrity can also point to a larger problem requiring professional inspection.
Recurrent clogs after vent clearing
When clogs return soon after a vent has been cleared, it signals that the issue may extend beyond a simple obstruction.
Recurrence suggests deeper problems: damaged or collapsed vent pipes, improper venting configuration, animal nests repeatedly entering due to unprotected terminals, or systemic waste line restrictions causing pressure imbalances.
Professional diagnostic inspection, camera-scoping, and testing of vent integrity are recommended to identify root causes and prevent further failures.
Sewage backups and widespread drainage failure
Recurrent vent clogs that persist despite clearing can escalate into more serious system-wide problems.
One of the most alarming signs is sewage backing up into fixtures or multiple drains running slowly or not at all.
These symptoms indicate impaired venting and possible main sewer obstruction; immediate assessment by a professional is advisable to prevent contamination, further backups, and costly repairs.
Structural or roof damage affecting vent integrity
Several visible signs on a roof or vent stack can point to structural damage that compromises vent integrity, such as cracked flashing, loose or missing vent caps, sagging decking around the stack, or persistent water stains in the attic.
Such damage can misalign or crack vent pipes, allow debris entry, and cause leaks that mimic or worsen clogs; prompt roof and plumbing inspection is advised.
Practical Checklist for Homeowners After a Vent Issue
After a vent issue is identified, a clear, prioritized checklist helps homeowners contain problems and preserve evidence for claims. The list should cover immediate steps to reduce damage and odors, records to support warranties or insurance, and a schedule for long-term maintenance.
Clear action items make follow-up repairs and preventative care more effective.
- Turn off affected fixtures and ventilate the area to limit odors and moisture.
- Photograph damage and keep receipts, service reports, and timestamps for claims.
- Call a qualified plumber to inspect and recommend repairs before proceeding.
- Note diagnostic findings, parts replaced, and any warranty details in a single folder.
- Set recurring reminders for vent cleaning and inspections to prevent future clogs.
Immediate steps to minimize damage and odors
Act promptly to limit water damage and reduce odors by shutting off affected fixtures and ventilating the area.
Remove standing water, place towels or buckets, and elevate valuables.
Use fans and open windows to disperse smells.
Inspect visible drains for backups, clear minor blockages if safe, and contain contaminated materials in sealed bags.
Call a plumber for persistent issues.
Documentation for warranties or insurance claims
Once immediate cleanup and containment are handled, homeowners should gather clear documentation to support warranties or insurance claims.
Record dates, times, and descriptions of the issue and actions taken. Photograph damage, vent pipe condition, and receipts for repairs or materials.
Keep contractor contact information, inspection reports, and warranty paperwork. Organize files digitally and in hard copy for prompt submission to insurers or manufacturers.
Long-term maintenance checklist and scheduling tips
While immediate repairs address the urgent problem, a clear long-term maintenance checklist and scheduling plan helps prevent recurrence and extends vent system life.
Create a log: inspection dates, findings, actions, and contractor contacts.
Schedule biannual visual checks, annual professional inspections, and post-storm reviews.
Include filter replacements, cap cleaning, and roof flashings.
Set reminders and budget for preventive servicing to avoid emergency repairs.
Conclusion
After a homeowner found their bathroom filling with slow-draining sinks after a storm, they likened the clogged vent pipe to a stopped-up straw—a tiny blockage that turns normal flow into struggle. One study noted vent-related issues cause a significant portion of residential sewer odors, underscoring how small obstructions yield outsized problems. The takeaway: treat vent care like regular maintenance—small, consistent actions prevent the big, smelly messes no one wants to fix on a weekend.