How to Find a Burst Pipe in a Wall: Quick Detection Tips and DIY Fixes
To find a burst pipe in a wall, look for signs like wet stains, bubbling paint, warped drywall, musty odors, or dripping sounds. Start by shutting off the main water supply, then tap the walls to listen for waterlogged sounds. Use a moisture meter or thermal camera for accurate detection, and check nearby fixtures for leaks. For temporary access, create small drywall panels to reach the leak, allowing you to apply rubber patches, tape, epoxy putty, or clamps for a quick fix. Continue reading for detailed detection methods and repair options.
How to Know Immediately If a Wall Pipe Has Burst
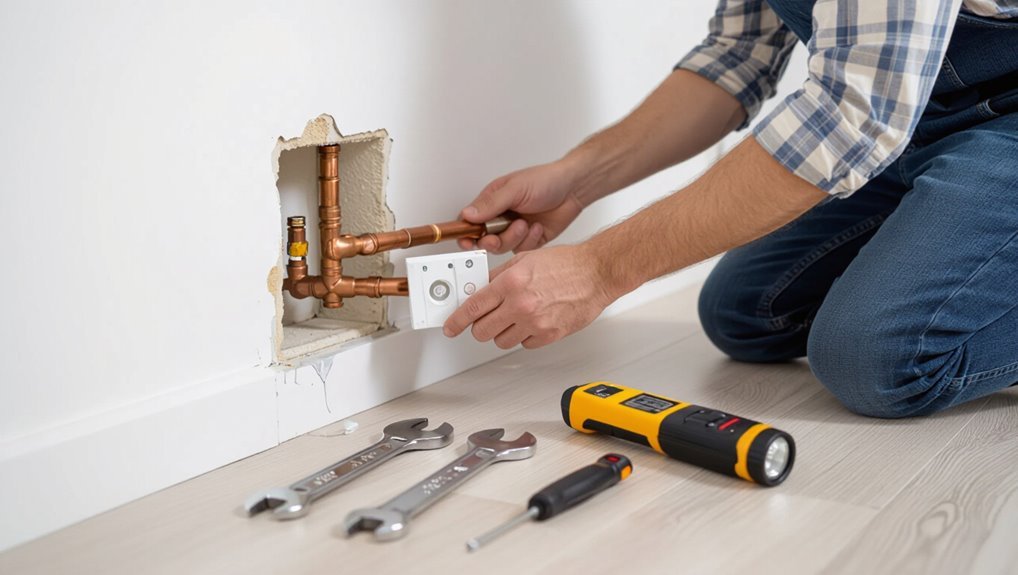
Signs of a burst wall pipe can be obvious and subtle, from visible wet patches or bubbling paint to warped drywall and new stains.
Audible or sensory clues—persistent dripping sounds, unexpected running water, or sudden loss of water pressure—often signal an active leak.
Secondary indicators such as musty odors, mildew growth, or damp floors and ceilings reinforce the need for immediate inspection.
Common visible signs of a burst pipe inside a wall
When a pipe bursts inside a wall, certain visible clues usually appear quickly and unmistakably: discolored or bulging drywall, peeling or bubbling paint, wet or sagging baseboards, and pools or streaks of water on floors or ceilings.
Observers checking how to find burst pipe in wall should note warped trim, mildew stains, musty odor sources, and unexplained paint failure; document locations and limit further damage.
Audible and sensory clues (drips, running water, pressure changes)
Listen for sudden changes in household sounds: the quiet hiss of running water behind a wall, a rhythmic drip that persists even when fixtures are off, or an abrupt loss of normal plumbing noise can signal a burst pipe.
Additional clues include unexplained pressure drops at faucets, intermittent sputtering, and waterlogged textured sounds when knocking walls.
Trust sudden, consistent auditory or tactile changes as urgent indicators.
Secondary signs around the home (stains, peeling paint, musty odors)
Discolored patches spreading across drywall or ceiling, curling or blistering paint, and a persistent musty smell are clear secondary indicators that a pipe inside a wall has failed.
Homeowners should inspect for water stains, warped trim, bubbling wallpaper, or soft plaster.
Mold growth, damp carpets, and unexplained humidity in rooms corroborate leakage.
Prompt investigation prevents structural damage and health risks.
Quick DIY Detection Steps You Can Do Right Now
First, the homeowner is advised to shut off the main water supply and check whether the leak noise or visible moisture continues to rule out fixtures or external sources.
Next, basic tools—moisture meter, thermal camera or infrared app, and a small hammer for cautious tapping—can quickly narrow the affected wall area while listening for changes in sound.
Finally, a short inspection of nearby fixtures, appliances, and floor drains helps confirm whether the problem is localized to the wall or originates from connected plumbing.
Shut off main water and confirm leak persistence
Shut the main water valve to isolate the household supply and stop active flow into the compromised wall section.
After closing the valve, observe visible wet spots, dripping fixtures, and the water meter for movement.
If wetting continues or the meter still registers flow, the leak is within the isolated plumbing.
Document locations, turn off electricity near soaked areas, and contact a plumber for repair.
Use moisture meter, thermal camera, and simple tools
Begin systematic scanning with a moisture meter and thermal camera, supplemented by simple tools like a screwdriver, flashlight, and tapping figure, to quickly narrow the likely leak area before opening walls.
Scan surfaces methodically, mark wet or cold spots, verify moisture depth with meter, and inspect baseboards, outlets, and fixtures.
Document findings, photograph suspicious zones, and plan targeted access or professional repair.
How to safely tap and listen along the wall to localize leak
After narrowing likely wet or cold zones with meters and cameras, the next step is a controlled tap-and-listen survey along the wall to pinpoint flow sounds or hollow echoes indicating cavity water.
Using a small rubber mallet or the knuckle, tap systematically from baseboard to ceiling. Pause to listen near pipes, fixtures and seams.
Mark changes in tone, repeat tests, then plan targeted access.
Inspect nearby fixtures, appliances, and floor drains
One or two quick checks at nearby fixtures, appliances, and floor drains often reveal obvious signs of a leak without opening walls.
The inspector examines under sinks, behind toilets, around washing machines, dishwashers, and water heaters for wetness, corrosion, pooled water, or mineral deposits.
Floor drains and traps are checked for unusual moisture, odors, or active dripping that indicate concealed pipe failure.
Tools and Materials for Locating a Burst Pipe
The discussion outlines basic, inexpensive tools a homeowner can use immediately—flashlight, screwdriver, moisture meter, and plumber’s wrench—followed by criteria for when to rent or buy specialized equipment such as a thermal camera or acoustic leak detector.
It also covers necessary safety gear and precautions, including gloves, eye protection, and shutting off water and power before inspection.
Practical guidance distinguishes routine DIY items from situations that justify professional tools or help.
Essential inexpensive tools for homeowners
Several basic, low-cost tools can help a homeowner locate a burst pipe in a wall quickly and accurately:
- Flashlight — inspect cavities, damp spots, and behind cabinets.
- Moisture meter — confirm elevated dampness through drywall.
- Stud finder with live-wire detection — map studs and avoid electricals.
- Small mirror and telescoping inspection mirror — view tight spaces and behind piping.
When to rent or buy specialized tools (thermal camera, acoustic leak detector)
When a basic toolkit fails to pinpoint the source of moisture, a homeowner must decide whether to rent or buy specialized equipment such as a thermal camera or acoustic leak detector.
Rent for one-off emergencies or occasional inspections to save cost; buy if recurring plumbing issues, professional use, or frequent monitoring justify investment.
Consider rental availability, device accuracy, and budget before choosing.
Safety gear and precautions
Because locating a burst pipe often requires entering tight, wet, or electrically active spaces, appropriate safety gear and clear precautions are essential: wear waterproof gloves, safety goggles, sturdy boots, and a respirator if mold is present.
Use insulated tools, a headlamp, and a GFCI-protected extension cord.
Shut off water and power before work, ventilate the area, and have an assistant nearby for emergencies.
How to Access and Expose a Burst Pipe in a Wall
The technician first identifies the smallest practical area of drywall to remove by tracing water stains, using stud and pipe locators to avoid unnecessary cuts.
Careful removal of drywall and insulation follows, cutting along marked lines and gently pulling materials away to prevent enlarging the leak or dislodging pipe fittings.
Temporary containment—such as towels, a drip tray, and a quick shutoff clamp on the pipe—is put in place before further exposure or repair work proceeds.
Determining where to cut drywall with minimal damage
Before cutting drywall, a careful assessment pinpoints the smallest, safest opening that provides clear access to the suspected burst without unnecessary damage.
Measure, mark stud locations with a stud finder, trace plumbing runs from visible fixtures, and identify high-moisture stains.
Plan a rectangular access panel between studs, avoiding electrical lines.
Use minimal dimensions to expose the pipe for inspection and repair.
Proper way to remove drywall and insulation without making the leak worse
Having located the smallest practical opening, the next step is to expose the pipe carefully so water damage and mold spread are minimized.
Remove drywall along stud lines with a utility knife and reciprocating saw, cutting slowly to avoid pipe contact.
Extract wet insulation with gloves and a trash bag, inspecting for hidden moisture.
Keep cuts neat for easier repair and documentation.
Temporary containment while exposing the pipe
Once the access opening is started, the area should be contained to limit water spread and keep the workspace safe.
Use tarps and plastic sheeting to direct water into a bucket or drain.
Place absorbent towels around the hole and under the affected floor.
Turn off surrounding power if moisture reaches wiring.
Maintain ventilation and clear debris to preserve unobstructed access.
Immediate DIY Fixes to Stop Water Damage
When a burst pipe is discovered, immediate DIY measures can limit damage while preparing for a permanent repair. Options include temporary sealing with a rubber patch, pipe clamp, or epoxy putty.
Short-term repair techniques tailored to copper, PEX, or PVC, and the targeted use of pipe-freezing kits to create a safe working window are also effective.
Clear guidance on selecting the right method and following safety steps helps guarantee temporary fixes hold and prevent injury.
Temporary sealing methods (rubber patch, pipe clamp, epoxy putty)
If a pipe inside a wall begins to leak, quick temporary seals can greatly reduce water damage until a permanent repair is made.
A rubber patch or self-fusing tape applied over a cleaned, dried area can stop seepage briefly. Pipe clamps stabilize larger holes.
Epoxy putty molds into place, cures to a hard seal. These are emergency measures; arrange professional repair promptly.
Short-term plumbing repairs for copper, PEX, and PVC pipes
Act quickly to limit damage: short-term repairs for copper, PEX, and PVC focus on stopping active leaks and protecting surrounding materials until a permanent fix is possible.
For copper, apply a compression sleeve or solder-free coupling; for PEX, use a push-fit coupling or crimp ring; for PVC, clean, deburr, and use a slip coupling with solvent or a temporary rubber sleeve and clamp.
When to use pipe freezing kits and how to use them safely
Although best reserved for experienced DIYers or professionals, pipe freezing kits can provide a rapid, temporary stop to water flow in a frozen or leaking section of copper or steel piping without shutting off the main supply.
Use only on compatible metals, follow manufacturer instructions, monitor ice plug integrity, insulate and support surrounding pipes, wear PPE, and arrange permanent repair promptly to prevent rupture or corrosion.
When to Call a Professional Plumber
If visible flooding, persistent high water pressure, mold growth, or structural damage appear, the situation likely exceeds DIY repair and requires a professional.
Homeowners should be prepared to ask about diagnosis methods, estimated costs, repair timeline, and warranty, and to provide the plumber with the leak location, recent repairs, and any shutoff actions already taken.
Emergency plumbers commonly offer temporary shutoffs, pipe patches or clamps, section replacements, and full line rerouting depending on severity.
Signs the leak is beyond DIY repair
Several clear signs indicate a leak is beyond DIY repair and require a professional plumber: widespread water stains, steady dripping despite shutoff, mold growth with recurring moisture, sagging ceilings or bulging walls, reduced water pressure across fixtures, multiple affected outlets, visible pipe corrosion, or electrical hazards.
Complex repairs, concealed pipe runs, or structural compromise also demand licensed expertise to diagnose and remediate safely and permanently.
Questions to ask a plumber and information to provide
When calling a plumber, what key questions to ask and what details to provide can determine the speed and accuracy of the response.
The caller should describe location, visible damage, water flow status, odors, noises, and any shutoff attempts.
Ask about availability, response time, licensing, insurance, diagnostic fees, and estimated inspection procedures.
Request arrival window and contact protocols for updates.
Typical emergency repair options professionals offer
A professional plumber typically offers a range of emergency repair options tailored to the severity and location of a burst pipe, from temporary measures that stop or slow water flow to permanent replacements.
They assess damage, isolate leaks, and advise on restoration priorities.
- Shutoff and isolation
- Temporary clamp or sleeve
- Pipe replacement or reroute
- Leak detection and wall repair planning
Preventing Future Wall Pipe Bursts
Preventing future wall pipe bursts requires a mix of seasonal preparation, routine inspection, and targeted upgrades.
Homeowners should winterize and insulate in-wall pipes, monitor water pressure and perform regular maintenance checks, and replace aging materials in known risk areas.
Identifying hidden vulnerabilities and prioritizing repairs can substantially reduce the chance of repeat failures.
Steps to winterize and insulate pipes inside walls
Begin by identifying vulnerable pipe runs and evaluating exposure to cold air within wall cavities.
Install foam pipe insulation or wrap with closed-cell materials, sealing gaps with caulk or spray foam.
Add insulation batts to wall cavities and consider interior access panels for future work.
Maintain consistent indoor temperatures and shutoff protocols for long absences.
Label insulated zones for inspection.
Routine maintenance checks and water pressure control
Establishes a simple routine of visual inspections and pressure monitoring to reduce the risk of wall pipe failures: check exposed fittings and access panels monthly for corrosion, stains, or dampness; verify attic and crawlspace insulation remains intact; test water pressure at a hose bib or fixture with a gauge quarterly and note readings; and exercise shutoff valves annually to guarantee they operate smoothly.
Record anomalies, address minor leaks promptly, and adjust pressure-reducing valves if readings exceed recommended limits.
Upgrading older plumbing materials and hidden risk areas
Routine checks and pressure control help catch many issues early, but older plumbing materials and concealed problem spots require proactive upgrades to avert future wall pipe bursts.
Inspect for corroded galvanized, lead, or brittle polybutylene lines and replace with copper or PEX.
Seal and access hidden junctions, insulate pipes in cold zones, relocate vulnerable runs away from heat sources, and schedule professional assessment for systemic risks.
Assessing and Repairing Water Damage After a Burst
After stopping the leak, the next step is to assess and begin drying the affected area, using air movers and dehumidifiers to prevent mold growth.
The article will outline signs that require a restoration specialist and when professional drying or mold remediation is warranted.
It will also cover practical repairs for damaged drywall and insulation and steps for cleaning and repainting.
Drying, mold prevention, and dehumidification steps
Several practical steps limit damage and mold growth once a burst pipe has been stopped and the source of water secured.
Remove standing water, open walls and flooring as needed, and dry materials with fans and high-capacity dehumidifiers.
Discard soaked porous items, clean surfaces with appropriate antimicrobials, monitor humidity below 50%, and inspect for early mold signs over the following 48–72 hours.
When to involve a restoration specialist
Consider contacting a restoration specialist when damage extends beyond what household cleanup can safely manage or when structural integrity, extensive contamination, or persistent moisture are present.
Professionals assess hidden deterioration, mold risk, and electrical or HVAC impacts, recommend monitored drying, containment, and remediation, coordinate insurance documentation, and perform hazardous-material handling.
Engage specialists for large-scale loss, unclear odor sources, recurrent dampness, or compromised load-bearing elements.
Repairing drywall, insulation, and repainting
Begin by evaluating the extent of visible and hidden damage to drywall and insulation before any cosmetic work begins.
Remove saturated insulation, cut out compromised drywall to at least 12 inches beyond stains, and dry the cavity thoroughly.
Replace insulation with appropriate R-value material, install new drywall, tape and mud seams, sand smooth, prime with stain-blocking primer, then repaint to match surrounding finishes.
Cost Estimates and Timeframes for Detection and Repair
Costs for detecting and a burst in a wall vary widely depending on whether a homeowner uses DIY methods or hires a professional, and repair bills depend on pipe material and the severity of damage. Typical repair ranges and detection-to-restoration timelines help set realistic expectations for budgeting and scheduling. The table below summarizes common cost and time benchmarks to guide decisions.
| Item | Typical Cost Range | Typical Timeline |
|---|---|---|
| DIY detection (tools, meters) | $20–$200 | Same day to 2 days |
| Professional leak detection | $150–$800 | Same day to 3 days |
| Minor repair (copper/PEX, small leak) | $150–$800 | 1–3 days |
| Major repair (cast iron/hidden, extensive) | $1,000–$6,000+ | Several days to 2+ weeks |
Typical costs for DIY vs professional detection
While homeowners can sometimes locate a burst pipe with basic tools and time, the expense and hours involved vary widely compared with hiring a professional.
DIY detection may cost under $100 for moisture meters, thermal imagers (rental) and patchwork time, often taking several hours to days.
Professional services typically charge $150–$600 for diagnostics, faster results, and diagnostic warranties.
Repair cost ranges by pipe material and damage severity
After outlining detection expenses, attention shifts to repair costs, which depend heavily on pipe material and the extent of damage.
Copper repairs typically range higher than PEX or PVC; minor localized leaks cost a few hundred dollars, while extensive ruptures requiring wall access, section replacement, and water damage mitigation escalate to several thousand.
Corrosion, joint failure, and hidden mold increase costs further.
Expected timelines from detection to full restoration
Because the steps from locating a burst to complete restoration involve distinct phases—detection, temporary shutoff, repair, drying and remediation, and final finishes—projected timelines are best presented as ranges tied to damage severity and access difficulty.
Minor, accessible leaks: 1–3 days.
Moderate damage with drywall removal and moisture control: 3–10 days.
Severe or concealed failures requiring reconstruction and mold remediation: 2–6 weeks.
Practical Tips and Common Mistakes to Avoid
Practical steps can limit damage while waiting for professional help, such as shutting off the main valve, isolating affected rooms, and using buckets or towels to catch leaks.
Common mistakes—like attempting complex repairs without shutting off water, using heat on PVC, or failing to document damage—often increase costs and reduce repair effectiveness.
A concise checklist of immediate actions and items to record helps homeowners respond quickly and preserve insurance claims.
Quick wins that reduce damage while waiting for help
Act quickly to limit water spread and property damage while waiting for professional help.
Shut main water and electricity to affected areas, open nearby faucets to drain lines, and move valuables away.
Use towels and buckets to contain leaks, place a wet/dry vacuum if available, and ventilate to reduce humidity.
Photograph damage for insurance and avoid unnecessary demolition.
Mistakes that make repairs costlier or less effective
When attempting repairs, homeowners often make decisions that increase costs or reduce effectiveness—common errors include delaying professional assessment, using incompatible patch materials, and performing hasty demolition that hides or worsens underlying damage.
- Ignoring mold risk.
- Applying temporary fixes as permanent.
- Painting over stains before drying.
- Replacing fixtures without checking pipe integrity.
Checklist to follow immediately after finding a burst pipe
Shut off the water supply immediately and follow a short, prioritized checklist to limit damage and guide the next steps:
- Stop power to affected area and move electronics.
- Contain water with towels, buckets, and a wet vacuum.
- Locate and temporarily seal the leak; document damage with photos.
- Call a licensed plumber and insurer; follow recommended mitigation to prevent mold.
Conclusion
A homeowner treating a burst wall pipe should act like a vigilant gardener spotting a sudden leak in irrigation: swift, methodical steps prevent wider harm. Immediate detection, cautious access, and temporary shutoffs stem damage while documented inspections guide repairs. Proper tools, clear safety measures, and timely professional help reduce costs and future risk. With careful remediation and preventive maintenance, the wall’s integrity and the home’s systems can be restored and safeguarded.