How to Reroute Sump Pump Discharge: Step-By-Step Guide to Safely Redirect Water Away From Your Home
To safely reroute your sump pump discharge and protect your home’s foundation, landscaping, and neighbors, follow these essential steps: plan a proper outlet, check local regulations, and use suitable materials. Start by shutting off the power and draining the line. Map a downhill route that avoids sidewalks and neighboring properties. Use outdoor-rated PVC pipe, install a one-way check valve, secure the pipe with supports, and add frost protection if necessary. After installation, test the system and conduct regular inspections for clogs or freezes. For detailed guidance on each step and additional options, continue reading.
Overview of Sump Pump Discharge Rerouting
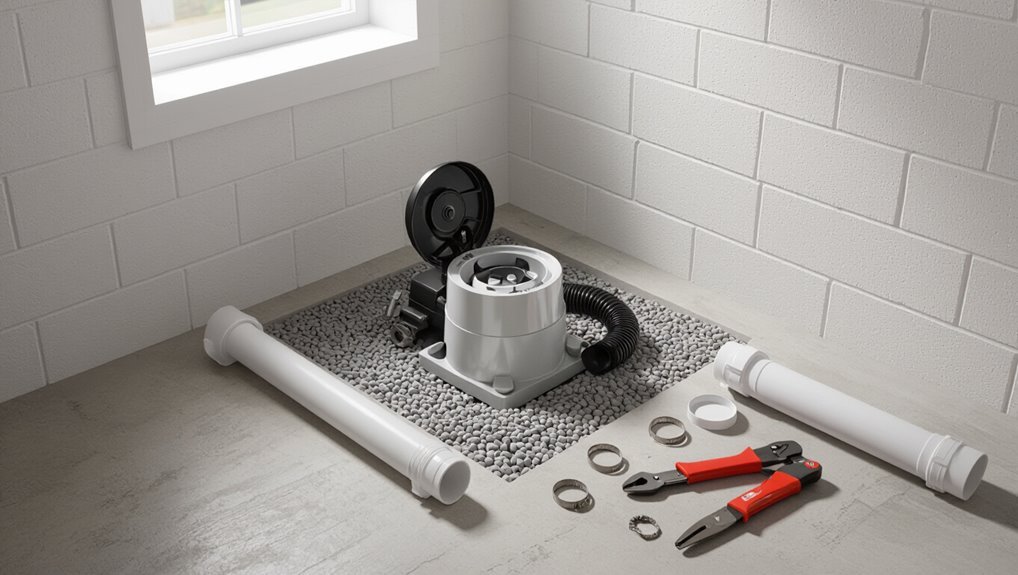
Rerouting a sump pump discharge is often undertaken to prevent basement flooding, reduce erosion, or stop water from affecting neighbors and landscaping.
Visible signs that redirection is needed include pooling near the foundation, persistent dampness, or discharge that flows toward adjoining properties.
Before making changes, the homeowner should verify local codes and obtain any required permits to guarantee the new discharge location complies with regulations.
Why reroute a sump pump discharge
Because property drainage needs and neighborhood regulations change over time, homeowners often choose to redirect a sump pump discharge to prevent basement flooding, reduce yard erosion, and comply with local codes.
Reasons include protecting foundations, preserving landscaping, avoiding sewer backups, and meeting HOA or municipal rules.
Understanding how to reroute sump pump discharge helps prioritize safe, code-compliant, and effective water management solutions.
Signs you need to redirect the discharge
When should a homeowner consider redirecting a sump pump discharge? Observable signs include pooling or soggy soil near the foundation, basement water odor or dampness, recurring foundation or exterior staining, ice formation at the discharge point in winter, frequent backups or visible erosion, and discharge too close to neighboring property.
These indicators suggest water is not leaving the site safely and rerouting is warranted.
Local codes and permitting considerations
Noticing persistent pooling or discharge that affects neighbors should prompt a check of local regulations before any work begins.
Homeowners must confirm municipal codes, easements, and stormwater rules; some areas ban discharge onto sidewalks or adjacent properties.
Permits may be required for underground lines, connections to storm systems, or significant grading.
Failure to comply can lead to fines and mandatory corrective work.
Safety Precautions and Required Tools
Before beginning any rerouting work, a concise safety checklist should be reviewed to address electrical hazards, proper ventilation, and stable footing.
A clear list of required tools and materials—such as PVC pipe, fittings, primer/cement, a utility knife, and proper personal protective equipment—enables efficient, safe progress.
If the job involves complex wiring, persistent leaks, or local code concerns, a licensed professional should be consulted.
Safety checklist before starting work
A short checklist verifies all safety precautions and tools are addressed before rerouting a sump pump discharge.
Verify power is off, confirm pump is disconnected, inspect area for trip hazards, ascertain stable footing and lighting, and note local codes or permit needs.
Confirm protective gear fits and is available.
Identify emergency shutoff and have a clear communication plan before beginning work.
Tools and materials list
Several essential tools and materials are required to reroute a sump pump discharge safely and effectively.
Personal protective equipment, pipe fittings, and sealants should be prepared.
Basic items include:
- PVC or flexible discharge pipe, couplings, elbow fittings
- Hose clamps, PVC primer and cement, plumber’s tape
- Shovel, trenching shovel, gloves, safety glasses
- Check valve, adapter fittings, gravel for bedding
When to call a professional
When should a homeowner call a professional to reroute a sump pump discharge?
A professional is advised for complex plumbing, unclear property drainage, electrical work, permits, steep slopes, persistent backups, or visible foundation damage.
Hire licensed plumbers or waterproofing contractors when tools, permits, or safety risks exceed DIY skills.
Professionals assess grading, install check valves, guarantee code compliance, and prevent inadvertent water damage.
Assessing Your Property and Planning the Route
The homeowner begins by inspecting the existing sump pump and discharge line for condition and flow issues.
They then map potential discharge paths that lead water away from the foundation while noting landscaping, sidewalks, and buried utility lines that could obstruct routing.
Finally, they evaluate grade and drainage principles to guarantee discharge follows a downhill path and does not create pooling near the house.
Inspecting the existing sump pump and discharge line
Begin by visually and manually inspecting the sump pump and its discharge line to determine current condition, capacity, and routing constraints.
Note pump model, flow rate, power source, and any corrosion, cracks, or leaks.
Check check valve function, pipe joints, slope, and connections to exterior fittings.
Photograph issues, measure pipe diameter and lengths, and record obstructions or nearby utilities for planning.
Mapping optimal discharge paths around foundation
After documenting the pump, piping, and site constraints, attention shifts to mapping discharge routes that keep water well away from the foundation and neighboring properties.
The planner examines slopes, natural drainage patterns, and low spots, selecting a route that uses gravity where possible. Proposed paths minimize backyard disruption, direct flow toward storm drains or percolation areas, and allow future maintenance access.
Identifying obstacles: landscaping, sidewalks, utility lines
When evaluating potential discharge routes, a careful inventory of hardscaping, plantings, and buried utilities identifies constraints that will dictate trench locations and pipe types.
The assessor notes irrigation lines, electrical conduits, gas mains, and sewer connections, plus patios, driveways, and tree roots.
Marking utilities, consulting utility maps, and preserving desirable vegetation prevents damage and informs feasible routing and installation methods.
Slope and drainage principles to follow
Although not every yard is naturally suited to gravity-fed discharge, a reliable route requires a consistent downhill grade of at least 1% (1 foot of drop per 100 feet) to maintain flow and prevent standing water.
Plan routes avoiding low spots, guarantee positive slope away from foundations, use swales or buried pipe to preserve grade, and account for erosion, soil permeability, and local drainage codes.
Step-by-Step Guide to Reroute a Sump Pump Discharge
The following steps outline the practical actions needed to reroute a sump pump discharge, beginning with preparing the work area and ensuring personal safety.
Power should be shut off and the pump made safe before disconnecting the existing discharge pipe.
New piping is selected and cut to length, with a check valve and final connections installed to complete the reroute.
Preparing the work area
Clear the immediate area around the sump pump and discharge path to provide safe, unobstructed access for tools and materials.
Remove debris, stored items, and tripping hazards.
Lay down protective coverings for floors and nearby equipment.
Organize necessary fittings, pipe sections, clamps, and tools within reach.
Guarantee adequate lighting and ventilation.
Mark the planned new discharge route before beginning work.
Shutting off power and ensuring pump safety
Before any plumbing work begins, power to the sump pump must be cut and its safety verified to prevent accidental activation or electrical shock.
The breaker or disconnect should be labeled and switched off. Confirm power is off with a noncontact tester, then unplug or isolate the pump.
Wear gloves and eye protection, and keep children and pets away until work completes.
Disconnecting the current discharge pipe
Begin by draining residual water from the discharge line to minimize spills and weight; then locate the union, clamp, or threaded joint nearest the pump where the pipe connects.
Wear gloves and eye protection, support the pipe to prevent strain, and loosen fittings with appropriate tools.
Remove the section gently, inspect seals and coupling faces for damage, and set components aside for reuse or replacement.
Selecting and cutting new piping to length
Measure the required run precisely, accounting for bends, fittings, and a small overlap at each joint. Then select pipe and fittings rated for outdoor use and the pump’s discharge diameter and pressure.
Mark cut lengths on pipe, allow slight extra for final adjustments, and use a proper saw or PVC cutter for clean, square ends.
Deburr edges and dry-fit sections before final assembly.
Installing check valve and connections
Install the check valve and make final connections with care to guarantee one-way flow and leak-free joints.
Orient the valve arrow toward discharge, clean and deburr pipe ends, apply compatible primer and solvent or thread sealant per material.
Hand-tighten fittings, then torque to manufacturer specs.
Test under pressure, inspect for leaks, tighten or reseat joints as needed before restoring normal operation.
Securing pipe runs and using proper anchors
With the check valve secured and joints verified for watertight operation, attention shifts to routing and fastening the discharge line so it remains supported, vibration-free, and protected from strain.
The line should follow straight runs with gentle bends, use corrosion-resistant clamps or straps at regular intervals, include expansion loops where needed, and anchor at wall penetrations to prevent movement and reduce stress on fittings.
Burying or concealing the line vs. above-ground routing
When choosing between burying or concealing a sump pump discharge line and routing it above ground, the decision hinges on site conditions, local codes, maintenance access, and freeze protection.
Burying provides concealment and protection from physical damage but requires proper bedding, frost-depth placement, and a cleanout, while above-ground runs simplify inspection and repairs but demand secure anchoring and insulation in cold climates.
Burying may need permits.
Testing the rerouted discharge for leaks and flow
Begin by running the pump through a full cycle and observing the entire rerouted run for leaks, proper flow, and secure fittings.
Inspect joints, couplings, and clamps for drips. Verify outlet discharge velocity and absence of backflow or pooling.
Check slope and clear obstructions.
Repeat multiple cycles, noting any temperature or vibration anomalies, then tighten, reseal, or adjust as required.
Options for Where to Redirect Discharge
When choosing where to redirect sump pump discharge, the homeowner should weigh options such as a dry well or soakaway pit, which store and infiltrate water on-site.
Connecting to a storm drain or municipal system may be possible but often requires checking local codes and permits.
Surface solutions — extending pipe downhill, swales, rock beds, or splash blocks — provide alternatives for directing flow away from the foundation.
Discharging to a dry well or soakaway pit
Installing a dry well or soakaway pit provides an on-site method to manage sump pump discharge by directing water into a subsurface reservoir where it can percolate into surrounding soil.
Proper sizing, gravel or chamber fill, and an inlet filter prevent clogging.
Location should avoid foundations and high water table areas.
Periodic inspection and maintenance guarantee continued infiltration and prevent backups.
Connecting to a storm drain or municipal system (code considerations)
If a dry well proves impractical due to soil, space, or permitting constraints, many homeowners consider routing sump pump discharge into a municipal storm drain or sewer system.
This option is governed by local codes and often requires permits, inspection, or an approved outlet.
Homeowners should consult municipal regulations, obtain necessary permits, follow required backflow and connection standards, and schedule inspections to avoid fines or service disruptions.
Extending discharge to a safe distance downhill
A downhill gravity discharge directs sump pump outflow away from the foundation to a lower, safe location such as a swale, ditch, or stormwater inlet, minimizing the need for powered conveyance.
Pipe routing should follow continuous slope, use durable PVC or corrugated HDPE, include proper fittings and venting, secure with anchors, and terminate where runoff cannot reenter the yard or harm neighbors or infrastructure.
Surface drainage techniques: swales, rock beds, and splash blocks
When downhill gravity discharge cannot reach a suitable storm drain or is impractical because of property layout, surface drainage techniques—swales, rock beds, and splash blocks—offer localized, low-maintenance options for dispersing and managing sump pump outflow.
Swales channel water along shallow graded trenches; rock beds slow and infiltrate flow; splash blocks reduce erosion at outlets.
Proper grading, erosion control, and periodic maintenance guarantee effective, code-compliant performance.
Materials and Methods Compared
Materials and methods are compared by weighing pipe types, installation styles, and check valve performance to identify the best fit for site conditions and budget. PVC and corrugated pipe are contrasted for durability, cost, and ease of installation, while permanent buried lines are measured against temporary above-ground setups for longevity and flexibility. Check valve types and their reliability complete the evaluation to guarantee effective backflow prevention.
| Category | Option A | Option B |
|---|---|---|
| Pipe type | PVC — durable, moderate cost | Corrugated — cheaper, easier install |
| Installation | Permanent buried — long-lasting | Temporary above-ground — flexible |
| Check valves | Spring/ball — reliable | Flapper — simple, less reliable |
PVC vs. corrugated pipe: durability, cost, ease of installation
Choosing between PVC and corrugated pipe for sump pump discharge hinges on trade-offs among durability, cost, and installation simplicity.
PVC offers superior rigidity, longevity, and smoother flow but costs more and requires solvent welding or threaded fittings.
Corrugated pipe is inexpensive, flexible, and quick to route around obstacles yet is less durable, can clog, and may need more frequent replacement or support.
Permanent buried lines vs. temporary above-ground solutions
Deciding between a permanent buried discharge line and a temporary above-ground setup involves balancing longevity, appearance, cost, and maintenance needs.
Permanent buried lines offer concealed aesthetics, freeze protection, and reduced trip hazards but require trenching and higher upfront expense.
Temporary above-ground solutions allow quick deployment, easy inspection, and low initial cost yet are more vulnerable to freezing, damage, and visual clutter, needing frequent attention.
Check valve types and performance
Evaluate check valve options by comparing how different materials and mechanisms handle backflow, pressure, and durability in sump pump systems.
Plastic swing valves are affordable and corrosion-resistant but can stick.
Brass or stainless steel ball and spring valves offer higher pressure tolerance and longevity. Stainless trim reduces sediment issues.
Spring-return designs close faster, minimizing reverse flow; choose based on pump output, debris load, and climate.
Common Problems and How to Fix Them
Common issues encountered when rerouting sump pump discharge include backflow or frozen pipes in winter, leaks at joints, insufficient slope causing pooling near the foundation, and clogged discharge lines.
Each problem requires targeted prevention or repair measures such as check valves and insulation for freeze protection, proper sealing and thread compounds for joints, grading adjustments for slope, and routine flushing or snaking for blockages.
The following sections explain how to identify these failures and apply the appropriate fixes.
Backflow or frozen pipes in winter and prevention
Cold weather can cause sump pump discharge lines to freeze or allow water to backflow into the basement, creating flood and mold risks if not addressed promptly.
Prevention includes insulating exposed piping, installing heat tape with thermostat control, and maintaining slight downhill grading away from the foundation.
A check valve prevents reverse flow; periodic winter inspections and running the pump briefly reduce ice buildup and guarantee readiness.
Leaks at joints and proper sealing techniques
Inspecting sump pump discharge connections frequently reveals that most leaks originate at joints where fittings, pipe ends, or couplings meet. These failures stem from loose threads, degraded seals, improper adhesives, or movement from freeze-thaw cycles and soil shifting.
Repairs require cleaning, replacing worn gaskets or thread seal tape, applying appropriate PVC primer and solvent cement, and tightening or replacing corroded clamps and fittings to restore watertight integrity.
Insufficient slope or pooling near foundation
When the discharge line lacks adequate downhill pitch or terminates too close to the foundation, water can pool near the house and be drawn back toward the basement rather than carried safely away.
Address by regrading soil to establish a consistent 1%–2% slope, extending the discharge pipe several feet beyond the foundation, and installing a shallow swale or gravel trench to promote rapid surface runoff.
Clogged discharge lines and cleaning methods
Check the discharge line regularly for blockages caused by debris, ice, or sediment that can restrict flow and force the pump to run continuously or fail.
Inspect fittings, unions, and check valve. Clear clogs with a garden hose flush, pipe brush, or plumber’s snake.
For frozen lines, thaw gently with warm water or heat tape.
Replace damaged sections and install a screened outlet to prevent recurrence.
Maintenance and Long-Term Care
Routine maintenance emphasizes a regular inspection schedule to check for clogs, leaks, and proper float operation.
In cold climates, winterizing measures such as insulating discharge lines and draining exposed sections help prevent freezing.
Guidance is provided on signs that indicate when the pump or piping should be replaced to avoid failures.
Regular inspection schedule and what to look for
Typically, a homeowner should inspect the sump pump and discharge system monthly during wet seasons and every two to three months in dry periods.
Check for obstructions, cracked or disconnected discharge pipes, secure fittings, proper slope, standing water near outlets, and functioning check valves.
Verify pump cycling, power connections, and basin debris.
Document findings and schedule repairs promptly to prevent failures.
Winterizing tips for cold climates
When temperatures approach freezing, homeowners should prepare the sump pump and discharge system to prevent frozen lines, damaged pipes, and pump failure.
This includes insulating exposed discharge piping, installing heat tape where needed, and ensuring the outlet and any extension lines slope and drain away from the foundation to avoid standing water.
Additionally, purge low spots, secure covers to block snow, test pump operation, and keep a backup power source available.
When to replace pump or piping
Inspecting the sump pump and discharge piping on a regular schedule lets homeowners identify signs that replacement is necessary.
Corrosion, persistent leaks, reduced flow, frequent cycling, unusual noises, or failure to start indicate failing components.
Replace flexible hoses every few years; evaluate pumps after 5–10 years or sooner if performance declines.
Use correctly sized, durable piping and test after any replacement.
Cost Estimates and Time Requirements
Typical do-it-yourself rerouting projects can cost anywhere from a few dozen dollars for simple hose extensions to several hundred for pipe, fittings, and tools, depending on the chosen approach.
Professional installation generally ranges from several hundred to over a thousand dollars based on complexity, materials, and labor.
Common reroute jobs often take between one to eight hours for contractors, while DIY efforts may require a weekend or more if trenching or permits are involved.
Typical DIY costs by approach
A range of DIY rerouting options — from extending the existing discharge line to installing an underground lateral or replacing the pump and check valve — carries distinct material and time costs.
Simple PVC extensions often cost $30–$150 and take 1–3 hours.
Underground lateral kits and trenching run $150–$400 and require a day.
Pump or valve replacements cost $100–$400 and may take 1–4 hours.
Professional installation cost ranges
Professional installation of sump pump rerouting typically ranges from modest to substantial depending on scope: straightforward discharge line extensions usually cost $150–$350 and take 1–3 hours.
In contrast, installing an underground lateral or relocating the outlet can run $400–$1,200 and require a half- to full-day for trenching, permitting, and tie-ins.
Labor, materials, permits, and accessibility affect final invoices; warranties may raise costs.
Estimated time for common reroute jobs
Most reroute jobs fall into three time categories: quick adjustments (30–90 minutes) for simple aboveground extensions or clamp-on fittings; moderate projects (2–4 hours) for new PVC runs to a nearby discharge point or replacing check valves and fittings; and extensive work (half-day to full-day) for trenching, installing underground lateral lines, or relocating the outlet where permitting and inspections are required.
Labor availability, soil conditions, and permit delays affect total duration.
Real-World Examples and Scenarios
The article presents three concise scenarios to illustrate common rerouting choices: a small yard using an above-ground extension, an urban property tying into the municipal storm system, and a rural site employing a soakaway.
Each example highlights typical constraints, required permits or approvals, and expected performance.
Readers can compare trade-offs and practical steps for implementation in similar situations.
Small yard reroute with above-ground extension
In tight urban lots where space and grading limit below-ground discharge, homeowners often extend sump pump outlets above ground to route water to a driveway, storm drain, or landscaped swale.
Typical implementations use UV-resistant flexible hose or PVC risers, secured and sloped away from foundations, with splash blocks and erosion control.
Periodic inspection prevents clogs, freezes, and nuisance runoff onto neighbors’ property.
Urban property connecting to storm system
When above-ground extensions cannot legally or practically discharge to a driveway or swale, many urban homeowners consider tying the sump pump into the municipal storm system.
Examples from condo conversions, narrow-lot infill, and commercial-retrofit projects illustrate how permits, backflow prevention, and inspection requirements shape feasible options.
Case studies show negotiated tap locations, licensed-plumber hookups, metered discharges, and municipal bonds or fees determining project scope and timing.
Rural property using a soakaway solution
Although access to municipal drains is often impractical in remote settings, several rural homeowners have successfully routed sump pump output into engineered soakaways that manage runoff on-site.
These case studies illustrate site assessment, sizing, and maintenance choices made for varied soil types, lot slopes, and seasonal water tables.
One example used crushed stone trenches and inspection ports; another combined dry wells with overflow swales to protect foundations and wetlands.
Quick Troubleshooting Checklist
After rerouting the discharge, a quick checklist helps verify connections, slope, and that the outlet is clear and unobstructed.
If the basement still shows water, the checklist directs testing pump operation, checking for clogs or frozen lines, and confirming the discharge point is outside the foundation and downhill.
If problems persist, it recommends inspecting the check valve, float switch, and considering professional assessment.
Immediate checks after reroute
Confirm that the rerouted discharge operates correctly by running the pump through several full cycles and observing flow, connections, and surrounding areas for leaks, blockages, or pooling.
Verify that pipe fittings are secure, clamps tightened, and hose slopes permit gravity drainage. Check outlet location for erosion or runoff toward the foundation, confirm discharge timing and float switch response, and remove debris that could impede flow.
Steps to take if pump still causes basement water issues
If basement water problems persist despite rerouting, follow a concise troubleshooting checklist to isolate and fix common causes.
Inspect pump operation, float switch movement, and power supply.
Clear debris from the basin and check discharge pipe for clogs, leaks, or improper grade.
Verify check valve function and pit depth.
Test backup systems and consult a professional plumber if issues remain unresolved.
Conclusion
To sum up, rerouting a sump pump discharge transforms a reactive fix into proactive defense, safeguarding a home from water’s quiet persistence. With careful planning, proper tools, and routine maintenance, one can turn a nuisance into a managed flow that preserves foundations and basements alike. Like guiding a river around a village, small interventions yield lasting protection; homeowners who follow the steps and respect local regulations will enjoy dryer, safer spaces and fewer surprises.