How to Use a Hose End Sprayer: Step-by-Step Guide for Even Lawn & Garden Application
A hose-end sprayer connects to your garden hose, allowing for quick and efficient application of lawn and garden treatments. To use it effectively, first check the label for proper dilution rates and wear necessary personal protective equipment (PPE). Inspect the sprayer, then accurately measure and mix the concentrate with water in the reservoir. For even application, calibrate with test sprays and maintain a consistent walking speed with overlapping passes. After use, flush the system and store it properly. The following sections will provide detailed guidance on calibration, technique, and troubleshooting.
How a Hose End Sprayer Works and When to Use One
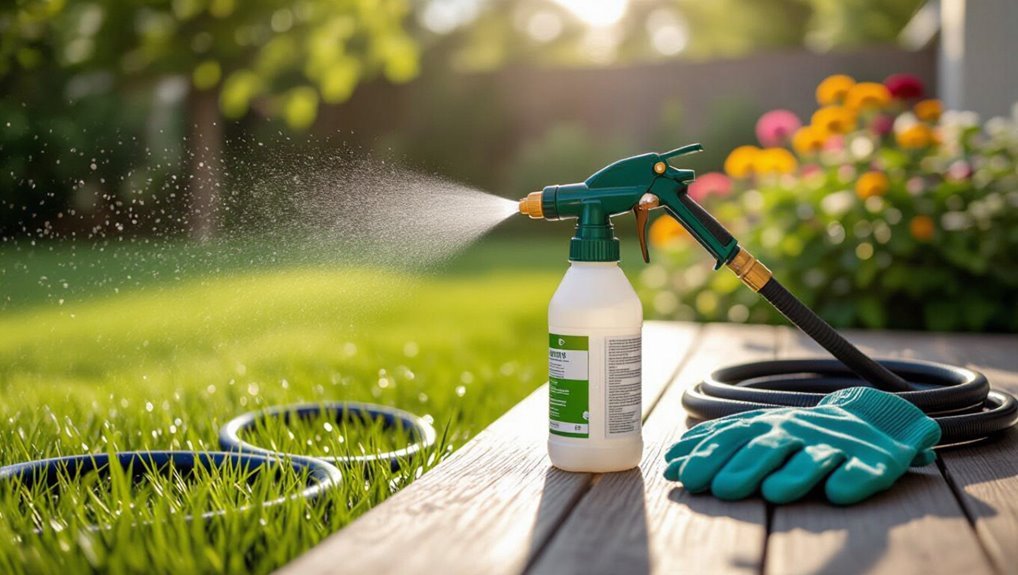
A hose end sprayer consists of a reservoir, mixing chamber, and adjustable nozzle that meters concentrate into the water stream to produce a fine spray or coarse stream.
It is commonly used for applying liquid fertilizers, herbicides, and insecticides across lawns, flowerbeds, and shrubs where quick coverage is needed.
Compared with pump sprayers and granular treatments, it offers speed and convenience but less precise dosing, limited pressure control, and potential runoff or drift.
Basic components and spray mechanisms
Hose end sprayers combine a small chemical reservoir, an adjustable nozzle, and a coupling that attaches to garden hoses to deliver diluted solutions directly from the tap.
Internal venturi or metering valves draw concentrate into the water stream; adjustable nozzles control droplet size and spray pattern.
Understanding how to use hose end sprayer helps select settings, measure concentrate, and troubleshoot leaks or uneven flow.
Common applications for lawn and garden care
When treating typical yard issues—weeds in the lawn, fungal spots on shrubs, or insect infestations in flower beds—a hose end sprayer offers a fast, proportional way to apply pesticides, herbicides, fungicides, and liquid fertilizers without mixing batches by hand.
It suits spot treatments, whole‑lawn applications, foliar feeding, and preventive sprays for trees, shrubs, annuals, and vegetable rows, enabling consistent coverage and reduced overlap.
Advantages and limitations compared with pump sprayers and granular treatments
Moving from common yard uses to equipment choice, the hose end sprayer offers rapid, proportional liquid application but differs in operation and suitability from pump sprayers and granular products.
It excels in convenience, uniform coverage, and low effort for large areas.
Limitations include less precise targeting, dilution restrictions, reliance on water pressure, and incompatibility with some concentrates; granular treatments provide persistence and targeted slow release.
Choosing the Right Hose End Sprayer for Your Needs
Selecting a hose end sprayer begins with comparing types and features—capacity, adjustable dilution ratios, and nozzle patterns—that affect coverage and convenience.
The choice should match the product type, since herbicides, fertilizers, insecticides, and fungicides often require different dilution settings and spray characteristics.
Finally, a quick safety and material compatibility checklist (chemical resistance, secure seals, and clear labeling) helps prevent damage and misuse.
Types and features to consider (capacity, adjustable dilution, nozzle patterns)
Although the right hose end sprayer can simplify yard work, choosing among models requires attention to a few core features: capacity affects coverage and refill frequency; adjustable dilution settings allow precise mix ratios for different tasks; interchangeable or adjustable nozzle patterns (stream, cone, mist) control droplet size and spray width.
Durable materials, clear measurement markings, and easy-clean designs improve usability and longevity.
Matching sprayer to product type (herbicide, fertilizer, insecticide, fungicide)
After evaluating capacity, dilution control, and nozzle options, attention should turn to matching the sprayer to the type of product being applied.
Select models with precise dilution for concentrated herbicides and fertilizers, robust seals for oil-based insecticides, and fine mist capability for systemic fungicides.
Consider tank volume for coverage needs and adjustable flow for uniform application across product viscosities and targeted plantings.
Safety and material compatibility checklist
When determining a hose end sprayer, prioritize a concise safety and material-compatibility checklist that addresses chemical resistance, seal integrity, and labeled use; these factors prevent equipment failure and chemical cross-contamination.
- Confirm sprayer materials (HDPE, PVC, stainless) match product chemical class and pH tolerance.
- Inspect O-rings, gaskets, and fittings for wear; replace incompatible elastomers.
- Verify manufacturer labeling for approved formulations and dilution ratios before use.
Preparing Before You Spray
Before starting, the user should read product labels to confirm active ingredients and calculate the correct dilution rates.
They should assemble personal protective equipment and any necessary tools.
Finally, they should inspect the sprayer and hose for damage, clean any residues, and verify all fittings function properly.
Reading product labels and calculating dilution rates
Although the sprayer makes application easy, the product label remains the authoritative source for safe and effective use; it specifies active ingredient concentration, target pest or plant, allowed application rates, and required personal protective equipment.
The reader should convert label rates to volume per area, calculate concentrate needed for the sprayer’s total tank, account for water quality, and double-check math before mixing.
Gathering personal protective equipment and tools
Having confirmed label rates and mixed quantities, the operator next assembles the personal protective equipment and tools needed for a safe application.
Protective gear reduces exposure; tools enable controlled, efficient spraying. Essentials are selected and checked before moving outside.
- Nitrile gloves, eye protection, long sleeves and closed shoes.
- Measuring cup, funnel, and spill kit.
- Weather‑appropriate hat and respirator if required.
Inspecting and preparing the sprayer and hose
Inspect the hose end sprayer and garden hose for damage and proper function before attaching them.
Check fittings, O-rings, and threads for cracks, wear, or debris.
Verify the trigger and dial move smoothly and seals seat correctly.
Flush the hose to remove sediment.
Replace worn parts or a compromised hose.
Confirm flow rate and spray pattern before adding chemicals.
Step-by-Step: Filling and Calibrating the Sprayer
The next steps cover measuring concentrate and water precisely, attaching the sprayer to the hose and priming the unit, and adjusting flow and coverage for an even application.
Instructions will show how to perform each action and include a quick calibration worksheet example to record results.
Following these steps guarantees accurate dilution and consistent spray patterns.
Measuring concentrate and water accurately
Accurate measurements are essential when filling a hose end sprayer to guarantee effective application and avoid plant damage or wasted product.
Read the product label for dilution ratios, use marked measuring cups or syringes, and pour concentrate into the tank first.
Add water to the indicated fill line, checking volumes twice.
Record settings for consistent future mixes.
Attaching the sprayer to the hose and priming the unit
Connect the hose securely to the sprayer’s inlet coupling, ensuring rubber washers are seated and threads are hand-tightened to prevent leaks.
Open the water slowly, bleed trapped air by holding the trigger until a steady stream appears, and observe the solution mixing in the sight tube.
Check for leaks at connections and tighten if needed.
Ready the unit for application.
Calibrating flow and coverage for even application
With the sprayer primed and leak-free, attention turns to calibrating flow and coverage to guarantee even application.
Measure a defined area, note time required to wet it, and record the sprayer’s output volume over that interval.
Calculate required dilution and travel speed to match label rates. Adjust nozzle setting or water pressure, then re-test until measured coverage equals target application.
Quick calibration worksheet example
Consistency matters when transferring field measurements into usable numbers; a simple worksheet guides the user through each step. The example worksheet records area, time, collected volume, flow rate, and calculated dilution. It helps verify consistent coverage and chemical amounts before application.
| Field | Example |
|---|---|
| Area | 1000 ft² |
| Time | 2 min |
| Volume | 1.5 L |
| Flow rate | 0.75 L/min |
Step-by-Step: Spraying Technique for Even Coverage
The section outlines practical walking patterns and overlap techniques to prevent streaks while noting ideal nozzle settings and pressure control for uniform spray.
It also covers adjustments for wind, temperature, and specific plant types to minimize drift and leaf burn.
Separate recommendations are provided for ornamental beds, lawns, and shrubs to match spray volume and application method to the target.
Best walking patterns and overlap to avoid streaks
Begin each pass at a steady pace and a straight line to establish an even baseline of spray; maintaining a consistent speed prevents pooling and thin spots.
Use parallel passes with 25–50% overlap of the spray width, alternating directions on successive applications.
For irregular areas, employ back-and-forth arcs or concentric paths, keeping spacing consistent to blend edges and avoid visible streaks.
Optimal nozzle settings and pressure control
Select a nozzle setting that matches the task and adjust water pressure to maintain an even, atomized spray; too high pressure causes drift and misting, too low yields large droplets and uneven coverage.
The operator should test spray pattern on a non-target area, calibrate flow for recommended application rate, and fine-tune pressure to sustain consistent droplet size across passes for uniform deposition.
Adjusting for wind, temperature, and plant type
When conditions vary—windy, hot, or with diverse plant types—operators must adapt technique to maintain even coverage.
Reduce spray volume and lower nozzle pressure in wind; spray during calmer periods.
In heat, avoid mid-day applications to limit evaporation and leaf burn.
Adjust distance and overlap for plant leaf structure; use coarser droplets for dense foliage and finer for thin-leaved species.
Spraying ornamental beds vs. lawns vs. shrubs
After accounting for wind, temperature, and plant type, operators should modify their spraying technique to suit the specific target—ornamental beds, lawns, or shrubs—because each requires different nozzle height, walking speed, and overlap to achieve uniform coverage.
For beds, use lower nozzle, slower passes, closer overlap.
For lawns, maintain moderate height, steady pace, 30–50% overlap.
For shrubs, apply from multiple angles, adjust flow for canopy density.
Post-Spray Procedures and Cleanup
After spraying, the operator should flush and rinse the sprayer and hose according to label directions to remove residual chemicals and prevent clogging.
Any leftover solutions and empty containers must be disposed of or recycled following local regulations and product instructions.
The sprayer should be drained, dried, and stored in a cool, protected location to prevent damage and extend its service life.
Flushing and rinsing the sprayer and hose safely
Flush the sprayer and hose immediately to remove residual chemicals and prevent cross-contamination or damage.
Disconnect and run clean water through the sprayer until clear, including trigger, nozzle, and dilution chamber.
Operate briefly with plain water under normal pressure.
Inspect for leaks, sanitize with manufacturer-recommended cleaner if required, then allow all parts to air-dry before storage in a protected, labeled area.
Proper disposal of leftover solutions and containers
Dispose leftover solutions and containers according to label instructions and local hazardous-waste regulations, treating concentrated or unknown mixtures as hazardous; do not pour excess pesticides, herbicides, or concentrated fertilizers onto the ground, into storm drains, or down household drains.
Triple-rinse empty containers when permitted, collect rinse water for proper disposal, and take nonempty or prohibited containers to an approved collection site or household hazardous-waste facility.
Storing the sprayer to prevent damage
Once leftover solutions and containers have been handled according to label and local regulations, attention should turn to preparing the hose end sprayer for storage to prevent damage.
Flush the unit with clean water, disassemble removable parts, and dry thoroughly.
Inspect seals, replace worn components, and lubricate O-rings if recommended.
Store in a cool, dry place away from sunlight and freezing temperatures.
Safety, Environmental, and Legal Considerations
Before beginning application, users should review product labels to determine required personal protective equipment and any specific handling instructions.
Care must be taken to shield non-target plants, keep pets and people away, and avoid runoff into ponds, streams, or storm drains.
Additionally, operators should follow local regulations and label directions to guarantee legal and environmentally responsible use.
PPE requirements by product type
Because different hose-end products contain varying active ingredients and carrier solvents, recommended personal protective equipment (PPE) must be matched to the specific formulation and label instructions.
Generally, labels may require chemical-resistant gloves, long-sleeved shirts, long pants, closed-toe shoes, eye protection, and respiratory protection for volatile or aerosolized formulations.
Follow label-specified materials, fit, and disposal guidance to guarantee compliance and minimize exposure.
Protecting non-target plants, pets, and water sources
Any application of hose-end products should prioritize protecting nearby plants, pets, and water sources to prevent unintended harm.
Users should avoid spraying on windy days, shield ornamentals with barriers, keep pets and people indoors until surfaces dry, and rinse accidental plant contact with clear water.
Prevent runoff into storm drains, ponds, or wells by creating buffer zones and using minimal effective concentrations.
Local regulations and label compliance
Frequent adherence to product labels and local regulations is essential when using hose-end sprayers to verify safety, protect the environment, and avoid legal penalties.
Users must read and follow label directions, application rates, buffer zones, and reentry intervals.
Check municipal ordinances, pesticide licensing requirements, and disposal rules.
Keep records of applications and confirm permitted active ingredients and timing to guarantee compliance.
Troubleshooting Common Problems
The section addresses common operational issues such as uneven spray patterns and nozzle clogging, offering straightforward cleaning and adjustment steps.
It also covers leaks, pressure loss, and incorrect dilution ratios with quick diagnostics and fixes.
Guidance is provided on evaluating damage and deciding when repair is sufficient or replacement is more practical.
Uneven spray patterns and clogging solutions
Inspecting the sprayer and nozzle is the first step when uneven spray patterns or clogging occur, since build-up, debris, or worn parts are usually the cause.
Clean nozzle openings with warm water and a soft brush; soak removable parts if residue persists.
Replace damaged nozzles, check filter screens, and flush the hose attachment.
Reassemble and test spray pattern before treating the lawn.
Leaks, pressure loss, and poor dilution issues
Start by isolating the source: leaks, pressure loss, and poor dilution usually stem from worn seals, loose fittings, blocked filters, or incorrect mixing in the reservoir.
Inspect O-rings and hose connections, clean or replace filters, tighten fittings, and flush lines.
Verify reservoir ratios and agitation.
Test at low flow, then normal pressure, watching for steady stream and correct concentration before full application.
When to repair vs. replace the sprayer
Decide whether repair or replacement is appropriate by weighing the sprayer’s age, frequency of use, extent of damage, and cost of parts versus a new unit.
Minor issues—worn seals, clogged nozzles, or cracked hoses—can be repaired cheaply.
Replace when corrosion, cracked housing, persistent leaks, or failing internal valves make repairs costly or unreliable; choose replacement for safety, warranty, and long-term reliability.
Time-Saving Tips and Best Practices for Professional Results
For efficient, professional results, operators are advised to batch-mix concentrates and work systematically through defined zones to reduce setup time and overlap.
Scheduling applications by season and observing recommended reapplication intervals guarantees treatments remain effective without wasted effort.
A simple maintenance schedule for the sprayer—cleaning, filter checks, and seal inspections—preserves performance and prevents downtime.
Batch-mixing strategies and working in zones
Batch-mixing concentrates into measured volumes and organizing work by zone allow professionals to cover large areas faster while maintaining consistent application rates.
Prepare labeled, ready-to-dispense batches for each formulation, calculate dose per gallon, and refill sprayers centrally.
Map property into manageable zones, sequence treatments to minimize overlap and hose travel, and log completed sections to guarantee uniform coverage and efficient crew coordination.
Seasonal timing and reapplication intervals
Once batches and zones are organized, timing the applications to seasonal pest and plant cycles maximizes effectiveness and reduces repeat trips.
Professionals plan herbicide, fertilizer and pesticide timing around growth stages, dormancy and peak pest activity.
Reapplication intervals follow label directions, weather forecasts and observed efficacy.
Record dates, conditions and results to refine schedules and avoid unnecessary overlaps or missed windows.
Maintenance schedule for long-term performance
Consistency underpins long-term sprayer performance: a concise maintenance schedule prevents downtime, preserves calibration, and extends component life.
Routine checks, cleaning, and records guarantee reliable application and safety.
- Weekly: flush lines, inspect nozzles, tighten fittings.
- Monthly: deep-clean reservoir, test calibration, replace worn seals.
- Annually: full inspection, lubricate moving parts, store dry and protected.
Comparison of Popular Hose End Sprayer Models
A concise side-by-side comparison of features and prices helps readers weigh value against needs.
The section highlights recommended models for beginners, typical homeowners, and professional users.
Clear specifications and price brackets will guide selection based on performance and budget.
Side-by-side feature and price comparison
When choosing a hose end sprayer, comparing key features and prices side-by-side helps identify the best fit for a specific task and budget. A concise table highlights capacity, adjustable settings, material, warranty and price to streamline selection. Consumers evaluate durability, spray control, and value to match application needs without overpaying.
| Feature | Quick view |
|---|---|
| Capacity | |
| Settings | |
| Material | |
| Warranty | |
| Price |
Recommended models for beginners, homeowners, and pros
Having compared features and prices side-by-side, attention turns to specific models suited to different user needs.
- Beginner: A compact, easy‑set dial model with fixed dilution and splash guard for straightforward, low-maintenance use.
- Homeowner: A midrange adjustable unit offering multiple spray patterns, corrosion resistance, and durable seals for regular yard care.
- Pro: A heavy‑duty, high‑flow sprayer with precise metering, quick‑change nozzles, and contractor‑grade materials for frequent, large‑scale applications.
Quick Reference: Dos and Don’ts Checklist
A concise checklist highlights essential dos for safe and effective spraying, such as checking labels, calibrating the sprayer, and wearing protective gear.
It also lists common don’ts to prevent damage and liability, like overapplying, spraying near waterways, or ignoring wind conditions.
The checklist serves as a quick reference to reduce mistakes and guarantee responsible use.
Essential dos for safe and effective spraying
Refer to a concise dos-and-don’ts checklist before attaching a hose end sprayer to verify safe, accurate application. The following essential dos focus on preparation, calibration, and protection to guarantee even coverage and minimize risk.
- Read label and mix precisely; confirm sprayer dilution and settings.
- Test spray on a small area; adjust flow and pattern.
- Wear protective gear and rinse equipment after use.
Common don’ts to avoid damage and liability
While following the dos reduces risk, ignoring key don’ts can cause property damage, personal injury, and legal exposure; users should therefore avoid shortcuts that compromise safety or accuracy.
- Never bypass label rates or mix incompatible chemicals; document usage.
- Don’t spray near people, pets, water sources, or sensitive plants; maintain buffer zones.
- Avoid leaving equipment pressurized or unattended; store and dispose per regulations.
Conclusion
A hose end sprayer transforms yard care into a near-effortless ritual, delivering evenly mixed solutions with surprising precision. When chosen, prepared, calibrated, and applied correctly, it saves time and reduces waste while protecting plants. Users who follow the outlined steps and heed troubleshooting tips will achieve professional results without heroic effort—yet the right model can feel like a magic wand. Consistent practice and simple maintenance guarantee reliable performance season after season.