How to Bleed Air From a Pool Pump: Step-By-Step Fix for Noisy or Low-Flow Systems
To effectively bleed air from a pool pump, first, ensure the power is off and valves are closed. Air can enter through loose fittings, cracked lids, worn O-rings, or leaks in skimmers and valves, leading to reduced flow and noisy operation. Begin by inspecting and cleaning the strainer basket. Then, slightly loosen the pump lid or open the bleeder valve to release trapped air until a steady stream of water flows. Reseal the lid, restart the pump, and monitor for consistent pressure. For further assistance, this guide includes steps for diagnosing leaks, making repairs, and implementing preventive maintenance.
What Causes Air in a Pool Pump and Why It Matters
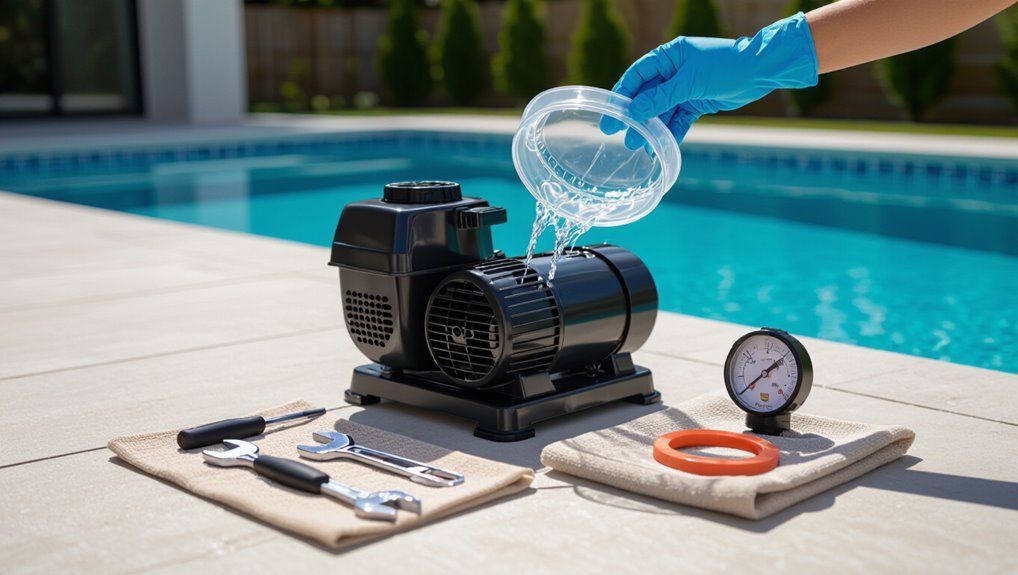
Air can enter a pool circulation system through loose fittings, cracked plumbing, a worn pump lid O-ring, or leaks at skimmers and valves.
Even small amounts of air disrupt pump performance, causing reduced flow, noisy operation, and impaired filtration.
If left unaddressed, trapped air can lead to cavitation and premature equipment damage as well as poorer water quality.
Common sources of air leaks in pool circulation systems
A small leak anywhere in the pool circulation system can draw in gas and disrupt pump performance, lowering flow, causing noisy operation, and risking damage to seals and the motor.
Common sources include cracked pump lids or O-rings, loose unions, damaged suction fittings, hairline cracks in plumbing, faulty valves, and worn skimmer gaskets.
Diagnosing these is essential when learning how to bleed air from pool pump.
How air affects pump performance, noise, and water flow
Introduce trapped gas into the suction side of the pump and performance plunges: flow rate drops, pressure fluctuates, and the impeller cavitates.
Air reduces hydraulic efficiency, causing sputtering returns and intermittent suction. Noise increases—gurgles, rattles, and vibrating housings—while pump workload rises as it struggles to maintain circulation.
Observable signs include air in skimmer lines and weakened jets.
Risks of leaving air in the system (damage, reduced filtration)
Allowing gas to remain in the pump and plumbing accelerates wear and undermines filtration efficiency: pockets of air cause cavitation that erodes impeller vanes and seals, increase motor stress from uneven loading, and promote leaks at joints and O-rings.
Reduced suction lowers skimmer and filter performance, raises chemical imbalance risk from poor turnover, and shortens component lifespan, leading to costly repairs and degraded water quality.
Quick Fix: How to Bleed Air from a Pool Pump
Before beginning, one should gather basic tools and supplies and observe safety precautions such as cutting power and wearing gloves.
The quick-fix process starts by turning off the pump, closing the valves, and removing the pump lid to inspect the basket for debris.
Finally, trapped air is released using the bleeder valve or another air-relief method until steady water flow returns.
Tools and supplies you need before starting
A few basic tools and a handful of common supplies make bleeding air from a pool pump straightforward: adjustable pliers, a flathead screwdriver, a shop towel, a small bucket, and a replacement lid O‑ring or pump lid lubricant if the existing seal is worn.
Essential extras streamline the job and prevent repeat leaks.
- Replacement O‑ring
- Silicone lubricant
- Rag or shop towel
- Small bucket
- Adjustable pliers
Safety precautions to follow
With tools and supplies assembled, attention turns to safety precautions that reduce risk while bleeding air from a pool pump.
Wear eye protection and gloves, keep electrical sources dry and disconnected, and guarantee stable footing.
Verify pool chemicals are stored away.
Use tools rated for wet environments, avoid loose clothing, and have a phone nearby for emergencies.
Follow manufacturer warnings.
Step 1 Turn off the pump and close the valves
Shut down the pump at the circuit breaker or control panel to eliminate power to the unit, then close the skimmer and main drain valves to isolate the pump from the pool.
Verify the pump is fully off and pressure has dropped.
Close any additional manual valves on suction and return lines. This prevents water flow while access and troubleshooting occur safely.
Step 2 Open the pump lid and inspect the basket
Lift the pump lid and visually inspect the strainer basket for debris, cracks, or misalignment. The observer notes leaves, hair, or sediment that could restrict flow; damaged or warped baskets must be replaced.
Confirm the basket seats evenly in the housing and the O-ring or gasket surface is clean and intact. Re-seat components carefully before replacing the lid and restoring flow controls.
Step 3 Release air using the bleeder valve or air relief method
Turn the bleeder valve or air relief fitting slowly to allow trapped air to escape while the pump is either briefly powered on at low speed or manually primed according to the manufacturer’s instructions.
Listen for steady water flow, not sputtering. Close the valve once a continuous stream appears.
Repeat until all air is gone. Monitor pressure and watch for leaks during the procedure.
Step 4 Reassemble, prime the pump, and restart
Reinstall the pump lid and any fittings, ensuring O-rings are seated and clamps are tightened to their specified torque.
Close all valves to the pump, open the skimmer and/or suction valves, then fill the strainer basket with water to prime.
Restore power, start the pump on low briefly to purge residual air, then set normal speed.
Check for leaks and proper pressure.
Step 5 Monitor for remaining air and repeat if needed
Observe the pump closely for several minutes after restarting to confirm that air has been fully expelled: watch the pressure gauge for a steady reading, listen for irregular gurgling or sputtering at the skimmer and return lines, and inspect the strainer lid for new bubbles.
If symptoms persist, repeat the bleed procedure, check fittings and suction lines for leaks, and run the system until flow stabilizes.
Detailed Inspection Steps to Find the Air Leak
A systematic inspection begins with the skimmer, suction lines, and main drain connections to spot loose fittings or cracks.
Next, the pump lid O-ring, clamp, and housing should be examined for wear or improper seating, followed by checks of valves, unions, and dripless shaft seals.
If visible issues aren’t found, soapy water and pressure tests are used to pinpoint air leaks.
Checking the skimmer, suction lines, and main drain connections
Begin by shutting off the pump and visually inspecting the skimmer basket, suction lines, and main drain fittings for signs of loose clamps, cracked seals, or hairline cracks that could admit air.
Tighten hose clamps, replace brittle gaskets, and probe fittings with soapy water for bubbles while an assistant runs the system briefly.
Document any damaged pipe sections for repair or replacement.
Inspecting pump lid O-ring, clamp, and housing for wear
After confirming the skimmer, suction lines, and main drain connections are secure, attention should shift to the pump lid assembly, where most air intrusions originate.
Inspect the O-ring for cracks, nicks, or flattening; clean and lubricate with silicone grease.
Check the clamp for proper seating and corrosion; replace if deformed.
Examine housing sealing surface for gouges or warping and replace damaged parts.
Examining valves, unions, and dripless shaft seals
Inspect the valves, unions, and dripless shaft seal systematically to pinpoint remaining entry points for air.
Check valve handles and housings for cracks, loose fittings, or warped seats.
Tighten unions to specified torque and verify O-rings are intact and lubricated.
Inspect the dripless seal for weeping, worn bellows, or shaft play.
Replace compromised components to restore airtight integrity.
Using soapy water and pressure tests to locate leaks
To locate remaining air leaks, apply a systematic combination of soapy water and low-pressure tests to each suspect joint, fitting, and seal while the pump is pressurized and the system is isolated.
Inspect for bubbles at unions, O-rings, air reliefs, and threaded connections. Use a hand pump or regulator to pressurize lines gently, repair any bubble-producing source, then retest to confirm leak elimination.
Troubleshooting Specific Noisy or Low-Flow Scenarios
The section distinguishes intermittent air noise from continuous gurgling and explains what each symptom typically indicates about suction-side leaks or trapped air.
It then outlines likely causes and straightforward fixes when low flow persists after bleeding, such as clogged strainer baskets or closed valves.
Finally, it presents advanced troubleshooting for pumps that lose prime repeatedly, including pressure testing, hairline crack inspection, and seal or impeller checks.
Intermittent air noise vs. continuous gurgling what it indicates
How can one distinguish intermittent air noise from continuous gurgling at the pump?
Intermittent squeaks or hisses often indicate occasional air entry—loose fittings, suction leaks, or priming lapses.
Continuous gurgling signals trapped air cycling in the pump or return lines, persistent venting issues, or a cracked hairline leak allowing steady air inflow.
Observing patterns and timing guides targeted inspection.
Low flow after bleeding possible causes and fixes
Check for restricted flow sources immediately after bleeding, since low output often stems from remaining air pockets, clogged suction lines, or closed valves rather than the pump itself.
Inspect baskets and skimmer for debris, confirm valves are fully open, and examine suction lines for kinks or blockages.
Clean or clear obstructions, reseat pump lid O-ring, and retighten fittings; then rebleed and verify restored flow.
Pump losing prime repeatedly advanced troubleshooting steps
When a pool pump repeatedly loses prime, pursue a focused sequence of advanced diagnostics to isolate persistent air leaks, intermittent suction restrictions, or valve and equipment failures.
Inspect fittings, unions, and piping under pressure for hairline leaks; perform a vacuum gauge test at the pump suction; verify check valve and skimmer basket function; examine impeller and strainer for obstructions; test multiport and valves for internal failure.
Replacement and Repair Options
The article next outlines when worn O-rings, cracked lids, or leaking unions warrant replacement versus simple tightening or lubrication.
It also covers signs that the pump seal or impeller needs servicing or a rebuild.
Finally, it compares the cost, tools, and complexity of hiring a professional against common DIY repairs.
When to replace O-rings, lids, or unions
Symptoms such as persistent leaks, cracks in the lid, or repeated difficulty achieving a proper seal indicate it is time to contemplate replacing O-rings, lids, or unions.
Replace when rubber shows flattening, tearing, hardening, or chemical degradation. Replace cracked or warped lids and brittle unions.
Use correctly sized, compatible parts and lubricate new O-rings with manufacturer-approved lubricant to guarantee a reliable, air-tight seal.
When to service or rebuild the pump seal and impeller
Persistent or recurring air leaks, seals that continue to fail despite O-ring or lid replacement, and unusual vibrations are indicators that the pump seal and impeller need inspection and likely service.
Technicians should check for shaft wear, corroded or brittle seals, impeller damage or clogging, and cavitation erosion.
If inspection reveals significant wear, rebuild or replace the seal assembly and impeller to restore proper suction.
Hiring a pro vs. DIY: cost and complexity comparison
Compare cost and complexity before deciding whether to hire a professional or tackle a pool pump repair oneself. A pro offers warranty, diagnostic speed, and higher labor cost; DIY saves money but requires tools, time, and risk. Match skill level to task complexity and budget.
| Option | Typical outcome |
|---|---|
| Professional | Reliable, costlier |
| DIY | Cheaper, variable |
Preventive Maintenance to Keep Air Out of the System
A concise preventive maintenance routine helps minimize air entry and keeps the pump running efficiently.
The routine should include a regular inspection checklist for fittings, valves, and the skimmer line, attention to lubrication and O-ring condition, and seasonal steps such as winterizing or pre-summer system checks.
Following these measures reduces leaks, extends component life, and limits the need for frequent bleeding.
Regular inspection checklist
Regular inspections reduce the chance of air entering the circulation system by identifying small problems before they escalate.
Inspectors should check seals, lid tightness, visible cracks, hose connections, and basket condition regularly. Document findings and corrective actions.
Prioritize repairs that restore airtight integrity to prevent cavitation and loss of prime.
- Pump lid seal
- Strainer basket fit
- Visible cracks
- Hose clamps
- Pressure gauge readings
Lubrication and O-ring care
Maintain O-rings and lubrication on pump lids, union fittings, and valve stems to preserve airtight seals and prevent air intrusion.
Inspect O-rings for cracks, flat spots, or hardening and replace when compromised. Clean sealing surfaces, apply a thin film of compatible silicone-based lubricant, and avoid petroleum products.
Re-seat components evenly to prevent pinching. Periodic checks reduce leaks and maintain consistent pump performance.
Seasonal steps to prevent air intrusion
Having kept O-rings and lubricated seals in good condition, the homeowner should adopt a seasonal checklist to guard against air intrusion as weather and usage change.
Inspect and tighten all unions and lid clamps quarterly, replace cracked hoses before heavy use, winterize open fittings, clean skimmer baskets monthly, verify pump priming after storms, and schedule professional leak checks annually to catch hidden air sources.
Common Mistakes and How to Avoid Them
Common mistakes that introduce air into a pool pump include improperly tightened fittings, skipped priming steps after maintenance, and small leaks left unaddressed.
Each error can reduce pump efficiency or cause damage if not corrected promptly.
The following guidance explains how to avoid these pitfalls and verify a properly sealed, primed system.
Over-tightening or under-tightening fittings
Improperly tightened fittings are a frequent source of air leaks and water loss in pool pump systems, yet the solution is simply a matter of correct torque and inspection.
Technicians should follow manufacturer torque specs, use appropriate thread sealant, and avoid overtightening plastic unions.
Periodic checks for finger-tight looseness, hairline cracks, or stress marks prevent leaks.
Replace damaged fittings rather than forcing a tight seal.
Skipping priming steps after maintenance
Once fittings are confirmed secure, technicians often skip priming steps after maintenance, which allows air pockets to remain in the pump and suction lines.
This omission yields persistent noisy operation, reduced flow, and repeated troubleshooting.
Proper protocol reinstates water into the pump strainer, opens valves, and slowly restarts the system while watching for steady water return.
Documenting priming prevents recurrence.
Ignoring small leaks that become major problems
Overlooking a hairline leak can quickly escalate into equipment damage and costly repairs; what starts as a steady drip often erodes seals, weakens fittings, and introduces air that impairs pump performance.
Small leaks should be inspected promptly, tightened, or replaced. Regularly check unions, O-rings, and hoses, and address mineral buildup or UV degradation to prevent loss of prime and avoid premature pump failure.
Signs the Problem Is Resolved and When to Reevaluate
Confirmation comes from a steady pressure reading on the filter gauge and a consistent return flow without sputtering.
Minor residual noise or occasional small bubbles can indicate trapped air being expelled, but persistent loud cavitation or frequent bubbles signals a remaining leak.
If irregularities continue after 24–48 hours of normal operation, a prompt follow-up inspection of seals, fittings, and the pump lid is warranted.
How to confirm steady pressure and normal flow
Check the pump and filter gauges and observe the return flow to guarantee pressure holds steady and water circulation looks normal.
Note stable PSI within the typical operating range and consistent RPM or sound from the motor.
Inspect skimmer and return lines for steady streams, clear sight glass if present, and confirm filter pressure remains constant over 15–30 minutes before concluding resolution.
What residual noise or air bubbles still mean
A few small, intermittent noises or isolated surface bubbles after bleeding usually indicate trapped air pockets still working their way out rather than an active leak; these symptoms should diminish within a few hours of normal operation.
Persistent or worsening sputtering, repeated large bubbles, or audible cavitation suggest remaining intake leaks, faulty seals, or impeller issues and warrant prompt troubleshooting.
When to perform follow-up inspections
When should follow-up inspections occur after bleeding a pool pump?
Inspect immediately for leaks, steady pressure, and absence of air in sight glass.
Recheck after 24–48 hours of normal operation to confirm flow and noise remain stable.
If issues recur, evaluate seals, skimmer lines, and pump basket; schedule professional service if persistent air, pressure drops, or intermittent cavitation continue.
Quick Reference Checklist for Bleeding a Pool Pump
Several concise steps guide the rapid bleeding of a pool pump to restore proper flow and prevent damage.
A technician follows a focused checklist to isolate the system, relieve pressure, purge trapped air, verify seals, and confirm normal operation. Clear, sequential actions minimize downtime and risk.
- Turn off power and close valves
- Open air relief on filter
- Loosen pump lid slightly
- Tighten fittings and seals
- Restart and observe pressure
Conclusion
Keeping air out of a pool pump preserves performance and prevents damage; when bleeding is done correctly, the system usually returns to smooth, quiet operation. Technicians should follow the quick fix first, then inspect seals, fittings, and valves if issues persist. For stubborn leaks, consider replacing worn parts rather than chasing shadows. With routine maintenance and attention to early signs, most air problems are easily defeated and won’t return to haunt the system.