How to Fix a Leak in PVC Pipe Joint: Simple Step-by-Step Repair Guide
To fix a leak in a PVC pipe joint, start by shutting off the water supply and drying the affected area. Identify the type of joint: solvent-weld, threaded, compression, or slip. For quick fixes, use a repair clamp, epoxy putty, or self-fusing tape. For a permanent solution, follow these steps:
- Solvent-weld joints: Cut out the damaged section, deburr the edges, and use primer and cement to attach a new fitting.
- Threaded joints: Clean the threads and apply PTFE tape before reassembling.
- Compression joints: Replace the rubber rings and tighten the joint appropriately.
Don’t forget to adhere to cure times and conduct a pressure test gradually. Detailed step-by-step instructions are available for each method if needed.
How to Quickly Assess a Leaking PVC Pipe Joint
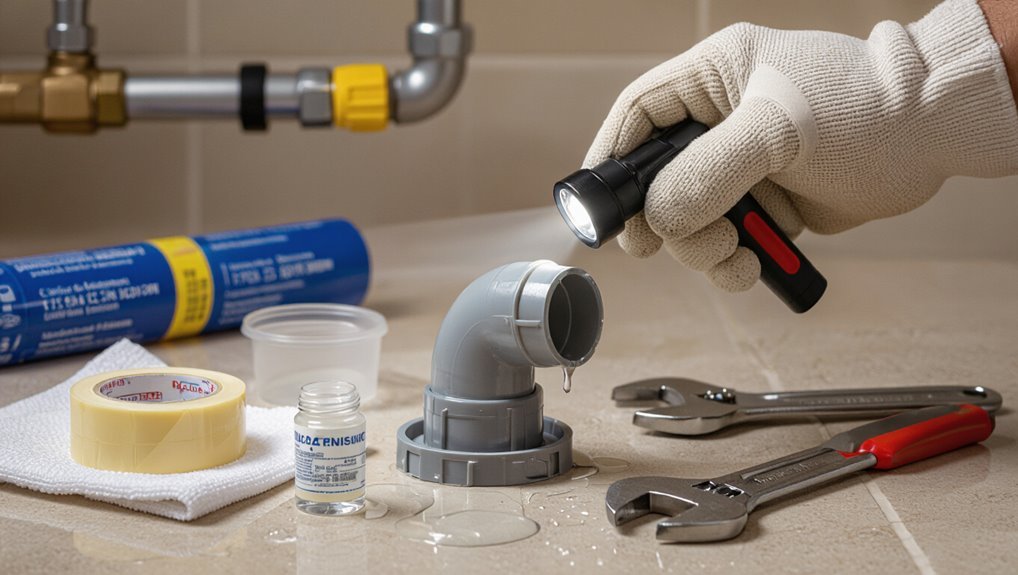
A quick assessment begins by noting whether water is visible on the surface or appearing as dampness, stains, or pooled water that indicate a hidden leak.
The inspector then identifies the joint type—solvent-weld, threaded, compression, or slip—to anticipate likely failure modes and appropriate fixes.
Before touching the pipe, basic safety checks are performed: shut off water, confirm no electrical hazards, and guarantee adequate ventilation.
Identifying visible vs. hidden leaks
Visible leaks announce themselves with drips, wet stains, or pooling around a joint, while hidden leaks require inspection for subtle signs such as unexplained water bills, musty odors, or damp patches on nearby walls or flooring.
A homeowner evaluating how to fix a leak in pvc pipe joint should note sound, discoloration, and paint blistering; moisture meters and thermal cameras help locate concealed leaks before repair.
Determining the type of joint (solvent-weld, threaded, compression, slip)
After locating the leak or gathering signs of a concealed one, the next step is to identify the joint type: solvent-weld, threaded, compression, or slip.
Visual cues narrow diagnosis: solvent-weld has smooth glued seams; threaded shows spiral threads and often tape; compression features a nut and ferrule; slip joints are plain socket connections without threads or nuts.
- Smooth, glued seam
- Visible threads/tape
- Nut/ferrule assembly
Safety checks before repair (water shutoff, electrical hazards, ventilation)
Before touching the joint, the person should cut off the water supply to that section, confirm power sources are clear, and guarantee adequate ventilation if adhesives or solvents will be used.
They should drain and depressurize the line, verify nearby wiring or outlets are dry and de-energized, and open windows or use a fan when solvent cement is involved.
Wear gloves and eye protection.
Tools and Materials You Need for PVC Joint Repairs
A concise selection of tools and materials streamlines PVC joint repairs and helps determine whether a temporary patch or a permanent replacement is appropriate.
Basic cutting and finishing tools plus a heat source make clean, secure joins possible, while primers, cements, and fittings provide lasting repairs. For quick fixes, epoxy or silicone tape can stop leaks short-term until a proper coupling or replacement fitting is installed.
- Essential tools: pipe cutter, hacksaw, deburring tool, wrench, heat gun
- Repair materials: PVC primer, PVC cement, replacement fittings, PVC repair coupling, epoxy putty, silicone tape
- Decision point: when to use temporary materials (speed, access) versus permanent solutions (pressure-rated fittings, solvent-weld joints)
Essential tools (pipe cutter, hacksaw, deburring tool, wrench, heat gun)
Gathering the right tools streamlines PVC joint repairs and reduces the chance of mistakes. A pipe cutter or hacksaw provides clean cuts; a deburring tool smooths edges for proper fit.
A wrench tightens fittings without damage. A heat gun helps soften stubborn fittings for removal.
Each tool guarantees precise, safe work and speeds the repair process while minimizing leaks and future failures.
Repair materials (PVC primer, PVC cement, replacement fittings, PVC repair coupling, epoxy putty, silicone tape)
Select durable, compatible repair materials to guarantee a lasting seal and proper joint function.
Recommended items include PVC primer and cement for solvent-welded joints, replacement fittings sized to the pipe, and a PVC repair coupling for short damaged sections.
For quick fixes or irregular leaks, epoxy putty or silicone tape provide adhesion and sealing.
Verify chemical compatibility and pressure ratings before use.
When to use temporary vs. permanent materials
Choosing between temporary and permanent repair materials follows naturally from selecting compatible supplies like primer, cement, and repair couplings.
Temporary options—epoxy putty, silicone tape—suit immediate stops, low-pressure lines, or while awaiting parts.
Permanent fixes—properly primed and solvent-welded fittings or replacement couplings—are required for pressurized systems, buried lines, or long-term reliability.
Match choice to pressure, location, and downtime tolerance.
Quick Immediate Fixes to Stop Active Leaks
For immediate containment of an active leak, a pipe repair clamp or a rubber patch can be fitted over the joint to provide a fast, temporary seal.
Epoxy putty offers a quick, durable stopgap for pinholes and hairline cracks when molded and cured over the defect.
In urgent situations, silicone or self-fusing tape can be wrapped tightly to slow or halt flow until a permanent repair is made.
How to use pipe repair clamp or rubber patch for temporary sealing
Clamp or wrap the leaking joint immediately to halt water flow while planning a permanent repair.
Select a sized repair clamp or rubber patch, clean and dry the area, then center the patch over the leak.
Tighten clamp bolts evenly or wrap and secure rubber with hose clamps or stainless bands.
Verify sealing under low pressure before full system restart; replace with permanent fix soon.
Applying epoxy putty for small pinholes and hairline cracks
After temporarily stopping the flow with a clamp or rubber patch, epoxy putty offers a fast, durable way to seal small pinholes and hairline cracks until a permanent repair is made.
Surface must be clean, dry, and roughened. Knead to uniform color, press firmly over defect, and smooth edges.
Allow full cure per manufacturer before restoring pressure; inspect for leaks afterward.
Using silicone or self-fusing tape for emergency situations
When an active leak requires an immediate stop, silicone or self-fusing tape can provide a fast, temporary seal until a proper repair is made.
The surface should be dry and clean; wrap tape tightly with overlapping layers or apply silicone over the leak and smooth.
These fixes resist pressure briefly but are temporary—schedule a permanent repair soon to prevent failure or further damage.
Step-by-Step Permanent Repair for Solvent-Weld (Glued) PVC Joints
First, the water supply is shut off and the affected section is drained to prevent contamination and guarantee a dry work area.
Next, the damaged joint is cut out and the remaining pipe ends are cleaned, deburred, and dry-fitted to confirm proper alignment.
Finally, primer and PVC cement are applied correctly, the joint assembled, and allowed to cure for the manufacturer-recommended time to achieve a permanent, reliable bond.
Shutting off water and draining the section
Shut off the appropriate water supply and isolate the damaged section to prevent flow into the joint before cutting or disturbing the pipe.
Next, open nearby faucets and drain valves to relieve pressure and empty the line. Use a bucket and towels to catch residual water.
If applicable, depressurize hot-water heaters and drain low spots.
Confirm dryness before proceeding with repairs.
Cutting out the damaged joint safely
With the line isolated and drained, attention turns to removing the damaged solvent-weld joint without harming adjacent pipe or fittings.
The technician marks cut lines beyond the glued joint, uses a fine-tooth saw or rotary cutter held square, and supports the pipe to prevent flex.
Cuts are slow, controlled, and finished flush. Debris is removed and the area inspected for hidden cracks.
Preparing pipe ends: cleaning, deburring, and dry-fitting
Prepare the cut pipe ends by removing burrs, dirt, and moisture so the surfaces will mate cleanly for a solvent-weld.
Use a utility knife or deburring tool to chamfer edges, then wipe with a clean, lint-free cloth and appropriate cleaner to remove grease and dust.
Dry-fit the pipe and fitting to confirm alignment, correct depth, and gap-free contact before proceeding to primer and cement.
Correct application of primer and PVC cement
Begin by applying primer and cement methodically to guarantee a secure solvent weld: the primer softens and cleans the PVC surface, promoting solvent action, while the cement chemically fuses the parts.
Using a brush applicator, coat pipe end and fitting socket evenly with primer; follow immediately with a uniform layer of cement.
Avoid pooling, rotate the pipe during insertion, and wipe excess for a neat joint.
Assembling and curing times for a reliable bond
Insert the primed and cemented pipe into the fitting promptly, giving it a quarter turn to evenly distribute the solvent and guarantee full contact between surfaces.
Hold alignment for 30 seconds to prevent push-out. Allow initial set per manufacturer (typically 15–30 minutes) before handling; wait full cure time (usually 24 hours at room temperature) before pressurizing the system.
Adjust times for cold or humid conditions.
Step-by-Step Repair for Threaded and Compression PVC Connections
The section covers inspection and removal of worn threads or damaged fittings before reassembly.
It then explains cleaning mating surfaces and applying fresh Teflon tape or pipe dope to threaded joints.
Finally, it describes replacing compression rings and following proper tightening guidelines to secure the connection without overtightening.
Inspecting and removing old threads or fittings
Before disassembling the joint, inspect the threaded or compression connection closely to determine the failure mode—corrosion, worn threads, cracked fittings, or residual sealant buildup—and document any visible damage.
Remove fittings using appropriate wrenches or vice grips, protecting PVC with cloth.
For compression nuts, loosen retaining nuts and slide off ferrules; cut away damaged threads or brittle sections with a fine-tooth saw or rotary tool, deburring afterward.
Cleaning and replacing Teflon tape or pipe dope on threaded joints
Begin by thoroughly cleaning both male and female threads to remove old Teflon tape, pipe dope, debris, or corrosion that could prevent a proper seal.
Inspect threads for damage; replace fittings if stripped.
Apply new PTFE tape clockwise with two to three wraps or a thin, even coat of compatible pipe dope.
Reassemble and hand-start threads to guarantee proper engagement before final tightening.
Replacing compression rings and tightening guidelines to avoid overtightening
Inspect the compression assembly for worn or cracked rings and seating surfaces. Then remove and replace any damaged ferrules with properly sized replacements.
Reassemble hand-tight, then tighten the nut an additional quarter to half turn with a wrench while monitoring for leaks. Stop when sealing is achieved; overtightening can deform the ferrule or crack PVC.
Recheck after pressure cycles.
Using Repair Couplings and Slip-Fix Fittings
When a localized crack or short damaged section is present, a repair coupling can save time and material, whereas extensive corrosion or misaligned runs usually warrant full pipe replacement.
For quick fixes, slip-fix or push-fit couplings (SharkBite-style) are installed by cutting back to clean pipe, seating the fitting fully, and securing any adjustable collars per manufacturer instructions.
After installation, the installer must check alignment, restore pressure slowly, and inspect for leaks to verify a watertight seal.
When to choose a repair coupling vs. full replacement
Choosing between a repair coupling or a full replacement hinges on the nature and location of the leak: repair couplings and slip-fix fittings suit localized joint failures, short damaged sections, or situations where surrounding access is limited.
On the other hand, full replacement is warranted for extensive corrosion, multiple compromised joints, significant misalignment, or when long-term reliability is a priority.
Consider budget, expected service life, and code requirements before deciding.
Installing a slip-fix or push-fit coupling (SharkBite style)
If the leak is confined to a joint or a short section and the pipe alignment is reasonable, a slip-fix or push-fit coupling (commonly known by brand names like SharkBite) offers a fast, tool-minimal repair option.
The damaged section is cut back, deburred, and cleaned; the coupling slides or pushes on to create an immediate seal without solvent cement.
- Cut and square the pipe
- Deburr and clean
- Insert coupling fully to mark and secure
Checking alignment and testing the seal after installation
Verify alignment and test the seal immediately after installing a repair coupling or slip-fit fitting to confirm a lasting repair.
The technician verifies pipe ends are centered and coupling seats fully. After curing or locking, pressurize the line to normal operating pressure and inspect for drips or seepage.
Rotate and lightly flex the joint while monitoring; any movement or leakage requires reinstallation or replacement.
Repairing PVC Pipes Buried or Inside Walls
Locating a leak behind drywall or underground requires careful inspection using listening devices, moisture meters, or trenching probes to pinpoint the source.
Access options include cutting a small access panel in the wall, excavating a trench to expose the pipe, or rerouting the line to avoid intrusive repair.
Once exposed, the pipe can be replaced or sleeved and the wall or landscape restored with appropriate patching and finishing.
Locating the leak behind drywall or underground
Where is the leak when no pipe is visible?
The technician listens for drips, taps drywall to detect hollow sounds, and uses a moisture meter to map wet areas.
For underground lines, they check surface depressions, soggy spots, and unusually green vegetation.
Infrared cameras, acoustic leak detectors, or tracer dye can narrow the location before creating access for repair.
Options for access: cutting access panels, excavating, or rerouting
Access decisions hinge on pipe location, depth, and surrounding structure: cutting access panels is least invasive for wall-mounted lines, excavating exposes buried runs but requires more labor, and rerouting eliminates difficult-to-reach sections at the cost of added material and potential layout changes.
Choices depend on access duration, safety, permits, and finish restoration complexity; prioritize minimal disruption, clear workspace, and code compliance.
Steps to replace or sleeve the pipe and restore the wall or landscape
Begin by evaluating the breach and surrounding materials to determine whether the run requires full replacement, sleeving, or a localized splice. This decision guides the sequence of excavation or demolition, pipe preparation, jointing method, and restoration needed to return the wall or landscape to code-compliant condition.
Excavate or open wall minimally, cut and remove damaged section, deburr, test-fit sleeve or new pipe, solvent-weld or mechanical-coupling, pressure-test, backfill or patch, compact, and finish surfaces to match surroundings.
Preventing Future Leaks and Common Causes to Address
Common causes of PVC joint failure include poor solvent welds, thermal expansion and freeze–thaw cycles, UV degradation, and mechanical stress from movement or external loads.
Proper installation—correct joining technique, adequate pipe spacing for expansion, and use of insulation, clamps, and supports—reduces the risk of future leaks.
Addressing these factors during installation and maintenance prevents stress concentrations that commonly lead to joint failure.
Causes: poor solvent welds, thermal expansion, freeze-thaw, UV degradation, mechanical stress
Identify the underlying causes of PVC joint leaks to prevent recurrence and guide durable repairs.
Faulty solvent welds, movement from thermal expansion, freeze–thaw cycling, UV embrittlement, and mechanical stress each produce distinct failure patterns.
Diagnosis directs targeted remedies and inspection priorities.
- Cracked or incomplete solvent joints causing seepage and gaps
- Stress fractures from temperature cycling and external loads
- Surface degradation from sunlight leading to brittleness
Correct installation practices to minimize leaks
Adhere to proven installation practices to considerably reduce PVC joint failures and extend system life.
Clean, dry mating surfaces; cut squarely and deburr ends; apply primer then solvent cement per manufacturer timing; assemble with proper alignment and full insertion; allow recommended cure time before pressure testing; select correct fittings and pipe grade for application; avoid over-tightening threaded adapters to prevent stress and cracks.
Insulation, clamps, and supports to prevent movement and stress
Beyond correct joint assembly, preventing movement and stress at PVC connections depends on proper insulation, clamps, and supports.
Insulation reduces thermal expansion and condensation. Properly spaced supports and cushioned clamps limit sagging and vibration.
Use rigid hangers for horizontal runs, adjustable straps near fittings, and foam sleeves where metal meets plastic.
Periodic inspection verifies fasteners remain secure and materials intact, preventing recurrence.
Troubleshooting Persistent Leaks and When to Call a Professional
If a patched joint continues to drip, shows expanding damp areas, or repeatedly fails after tightening or resealing, it indicates the DIY repair did not resolve the underlying issue.
Situations involving high system pressure, long damaged sections, or multiple leaks typically require a licensed plumber with proper tools and experience.
Before calling, note pipe diameter, joint type, exact leak locations, and what repairs were attempted to speed diagnosis and repair.
Signs a DIY repair failed and why
How can one tell a DIY PVC joint repair has failed?
Persistent dripping after drying, fresh moisture at the joint, visible gaps in adhesive or primer, or a return of water stains indicate failure.
Increased leakage under pressure, hollow sounds when tapped, and recurring corrosion or mold nearby signal poor adhesion, improper cleaning, incorrect fittings, or inadequate cure time—necessitating rework or professional assessment.
Complex scenarios requiring a plumber (pressure issues, large sections, multiple leaks)
When leaks persist despite correct adhesive use and proper cure time, or when multiple joints fail, the problem often exceeds routine DIY repair and warrants a plumber’s assessment.
High-pressure systems, long damaged runs, hidden leaks, corroded fittings or structural movement require diagnostic tools and experience. A professional evaluates pressure, isolates sections, recommends durable replacement or rerouting, and guarantees code-compliant, long-term repairs.
What information to prepare for the professional (pipe size, joint type, repair attempts)
Before the visit, gather key facts so the professional can diagnose and plan efficiently: pipe diameter, material (PVC schedule), and visible joint type (solvent-weld, threaded, gasketed).
Note leak location, history, frequency, and recent repair attempts or adhesives used.
Record water pressure, related fixtures, and any accessible photos or measurements.
Provide shutoff locations and any site access constraints.
Cost and Time Estimates for Common PVC Joint Repairs
Cost and time estimates help prioritize repairs and set realistic expectations for homeowners. Below is a quick reference for typical repair durations and estimated material plus labor costs. These ranges reflect common scenarios and may vary with location and complexity.
| Repair Type | Time & Cost Estimate |
|---|---|
| Slip joint replacement | 30–60 minutes; $20–$80 |
| Solvent-weld joint repair | 20–45 minutes; $10–$60 |
| Coupling or adapter replacement | 30–90 minutes; $15–$120 |
| Sectional pipe replacement | 1–3 hours; $40–$300 |
Typical time to complete each repair type
Repair times for common PVC joint fixes typically range from 15 minutes for a simple solvent-weld splice to several hours for more involved work like replacing a buried section or reconfiguring fittings.
Most straightforward joint repairs (cleaning, cutting, gluing, and curing) can be completed within 30–60 minutes, while tasks requiring excavation, pipe alignment, or pressure testing add significant labor and drying time.
Minor clamp or epoxy repairs often take 20–45 minutes.
Estimated material and labor cost ranges
A rough budget for common PVC joint fixes typically falls into modest ranges that depend on materials, labor rates, and job complexity.
Materials: $5–$40 for couplers, cement, primer, seals.
DIY labor: minimal, often under an hour.
Professional service: $75–$250 per visit plus parts; extensive replacements may reach $300–$600.
Regional variations and emergency calls raise costs.
Safety and Maintenance Checklist After Repair
After completing a PVC joint repair, the technician performs pressure testing and initiates regular leak monitoring to confirm integrity.
A clear long-term inspection schedule is established, noting specific intervals and responsibilities. The checklist also highlights visual and tactile signs to watch for that indicate recurrence or deterioration.
- Perform a calibrated pressure test and monitor for drops over a set period.
- Inspect joints on a monthly, quarterly, and annual basis depending on system pressure and usage.
- Watch for damp spots, new stains, soft fittings, or an unexplained rise in water bills.
Pressure testing and leak monitoring
Begin pressure testing only when the adhesive or sealant has fully cured and the work area is clear of tools and debris.
Gradually pressurize the system to recommended levels, monitor gauges for stability, and inspect joints for droplets or seepage.
Maintain pressure for the manufacturer’s specified duration, log readings, and tag the repair as tested.
If pressure falls or leaks appear, depressurize and redo the repair.
Long-term inspection schedule and signs to watch for
When curing and initial testing are complete, a structured long-term inspection schedule guarantees the repaired PVC joint remains sound and safe.
Inspect quarterly for visible leaks, soft spots, discoloration, or odor.
Annually perform pressure checks and verify clamps, supports, and surrounding seals.
After any freeze, vibration event, or nearby work, re-inspect immediately.
Document findings and schedule repairs promptly if deterioration appears.
Conclusion
When a PVC pipe joint leaks, a calm, methodical approach wins the day. After evaluating the source and applying temporary stops if needed, the proper repair—whether solvent-weld, threaded, or compression—restores integrity and prevents repeat problems. Regular inspection and correct installation avoid most issues; however, if leaks persist despite best efforts, calling a professional prevents throwing good money after bad. With prompt action, the problem can usually be fixed quickly and reliably.