
How to Stop a Condensate Pipe From Freezing: Simple Fixes That Work
To stop a condensate pipe from freezing, address the issues of cold air, poor insulation, improper pitch, and blockages. Quick remedies include thawing the pipe with warm towels or a hair dryer, enhancing insulation with closed-cell foam, and applying UL-listed heat tape on exposed sections. For a lasting solution, ensure proper slope, consider rerouting the pipe, or install a condensate pump. Always prioritize safety and compliance with electrical codes. Regularly inspect for cold spots and leaks to maintain functionality. Follow the practical step-by-step guidance below for effective solutions.
Why condensate pipes freeze and why it matters
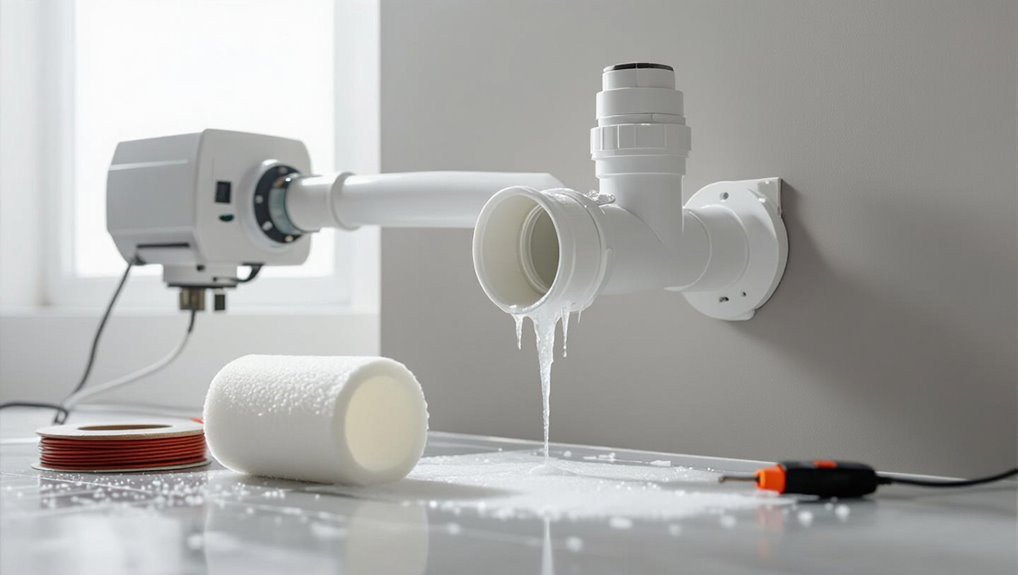
Condensate pipes carry acidic water produced by HVAC and boiler condensers away from the appliance to a drain or outdoors.
They can freeze when outdoor or uninsulated indoor temperatures drop, when airflow is restricted, when the pipe lacks proper pitch, or when blockages trap water.
A frozen condensate line can force system shutdowns, cause pipe damage and leaks, and create conditions for mold growth if not addressed.
How condensate pipes work in HVAC and boiler systems
Understanding is improved by recognizing that condensate lines carry the acidic water formed when combustion gases or warm, humid air cool and condense.
These narrow, often externally routed pipes remove that condensate from boilers, high-efficiency furnaces, and air conditioning units to a drain or soakaway.
They rely on gravity or condensate pumps, simple traps, and modest diameter runs; guidance on how to stop a condensate pipe from freezing follows.
Common causes of freezing: temperature, airflow, pitch, blockages
Freezing occurs when several interacting factors allow liquid in the condensate line to drop below its freezing point and remain stationary long enough to solidify.
Low ambient temperatures, poor insulation and restricted airflow around the pipe lower heat input.
Incorrect pipe pitch prevents drainage.
Debris, algae or ice build-up create blockages that trap water.
Combined, these conditions increase freeze likelihood and operational interruption.
Risks of a frozen condensate pipe: system shutdown, damage, leaks, mold
When a condensate pipe freezes, HVAC systems can quickly halt as safety controls shut equipment down to prevent overflow or damage.
Ice blockage can rupture plastic or copper, create leaks when thawed, and cause secondary water damage.
Extended dampness fosters mold growth, degrading indoor air quality and posing health risks.
Repair costs and downtime rise; proactive prevention reduces these consequences.
Quick fixes you can do now to stop a condensate pipe from freezing
The section outlines practical, immediate steps to address a frozen condensate pipe, starting with safe temporary thawing methods such as warm towels or a hairdryer used cautiously.
It also covers short-term insulation and improvised heat-source tricks to keep the pipe above freezing until a permanent fix is arranged.
Finally, guidance is given on when to shut down the system safely to prevent damage or hazards.
Temporary thawing methods for a frozen pipe
Act quickly to reduce damage and restore flow by applying short-term thawing techniques that require minimal tools and can be done safely by most homeowners.
Use warm (not boiling) towels, a hair dryer moved steadily along the pipe, or a portable space heater positioned safely nearby.
Monitor for leaks, thaw gradually from the faucet toward the frozen section, and call a pro if unsure.
Short-term insulation and heat-source tricks
After briefly thawing a frozen condensate line, attention should shift to quick insulation and temporary heat sources to keep it from refreezing while longer-term repairs are arranged.
Wrap exposed sections with foam pipe insulation or fiberglass, secure with tape, and add a heat tape or a thermostatic cable rated for condensate lines.
Complement with a small space heater nearby and monitor for safety and effectiveness.
When to shut down the system safely
Shut down the HVAC or boiler only when ice buildup inside the condensate line poses an immediate risk of overflow, damage, or persistent leakage that cannot be resolved by quick thawing and temporary insulation.
Then power down following manufacturer shutdown steps, close fuel supply if applicable, and tag controls.
Arrange safe thawing, monitor for drainage, and schedule professional repair before restart to prevent recurrence.
Permanent solutions to prevent condensate pipe freezing
Permanent solutions focus on altering the pipe and its environment to eliminate freezing risk. This includes proper insulation with appropriate materials and installation, adding electric heat trace or heating tape with correct selection and safe wiring, and changing pipe slope or rerouting to guarantee positive drainage.
More involved upgrades include redesigning the condensate drain—improving traps, venting, and termination—to prevent backups and ice formation.
Proper pipe insulation: materials and installation steps
Choose appropriate insulation materials and follow careful installation steps to guarantee condensate pipes remain protected from freezing in cold conditions.
Select closed-cell foam, rubber, or polyethylene sleeves sized to pipe diameter and rated for low temperatures.
Clean and dry pipe, cut insulation to fit, seal seams with weatherproof tape or mastic, and secure with UV-resistant zip ties.
Inspect and replace damaged sections annually.
Adding heat trace or electric heating tape: selection and safe installation
Install electric heat trace or self-regulating heating tape along condensate lines to provide reliable, controlled warmth that prevents freezing in cold conditions.
Select UL-listed, thermostat- or ambient-activated tapes sized for pipe material and length. Secure with recommended clips, overlap restrictions, and weatherproof junctions.
Follow manufacturer wiring diagrams, ground fault protection, and local electrical codes. Test operation before insulation and schedule periodic inspections.
Adjusting pipe slope and rerouting to improve drainage
Several straightforward adjustments to condensate piping — improving slope, eliminating sags, and rerouting low points — reliably reduce standing water that can freeze and block flow.
Technicians assess existing runs, increase continuous fall toward the drain, and replace unsupported sections.
Where gravity drainage is impossible, pipes are rerouted to higher, insulated paths or given shorter, direct runs to minimize pooling and maintain consistent condensate discharge.
Upgrading condensate drain design (trap, venting, and termination)
Upgrading the condensate drain design addresses freezing at its source by optimizing trap configuration, venting, and termination so condensate cannot collect or back up into exposed runs.
Proper trap depth prevents siphoning; venting equalizes pressure and avoids air locks; insulated, sloped, and terminated drains discharge to protected locations or indoors.
Professional-grade materials and code-compliant terminations guarantee durability and reduce freeze risk.
Step-by-step DIY guide to insulating and protecting a condensate pipe
The guide begins with a concise checklist of tools and materials needed for insulating and protecting a condensate pipe.
It then outlines how to locate the line, identify vulnerable spots, and apply different methods for exterior versus interior sections, including safe heat-tape installation with proper wiring, weatherproofing, and thermostat control.
Finally, it explains how to verify effectiveness by measuring pipe temperature and inspecting for continued drainage.
Tools and materials checklist
Gathering the right tools and materials guarantees the insulating and protective work on a condensate pipe proceeds efficiently and safely.
The checklist below lists essentials for a straightforward DIY job, all chosen for effectiveness and accessibility.
- Pipe insulation (foam or rubber)
- Heat tape or cable with thermostat
- Waterproof tape and zip ties
- Utility knife and scissors
- Gloves and safety glasses
Prep: locating the pipe and identifying trouble spots
With tools assembled, attention turns to finding the condensate pipe and pinpointing sections most likely to freeze.
Inspect visible runs from the appliance to the drain, tracing bends, exposed outdoor segments, and low spots where water pools.
Note unsecured sections, thin insulation, and nearby cold-air gaps.
Mark trouble spots for targeted work and plan access routes before beginning insulation or repairs.
Insulating exterior vs interior sections: method differences
Several distinct approaches are needed when insulating condensate lines that run outside versus those routed inside:
Exterior sections require weatherproofing, thicker insulation, and often heating tape to resist freezing, while interior runs benefit from thinner insulation, sealing against drafts, and attention to adjacent cold surfaces.
Exterior work uses closed-cell foam, taped seams, and protected joints; interior work prioritizes vapor barriers, tight fittings, and avoiding trapped moisture.
Installing heat tape safely: wiring, weatherproofing, and thermostat control
After selecting appropriate insulation and sealing techniques for both exterior and interior runs, the next step is installing heat tape to actively prevent freezing where passive measures are insufficient.
Use UL-listed self-regulating tape, follow manufacturer wiring diagrams, connect to a GFCI-protected circuit, secure with weatherproof tape and conduit for outdoor sections, and install an adjustable thermostat controller per code for energy-efficient, safe operation.
Verifying effectiveness and measuring temperature
Begin by establishing a baseline: record outdoor and pipe surface temperatures, note recent weather patterns, and photograph the insulated runs and heat‑tape connections so comparisons can be made after adjustments.
Monitor temperatures with a calibrated infrared or contact thermometer at intervals and under similar conditions. Log results, inspect for cold spots or condensation, and repeat after modifications to confirm sustained protection and energy use.
When to call a professional and what to expect
If freezing recurs despite DIY measures, or if the system shows leaks or boiler error codes, professional service is advised.
Technicians typically perform diagnostics and may recommend permanent rerouting, condensate pump installation, or other repairs.
Homeowners should ask about proposed fixes, timelines, warranties, and request written estimates for parts and labor.
Signs you need pro service: persistent freezing, leaks, boiler errors
When should a homeowner call a professional for a frozen condensate pipe?
Persistent re-freezing despite DIY thawing, visible leaks or water damage around condensate lines, and boiler error codes or lockouts indicating drainage failure all warrant professional attention.
A technician can identify underlying causes, prevent repeat freezes, and advise on safe repair timing; immediate contact is advised if leaks or system faults appear.
Services technicians provide: diagnostics, permanent reroute, condensate pump installation
Technicians assess frozen condensate issues by tracing the condensate path, testing drainage and pressure components, and inspecting pipe insulation and routing to pinpoint the failure mode.
They offer targeted solutions: repairing leaks, replacing damaged pipe, insulating exposed runs, installing condensate pumps with float controls, and performing permanent reroutes to warmer or protected locations.
Expect documentation, safety checks, and warranty information.
Questions to ask and estimates to request
How should a homeowner determine whether to call a professional and what figures to expect on an estimate? Homeowners should assess risk, compare quotes, and prioritize safety.
Ask technicians about scope, timeline, warranties, and permits. Request itemized estimates for diagnostics, labor, materials, and reroute or pump installation.
- Scope of work
- Itemized costs
- Timeline and disruptions
- Warranty details
- Permit/inspection needs
Comparing common prevention options
The article next compares insulation, heat trace, and rerouting as practical options for preventing condensate pipe freeze.
It evaluates upfront and lifetime costs, expected longevity, routine maintenance needs, and the energy implications of each method.
This comparison helps identify the most suitable approach for different budgets, climates, and installation constraints.
Insulation vs heat trace vs rerouting
Comparing insulation, electric heat trace, and rerouting reveals distinct trade-offs in cost, effectiveness, and installation complexity for preventing condensate pipe freezing. Insulation is simple and passive; heat trace actively prevents ice in extreme cold; rerouting removes exposure but requires plumbing work. Choice depends on site constraints and severity of freezing risk.
| Option | Typical use case |
|---|---|
| Insulation | Mild exposure |
| Heat trace | Severe exposure |
| Rerouting | Persistent problem locations |
Cost, longevity, maintenance, and energy impact of each option
After weighing where insulation, heat trace, or rerouting fit best, attention shifts to their fiscal and operational implications: upfront and lifecycle costs, expected service life, routine upkeep, and any ongoing energy draw. Insulation is low-cost, low maintenance, medium lifespan. Heat trace costs more, needs power and checks, lasts long. Rerouting has high upfront but minimal energy use thereafter.
| Option | Cost | Energy & Maintenance |
|---|---|---|
| Insulation | Low | Minimal energy, occasional checks |
| Heat trace | Medium–High | Continuous energy, regular inspection |
| Rerouting | High | Low energy, rare maintenance |
Maintenance and seasonal checklist to keep condensate pipes thawed
A concise maintenance and seasonal checklist helps guarantee condensate pipes remain thawed through routine attention and targeted winter preparation.
Recommended actions include monthly and annual inspection steps, a winter prep checklist for HVAC and boiler systems, and practical tips for combining insulation, heat tracing, and drainage improvements.
Implementing these measures together reduces freeze risk and simplifies troubleshooting when issues arise.
Monthly and annual inspection steps
Establishing a regular inspection routine helps prevent condensate pipes from freezing by catching problems early and keeping preventive measures effective.
Monthly checks look for leaks, insulation damage, and blockages; annual inspections verify trap integrity and slope.
Recommended steps include:
- Inspect visible pipe insulation
- Clear condensate drains and traps
- Verify proper pipe pitch
- Check for leaks or corrosion
- Test float switch operation
Winter preparation checklist for HVAC and boiler systems
When temperatures drop, preparing HVAC and boiler systems with a focused winter checklist reduces the risk of condensate pipes freezing and causing system failures.
A concise seasonal plan includes inspections, insulation, and routine servicing to keep drains flowing.
- Inspect and clear condensate lines
- Insulate exposed pipes and traps
- Test condensate pump operation
- Schedule professional servicing
- Verify thermostat and drain pan sensors
Tips for combining solutions for best protection
Resilience against frozen condensate lines comes from layering simple, complementary measures into a single seasonal routine: combine routine inspections, targeted insulation, pump tests, and sensor checks so each element backs up the others without adding complexity.
Schedule monthly visual checks, pre-winter seal and insulate exposed runs, confirm trap and condensate pump operation, test float switches, and document actions to streamline future maintenance and rapid response.
Common mistakes and pitfalls to avoid
Common mistakes can turn simple precautions into hazards, such as selecting the wrong insulation material or installing it incorrectly.
Unsafe DIY electrical work with heat tape risks shock or fire when not performed to specification.
Overlooking building codes and condensate disposal rules can lead to fines and system failures.
Improper insulation choices and installation errors
Mistakes in selecting or installing insulation are a frequent cause of condensate pipe freezing, because even small gaps or inappropriate materials can negate the insulation’s effectiveness.
Common errors include using low-R-value foam, leaving seams unsealed, compressing insulation, failing to protect fittings and bends, and ignoring outdoor exposure.
Correct material choice, continuous coverage, watertight joints, and proper thickness prevent cold bridges and moisture damage.
Unsafe DIY electrical work with heat tape
Attempting DIY electrical work with heat tape often introduces serious hazards when users misunderstand wiring requirements, load limits, or manufacturer instructions.
Unqualified installation can overload circuits, create shock or fire risks, and void warranties.
Common mistakes include improper grounding, using non-listed products, splicing without sealed connectors, and running heat tape under insulation that traps heat.
Seek licensed electricians for safe, code-compliant installations.
Ignoring building codes and condensate disposal rules
Ignoring local building codes and condensate disposal regulations can lead to costly repairs, fines, and safety hazards when condensate lines are improperly routed, discharged, or modified.
Professionals should follow permits and approved drainage methods to avoid sewer contamination, structural damage, or system failure.
Noncompliance voids warranties and insurance coverage.
Consult authorities and licensed contractors to guarantee lawful, effective condensate handling and freeze prevention.
Signs your fixes are working and how to monitor long-term performance
After insulation or heat tape is applied, visible signs like steady condensate flow, absence of frost on the pipe, and no recurring leaks indicate the repairs are functioning.
Simple checks such as periodic visual inspections, feeling the pipe for warmth, and noting normal drip patterns provide basic monitoring.
For long-term assurance, wireless temperature sensors or smart water-detection alarms can log conditions and alert to future freezes.
What to look for after insulation or heat tape installation
Once insulation or heat tape is in place, the homeowner should check for steady condensate flow and absence of frost or ice along the pipe as immediate signs the measures are working.
Additionally, inspect joints and wrap integrity, feel for cold spots, watch for unusual dripping or pooling, and verify clips remain secure.
Periodic visual checks after severe weather confirm lasting effectiveness.
Simple monitoring methods and smart sensor options
Monitor condensate pipe performance with simple visual checks and a few inexpensive sensors to confirm insulation or heat tape continues to work.
Regular brief inspections and basic meters catch issues early.
Suggested monitoring tools:
- Visual drip and frost checks
- Thermometer on pipe surface
- Moisture detector near joints
- In-line flow sensor for condensate drain
- Wi‑fi temperature/humidity sensor with alerts
Conclusion
In the grand domestic theater where pipes audition for catastrophe, the condensate line’s freeze is less tragedy, more inconvenient comedy. With sensible insulation, modest rerouting, and occasional vigilance, homeowners can largely deprive winter of its punchline. If hands-on fixes fail, a professional will deliver the solemn curtain call. Ultimately, prevention — not panic — keeps the plot moving, ensuring clogged dramas are confined to bad plays rather than one’s heating system.
