
How to Stop a Gas Leak From a Pipe: Emergency Steps to Seal and Stay Safe
If you suspect a gas leak from a pipe, prioritize safety by evacuating the area immediately. If you are trained and it’s safe to do so, shut off the main gas supply and ventilate the space from outside. Avoid any ignition sources—this includes not operating switches or using devices that could spark. Once clear, notify the gas company and emergency services. Only consider temporary fixes, like pipe clamps or gas-rated epoxy, as a last resort, and continuously monitor the situation. Always wear proper personal protective equipment (PPE) and contact a licensed technician for a permanent repair. Further safety steps and precautions will follow for effective handling of gas leaks.
Immediate Actions to Take When You Suspect a Gas Leak
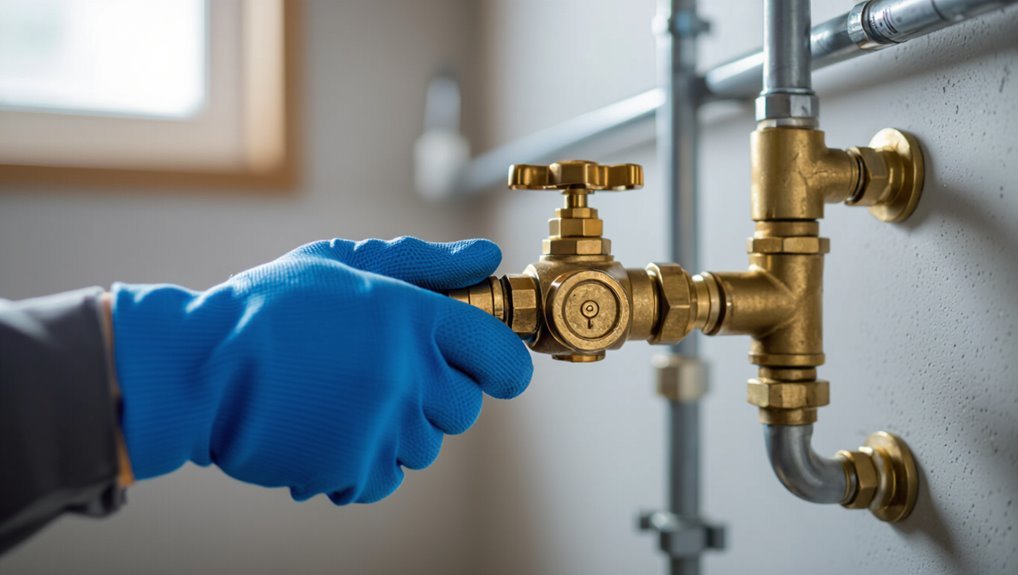
Upon suspecting a gas leak, the first priority is to identify clear indicators such as a rotten-egg smell, hissing sounds near pipes, or physical symptoms like dizziness and headaches.
Next steps should focus on immediate safety: ventilate by opening windows and doors if safe, avoid sparks or flames, and do not operate electrical switches or phones indoors.
If the leak is confirmed or suspected to be large, evacuate calmly upwind and, if trained, shut off the gas at the appliance or meter before notifying the gas company and emergency services.
How to Recognize Signs of a Gas Leak (Smell, Sound, Symptoms)
When a gas leak occurs, recognizing it quickly can prevent injury and property damage; typical indicators include the distinctive rotten-egg odor added to natural gas, an audible hissing or whistling near pipes or appliances, visible signs such as blowing dust or bubbling in standing water, and physical symptoms like dizziness, headache, nausea, or difficulty breathing.
Observers should note locations, shut off sources where trained, call emergency services, and document evidence related to how to stop gas leak from pipe.
Immediate Safety Steps Before Sealing Anything
Act quickly and calmly: evacuate the area, avoid using anything that could spark (phones, light switches, engines), and move people and pets upwind to a safe distance.
Shut off gas supply at the main valve only if it can be reached without entering the danger zone.
Do not light flames, operate electrical devices, or re-enter until professionals declare it safe; notify emergency services immediately.
When and How to Evacuate Safely
How should occupants proceed the moment a gas odor is detected?
Occupants should leave immediately, closing doors behind them without using electrical switches, phones, or vehicles.
Avoid sparks; do not light flames.
Move upwind and at least 100 feet from the structure.
Call emergency services and the gas company from a safe location.
Do not re-enter until authorities declare it safe.
How to Shut Off Gas Supply at the Meter or Appliance
Shut off the gas supply immediately only if it can be done from outside the building without entering an area where the odor is present.
Locate the meter’s main valve — usually a rectangular or round shutoff — and turn perpendicular to the pipe using a wrench.
If inaccessible, shut appliance valves only if no smell is detected nearby.
Call the gas company and evacuate promptly.
Emergency Temporary Sealing Methods for Pipe Leaks
The section outlines common emergency temporary sealing methods for pipe leaks, including pipe repair clamps, rubber patches, and repair sleeves.
It covers the proper use of epoxy putty and sealants, fastening options such as hose clamps and U-bolts, and when tape solutions like repair tape or Teflon tape may be appropriate.
Limitations and safety considerations for each method are highlighted to guide short-term stabilization until professional repair.
Using Pipe Repair Clamps and Rubber Patches
When an immediate, temporary seal is needed on a leaking gas pipe, repair clamps and rubber patches provide a fast, stopgap solution that isolates the leak until a qualified technician can perform a permanent repair.
They are applied from outside, require minimal tools, and must be monitored continuously.
- Position clamp or patch over leak.
- Tighten evenly to compress gasket.
- Check for residual odor or hissing.
Applying Epoxy Putty and Sealants Safely
Apply epoxy putty or a compatible sealant only as a short-term measure to halt visible seepage while evacuation and professional repair are arranged.
The operator should follow manufacturer instructions, guarantee surfaces are clean and dry, wear appropriate PPE, and avoid open flames or sparks.
Patch application must be inspected from a safe distance; treat any temporary seal as provisional until certified gas technicians complete permanent repair.
Using Hose Clamps, U-Bolts, and Repair Sleeves
Clamp, bolt, or sleeve a leaking pipe only as an emergency, temporary measure to slow or stop visible gas escape until trained gas technicians arrive.
Use a properly sized hose clamp or U-bolt with a rubber patch or commercial repair sleeve, tighten evenly, and avoid over‑torque.
Monitor for residual odor or hissing, ventilate the area, evacuate if uncertain, and await professional repair.
When to Use Tape Solutions (Repair tape, Teflon) and Limitations
After using clamps, U‑bolts, or sleeves to slow a visible leak, tape solutions offer another short‑term option for small fittings and threaded joints where mechanical wraps cannot be fitted.
Repair tapes (butyl, silicone) and PTFE (Teflon) tape can temporarily reduce seepage on low‑pressure gas lines but are unsuitable for large ruptures, high pressure, corrosion, or long‑term use; replace with proper repair.
Tools and Materials to Keep for Emergency Gas Leak Response
For emergency gas leak response, having a compact set of tools and materials ready can facilitate a faster, safer temporary repair while waiting for professionals.
The kit should include items for immediate mechanical fixes, approved sealants and repair kits designed for gas lines, and personal protective gear to reduce inhalation and injury risks. Proper storage and periodic inspection of these components guarantees readiness when time is critical.
- Essential tools for immediate repair: adjustable wrenches, pipe clamps, repair putty.
- Recommended sealants and repair kits for gas pipes: gas-rated epoxy, rubber pipe patches, two-part pipe repair kits.
- Personal safety gear: NIOSH-approved masks or respirators, chemical-resistant gloves, intrinsically safe flashlights.
Essential Tools for Immediate Repair (wrenches, clamps, putty)
Keep a compact set of tools and materials on hand to enable a swift, temporary response to a pipe gas leak: adjustable wrenches for tightening fittings, hose clamps and repair sleeves for sealing small fractures, and specialized putty or epoxy for filling hairline cracks.
A flashlight, gloves, pipe cutters, and a pressure gauge support safe assessment.
Store items in a labeled, accessible kit for rapid deployment.
Recommended Sealants and Repair Kits for Gas Pipes
Several compact, purpose-made sealants and repair kits are advisable for immediate response to a pipe gas leak:
- two-part epoxy putties rated for gas service,
- self-fusing silicone or butyl rubber tape,
- stainless-steel repair clamps with rubber gaskets,
- and pre-assembled repair sleeves sized for common pipe diameters.
Also include pipe-specific thread sealant approved for gas, small tubing repair kits, and clear manufacturer instructions.
Personal Safety Gear (masks, gloves, flashlights)
Personal protective equipment is essential during any emergency response to a gas leak.
Responders should keep NIOSH-rated respirators or at minimum N95 masks for particulate protection, chemical-resistant gloves, and eye protection.
A reliable intrinsically safe flashlight, spare batteries, and protective clothing reduce ignition and contamination risk.
Gear must be inspected, stored accessibly, and replaced after exposure or damage.
Step-by-Step Guide to Temporarily Stopping a Leak on Different Pipe Types
The section outlines clear, practical steps for temporarily stopping leaks on common pipe materials: steel or iron, copper, and flexible gas lines including corrugated stainless tubing (CST).
It distinguishes procedures for indoor versus outdoor leaks, noting access, ventilation, and weather considerations that affect chosen methods.
Each subsection provides sequence-based actions and safety checks to stabilize the situation until a qualified professional completes permanent repairs.
Fixing Leaks on Steel or Iron Pipes (procedure)
Addressing a leak on steel or iron gas piping requires prompt, careful action to minimize risk and restore containment temporarily until a qualified professional can perform a permanent repair.
Isolate gas, ventilate area, and shut main supply.
Clean and dry pipe, apply a repair clamp or wrap epoxy repair band per manufacturer instructions.
Monitor for remaining odor and evacuate if leak persists.
Fixing Leaks on Copper Pipes (procedure)
When a copper gas line shows signs of leakage, isolate the supply, ventilate the area, and shut off the main immediately before attempting any temporary repair.
Inspect the joint to locate the breach. Use approved gas-rated repair couplings or wrap with a gas-rated patch and clamp.
Test with soapy water for bubbles. Call a licensed gas technician to perform permanent repairs and pressure testing.
Fixing Leaks on Flexible Gas Lines and Corrugated Stainless Tubing (CST)
Begin by shutting off the appliance and the gas supply to the affected flexible line or CST.
Ventilate the area to disperse any accumulated gas and ensure no ignition sources are present before any work begins.
Inspect fittings and visible damage; tighten loose connectors with appropriate tools.
For small punctures, apply an approved gas-rated repair clamp or wrap per manufacturer instructions.
Replace line promptly and contact a licensed technician.
Outdoor vs Indoor Pipe Leak Procedures
How should one respond differently to a gas leak on an outdoor pipe versus an indoor line?
Outdoors, evacuate downwind, shut external valves, and isolate supply at the meter; use soil or temporary clamps for visible damage.
Indoors, evacuate immediately, avoid ignition sources, shut main indoors or at meter, ventilate if safe, and apply approved sealants or emergency clamps only by trained personnel before utility arrival.
When Not to Attempt a DIY Repair and Why
Signs that a leak is too large or hazardous—such as a strong rotten-egg odor, hissing under pressure, visible flame, or rapid gas buildup—indicate that a temporary DIY fix is inappropriate.
Improper sealing can worsen the breach, cause fire or explosion, and produce toxic exposure with serious health and property consequences.
Any situation with uncontrolled gas flow, suspected appliance involvement, or multiple affected units requires immediate evacuation and professional emergency response.
Signs the Leak Is Too Large or Dangerous for Temporary Repair
Any visible spray of gas, persistent hissing from a joint, or a strong rotten-egg odor indicates a leak too large for a temporary fix and requires immediate professional response.
Additional signs include bulging fittings, metal frost from rapid gas escape, repeated fainting or headaches among occupants, ignition sources sparking nearby, or detection by multiple sensors.
Evacuate and call emergency services without delay.
Risks of Improper Sealing and Potential Consequences
If the leak exhibits the severe indicators described above, attempting a DIY seal can convert a repair situation into a life‑threatening emergency.
Improper sealing risks persistent leaks, delayed detection, fire or explosion, toxic inhalation, and structural damage.
Inadequate materials or techniques can worsen corrosion or create hidden voids.
Liability, insurance denial, and costly repairs may follow when unqualified fixes fail.
Scenarios Requiring Immediate Professional Intervention
When does a gas leak exceed the scope of homeowner repair?
Situations include large or persistent leaks, unknown source, multiple appliance involvement, smell indoors with symptoms, suspected pipe corrosion, or signs of structural gas penetration.
Also required: damaged buried lines, explosions, or meter/pressure irregularities.
In these cases, evacuate, call emergency services and the gas utility; do not attempt DIY fixes.
After Temporary Repair: Testing, Notification, and Follow-Up
After a temporary repair is made, the repaired area should be tested for continued leaks using safe methods such as soapy water and portable gas detectors.
If any leak is detected or odor persists, the gas company or emergency services should be contacted immediately.
Regardless of immediate results, a licensed technician must be scheduled for a permanent repair or pipe replacement.
How to Test for Continued Leaks Safely (soapy water, detectors)
Several simple checks can confirm whether a temporary gas-line repair is holding and whether further action is required.
Apply soapy water to joints; bubbling indicates a leak. Use a calibrated combustible-gas detector or fixed alarm; observe readings at pipe joints and nearby rooms.
Re-test after venting and pressurization. If sensors or soap show leaks, keep area ventilated and proceed with professional escalation.
When to Contact the Gas Company or Emergency Services
Notify the gas company or emergency services immediately if testing shows any persistent gas odor, positive readings on a combustible-gas detector, soap-bubble formation at joints, or if occupants report symptoms such as headache, dizziness, nausea, or difficulty breathing.
Inform responders of actions taken, location, and appliance status. Evacuate until cleared, follow dispatcher instructions, and document readings and times for handover to professionals.
Scheduling Permanent Repair or Replacement with a Licensed Technician
Arrange a licensed technician promptly to assess and perform the permanent repair or replacement once temporary measures, testing, and any required notifications are complete.
The homeowner should confirm contractor licensing, insurance, and gas-specific experience, request a written estimate and scope, schedule work considering safety clearances, and guarantee post-repair leak testing and certification.
Retain records for warranty and utility inspection.
Preventive Measures to Reduce Future Gas Leak Risk
The article now addresses preventive measures to reduce future gas leak risk by outlining a routine inspection checklist for pipes and appliances, methods for corrosion control, and guidelines for proper installation and material selection.
It also covers effective installation and maintenance of gas detectors to guarantee early warning and continued function.
These topics aim to minimize leak likelihood and improve long‑term safety.
Routine Inspection Checklist for Gas Pipes and Appliances
A concise routine inspection checklist helps identify wear, corrosion, loose fittings, and appliance issues before they escalate into leaks or hazards.
The checklist covers visual inspections, functional testing, and documentation to guarantee timely correction and professional follow-up when needed.
- Inspect visible pipes, joints, and valves for damage or odour.
- Test appliance connections, burners, and detectors.
- Record findings, dates, and recommended actions.
Corrosion Control, Proper Installation, and Material Choices
When corrosion, improper installation, and incompatible materials are addressed together, the likelihood of future gas leaks drops considerably.
Effective prevention hinges on selecting corrosion-resistant piping, following manufacturer and code installation practices, and ensuring material compatibility at every joint and connection.
Regular coatings, cathodic protection where applicable, correct fasteners and sealants, and qualified installers reduce stress, galvanic reactions, and mechanical failure risk, extending system integrity.
How to Install and Maintain Gas Detectors Effectively
Addressing corrosion, installation quality, and material compatibility reduces many causes of pipeline failure, but active monitoring with properly placed and maintained gas detectors provides the final layer of defense against undetected leaks.
Detectors should be installed per manufacturer and code, positioned for gas behavior, tested regularly, calibrated, and batteries replaced.
Log maintenance, replace aged units, and train occupants on alerts and evacuation procedures.
Common Mistakes and Myths to Avoid During a Gas Leak
Common errors during a pipe gas leak include actions that can ignite vapors, such as operating electrical switches or smoking near the source.
Reliance on homemade or temporary fixes often fails and can give a false sense of safety until professional repairs are made.
Additionally, assuming all leaking gas will be detectable by smell overlooks odorless gas risks and limitations of added odorants.
Dangerous Actions That Increase Risk (electrical switches, smoking)
Avoiding sparks and open flames is essential because even small ignition sources can trigger an explosion when gas has accumulated.
People should never operate electrical switches, appliances, or phones indoors, light matches, or smoke.
Ventilation and evacuation are priorities; trained responders must handle shutoff and repairs.
Misjudging risk by testing devices endangers lives and property.
False Remedies and Why Temporary Fixes Can Fail
People may reach for quick fixes when a gas smell is detected, but many improvised remedies are ineffective or increase danger.
Taping leaks, applying oil, or using candles to locate a source can worsen leaks, hide damage, or ignite vapor.
Temporary patches often fail under pressure; relying on them delays professional intervention.
Evacuation and trained repair are the safe responses.
Misunderstandings About Odorless Gas and Additives
Many assume that natural gas is always easily detected by smell, but that belief overlooks important realities about odorants and detection limits.
Some methane supplies can be odorless, additives may fade, and individual sensitivity varies. Relying solely on scent delays action.
Professionals recommend detectors, ventilation, and immediate evacuation when a leak is suspected rather than trusting perceived odors.
Quick Reference: What to Do in the First 10 Minutes of a Suspected Gas Leak
Within the first ten minutes of suspecting a gas leak, prioritize immediate safety actions: evacuate occupants, extinguish open flames and pilot lights, avoid operating electrical switches or appliances, and move upwind and well away from the structure before calling emergency services from a safe location. First responders should be notified; do not re-enter until cleared.
| Action | Priority | Outcome |
|---|---|---|
| Evacuate | High | Reduce exposure |
| Extinguish flames | High | Prevent ignition |
| Call emergency services | High | Professional response |
Conclusion
A thin hiss lingers as a hand hovers over a closed valve; breath catches in the corridor’s stale air. In those suspended seconds, the checklist becomes lifeline: evacuate, shut off, call professionals, and avoid sparks. Temporary seals hold like fragile promises until experts arrive. The house waits, tuned to the smallest click, every shadow a question—only trained responders can turn that tense hush back into ordinary calm.
