
How to Turn Off a Burst Water Pipe Fast: Step-by-Step Emergency Guide
If a pipe bursts, act quickly to minimize damage. First, locate and shut the nearest valve, then turn off the main water supply within a minute. If it’s safe, cut the electricity to flooded areas. Use buckets, towels, and pumps to contain the water, document any damage, and apply temporary patches or clamps if the shutoff is hard to reach. For persistent or hazardous leaks, contact a utility provider or plumber. Follow the detailed steps for temporary fixes, safety measures, and recovery.
What to Do Immediately When a Water Pipe Bursts
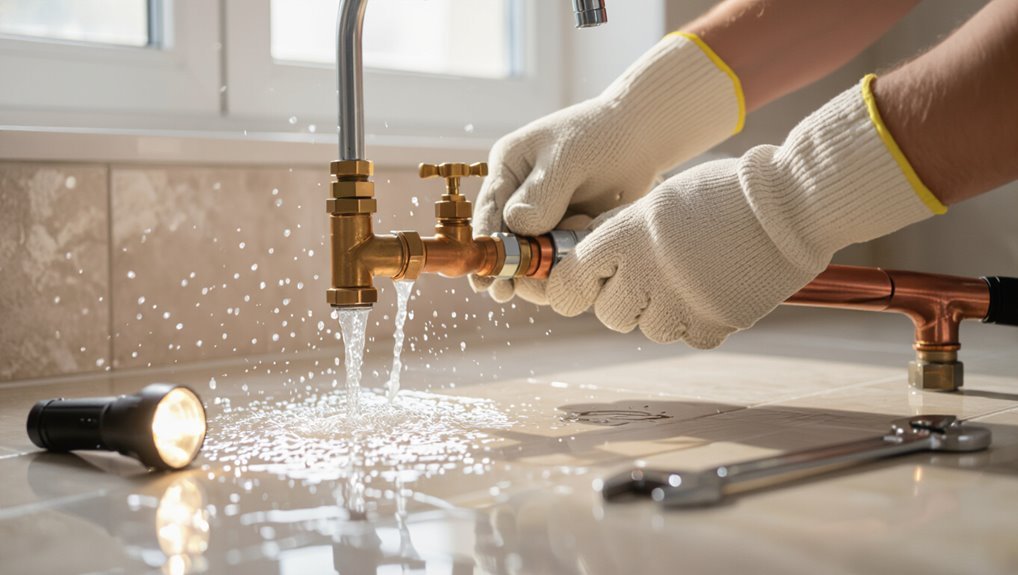
A sudden rush of water, hissing sounds, or unexplained drops and stains indicate a burst pipe and require immediate attention.
Within the first 60 seconds, shutting off the main water supply, turning off electricity to affected areas if safe, and using buckets or towels to contain flow can greatly limit damage.
If water is rising rapidly, electrical hazards are present, or occupants feel unsafe, evacuation should be the priority.
How to recognize a burst pipe quickly
How can a burst pipe be identified quickly? Observers notice sudden pooling, steady dripping, or high-pressure sprays; damp ceilings, bulging walls, and unexplained water meters continuing to run indicate failure.
Sounds of rushing or hammering pipes and foul odors help confirm rupture. Prompt recognition supports knowing how to turn off water pipe burst and contacting emergency services while avoiding electrical hazards.
Quick actions to stop damage within the first 60 seconds
Act immediately: shut off the main water supply, cut power to affected areas if safe, and move people and valuables away from the leak.
Next, contain flow with buckets, towels, or a tarp; plug or clamp visible pipe breaks if possible.
Open nearby drains to reduce pooling, document damage with photos, and contact emergency plumbing services for immediate assistance.
When to evacuate and prioritize safety
When water gushes from a burst pipe and conditions become unstable, occupants should immediately assess whether remaining inside is safe and withdraw if there is any risk of electrical shock, structural collapse, or rapidly rising water.
Prioritize people, pets, and vulnerable individuals. Shut off electricity if safe, exit calmly via the safest route, and assemble at a predetermined safe location.
Call emergency services if hazards persist.
Step-by-Step Emergency Shutoff Procedure
The procedure begins by locating and closing the nearest shutoff valves at the affected appliance or fixture to stop immediate flow.
If those do not stop the leak, the main indoor shutoff for the property should be found and operated, followed by the curb or meter shutoff using appropriate tools if necessary.
If valves are corroded, stuck, or inaccessible, the guide explains safe alternatives and when to call the water utility or a professional.
Locate and turn off the nearest shutoff valves (indoor valves by appliance/fixture)
Locate the nearest indoor shutoff valves by following visible pipes to fixtures or appliances; these valves typically sit under sinks, behind toilets, by washing machines, and on water heater supply lines.
Identify the small round or lever handles, turn clockwise or perpendicular to stop flow, and confirm cessation at the fixture.
If stiff, use adjustable pliers cautiously to avoid damage.
How to find and operate the main water shutoff valve for the property
A property’s main shutoff valve controls all incoming water and must be found and operated quickly during a burst; search likely locations: utility room, basement near where the supply enters, garage, crawlspace or exterior wall.
Identify valve type—wheel, lever or gate—and turn clockwise or fully perpendicular to shut.
Confirm water stops at a nearby faucet, then call a plumber if stiff or corroded.
Shutting off municipal water at the curb or meter (tools and steps)
If the property’s interior shutoff is inaccessible or fails to stop heavy flow, attention should move to the municipal shutoff at the curb or meter.
Locate the curb box or meter cover, clear debris, and use a long-handled curb key or adjustable wrench. Turn clockwise slowly until resistance indicates closed.
Notify the water utility once flow stops and document valve position for responders.
What to do if valves are corroded, stuck, or inaccessible
When interior and curb valves are corroded, seized, or otherwise inaccessible, responders should proceed with a prioritized emergency shutoff plan that emphasizes safety, rapid flow control, and clear documentation.
Assess access, isolate power to nearby equipment, attempt valve freeing with penetrating lubricant and proper tools, and use alternative shutoffs (main, service line, or building inlet).
If unsuccessful, contact utility authorities and arrange temporary bypass or pipe clamp.
Stopping the Leak When the Valve Cannot Be Shut Immediately
When the main valve cannot be shut immediately, a range of temporary fixes can reduce water loss and damage.
Appropriate measures vary by pipe material—copper, PVC, PEX, and galvanized each respond differently to clamps, rubber patches, or wrap-around repair tape.
Using household items together with purpose-made pipe clamps, hose clamps, or rubber and tape seals can provide a safe short-term hold until professional repair or shutoff is possible.
Temporary fixes for different pipe materials (copper, PVC, PEX, galvanized)
Start by evaluating the pipe material to choose an appropriate temporary repair method:
copper can be wrapped with a rubber patch and hose clamp or soldered by a professional.
PVC accepts repair sleeves or epoxy putty.
PEX responds well to compression couplers or clamping with rubber, and galvanized pipes often require specialty clamps or professional intervention.
Apply matching clamp or sleeve, tighten gradually, then monitor for leaks and arrange permanent repair.
Using available household materials for emergency sealing
If a shutoff valve cannot be reached or fails to stop the flow, improvised household materials can provide a short-term seal until professional help arrives.
Use thick cloths, duct tape, plastic wrap, rubber from a glove or bicycle inner tube, and hose or cable ties to compress and divert water.
Apply layers, fold for thickness, and replace drenched materials promptly to maintain effectiveness.
Applying pipe clamps, rubber and hose clamps, or repair tape safely
Apply clamps and repair tape with deliberate, steady motions to create a temporary, watertight seal while awaiting a permanent fix.
The responder selects appropriate sized pipe or rubber pads, centers the clamp over the leak, tightens evenly to avoid crushing, and layers silicone repair tape with overlap.
Monitor for seepage, relieve pressure upstream when possible, and replace with a proper repair promptly.
Controlling Electrical and Appliance Risks
The first priority is to cut power to any flooded rooms by switching off circuit breakers or using the main breaker if individual isolation is unsafe.
Appliances and electronics should be unplugged only from dry areas or by a qualified person to avoid shock.
Heating systems and water-exposed equipment must be isolated and documented for professional inspection before being restarted.
How to safely cut power to flooded areas
Before attempting any repairs, occupants should immediately isolate electricity to flooded areas to eliminate electrocution and fire hazards.
Have a qualified person disconnect power at the main breaker if water reaches outlets, switches, or appliances.
Do not touch electrical panels or devices while standing in water. If unsure, call the utility or an electrician.
Use battery-powered lighting until power is confirmed safe.
Protecting appliances, electronics, and heating systems from water exposure
Many household systems—refrigerators, TVs, computers, and furnaces—are vulnerable to even shallow flooding.
Occupants should move small electronics to higher ground and disconnect or elevate critical appliances when safe to do so.
Unplug devices before water reaches outlets, shut off fuel and power to HVAC, document serial numbers for insurance, and avoid restarting wet equipment until inspected by a qualified technician.
Assessing and Minimizing Water Damage After Shutoff
After the water supply is shut off, documenting damage with photos, timestamps, and brief notes helps support insurance claims.
Standing water should be removed promptly and affected areas dried with pumps, mops, fans, and dehumidifiers to prevent mold.
Salvageable furniture, documents, and valuables should be moved to a dry, secure location and dried or frozen for conservation as appropriate.
Documenting damage for insurance (photos, notes, times)
Documenting damage promptly and thoroughly is essential for a smooth insurance claim and accurate recovery estimates.
The responder should photograph all affected areas from multiple angles, capture close-ups of damaged items, and record time-stamped videos when possible.
A concise written log noting discovery times, shutoff time, visible losses, and any temporary actions taken supports claims.
Preserve originals and back up copies for adjuster review.
Removing standing water and drying affected areas quickly
Once photos and notes are secured, attention should shift to removing standing water and drying affected areas to prevent mold and structural damage.
Use pumps or wet/dry vacuums for pooling water, then extract moisture from carpets, padding, and flooring.
Increase ventilation with fans and dehumidifiers, open windows if safe, and remove baseboards or trim to access hidden dampness for thorough drying and inspection.
Salvaging furniture, documents, and valuables safely
Begin by categorizing items into wet, damp, and dry groups to prioritize salvage efforts and reduce further loss.
Remove wet textiles and upholstered pieces to ventilated, shaded areas; prop cushions to air.
Freeze or air-dry valuable documents, separately bagging pages to prevent staining.
Wipe and dry electronics; consult professionals before powering.
Photograph items for insurance claims and label salvaged versus condemned belongings.
When to Call a Professional Plumber or Emergency Services
If water continues to flow, electrical hazards are present, or visible structural damage appears, professional help or emergency services should be summoned immediately.
Homeowners should be ready to provide the plumber with the location of the break, recent actions taken (valve shutoff, power off), and clear photos or video showing the leak and surrounding damage.
When restoration contractors are involved, communication should focus on containment steps taken, insurance contacts, and a coordinated plan for drying, repairs, and temporary mitigation.
Signs the situation requires immediate professional help
When water gushes uncontrollably, electrical systems are at risk, or structural damage is visible, professional help is required immediately.
Other clear signs: water rising beyond floor level, sewage backup, gas smell near plumbing, inability to shut main valve, multiple simultaneous leaks, frozen pipe bursts in subzero conditions, or visible foundation/ceiling collapse.
These situations demand licensed plumbers or emergency responders for safety and structural protection.
What information and photos to provide to the plumber
Although a homeowner’s immediate priority is stopping the flow, providing a plumber concise, specific information and clear photos speeds response and improves repair accuracy.
Include: exact location of leak, visible pipe material and fittings, water pressure behavior, shutoff status, affected fixtures, timestamps, and any prior repairs.
Send close-up and context shots showing access points, surrounding damage, and meter or valve identifiers.
How to work with emergency restoration contractors
Call emergency restoration contractors promptly after controlling immediate flooding to limit damage and speed recovery.
A homeowner should document damages, shut utilities if safe, and describe water source, duration, and visible hazards.
Contractors assess structural, electrical, and mold risks, provide remediation timelines, and coordinate with insurers.
Call professionals when flooding exceeds simple cleanup, involves contamination, or threatens structure or occupancy.
Repair Options and Timeline After a Burst Pipe
After shutting off the water, the homeowner should consider whether a temporary clamp or patch will suffice until a permanent splice, replacement section, or repiping can be scheduled.
Common fixes vary by material—copper often requires soldering or a compression repair, PEX can be crimped or replaced with a coupling, and PVC typically needs a solvent-welded or glued splice.
Emergency repairs can range from low-cost quick fixes completed in under an hour to more extensive replacements that take a day or more and carry higher labor and materials costs.
Temporary vs permanent repairs explained
Distinguishing between temporary and permanent repairs is essential for managing the aftermath of a burst pipe: temporary measures stop the immediate leak and limit water damage, while permanent fixes restore full system integrity and prevent recurrence.
Temporary fixes—clamps, tape, or shutoffs—hold until professionals assess conditions.
Permanent repairs require proper replacement or professional restoration, inspections, and testing to guarantee long-term reliability.
Typical repair methods for common pipe types
Repair methods vary by material and access: copper, PEX, PVC, and galvanized steel each require different techniques—soldering or compression fittings for copper; crimp or push-fit connections for PEX; solvent welding or replacement for PVC; and cutting out and replacing corroded sections for galvanized steel.
After isolation, technicians assess damage, remove affected runs, fit compatible couplings or replacement lengths, pressure-test, and restore service.
Expected costs and timeframes for emergency repairs
With materials and access established, attention turns to the time and expense of emergency repairs: costs depend on pipe type, extent of damage, required isolation and drying, and whether temporary or permanent fixes are used.
Minor patching and shutdowns often cost $100–$400 and take 1–4 hours.
Full section replacement may run $500–$2,500, plus drying and inspections adding days and extra fees.
Preventing Future Burst Pipes
Preventing future burst pipes requires proactive measures such as winterizing plumbing and insulating exposed lines to reduce freeze risk.
Regular maintenance, routine checks, and the use of leak-detection tools help catch problems early.
Upgrading aging pipes and installing automatic shutoff valves provide long-term protection and faster response if a failure begins.
Winterizing plumbing and protecting exposed pipes
Several simple measures can considerably reduce the risk of burst pipes during freezing weather.
Homeowners should insulate exposed pipes with foam sleeves, heat tape, or condensate wrap, and seal gaps around exterior walls and crawl spaces to prevent drafts.
During cold snaps, keep cabinet doors open and maintain low thermostat settings.
Drain and disconnect outdoor hoses and shut off exterior valves for added protection.
Regular maintenance checks and leak-detection tools
After insulating pipes and sealing drafts, routine inspections and smart detection tools provide the next line of defense against future bursts.
Homeowners should schedule periodic visual checks for corrosion, moisture, and loose fittings.
Install acoustic or moisture sensors on vulnerable lines and monitor water meters for unexplained flow.
Promptly address minor drips and hire licensed plumbers for pressure testing and corrective repairs to prevent escalation.
Upgrading old piping and installing shutoff improvements (automatic valves)
Upgrade aging plumbing and add automatic shutoff systems to reduce the risk of future pipe bursts.
Property owners should replace corroded or brittle pipes with modern materials (PEX, copper) and install sensor-linked automatic shutoff valves at main and branch lines.
These systems detect leaks, freeze conditions, or sudden pressure loss and isolate water flow, minimizing damage and simplifying emergency response.
Regular testing and professional installation are recommended.
Common Mistakes to Avoid During a Burst Pipe Emergency
When a pipe bursts, certain actions can make water and electrical hazards worse or compromise insurance claims. The following points highlight common errors to avoid so responders can act safely and preserve evidence for insurers. Quick, correct choices reduce risk and protect recovery options.
- Attempting repairs or touching electrical systems while water is flowing.
- Failing to document damage before cleanup or disposing of affected items.
- Not notifying the insurer promptly or ignoring policy requirements for mitigation.
Mistakes that increase water or electrical risk
Panicked or improvised responses during a burst-pipe emergency can unintentionally raise both water and electrical hazards. For example, moving appliances through standing water, using electrical tools on wet surfaces, or ignoring shutoff valves can worsen flooding and create electrocution risks.
Other dangerous errors include restoring power before drying, unplugging submerged cords with bare hands, and blocking access to main valves, all increasing injury and damage.
Insurance and cleanup mistakes that can hurt claims
Although immediate safety and repairs are paramount, mishandling documentation and cleanup can jeopardize insurance claims and lead to denied or reduced payouts.
Claimants should photograph damage before disposal, keep receipts for emergency repairs, avoid permanent repairs without insurer approval, and use qualified restoration services.
Ignoring mold prevention, failing to report promptly, or disposing of damaged property can all weaken or invalidate a claim.
Recommended Tools and Emergency Kit for Plumbing Failures
A basic emergency kit can mean the difference between a contained leak and major water damage, so it should be planned before a crisis occurs.
Essential hand tools and shutoff devices enable quick isolation of a broken line, while temporary repair supplies and drying gear limit damage until a plumber arrives.
The following items are practical, compact, and worth keeping accessible.
- Adjustable wrench, water shutoff key, and pipe repair clamps
- Waterproof tape, rubber patch kits, and heavy-duty tarps
- Portable fan, wet/dry vacuum, and absorbent towels
Essential tools to keep accessible (wrenches, shutoff keys, clamps)
Keep a small, well-organized kit of essential tools within easy reach so a burst pipe can be stopped quickly.
Include an adjustable wrench, pipe wrench, and basin wrench for valve access; a shutoff key for underground or building main valves; and rubber-lined hose clamps or repair clamps to temporarily seal leaks.
Store tools in a labeled waterproof box near the main shutoff.
Helpful supplies for temporary repairs and drying (tape, tarps, fans)
Several compact items make the difference between a manageable leak and major water damage. Adhesive pipe repair tape, plumber’s epoxy putty, and rubber patches allow quick sealing.
Heavy-duty tarps and plastic sheeting protect floors and belongings. Portable wet/dry vacuums, box fans, and dehumidifiers speed drying.
Gloves, utility knife, and zip ties complete a small, versatile emergency kit for temporary repairs and moisture control.
Comparison of Emergency Repair Materials and Methods
When time is critical, the choice of emergency repair materials and methods depends on pipe type, leak size, available tools, and duration of the temporary fix. A quick comparison highlights strength, speed, and permanence: rubber patch with hose clamp — fast, short-term; epoxy putty — moderate speed, longer hold; pipe wrap — versatile, durable.
| Material | Speed | Durability |
|---|---|---|
| Rubber patch | Fast | Short |
| Epoxy putty | Moderate | Medium |
| Pipe wrap | Moderate | Long |
Conclusion
The guide concludes with practical clarity: when a pipe bursts, actions must unfold like a trained relay team—swift, coordinated, and precise—to limit harm. Immediate shutoff, temporary sealing when valves fail, and electrical safety combine to prevent escalating damage. Rapid assessment and water removal reduce long-term loss, while documented repairs and targeted preventive measures shield against recurrence. Preparedness with proper tools and knowledge turns potential catastrophe into manageable disruption.

