How to Remove a Kohler Bathroom Faucet Handle: Step-by-Step Fix for Stuck or Broken Handles
To remove a Kohler bathroom faucet handle, start by shutting off the water supply and protecting the surrounding surfaces. Locate the set screw beneath the decorative cap and, if the handle is stuck, apply penetrating oil, use controlled heat, or a handle puller to assist in removal. For unstuck handles, simply loosen the set screw with the appropriate Allen wrench or screwdriver and lift the handle off. Be sure to inspect the cartridge and O-rings for wear before reassembling. Continue reading for detailed techniques and troubleshooting tips.
What to expect when removing a Kohler bathroom faucet handle
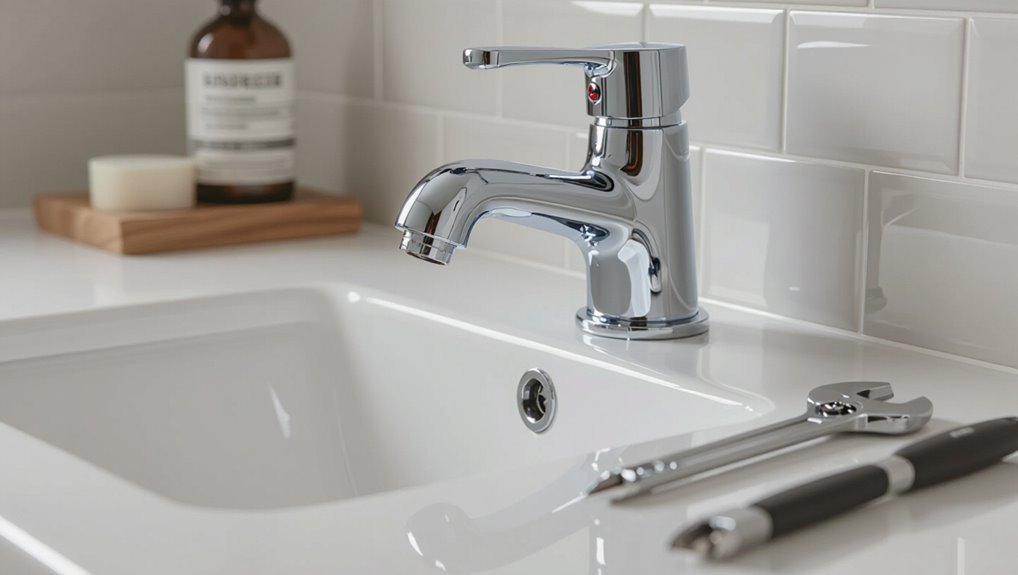
A brief overview outlines why a Kohler handle may need removal—common causes include being stuck, broken, needing replacement, or requiring deep cleaning.
Expect the job to take about 15–45 minutes depending on corrosion and access, with a low-to-moderate difficulty level and basic tools such as an Allen wrench, screwdriver, and pliers.
Before starting, follow a safety checklist: shut off water, protect surfaces, have towels and a bucket ready, and wear eye protection.
Common reasons to remove the handle (stuck, broken, replacement, cleaning)
Expect several straightforward motives for removing a Kohler bathroom faucet handle: mineral buildup causing it to seize, physical damage from wear or impact, upgrading to a new style, or routine cleaning and cartridge access.
Homeowners searching how to remove kohler bathroom faucet handle typically face seized stems, stripped splines, cosmetic wear, or debris buildup. Each reason dictates specific care steps and possible part replacement.
Estimated time, difficulty level, and tools required
Removing a Kohler bathroom faucet handle typically takes 15–45 minutes for someone with basic DIY skills, with most jobs falling toward the shorter end unless complications arise.
Difficulty is low to moderate. Expected tasks include removing caps, screws, and trim, possibly loosening corrosion.
Tools commonly required: flathead and Phillips screwdrivers, Allen wrench set, adjustable wrench, penetrating oil, rag, and small pick or needle-nose pliers.
Safety and preparation checklist
Before beginning work, the area should be cleared, the water supply shut off, and basic protective gear—gloves and eye protection—worn to prevent injury from sharp edges or debris.
Verify tools match fasteners, have a flashlight and container for small parts, and place towels to catch water.
Confirm shutoff by testing handles, note finish protection to avoid scratches, and work with adequate lighting.
Identify your Kohler faucet type and handle model
The first step is to determine whether the fixture is a single-handle or double-handle Kohler faucet, as removal steps differ by configuration.
Next, common Kohler handle styles and trim kits should be identified visually to match parts and fastener types.
Finally, locating model numbers or consulting Kohler’s manufacturer guides will confirm the exact handle assembly and required tools.
Single-handle vs. double-handle Kohler faucets
Identifying whether a Kohler bathroom faucet is single-handle or double-handle is the first step in choosing the correct removal method and replacement parts.
Single-handle units control temperature and flow from one lever, often requiring a cartridge or ball assembly.
Double-handle setups split hot and cold, with separate valve stems or cartridges.
Correct identification prevents improper disassembly and guarantees compatible parts.
Spotting common Kohler handle styles and trim kits
Recognizing common Kohler handle styles and associated trim kits helps guarantee correct part selection and smooth removal. Kohler designs include lever, knob, cross, and tee handles, plus integrated single-piece and multi-piece escutcheons.
Trim kits vary by finish and mounting type—deck, widespread, wall-mount—and often determine fastener access. Identifying visual features and mounting layout narrows replacement and removal procedures.
How to find model numbers and manufacturer guides
Where can a homeowner quickly locate a Kohler faucet model number and the matching manufacturer guide?
The faucet base, escutcheon, or underside of the spout often bears the stamped or printed model. If absent, compare handle shape to Kohler parts diagrams online and consult serial photos.
- Check underside and base markings
- Inspect escutcheon and spout
- Use Kohler online parts diagrams
- Contact Kohler with photos
Tools and replacement parts needed
Before starting, assemble the essential tools: Allen keys, a screwdriver, an adjustable wrench, and penetrating oil.
Optional aids such as a handle puller, rubber mallet, or heat gun can make removal easier in stubborn cases.
It is also wise to have replacement parts on hand—handle kit, set screw, O-rings, and bonnet nut—so repairs can be completed without delay.
Essential tools (allen keys, screwdriver, adjustable wrench, penetrating oil)
Gather the right tools to remove a Kohler bathroom faucet handle efficiently: a set of allen keys for set screws, a Phillips and flathead screwdriver for trim and retaining screws, an adjustable wrench for nuts and supply lines, and penetrating oil to loosen seized fasteners.
Also include needle-nose pliers for small clip removal, a basin wrench for hard-to-reach nuts, and a clean rag for cleanup.
Optional helpful tools and shop-made aids (handle puller, rubber mallet, heat gun)
Using a few optional tools and shop-made aids can simplify removal of a stubborn Kohler faucet handle and reduce the risk of damage.
A dedicated handle puller applies even upward force without marring finish. A rubber mallet delivers controlled taps to free seized parts.
A heat gun softens thread corrosion or old sealant; use low heat and caution to avoid damaging nearby finishes or plastics.
Replacement parts to buy (handle kit, set screw, O-rings, bonnet nut)
Several common replacement items cover the parts most likely to fail on a Kohler bathroom faucet: a matching handle kit, the small hex or Phillips set screw that secures the handle, replacement O-rings for the stem and spout, and the bonnet nut or retaining collar that threads over the cartridge.
Also include a cartridge or valve stem matched to the model, and silicone grease for O-rings.
Step-by-step removal for an unstuck Kohler faucet handle
Before beginning, the water supply should be shut off and the sink surface protected.
The decorative cap is removed to reveal the set screw, which is then loosened so the handle can be lifted off the spindle.
Finally, the trim sleeve is pulled away to expose the cartridge or valve for inspection or replacement.
Turn off water supply and protect the sink surface
Shut off the water supply at the shutoff valves beneath the sink to prevent accidental flow while working on the Kohler handle.
Open the faucet briefly to relieve residual pressure and confirm flow stops.
Place a towel or nonabrasive mat over the sink and around the base to catch small parts and protect the finish from tools and dropped hardware during removal.
Remove decorative cap and locate set screw
Gently pry off the decorative cap at the top or side of the Kohler handle using a small flathead screwdriver or a plastic trim tool, taking care not to scratch the finish.
Once removed, inspect the exposed area for a hex or Phillips set screw recessed on the handle base or underside. Note its size and orientation before proceeding to the next step.
Loosen set screw and lift handle off spindle
Using the appropriate hex or Phillips driver, turn the set screw counterclockwise until the screw is loosened enough for the handle to slide free; the screw only needs to be loosened a few turns—do not fully remove it unless necessary.
Then grasp the handle firmly, wiggle gently to break any seal, and lift straight up off the spindle.
Set the handle aside on a clean surface.
Remove trim sleeve and expose cartridge or valve
With the handle removed, the next step is to slide the trim sleeve off the valve body to reveal the cartridge or valve assembly.
Grip the sleeve near its base, twist gently to break any mineral deposits, then pull straight up.
If resistance persists, apply penetrating lubricant and wait.
Inspect the exposed cartridge for retaining clips or screws before proceeding with removal or replacement.
Step-by-step removal for a stuck or seized Kohler handle
When a Kohler handle is stuck or seized, the technician first applies penetrating oil and allows adequate soak time to break corrosion.
If soaking alone fails, controlled heat or cold may be used and protected leverage applied (soft-jaw pliers or a towel) to avoid harming the finish.
For stubborn or rounded fasteners, a handle puller or slide-hammer and extractor techniques for stripped set screws are employed as the next steps.
Apply penetrating oil and let it soak
Spray a penetrating oil directly onto the exposed parts of the handle assembly—around the set screw bore, the base where the handle meets the cartridge or escutcheon, and any visible metal-to-metal contact points—and allow it to penetrate for at least 10–15 minutes to loosen corrosion and mineral buildup.
After soaking, gently work the handle back and forth to help the lubricant migrate, then reapply if resistance remains.
Use heat and cold techniques safely to loosen corrosion
Apply controlled heat or cold to the handle assembly to break up mineral deposits and rust that anchoring the parts, using simple, safe methods and minimal force to avoid damaging finish or internal components.
Warm the area briefly with a hair dryer or heat gun on low, or apply a cold pack wrapped in cloth.
Alternate cycles, test movement, and stop if finish warps or seals leak.
Leverage methods without damaging finish (soft-jaw pliers, towel protection)
If heat or cold cycles have loosened mineral buildup but the handle still resists movement, proceed to leverage techniques that protect the faucet finish.
Wrap the handle with a folded microfiber towel, then use soft-jaw pliers or adjustable pliers with rubber covers.
Apply steady, controlled pressure—avoid sudden twists. Work incrementally, reapplying penetrating lubricant if needed, to prevent scratches and preserve plating.
When and how to use a handle puller or slide-hammer tool
When a Kohler handle remains immovable after lubrication and protected leverage, a handle puller or slide-hammer provides controlled, axial force to extract the handle without marring the finish.
Select a tool sized to the handle hub, attach gently to avoid scratching, and tighten per manufacturer instructions.
Apply steady, axial pulls until the handle releases. Stop if resistance spikes; reassess to avoid damage.
Dealing with rounded or stripped set screws
After attempting lubricant, protected leverage, or a handle puller as described above, attention turns to the set screw if the handle remains stuck.
Corroded or rounded screws require extraction: cut a slot with a rotary tool, use hardened extractor bits, or grip with locking pliers after grinding a flat.
Apply penetrating oil, tap gently to break corrosion, and replace the screw with stainless hardware.
Removing a broken or snapped handle
When a Kohler handle has broken or snapped, attention shifts to removing remaining stem or screw fragments lodged in the assembly.
The discussion covers safe use of screw extractors and rotary tools to grip and remove those fragments without damaging surrounding parts.
It also addresses methods for freeing a stuck bonnet nut or retaining clip so the cartridge can be accessed and serviced.
Extracting remaining stem or screw fragments
If a handle has sheared off, the remaining stem or screw fragment must be removed carefully to avoid damaging the valve body; identifying the fragment type and its material—metal or corroded brass—guides the choice of retrieval method and tools.
Small protrusions permit grip with needle-nose pliers or locking pliers; flush fragments require gently tapping to expose an edge, careful drilling for a pilot hole, and incremental extraction.
Using screw extractors and rotary tools safely
Begin by evaluating the fragment and workspace to determine the appropriate screw extractor size and rotary tool accessories. Selecting the correct extractor, drill bit, and speed setting reduces the risk of further damage to the valve body.
Wear eye protection and gloves, and secure the faucet to prevent movement. Start with a pilot hole, use steady pressure and low speeds, and back out fragments gently to avoid widening or cracking surrounding metal.
Removing a stuck bonnet nut or retaining clip
Free the bonnet nut or retaining clip by first exposing the valve stem and evaluating how the parts are seated and corroded.
Apply penetrating oil, let it dwell, then use appropriate tools: adjustable wrench for the bonnet nut, needle-nose pliers or snap-ring pliers for the clip.
Tap gently to break corrosion. If seized, heat briefly or carefully cut the nut/clip, protecting surrounding finishes.
Accessing and removing the valve cartridge after handle removal
With the handle removed, the technician first identifies the valve type—ceramic disc, cartridge, or ball—to determine removal technique and required tools.
Next, the cartridge or valve assembly is unfastened and withdrawn following manufacturer steps, noting retaining clips, screws, or retaining nuts.
The exposed parts are then inspected for wear, mineral buildup, or corrosion to decide on cleaning or replacement.
Identifying cartridge type (ceramic disc, cartridge, ball)
Several common valve types—ceramic disc, cartridge, and ball—require different removal methods and tools, so identifying the Kohler faucet’s cartridge is the essential next step.
Inspect the exposed valve body: ceramic disc assemblies are flat with two round openings; cartridge units are cylindrical with a single stem; ball valves feature a spherical control and multiple ports.
Match visual cues to Kohler model references.
Steps to remove cartridge or valve assembly
Begin by shutting off the water supply and draining any residual water from the lines to prevent spills.
After handle removal, detach decorative collar and retaining clip or nut with appropriate pliers or socket.
Gently lift the cartridge straight up; wiggle if stuck. Use a cartridge puller for stubborn units.
Note orientation for reassembly and collect seals, springs, and clips for inspection later.
Inspecting for damage and corrosion
After removing the cartridge and laying out the small parts, the inspector should examine the valve body, cartridge, seals, and springs for visible wear, mineral buildup, or corrosion.
Document pitting, scoring, hardened or flattened seals, and calcification. Light mineral deposits can be cleaned; damaged components require replacement.
Note loose or missing clips and compare parts to manufacturer specifications before reassembly or ordering replacements.
Cleaning, inspection, and deciding between repair or replacement
After removing the cartridge, the technician cleans mineral deposits and corrosion from all accessible components using vinegar or a mild descaler and a soft brush.
They inspect O-rings, seats, and the cartridge for cracks, flattening, or other wear that could cause leaks.
If parts are lightly worn or only O-rings and seats are damaged, those components can be replaced; a pitted or cracked cartridge or extensive corrosion in the valve body indicates replacement of the cartridge or the entire faucet.
Cleaning mineral buildup and corrosion from components
Inspecting and cleaning mineral buildup and corrosion on a Kohler faucet requires systematic attention to visible deposits, moving parts, and sealing surfaces.
Use vinegar or a commercial descaler, applying with a soft brush and soaking removable parts briefly.
Remove loose corrosion with nylon tools, rinse thoroughly, and dry.
Document damaged areas and test movement; persistent pitting or binding warrants replacement rather than continued repair.
Inspecting O-rings, seats, and cartridge for wear
Begin by removing the handle and trim to expose the cartridge and surrounding O-rings and seats.
Then visually and tactilely assess each component for wear. Check for cracks, flattening, nicks, or hardening of rubber, mineral pitting on seats, scoring on cartridge surfaces, and leaks during a gentle turn.
- O-ring flexibility
- Seat smoothness
- Cartridge surface integrity
- Evidence of leaks
When to replace the cartridge versus the entire faucet
Determine whether a cartridge replacement or a full faucet swap is warranted by weighing the extent of internal damage, age of the fixture, and cost-effectiveness of repairs.
If corrosion, multiple failing components, or obsolete parts exist, full replacement avoids repeated failures.
For isolated leaks, smooth operation issues, or available OEM cartridges, replace the cartridge.
Consider warranty, aesthetic updates, and long-term reliability when deciding.
Reassembly and installing a new handle
With parts prepared and O-rings lightly lubricated, the cartridge is reinstalled and oriented to match the handle’s neutral position.
The handle is secured by tightening the set screw to the manufacturer’s recommended torque, then the operation is tested for smooth movement.
Finally, the water supply is restored and the assembly inspected for any leaks.
Preparing replacement parts and applying grease to O-rings
Prepare the replacement components on a clean, well-lit surface and inspect each O-ring and cartridge seal for damage or debris before reassembly.
Select manufacturer-recommended silicone-based grease, apply a thin, even layer to O-rings and sliding surfaces, avoiding excess that can attract grit.
Verify part compatibility, replace any compromised seals, and keep small fasteners organized for efficient reinstallation.
Reinstalling cartridge and aligning handle orientation
After greasing and inspecting the O-rings and seals, the cartridge is seated into the faucet body ensuring its alignment tabs match the recesses in the valve bore.
The retaining clip or nut is replaced to secure the cartridge.
The handle adapter or hub is positioned over the cartridge stem, oriented to the desired off/on and hot/cold positions, then the cosmetic escutcheon and handle are fitted.
Tightening set screw to proper torque and testing operation
Carefully seating the handle and tightening the set screw to the manufacturer’s specified torque guarantees reliable operation and prevents damage to the stem or handle.
Using the correct Allen or Torx key, apply incremental torque to the specified value.
Verify handle alignment and smooth movement through full range.
Confirm no wobble, binding, or looseness; retorque if needed to maintain specification.
Restoring water supply and checking for leaks
Turn the water back on slowly, first opening the shutoff valves under the sink a quarter-turn, then fully, to prevent pressure surges.
Observe the faucet and supply connections for drips.
Cycle hot and cold to confirm proper flow and handle alignment.
Tighten any fittings showing moisture, then recheck.
If leaks persist, shut off water and inspect cartridge or connections before retesting.
Common problems during removal and how to avoid them
Common removal problems include scratches to the finish, stripped or overtightened fasteners, and persistent leaks after reassembly.
Practical precautions—protective coverings, the correct tools, and calibrated torque—minimize damage and hardware failure.
If leaks persist, systematic troubleshooting of seals, valve seats, and connections will identify the cause.
Preventing scratches and finish damage
Preventing scratches and finish damage requires simple precautions and the right tools to avoid costly cosmetic harm during faucet handle removal.
Use soft cloths, painter’s tape, or rubber pads to shield nearby surfaces.
Select nonmarring tools—plastic pry tools or strap wrenches—apply even, controlled force, and keep small parts contained to prevent metal contact and accidental abrasion on the faucet finish.
Avoiding overtightening and stripped fasteners
Work deliberately to avoid overtightening and stripped fasteners, which are frequent causes of difficult removals and permanent damage to faucet components.
Use correct-size tools, apply steady torque, and back off if resistance feels wrong.
Loosen seized screws with penetrating oil and short, controlled taps.
Replace rounded or corroded fasteners with stainless or brass equivalents to guarantee secure, serviceable reassembly.
Troubleshooting persistent leaks after reassembly
Even with care to avoid overtightening and stripped fasteners, leaks can appear after reassembly and often stem from simple oversights: misaligned seals, damaged O-rings, or improperly seated cartridges.
Inspect seals and O-rings for nicks; replace if brittle. Re-seat cartridges squarely and torque retaining nuts to spec. Confirm drain and supply connections.
Test slowly under pressure, watching joints for hairline seepage.
Maintenance tips to prevent future stuck handles
Preventing stuck Kohler faucet handles begins with regular cleaning to remove mineral buildup and using mild descalers as needed.
A scheduled routine of light lubrication and periodic inspection—every six months, or more often in hard-water areas—keeps moving parts functioning smoothly.
Installing water treatment or an aerator filter further reduces deposits and prolongs handle life.
Regular cleaning and mineral buildup prevention
Regularly removing mineral deposits and surface grime keeps a Kohler faucet handle operating smoothly and extends component life.
Weekly wiping with a soft cloth and mild soap prevents buildup. For stubborn deposits, a diluted vinegar solution applied briefly and rinsed thoroughly dissolves minerals without damaging finishes.
Avoid abrasive pads and harsh chemicals. Rinse and dry after cleaning to inhibit future scale and corrosion.
Recommended lubrication and inspection schedule
Establish a simple quarterly routine of light lubrication and visual inspection: every three months, apply a small amount of silicone-based grease to exposed moving parts (handle pivot and cartridge interface) and check for signs of wear, corrosion, or loose fasteners, addressing any issues immediately to prevent seizing and extend component life.
Record dates and observations, tighten fasteners as needed, and replace worn parts promptly to maintain smooth operation.
Water treatment and aerator filtration to reduce deposits
Although often overlooked, treating incoming water and installing aerator filtration greatly reduce mineral and debris buildup that can jam faucet handles.
Regularly flush lines after treatment changes. Replace aerators every 6–12 months and clean screens. Test water hardness and consider a softener if scale forms. Use inline sediment filters where supply is dirty.
- Test hardness
- Install aerator screens
- Schedule replacements
- Flush lines
Quick reference: removal steps by Kohler handle style
This quick-reference section lists the specific steps to remove Kohler faucet handles organized by common handle styles (lever, cross, push-button, and lever-with-set-screw), highlighting the fasteners and tools required for each so technicians can identify the correct procedure at a glance. Follow torque, unplug water, remove caps, loosen screws, and extract handles.
| Handle Style | Key Steps |
|---|---|
| Lever | Pry cap, hex key |
| Cross | Remove center cap, screwdriver |
| Push-button | Depress, pull |
| Set-screw Lever | Loosen set screw |
| Knob | Pull or unscrew |
Conclusion
Removing a Kohler faucet handle can often be resolved with basic tools and patience, but stubborn corrosion or mineral buildup may require extra care. Significantly, Kohler reports that about 40% of faucet service calls are due to handle and cartridge issues, highlighting how common these problems are. With correct identification, proper technique, and preventive maintenance like regular cleaning and occasional lubrication, most users can avoid service calls and extend the life of their fixtures.