How to Fix a Leaky Cartridge Faucet: Step-by-Step Repair Guide for Homeowners
To fix a leaky cartridge faucet, start by shutting off the water supply and relieving any pressure. Next, remove the faucet handle and trim to access the cartridge. Pull the cartridge straight out, typically held in place by a clip or nut, and compare it with the new part for compatibility. Replace it with fresh seals and apply plumber’s grease. After reassembling, slowly restore the water supply and test the faucet for leaks. For detailed diagnostics, alternative solutions, and maintenance tips, continue reading.
How to Tell If a Cartridge Faucet Is Leaking and Why It Matters
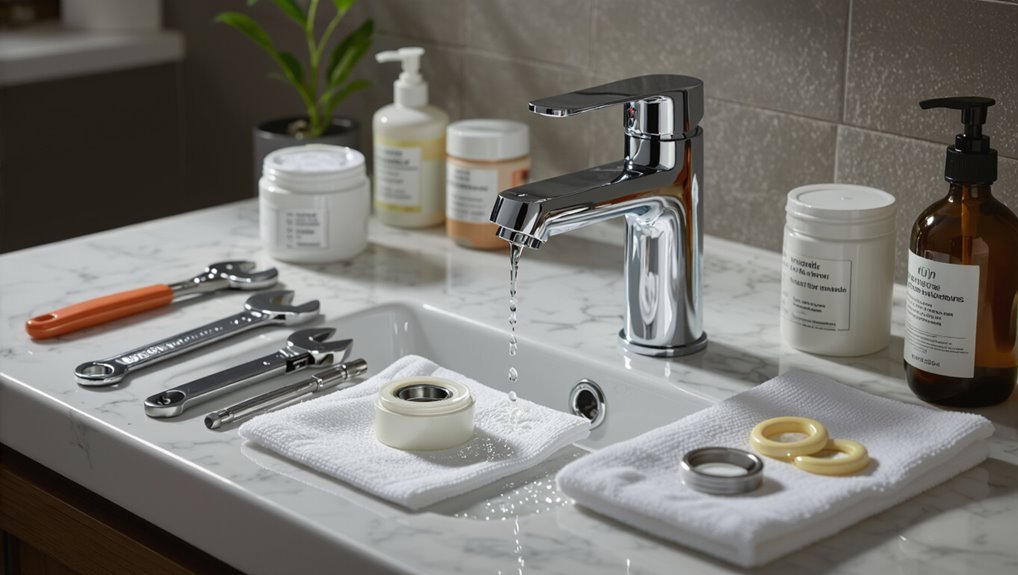
A leaking cartridge faucet often announces itself with steady drips, reduced water pressure, or mineral buildup around the handle and spout.
Ignoring these signs can waste water, raise utility bills, and cause corrosion or structural damage to fixtures and surrounding cabinetry.
Minor leaks may be fixed with basic parts and tools, but persistent, hard-to-access, or worsening leaks warrant a professional plumber.
Common signs of a leaky cartridge faucet
How can one recognize a leaking cartridge faucet before damage worsens? Homeowners spot constant drips, reduced water pressure, or erratic handle movement.
Mineral buildup, puddles beneath fixtures, and sticky operation also indicate cartridge wear.
Early detection guides decisions on how to fix a leaky cartridge faucet—inspection, cartridge replacement, or seal renewal—helping restore function and prevent progressive fixture deterioration.
Risks of ignoring a leak (water waste, damage, higher bills)
Neglect of a leaking cartridge faucet quickly turns inconvenience into measurable loss: even a slow drip wastes gallons over time, subtly raising water bills.
Persistent leaks also promote mineral buildup, corrosion, and mold growth, risking fixture failure and hidden structural damage to cabinets, floors, and ceilings.
Small, continuous losses compound into significant repair costs and higher utility expenses if left unaddressed.
When to call a professional vs. DIY
When can a homeowner know if a cartridge faucet leak is a simple DIY fix or requires a professional? The decision hinges on leak severity, visible corrosion, and water pressure.
Minor drips, accessible cartridge replacement, and basic tools suit DIY.
Persistent leaks, damaged valve bodies, hidden pipe issues, or lack of confidence warrant a licensed plumber to prevent further damage and guarantee proper sealing.
Tools, Parts, and Safety Precautions You’ll Need
Before beginning repairs, the article lists essential tools and replacement parts—adjustable wrench, screwdrivers, cartridge-specific O-rings and seals, and plumber’s grease—so the job can proceed without interruptions.
It also explains how to identify the faucet type and cartridge model to guarantee correct parts are used.
Finally, basic safety and prep steps are covered, including shutting off the water, draining the lines, and protecting the sink and surfaces.
List of essential tools and materials
A concise kit of the right tools, replacement parts, and basic safety items makes diagnosing and repairing a leaky faucet faster and less likely to cause additional damage.
Essential items include sturdy slip-joint pliers, adjustable wrench, screwdriver set, cartridge puller, replacement O-rings and cartridge, plumber’s grease, rag, and safety glasses.
- Basic tools and fasteners
- Replacement cartridge and seals
- Safety and cleanup supplies
Identifying your faucet type and cartridge model
Several quick observations can pinpoint the faucet type and cartridge model needed for repair.
Note handle count, spout shape, and mounting (single-hole, centerset, widespread).
Remove decorative caps to check visible brand logos or part numbers.
Measure cartridge length and diameter if exposed.
Photograph the assembly for reference.
Use these details to source a matching replacement cartridge and compatible seals.
Safety and prep steps (shutting off water, protecting sink)
Shut off the water supply and protect surrounding surfaces before disassembling the faucet: close the individual shutoff valves under the sink or, if none are present, turn off the home’s main water valve; then open the faucet to relieve residual pressure and drain remaining water.
Place a towel or basin in the sink, cover nearby fixtures, wear safety glasses and gloves, and lay out tools and replacement parts within reach.
Quick Diagnosis: Locate the Source of the Leak
The first step is a visual and tactile inspection of the handle, spout, and base to pinpoint where water appears or collects.
Simple tests—such as operating the handle, placing a dry paper towel around joints, and isolating the water supply—help distinguish internal leaks from external ones.
Documenting visible damage with photos and recording part numbers speeds replacement once the source is confirmed.
Inspecting handle, spout, and base for leak origin
Before disassembly, examine the handle, spout, and base to pinpoint where water appears or accumulates.
Note dripping patterns, wet spots, mineral deposits, and corrosion.
Check beneath the handle and around the spout seam for seepage.
Inspect the escutcheon and counter area for pooled water.
Photograph or mark observed locations to guide targeted disassembly and parts inspection.
How to test for internal vs. external leaks
A few simple tests can quickly distinguish internal leaks (within the valve or cartridge) from external leaks (around seals, fittings, or connections).
Shut off water and observe drip location; internal leaks often occur from the spout or handle when supply is on but external leaks appear at joints when pressurized.
Apply dye or tissue, tighten fittings, then retest under normal pressure to confirm source.
Photo and part-number documentation for replacement
Several clear photos and exact part numbers speed repair by ensuring the correct replacement is ordered and installed.
Photograph the cartridge, retaining clips, seals, and stamped model numbers from multiple angles.
Note manufacturer, serial, and measurements (length, diameter).
Record part numbers on a checklist and include date, source, and any observed wear.
This streamlines ordering, avoids returns, and verifies compatibility before installation.
Step-by-Step Repair: Replacing the Cartridge
To begin cartridge replacement, the water supply should be shut off and any remaining pressure relieved.
The handle and trim are then removed carefully to expose the retaining clip, nut, or bonnet, which is extracted to free the cartridge.
The old cartridge is compared with the new one, replaced, and the faucet reassembled for testing.
Step 1 Turn off water and relieve pressure
Shut off the water supply at the appropriate valves and open the faucet to relieve remaining pressure; this prevents unexpected spray and reduces mess during cartridge removal.
Verify both hot and cold shutoffs. If only a single house valve exists, close it and test other fixtures.
Place a towel in the sink and a bucket beneath the faucet to catch residual water before proceeding.
Step 2 Remove handle and trim without damage
Begin by exposing the faucet’s handle and trim components so each retaining screw, cap, and decorative piece is visible and accessible; this makes following steps straightforward and reduces the risk of accidental damage.
Use appropriate-size tools, protect finishes with cloth or tape, remove caps and screws carefully, and lift handles straight off.
Store small parts in labeled containers to prevent loss or misassembly.
Step 3 Extract retaining clip, nut, or bonnet
With the handle and trim removed, the next task is to expose and remove the fastener that secures the cartridge—either a retaining clip, packing nut, or bonnet—so the cartridge can be withdrawn.
Inspect the assembly to identify the type, then use needle-nose pliers for clips, an adjustable wrench for nuts, or a bonnet wrench if present.
Keep parts organized and note orientation.
Step 4 Remove old cartridge and compare with new one
Pull the cartridge straight out of the valve body, taking care not to force or twist it, which can damage the housing.
The old cartridge is inspected for worn seals, mineral buildup, or broken parts.
The replacement cartridge is laid beside it to verify matching shape, stem type, and O-ring locations.
Confirm identical orientation and dimensions before proceeding.
Step 5 Install new cartridge and reassemble
Carefully align the new cartridge with the valve body, matching the stem orientation and any locator tabs.
Then slide it straight into place without twisting to avoid damaging seals.
Seat the cartridge fully, reinstall retaining clip or nut, and torque to manufacturer specification.
Reassemble bonnet, handle, and trim pieces in reverse order, replacing worn washers or O-rings as needed for proper fit and function.
Step 6 Restore water, test for leaks, and final adjustments
After the cartridge and trim are reinstalled, the water supply can be turned back on to confirm proper operation.
The person opens supply valves slowly, checks for leaks around the cartridge, spout, and under sink. They cycle the handle to test hot/cold and pressure.
If leaks persist, tighten connections or reseat the cartridge; replace seals if needed.
Complete reinstall and clean workspace.
Alternative Fixes When Full Cartridge Replacement Isn’t Needed
When a cartridge shows no major damage, simpler repairs can stop a leak without full replacement.
Common options include replacing worn O-rings and seals, removing mineral buildup and lubricating moving parts, or choosing between restoration kits and individual replacement components.
Each approach has trade-offs in cost, convenience, and long-term reliability.
Replacing O-rings and seals
Replacing worn O-rings and seals often stops leaks without the time and expense of a full cartridge replacement.
The homeowner should drain water, remove the cartridge per manufacturer instructions, inspect O-rings and seat seals for cracks or flattening, select exact-size replacements, and reinstall with proper lubrication recommended for seals.
Test under pressure for leaks and retighten connections if necessary.
Cleaning mineral buildup and lubricating components
Inspecting and addressing mineral buildup and insufficient lubrication often restores smooth faucet operation without a full cartridge replacement.
Calcium deposits and grime should be dissolved with vinegar or a descaler, then rinsed thoroughly.
Moving parts require a plumber’s silicone grease applied sparingly to O-rings, stems, and seats.
Reassemble, test for leaks, and repeat cleaning if stiffness or drips persist.
Using restoration kits vs. individual parts
Choose between restoration kits and individual replacement parts based on the scope of the problem and the user’s comfort with small repairs.
Restoration kits bundle seals, O-rings, and springs for quick, compatible fixes and save time.
Individual parts suit targeted faults or unusual models but require accurate identification.
Compare costs, availability, and compatibility; inspect parts for quality before installation to guarantee a lasting repair.
Troubleshooting Common Problems During Repair
When problems arise during faucet repair, the article outlines methods for removing a stuck or corroded cartridge, including penetrating lubricants and gentle heat.
It also explains checks for persistent drips after replacement, such as seating, seals, and water pressure.
Finally, it covers causes of handle stiffness or spray issues after reassembly and how to correct misalignment or debris.
Stuck or corroded cartridge removal techniques
Persistent mineral buildup and years of use can fuse a faucet cartridge in place, requiring deliberate techniques to free it without causing damage.
Apply penetrating lubricant around the cartridge base, allow dwell time, then use a cartridge puller or adjustable wrench with a soft cloth to steady the valve.
Tap gently with a wooden mallet if needed.
Avoid excessive force to prevent housing damage.
Persistent drips after replacement what to check
After freeing and replacing a stuck cartridge, a faucet that continues to drip signals that one or more components were not seating or sealing correctly.
Check cartridge alignment, O-rings and seals for damage or debris, and verify the retaining clip or nut is tightened to spec.
Inspect valve seat and inlet screens for mineral deposits.
Reassemble carefully and test under normal pressure for remaining leaks.
Handle stiffness or spray issues after reassembly
Inspecting and testing the faucet immediately after reassembly can reveal why handles feel stiff or why the spray pattern is irregular.
Check cartridge alignment, guarantee retaining clips and O-rings seat properly, and confirm the handle screw is not overtightened.
Flush aerator and spray head to remove debris.
Verify lubricant suitability for seals.
If problems persist, partially disassemble to locate binding or blockages.
Cost, Time, and Parts Comparison
Typical replacement parts for a leaky faucet—such as O-rings, cartridges, and washers—generally cost between $5 and $50. A straightforward DIY repair often takes 15–60 minutes.
More complex valves or specialty parts can increase both parts cost and repair time. Hiring a plumber becomes cost-effective when the homeowner lacks tools or experience, when the repair requires replacement of major components, or when multiple fixtures are affected.
Typical cost range for parts and DIY time estimate
A basic DIY repair for a leaky faucet commonly requires only a few inexpensive parts—washers, O-rings, or a replacement cartridge—so homeowners can expect modest materials costs and a short time commitment. Typical parts cost: $5–$45. Estimated DIY time: 15–90 minutes depending on access and experience.
| Item | Typical Range |
|---|---|
| Parts | $5–$45 |
| Time | 15–90 min |
When hiring a plumber is cost-effective
Many homeowners find that hiring a plumber becomes cost-effective when the repair exceeds basic part replacement or when hidden complications raise labor time.
A professional handles complex cartridge failures, corroded valves, or inaccessible fittings more quickly, reducing risk of damage.
Compare quoted labor plus parts versus DIY time, tool rental, and potential follow-up repairs to decide cost-effectiveness.
Prevention and Maintenance Tips to Avoid Future Leaks
A simple routine cleaning and inspection schedule can catch wear before it becomes a leak.
In hard-water areas, scrubbing aerators and using descaling agents reduces mineral buildup that stresses seals.
Applying recommended lubricants and replacing cartridges or O-rings at manufacturer intervals extends faucet life and prevents future failures.
Routine cleaning and inspection schedule
Regular monthly checks and simple cleaning routines keep faucets functioning and prevent small issues from becoming leaks.
Inspect handles, spout, and visible connections for drips or looseness; wipe aerators and exterior surfaces with mild cleaner; run water to detect pressure changes or noise.
Record findings, tighten fittings as needed, and schedule cartridge replacement every few years or sooner if wear is noted.
Best practices for hard-water areas
Because hard water accelerates mineral buildup that can seize cartridges and clog aerators, homeowners in affected areas should adopt targeted prevention and maintenance steps to keep faucets leak-free.
Install point-of-use filters or a water softener where feasible, flush lines periodically, remove and descale aerators and cartridges on a schedule, inspect seals for mineral damage, and address staining or reduced flow promptly to prevent accelerated wear.
Recommended lubricants and replacement intervals
Several types of lubricants suit faucet maintenance, with silicone-based greases preferred for cartridge and O-ring lubrication and plumber’s grease for valve stems.
Thread sealant tape or pipe dope is recommended for threaded connections.
Recommended replacement intervals: O-rings and seals every 1–3 years, cartridges every 5–7 years or when wear appears, and stems or seats as needed.
Regular inspection extends service life.
Quick Reference: Parts Identification and Common Cartridge Models
A concise visual guide highlights brand-specific features—stampings, cartridge shape, and retaining clip styles—to help identify common cartridge manufacturers.
Photographs or clear notes from the old part speed up matching when searching replacement cartridges online or at local hardware stores.
When brand marks are missing, measuring cartridge dimensions and noting handle type provides reliable criteria for finding compatible replacements.
Visual cues to identify major cartridge brands
Different cartridge manufacturers include distinct visual cues that make quick identification possible without disassembly.
Logos or stamped letters on the cartridge top, unique spline counts, plastic color coding, and differing retainer clip shapes are common identifiers.
Some brands use molded part numbers, others have brass versus plastic bodies.
Comparing these features to reference photos narrows possibilities before removal.
How to find replacement cartridges online or locally
Identifying visible clues on the cartridge narrows likely manufacturers and makes the next step—locating a replacement—much faster.
Then, compare part numbers, dimensions, and mounting style before purchasing. Sources include online OEM catalogs, reputable plumbing retailers, and local supply houses; photographs aid matching.
Recommendations:
- Search OEM part number and image.
- Use retailer filters by brand/model.
- Bring the cartridge to a local supply store.
Step-by-Step Checklist for a Successful Repair
A concise checklist guides the repair from preparation through final checks.
It covers a pre-repair checklist to gather tools and isolate water, a during-repair checklist to follow steps and monitor progress, and a post-repair verification checklist to test for leaks and restore fixtures.
Following each checklist in order reduces mistakes and guarantees a reliable fix.
Pre-repair checklist
Before starting any repair, prepare a concise checklist that guarantees safety, correct tools, and an understanding of the faucet type and shutoff procedure.
Confirm water is off at the correct shutoff valves, gather replacement cartridge, O-rings, and seals, assemble screwdrivers, adjustable wrench, pliers, and flashlight.
Have towels, bucket, and manufacturer instructions ready. Note model numbers and document parts removed.
During-repair checklist
Begin by confirming the work area is safe and organized: verify the main or local shutoff remains closed, place towels and a bucket to catch residual water, set parts tray nearby, and guarantee tools and replacement components are within reach.
During repair, follow sequence: remove handle and trim, inspect cartridge and seals, replace worn parts, lubricate O-rings, reassemble carefully, and tighten to specified torque.
Post-repair verification checklist
Post-repair verification guarantees the faucet functions correctly and prevents future leaks.
The technician inspects seals, tests temperature and flow, and monitors for drips over time. Documents evidence and timelines for follow-up if issues recur.
- Run hot and cold for several minutes; check for drips.
- Inspect visible seals and connections for moisture.
- Record results and schedule a recheck.
Conclusion
The homeowner finished the steps but paused, fingers hovering above the drained basin. The repaired cartridge sat ready, seals snug and tools cleared, yet a soft drip seemed to hold its breath. If the fix had failed, hidden damage would reveal itself later—quiet, insistent. For now, silence meant success, but the lesson lingered: vigilance after repair can be the difference between a fixed faucet and a returning leak.