
How to Cap a Refrigerator Water Line Safely: Step-by-Step Guide for DIYers
Capping a refrigerator water line is essential for preventing leaks and contamination when disconnecting or relocating your fridge. To do this safely, follow these steps: Identify the pipe type (copper, PEX, polyethylene), turn off and drain the water supply, cut the line squarely, and install the appropriate cap (compression for copper, push-fit for plastic) with thread seal if necessary. After installation, gradually restore pressure and check for leaks. Continue reading for detailed steps and troubleshooting tips.
What “capping a refrigerator water line” means and when it’s necessary
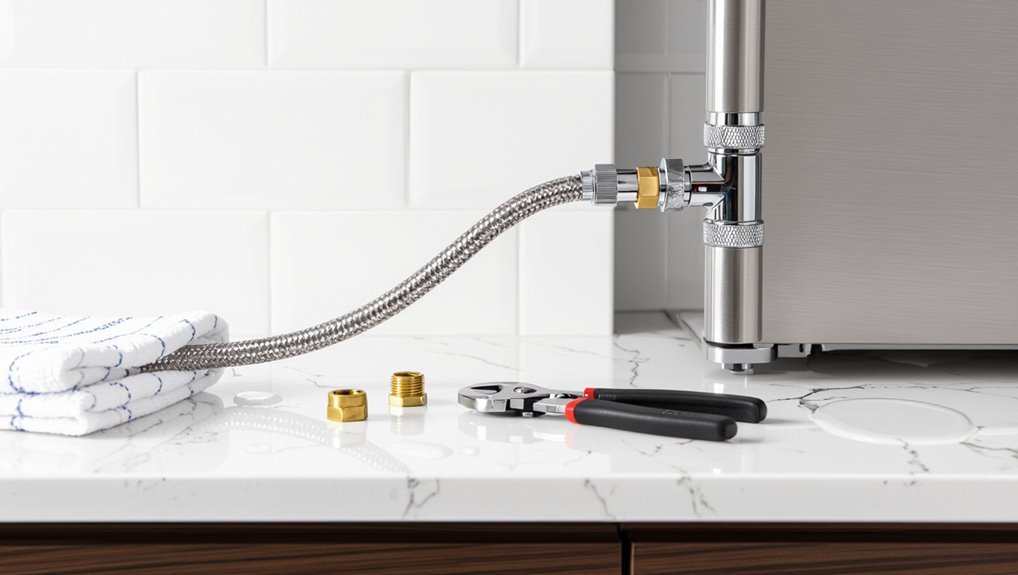
Capping a refrigerator water line means securely sealing the supply to prevent leaks or contamination when the appliance is moved, replaced, or taken out of service for a season.
Typical situations include relocating the fridge, installing a new unit, or winterizing a home to avoid frozen pipes.
The procedure varies with the type of supply—copper, plastic, or braided stainless lines—and with fittings such as compression, push-to-connect, or threaded valves.
Common scenarios requiring a cap (moving, replacing fridge, seasonal shutdown)
When a refrigerator is disconnected from its water source—whether for relocation, replacement, or winter shutdown—the exposed supply line must be securely sealed to prevent leaks, contamination, or water damage.
Common scenarios requiring a cap include moving the appliance, replacing it, or seasonal shutdowns.
DIYers researching how to cap water line for refrigerator should act promptly, isolating and capping the line to avoid problems.
Types of water lines and fittings used on refrigerators
A refrigerator water line typically consists of plastic (PE, PEX, or braided polyethylene) or copper tubing that connects the household supply to the appliance via compression, push-to-connect, or flare fittings.
Common terminations include 1/4″ compression nuts, quick-connect inserts, or threaded adapters.
Capping isolates the supply when removing, replacing, or winterizing the fridge; correct cap type matches tubing material and fitting style to prevent leaks.
Quick safety-first overview: Can a DIYer safely cap a refrigerator water line?
A homeowner with basic plumbing skills, the right tools, and a straightforward copper or plastic tubing run can usually cap a refrigerator water line safely.
If the line is corroded, buried in a wall, involves pressurized fittings, or the homeowner is unsure about shutoff valves and leak risks, a professional plumber should be called.
Prioritizing proper shutoff, leak testing, and suitable fittings reduces risk and determines whether the job remains a DIY task.
When it’s safe for a homeowner to proceed
Although many homeowners with basic plumbing skills can safely cap a refrigerator water line, certain conditions must be met before attempting the task.
The homeowner should confirm the line serves only the fridge, shut off and verify water at the supply, have appropriate tools and parts, understand isolation valves and fittings, and feel comfortable working in tight spaces.
Safety gear and leak checks are essential.
When to call a professional plumber
Consider calling a professional when uncertainty, risk, or lack of proper tools could lead to water damage or code violations.
A plumber should be contacted if the shutoff is inaccessible, piping is corroded, fittings leak after capping, or local codes require permit work.
For complex valves, multi-layer tubing, or visible mold, professional assessment prevents mistakes and guarantees a code-compliant, watertight resolution.
Tools and materials needed for capping a refrigerator water line
The following equipment and parts are required to cap a refrigerator water line: adjustable wrench, tubing cutter or utility knife, replacement shutoff valve or compression cap, and appropriate fittings or olives.
Optional items for extra protection and testing include Teflon tape, thread sealant, a small bucket or towels, and a pressure gauge or handheld leak detector.
The list focuses on practical, commonly available tools and materials for a safe, watertight termination.
List of required tools and replacement parts
Before beginning, gather all necessary tools and replacement parts to confirm the capping job proceeds safely and without interruption.
Required items include a shutoff-capable wrench, tubing cutter, compression cap or brass cap with ferrule, and thread seal tape. These guarantee a clean cut, secure seal, and easy installation to stop water flow at the refrigerator line quickly and reliably.
- Adjustable wrench
- Tubing cutter
- Compression/brass cap with ferrule
- Thread seal tape
Optional items for extra leak protection and testing
After assembling the basic wrench, cutter, compression cap, and thread tape, a few optional items can improve leak protection and confirm a secure seal.
Small additions aid testing and longevity.
- Leak-detection solution (bubble test)
- Silicone sealant for joints
- Spare compression nut and ferrule
- Inline shutoff valve for future maintenance
Preparing the workspace and shutting off water safely
The technician locates the refrigerator’s shutoff valve—typically behind the appliance or under the sink—and confirms the correct line is isolated before turning it off.
They relieve pressure and drain remaining water by running the dispenser briefly or opening a drain point, collecting runoff in a bucket.
Protective coverings are placed over floors, cabinet interiors, and nearby electrical outlets to prevent water damage and accidental shorts.
How to locate the shutoff valve for the fridge line
Where is the shutoff valve controlling the refrigerator water line and how to reach it safely are the immediate concerns; locating it typically requires tracing the tubing from the back of the fridge to the nearest wall, baseboard, or under-sink supply.
If visible, identify a small angle or saddle valve, braided supply stop, or dedicated isolation valve.
Confirm accessibility and clear nearby obstacles before proceeding.
Steps to depressurize and drain the line before capping
Begin by preparing a clear workspace and confirming the supply shutoff is fully closed so residual pressure can be relieved safely.
Next, open the refrigerator dispenser or ice maker valve to expel trapped water and air.
Place a bucket and absorbent cloth beneath the cut or exposed tubing.
Allow draining until flow stops, then pinch or cap temporarily to prevent drips before final capping.
Precautions to protect flooring, cabinets, and electrical components
Before shutting off the water, protect surrounding surfaces by placing an absorbent mat or towel under the workspace and covering nearby cabinet bottoms with a waterproof barrier.
Electrical outlets and appliance cords should be isolated or unplugged to eliminate shock risk.
The operator should also slide out the refrigerator slightly, shield flooring with cardboard or plastic, and keep a bucket and towels ready to contain spills.
Step-by-step method A Capping a copper water line with a compression cap
The procedure begins with inspecting the copper pipe and selecting a compression cap that matches the tube diameter and material.
The pipe end should be cleaned and deburred before fitting the cap, then tightened in the recommended sequence and to the manufacturer’s torque guidance.
After installation, a controlled pressure leak-check must be performed to confirm a secure seal.
Inspecting the copper pipe and choosing the correct cap size
A careful inspection of the exposed copper feed determines both the condition of the tubing and the exact diameter for the compression cap.
The inspector checks for corrosion, cracks, kinks, and previous fittings. Measurement with calipers or a pipe gauge confirms nominal size (1/4″, 3/8″, 1/2″) and outer diameter.
Select a matching compression cap rated for potable water and appropriate pressure.
Cleaning and deburring the pipe end
Prepare the cut end for a secure seal by removing burrs, corrosion, and any debris that could prevent the compression ring from seating evenly.
Use a deburring tool or round file to chamfer the inside and outside edges, then wipe with a clean rag.
Lightly clean corrosion with fine emery cloth until shiny copper appears.
Confirm the pipe end is straight, smooth, and dry before proceeding.
Installing the compression cap: step sequence and torque guidance
With the pipe end cleaned, chamfered, and verified straight, the installer can begin fitting the compression cap.
Slide the nut, then ferrule onto the tube. Insert tube fully into cap body, hand-tighten the nut.
Use a wrench to tighten one to one-and-a-quarter turns beyond hand-tight, or follow manufacturer torque spec if provided.
Recheck nut snugness; avoid over-torquing.
Leak-check procedure after installation
Begin the leak-check by slowly restoring water to the capped line and observing the fitting area for any signs of seepage or drips.
Maintain pressure for five minutes while inspecting joints and tubing. Wipe fittings dry, recheck for weeping.
If no leaks appear, pressurize the system fully and monitor ten minutes.
Tighten or reseat the compression cap if leakage is detected.
Step-by-step method B Capping a plastic (PE/PEX) water line
The technician first distinguishes PEX from polyethylene by checking markings, stiffness, and fittings to choose the correct cap type.
For PEX, push-to-connect caps (such as SharkBite) are shown with simple push-on installation, while polyethylene may require a clamp-style cap with a barbed fitting and secure hose clamp.
After installation, pressure-testing and inspection confirm a watertight seal before finishing the job.
Identifying PEX vs polyethylene lines
When preparing to cap a plastic refrigerator water line, it is important to distinguish PEX from polyethylene because each material requires different fittings and cutting techniques.
Visually inspect color, wall thickness, and marking: PEX often has printed labels (PEX-A/B/C) and thicker walls; polyethylene (PE) is usually plain, softer, and more flexible.
Bend, crush, and cut tests confirm material before selecting a cap and method.
Using push-to-connect caps (e.g., SharkBite) installation steps
Prepare the work area, gather a push-to-connect cap sized for the identified pipe (PEX or polyethylene), a tubing cutter, and a marker.
Shut off water, relieve pressure, and verify line is dry.
Mark cutting point, squarely cut pipe, remove burrs and debris, and guarantee cut end is fully round.
Push cap straight onto pipe until seated and tug to confirm secure connection.
Using clamp-style caps and barbed fittings installation steps
Begin by identifying the pipe material and size. Then gather a compatible barbed fitting, a stainless-steel or worm-drive hose clamp sized for the tubing, a tubing cutter, and a marker.
Cut the tubing squarely, deburr or chamfer the end, and mark insertion depth.
Fully push the barb into the tube, position the clamp over the barb ridge, and tighten securely without crushing the tubing.
Pressure-testing and verifying a secure seal
Pressure-test the capped PE/PEX line to confirm the seal holds under realistic conditions.
Attach a hand pump or pressure gauge, pressurize to normal system pressure (or slightly above, per local code), and monitor for at least 10–15 minutes.
Inspect fittings, clamp, and tubing for leaks, pressure drop, or moisture.
Release pressure slowly and recheck seals before final restoration.
Step-by-step method C Capping a flexible fridge supply line
The technician begins by disconnecting the flexible supply hose from the refrigerator to isolate the work area.
Next, they recommend using a dedicated inline shutoff valve or a screw-on end cap designed for flexible hoses to stop water flow.
Threads are finished with plumber’s tape or a compatible sealant where manufacturers advise, ensuring a watertight connection.
Disconnecting the supply hose from the appliance
To disconnect the flexible supply hose from the refrigerator, the technician first shuts off the water at the supply valve and drains any residual water from the line by opening the dispenser or a downstream valve; this prevents leaks when the hose-fitting is loosened.
The technician then places a towel, uses an adjustable wrench to loosen the compression nut, gently withdraws the hose, and inspects fittings for damage.
Using inline shutoff valves or end caps for flexible hoses
Begin by confirming the water supply is shut off and any residual pressure has been relieved; this guarantees a dry, safe workspace before fitting an inline valve or screw-on end cap to the flexible refrigerator supply line.
Select a compatible valve or cap, slide it onto the hose end, tighten per manufacturer torque guidance, then verify a secure, leak-free connection before restoring water to test.
Securing threads with tape or sealant where appropriate
Apply thread sealant carefully to guarantee a watertight joint without contaminating the interior of the supply line.
The installer wraps PTFE tape clockwise on male threads or brushes a compatible pipe compound sparingly, avoiding excess that could enter the line.
Tighten fittings to manufacturer torque specifications.
Inspect for gaps, wipe residues, and perform a pressure test to confirm a leak-free seal before restoring service.
Temporary vs permanent capping solutions and longevity
The article compares temporary caps, push-fit caps, and compression caps by outlining each option’s advantages and drawbacks.
It summarizes expected lifespans—short-term use for temporary caps, medium-term for push-fit, and longer-term reliability for properly installed compression caps—and notes signs indicating replacement.
Guidance highlights when a temporary solution should be upgraded to a permanent one to avoid leaks and water damage.
Pros and cons: temporary caps, push-fit caps, compression caps
Several common capping methods—temporary caps, push-fit caps, and compression caps—offer distinct trade-offs in ease of installation, leak resistance, and planned service life.
Temporary caps are quick and inexpensive but less robust.
Push-fit caps provide tool-free installation and reliable seals for many materials.
Compression caps require proper tightening and tools but deliver durable, serviceable connections suitable for longer-term use.
Expected lifespan of each solution and when to replace
Having compared temporary, push-fit, and compression caps for ease and leak resistance, attention shifts to how long each option can be expected to perform and when replacement is appropriate.
Temporary caps last weeks to months and should be replaced or upgraded at first sign of wear.
Push-fit caps reliably last several years; inspect annually.
Compression fittings can last a decade or more if installed correctly; replace upon corrosion, deformation, or persistent leaks.
How to test for leaks and ensure long-term reliability
After capping, a brief inspection should include visual, tactile, and paper-towel checks at the fitting to detect any seepage.
For added certainty, a pressure gauge or isolation test can verify that the line holds steady under system pressure.
If persistent wetness, pressure loss, or corrosion appears, the cap should be replaced and the connection rechecked or referred to a professional.
Methods for visual, tactile, and paper-towel leak checks
Inspect the capped refrigerator water line immediately and again after pressure is applied to catch leaks early.
Visually scan fittings and tubing for moisture, corrosion, or drips. Run a clean paper towel along joints and under the cap; any dampness indicates leakage.
Feel connections with fingertips for wetness and temperature differences.
Recheck after 15–30 minutes and periodically over 24 hours for long-term reliability.
Using a pressure gauge or isolation test
Visual and tactile checks are a good first step, but a pressure gauge or isolation test provides quantitative confirmation of a seal and reveals slow leaks that surface checks might miss.
Attach a gauge to the capped line, pressurize to supply pressure, isolate the section, and monitor for drop over 10–15 minutes.
Any pressure loss indicates a leak needing tightening or recapping before restoring service.
Signs of a failed cap and what to do next
Often a failed cap first reveals itself through subtle signs that, if ignored, can lead to water damage or mold.
The person should inspect for dampness, mineral deposits, staining, or a drop in water pressure.
Perform a dye or pressurized leak test, tighten or replace the cap if needed, and monitor periodically.
Consider upgrading to a corrosion-resistant cap for long-term reliability.
Common problems and troubleshooting
If water continues to drip after capping, the source and seal must be inspected promptly to determine whether the cap, ferrule, or valve is at fault.
Damaged pipe ends or stripped threads require either repair with a coupling or replacement of the fitting to restore a secure connection.
Frozen or corroded lines need to be thawed or cleaned and assessed for integrity before recapping to prevent recurring leaks.
What to do if water keeps dripping after capping
When drips persist after capping a refrigerator water line, the immediate task is to isolate the source and determine whether the cap, the valve, or residual pressure is responsible; this prevents wasted water and potential damage.
Check tightness and seating of the cap, inspect nearby shutoff valve for slow leaks, drain residual pressure by opening downstream fixtures, and monitor to confirm cessation of dripping.
Fixing damaged pipe ends or stripped threads
Inspect the damaged pipe end or stripped threads closely to determine repairability and required tools.
If threads are mildly damaged, a thread file or die can restore engagement; apply thread sealant after cleaning.
For severely deformed ends, cut back to a clean section and re-flare or re-thread as appropriate.
Replace irreparable fittings or tubing to guarantee a reliable, leak-free cap installation.
Handling frozen or corroded lines
After addressing damaged ends or stripped threads, attention should turn to frozen or corroded lines, which present different challenges and hazards.
Frozen lines require gradual thawing with warm towels, hairdryer on low, or space heater; avoid open flame.
Corroded tubing or fittings should be cut back to sound metal and replaced.
When corrosion is extensive, replace the entire section and inspect for leaks before capping.
Safety risks, code considerations, and disposal
Before capping a refrigerator water line, the responsible homeowner should verify local plumbing code requirements and permit needs to guarantee compliance.
Consideration must be given to potential health and water-quality issues from stagnant or cross-connected capped lines.
Old hoses and fittings should be disposed of according to local waste rules, recycling options, or hazardous-material guidelines to prevent contamination.
Local plumbing code issues to consider before capping
Many homeowners must confirm local plumbing codes and safety risks prior to capping a refrigerator water line, since regulations dictate acceptable methods, required permits, and proper disposal of removed components; failure to comply can lead to fines, backflow hazards, or contamination of the potable water supply.
Inspect jurisdictional requirements for permits, approved materials, backflow prevention, and contractor licensing; document compliance and dispose of fittings per local waste rules.
Health and water-quality considerations for capped lines
A capped refrigerator water line can pose water-quality and health risks if not handled and sealed correctly.
Proper materials, verification of a watertight shutoff, and adherence to code are essential to prevent contamination, stagnation, or backflow into the potable system.
Inspect caps and fittings for corrosion, test for leaks, label the capped line, consider periodic flushing or removal per code, and document compliance for future owners.
Proper disposal of old hoses and fittings
After capping and securing a refrigerator water line, attention should turn to removing and disposing of the old hoses and fittings to eliminate safety hazards and comply with local codes.
Inspect for corrosion, contamination, and sharp edges; label any suspect parts.
Follow municipal waste or recycling rules; hazardous materials require special handling.
Document disposal for inspections.
- Corroded metal hose
- Cracked plastic tubing
- Brass fittings
- Contaminated remnants
Alternatives to capping: temporary bypasses and redirecting water
Instead of permanently capping the refrigerator water line, one option is to install an isolation valve to allow future reconnection or maintenance without cutting the line.
Another approach routes the supply to an alternate appliance or ties it into a nearby drain using appropriate fittings and slope.
Each alternative requires proper fittings and adherence to local plumbing codes to prevent leaks and backflow.
Installing an isolation valve instead of capping
Consider installing a shutoff isolation valve when a refrigerator water line needs to be taken out of service without permanently capping it.
A quarter-turn ball valve provides reliable shutoff, minimal leakage risk, and easy access for future reconnection.
Install on the supply line with proper fittings, shut water off, test for leaks, and label the valve.
This preserves serviceability and reduces disruption.
Redirecting water to another appliance or drain
Redirecting the refrigerator water line to another appliance or a nearby drain offers a practical alternative to permanent capping, preserving water flow while preventing waste or accidental leaks.
A brief bypass uses a T-fitting, shutoff valve, and flexible tubing to route supply to a dishwasher, icemaker, or floor drain.
Confirm proper fittings, slope, secure clamps, and test for leaks before finalizing the installation.
Checklist: Step-by-step recap before finishing the job
Before closing the job, a brief checklist confirms the capped line is secure and the system is safely re-pressurized. The technician or homeowner should confirm there are no leaks, restore water pressure gradually, and note any signs that warrant professional attention.
If uncertainty remains or issues appear, schedule a follow-up with a licensed plumber.
- Inspect cap and fittings for tightness and visible leaks.
- Turn water back on slowly and watch pressure/fixtures for abnormalities.
- Check for moisture or drips over a 10–15 minute period.
- Arrange professional follow-up if persistent leaks, low pressure, or damaged components are observed.
Final verification and re-pressurization steps
Begin a systematic final verification by working through a concise checklist that confirms the cap is secure, fittings are tight, and the supply is ready for re-pressurization.
Slowly restore water pressure, watch for instant leaks around the cap and joints, listen for hissing, and monitor pressure gauges.
If dry, operate the refrigerator’s water functions briefly to purge air and confirm steady flow with no leaks.
When to schedule a professional follow-up
When should a professional be scheduled following capping a refrigerator water line depends on observed issues and homeowner confidence. If any leak persists, fittings were corroded, a saddle valve was used, or the person who performed the job is uncertain about valve integrity, a licensed plumber should be called to verify the seal and replace compromised components.
Additionally, schedule pro inspection if water pressure fluctuations, unusual noises, or visible damage occur.
Recommended products and price ranges for DIY capping
A brief comparison of common cap types, their materials, and approximate costs helps homeowners choose an appropriate option for capping a refrigerator water line. The table below summarizes typical choices and price ranges to inform a DIY decision. This comparison focuses on practicality, durability, and budget considerations.
| Cap Type | Material | Approximate Cost |
|---|---|---|
| Compression cap | Brass or nickel-plated brass | $5–$15 |
| Push-fit cap | Plastic (Pex/Poly) or brass | $4–$12 |
| Threaded pipe cap | Brass or PVC | $3–$10 |
Comparison of common cap types, materials, and approximate costs
Choosing the right cap for a refrigerator water line depends on pipe type, access, and budget: common options include compression caps for copper, push-to-connect (quick-connect) caps for plastic or copper, threaded brass caps for exposed fittings, and plastic end caps for temporary or low-pressure closures. Typical costs: compression $5–15, push-fit $8–20, brass $6–25, plastic $2–8.
| Type | Typical Cost |
|---|---|
| Compression/Brass | $5–25 |
| Push-fit/Plastic | $2–20 |
Conclusion
When a homeowner caps a refrigerator water line, they follow the old adage “measure twice, cut once,” ensuring care and planning prevent leaks and waste. With proper tools, shutoff, and correct fitting—typically a compression cap on copper—DIYers can safely complete the job. They should respect local codes, watch for pressure and frost risks, and dispose of materials responsibly. If uncertain, a licensed plumber provides the safest, most reliable finish.
