How to Remove a Faucet Handle Without Screws: Quick Fixes and Step-by-Step Guide
To remove a faucet handle without visible screws, first shut off the water supply. Look for a snap-on cap at the top of the handle; use a flat tool to gently pry it off. Check for a recessed set-screw or retaining clip at the base. If the handle is stuck, apply penetrating oil and gentle heat. Pull the handle straight up while wiggling it, or use a rubber strap wrench to avoid damaging the finish. After removing the handle, proceed with the removal of the clip or cartridge, and follow up with reassembly instructions for your specific faucet model.
What to Do When a Faucet Handle Has No Visible Screws
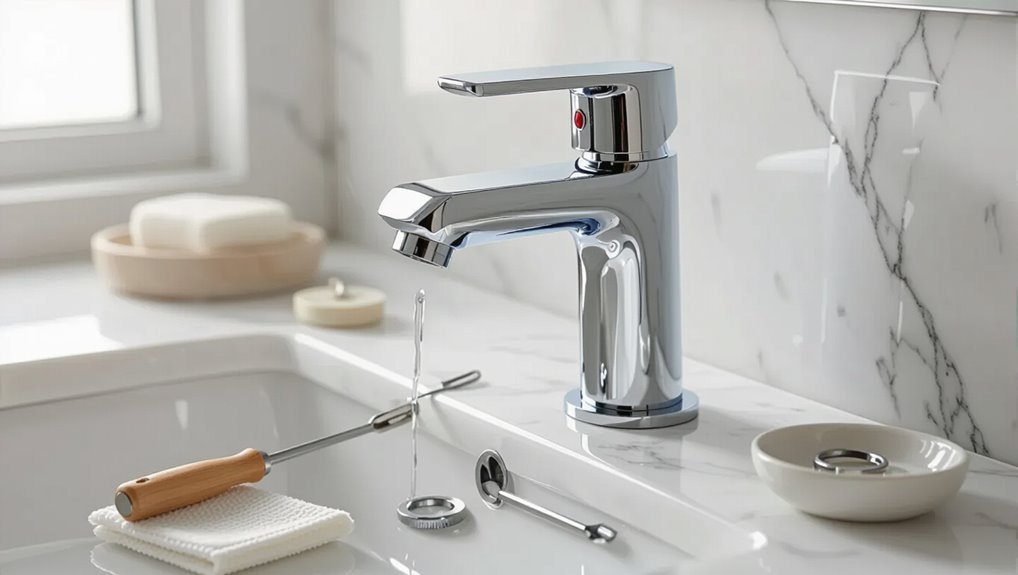
Some faucet handles hide fasteners beneath decorative caps, behind set screws, or are press-fit onto a splined stem, which is why no screws are immediately visible.
The first action is to inspect the handle for a removable cap or seam and gently pry it with a flat tool to reveal any hidden fastener.
If no cap appears, try pulling straight up on the handle while supporting the cartridge to check for a friction-fit.
Quick explanation of why some handles lack visible screws
Hidden fasteners or integrated mechanisms often conceal the screw that secures a faucet handle, giving it a smooth, uninterrupted appearance.
Manufacturers hide screws for aesthetics, corrosion protection, or to prevent tampering, using set screws under caps, press-fit splines, or retaining clips.
Recognizing these designs helps homeowners research how to remove faucet handle without screws and choose appropriate non-invasive removal techniques.
One-sentence immediate action to try first
Try gently prying off the decorative cap or cover at the top or back of the handle to reveal a set screw or access point.
If no cap exists, inspect around the base and under the handle for hidden clips, retaining rings, or a small hex screw; use a flat tool, flashlight, and magnifier.
Proceed slowly to avoid scratching or breaking finishes while testing for looseness.
Identify Your Faucet Type Before Starting
Before attempting removal, the reader should identify the faucet type—single-handle, two-handle, cartridge, ball, or ceramic disc—since each design often uses different attachment methods.
Mounting styles like set-screws, snap-on caps, hidden clips, or threaded stems determine the proper approach and tools. A quick inspection for a decorative cap, retaining clip, or recessed screw head will usually reveal which method secures the handle.
Common faucet handle designs (single-handle, two-handle, cartridge, ball, ceramic disc)
A quick visual assessment helps determine which of several common faucet handle designs is present: single-handle units that control both temperature and flow from one lever, two-handle setups with separate hot and cold controls, cartridge faucets that use a replaceable valve cartridge, ball-type faucets with a rounded rotating ball assembly, and ceramic-disc models that rely on sliding ceramic plates.
Recognizing design guides appropriate removal techniques and needed parts.
How mounting styles affect removal (set-screw, snap-on cap, hidden clip, threaded stem)
Recognizing the faucet type helps narrow likely mounting styles, which determine how the handle is secured and what tools or techniques are required. Different mounts—set-screw, snap-on cap, hidden clip, threaded stem—change removal steps and needed access.
| Mount style | Access point | Removal note |
|---|---|---|
| Set-screw | Side/bottom | Allen key |
| Snap-on cap | Top cover | Pry gently |
| Hidden clip | Base/slot | Clip tool |
How to tell if handle is decorative cap, retaining clip, or hidden screw
How can one quickly determine whether a faucet handle is held by a decorative cap, a retaining clip, or a hidden screw?
Inspect the handle for a removable cover or emblem (pop or pry gently).
Look beneath for a C-clip in a slot or groove near the cartridge.
Check for a small hex or Phillips recess under the cap or behind the handle base indicating a hidden screw.
Tools and Materials You May Need
A concise set of tools and materials can streamline removing a faucet handle without visible screws.
Basic hand tools like flathead and Phillips screwdrivers, hex/Allen keys, and a screwdriver set are often required, while specialty items such as a utility knife, slip-joint pliers, adjustable wrench, penetrating oil, and a rubber jar opener help with stubborn or sealed parts.
For safety and cleanup, keep a towel, bucket, masking tape, and gloves on hand.
Basic tools: flathead, Phillips, hex keys, Allen wrenches, screwdriver set
Several basic hand tools make handle removal straightforward: flathead and Phillips screwdrivers, a set of hex keys (Allen wrenches), and a compact screwdriver set with interchangeable bits.
These provide access to hidden fasteners, collar screws, and retainer plates. Choosing appropriate sizes prevents damage. A magnetic bit holder speeds work in tight spaces.
Keep tools organized and clean to guarantee efficient, safe removal.
Specialty tools: utility knife, slip-joint pliers, adjustable wrench, penetrating oil, rubber jar opener
Select a few specialty tools to handle stubborn, sealed, or awkward faucet handles that basic screwdrivers and Allen wrenches can’t address. A utility knife cuts seals, slip-joint pliers grip tight stems, an adjustable wrench adds torque, penetrating oil loosens corrosion, and a rubber jar opener improves grip for rounded knobs.
| Tool | Purpose | Tip |
|---|---|---|
| Utility knife | Cut seals | Score gently |
| Pliers | Grip | Adjust jaw |
| Penetrant | Loosen | Wait briefly |
Safety and protection: towel, bucket, masking tape, gloves
One towel, a small bucket, a strip of masking tape, and a pair of gloves form the basic safety kit for removing a faucet handle without screws.
The towel protects surfaces and catches drips; the bucket collects water or small parts.
Masking tape labels pieces or covers finishes to prevent scratches.
Gloves protect hands from grime and sharp edges during disassembly.
Step-by-Step Methods to Remove a No-Screw Faucet Handle
The following concise methods outline common ways to remove a no-screw faucet handle safely and efficiently.
- Pry off decorative cap to access hidden screw; turn-and-pull or twist-off handles; use an Allen key in a concealed recess.
- Remove a retaining clip with needle-nose pliers; apply penetrating oil and gentle heat to free stuck handles.
A reader can follow these steps in order or choose the method that matches the handle type.
Method 1 Pry off decorative cap and access hidden screw
Begin by locating the decorative cap at the center or base of the faucet handle and prying it off gently with a flathead screwdriver or plastic pry tool to reveal the hidden set screw beneath.
Once exposed, use the correct-sized Allen or Phillips driver to loosen the screw.
After loosening, lift the handle straight up; if stuck, rock gently side-to-side while pulling.
Method 2 Turn and pull: pull-up or twist-off handles with retaining friction
If removing a decorative cap did not reveal a set screw, many faucet handles rely on a friction fit and are removed by pulling up or twisting off.
Grasp the handle firmly, wiggle while pulling upward; apply steady force. For twist-off types, rotate counterclockwise; use penetrating oil if stiff.
Protect finishes with cloth and pry gently with a strap wrench or padded pliers if needed.
Method 3 Use an Allen key or hex wrench in concealed recess
Locate a small recessed hex socket beneath a decorative cap or along the handle base; many modern faucet handles hide an Allen set screw inside a narrow recess that secures the handle to the stem.
Select the correct-size Allen key, insert fully into the recess, then turn counterclockwise to loosen.
Once freed, pull the handle straight off. Keep parts safe for reassembly.
Method 4 Remove clip or C-clip retaining the handle (with needle-nose pliers)
Use needle-nose pliers to remove a retaining clip or C-clip that secures the handle to the faucet stem.
Inspect for a visible groove or small clip at the base, then grip the clip firmly and pull straight outward.
Work slowly to avoid bending or losing the clip.
Once removed, lift the handle off; keep the clip for reassembly or replace if damaged.
Method 5 Use penetrating oil and gentle heat to free stuck handles
Apply penetrating oil and gentle heat when a faucet handle is seized from mineral buildup or corrosion; this combination softens deposits and expands metal slightly to allow safe removal. Spray oil, wait, heat briefly with a hair dryer, then attempt rotation. Repeat if needed. Safety: ventilate, avoid open flame, protect finishes.
| Step | Action | Safety |
|---|---|---|
| 1 | Spray oil | Ventilate |
| 2 | Wait 10–15 min | Gloves |
| 3 | Heat briefly | No flame |
| 4 | Try rotation | Protect finish |
Method 6 Alternative grip techniques (rubber strap wrench, plumber’s tape, vice grips with protection)
After loosening mineral deposits with penetrating oil and heat, attention shifts to mechanical grip options that remove a seized screwless handle without damaging finishes.
A rubber strap wrench provides broad, nonmarring grip; plumber’s tape wrapped around the handle increases friction and protects chrome; padded vice grips clamp gently using cloth or leather padding.
Work slowly, alternating gentle torque and additional penetrating oil if needed.
Method 7 When handle is threaded: counterclockwise twist after securing trim
Loosen the trim to stabilize the assembly, then grasp the handle and rotate it counterclockwise—threaded faucet handles unscrew rather than pull straight off.
Maintain steady counter-torque on the trim with a strap wrench or adjustable spanner to prevent spinning. If resistance persists, apply penetrating lubricant, wait, then retry.
Once freed, lift straight up, inspect threads for damage, and clean before reinstalling.
Detailed Step Sequence for the Most Common Scenario (Hidden Retaining Clip)
For the common case where a hidden retaining clip secures the faucet handle, the sequence begins with shutting off the water and preparing the workspace.
Next, decorative caps are removed to expose the internals, the clip is located and carefully extracted, and the handle is lifted off the stem for inspection.
Finally, the handle is reassembled or replaced after any necessary repairs.
Step 1 Shut off water and prepare workspace
Shut off the water at the supply valves and relieve pressure by opening the faucet handles. Then close any nearby valves to isolate the fixture.
Place towels or a small bucket beneath to catch drips. Clear the area of personal items and lay out tools: needle-nose pliers, flashlight, flat pick, and gloves.
Wear eye protection and work with good lighting for visibility.
Step 2 Expose the handle internals by removing decorative pieces
Begin by locating and removing any visible decorative caps or covers on the handle to reveal the hidden retaining clip beneath; these caps often pry off at the seam with a flat pick or thin screwdriver and may be friction-fit or secured by a small snap.
Next, gently work around the cap’s edge, using a soft cloth to protect finishes, and set removed pieces aside in order.
Step 3 Locate and remove retaining clip or C-clip safely
Locate the retaining clip by inspecting the exposed handle bore just beneath the removed decorative cap; the clip is typically a small C-shaped metal piece seated in a circumferential groove on the cartridge stem or valve body.
Use needle-nose pliers or a flat pick to grasp one end, compress gently, and slide it out sideways into a magnetic tray.
Wear eye protection.
Step 4 Lift handle off the stem and inspect for damage
Gently lift the handle straight upward off the exposed stem, using steady, even pressure to avoid bending any parts; if it resists, rock it slightly back and forth while pulling to break any mineral bonds. The handle is set aside and examined for cracks, corrosion, or stripped splines. Note stem wear and residual debris; document condition before proceeding.
| Item | Observation |
|---|---|
| Handle integrity | Check for cracks |
| Splines | Inspect for wear |
| Corrosion | Surface oxidation |
| Debris | Mineral buildup |
| Stem wear | Scoring or deformation |
Step 5 Reassemble or replace handle after work
With the work completed and the stem clean, the technician prepares to reinstall a handle that was secured by a hidden retaining clip by first confirming clip integrity and orientation.
They slide the clip onto the stem groove, align the handle, and press firmly until the clip seats.
Operation is tested for smooth rotation and leak-free function; damaged handles or clips are replaced as needed.
What to Do if the Handle Is Stuck or Corroded
Signs such as white or green crust, difficulty turning, or visible pitting indicate corrosion or mineral buildup.
The writer then recommends safely applying a penetrating oil, using heat, rubber grips, or gentle taps to free the handle while protecting the finish.
If those methods fail, guidance follows for carefully cutting off the handle and minimizing damage to the faucet.
Signs of corrosion or mineral buildup
Minerals and corrosion often reveal themselves as white crusting, greenish tarnish, or a gritty film around the handle base and stem, and these deposits can seize moving parts over time. Visual cues include pitting, discoloration, stiffness, and flaking. Regular inspection prevents seizure.
| Sign | Appearance |
|---|---|
| Mineral crust | White, chalky |
| Tarnish | Greenish, dull |
| Pitting | Small holes |
| Grit | Sandlike film |
How to apply penetrating oil safely
Apply penetrating oil carefully to free a stuck or corroded faucet handle, focusing on the stem and the seam where the handle meets the base.
Protect surrounding finishes and cartridges with cloth or tape.
Apply oil sparingly, let it penetrate per product instructions, then work the handle gently to distribute.
Wipe excess oil, ventilate the area, and discard contaminated rags safely.
Using heat, rubber grips, and gentle tapping without damaging finish
After treating the joint with penetrating oil and allowing time for it to work, proceed with heat, rubber grips, and light tapping to coax a stubborn handle free without harming the finish.
Apply gentle localized heat (hairdryer, not torch), protect surfaces with a rubber jar opener or strap wrench, and deliver soft taps with a wooden dowel and hammer.
Reapply oil if movement starts but remains tight.
When to cut off a handle and how to minimize damage
Decide to cut off a handle only when all non-destructive methods—penetrating oil, heat, protective grips, and gentle tapping—have been exhausted and the part remains immovable or visibly corroded.
Use cutting tools that minimize vibration and heat transfer, protect surrounding finish with tape and metal shields, and cut near the base to preserve the valve.
Plan for replacement and clean remaining corrosion before installing a new handle.
How to Handle Specific Brands and Models
Common approaches for Delta, Moen, Kohler, and American Standard faucets are summarized to highlight typical set screws, cartridge-retaining caps, and hidden fasteners.
Readers are encouraged to locate model-specific diagrams and part numbers on manufacturer websites or in installation manuals before attempting removal.
When diagrams are unclear or parts appear damaged, contacting manufacturer support or an authorized service center is recommended.
Common approaches for Delta, Moen, Kohler, American Standard
When tackling faucets from major manufacturers like Delta, Moen, Kohler, and American Standard, the process typically centers on locating concealed fasteners, using model-specific trim removal techniques, and recognizing common cartridge or set-screw placements so the handle can be freed without visible screws.
Delta often uses spring clips; Moen may hide a retaining clip under the spout.
Kohler and American Standard commonly employ hidden set screws or snap-on caps requiring gentle prying.
How to find model-specific diagrams and part numbers
Having identified likely fastener types for Delta, Moen, Kohler, and American Standard, the next step is to locate model-specific diagrams and part numbers to confirm removal steps and replacement parts.
Search manufacturer sites by model name or finish, check underside or cartridge stamping, consult parts exploded views, use retailer PDFs, and photograph markings.
Cross-reference OEM part numbers with aftermarket equivalents before ordering.
When to contact manufacturer support
Why contact manufacturer support at all?
Manufacturer support can confirm model identification, provide official diagrams, and advise on proprietary removal methods or required tools.
Contact when instructions are unclear, parts are obsolete, or warranty concerns exist. Provide serial/model numbers and photos.
Expect specific torque limits, safety cautions, and authorized service recommendations to avoid damage and preserve warranty coverage.
When to Replace Rather Than Repair
The decision to replace rather than repair hinges on comparing the cost and effort of fixing a handle against buying and installing a new one.
Persistent leaks, stripped splines, or frequent stiffness indicate the cartridge or valve itself may need replacement instead of just the handle.
When replacing, selecting a compatible handle requires matching the faucet type, spline pattern, and finish to guarantee proper fit and appearance.
Cost and effort comparison: repair vs handle replacement
When weighing whether to repair a stubborn faucet handle or replace it entirely, homeowners should compare both upfront costs and the time or skill required. Minor issues like a loose set screw or a worn O-ring often justify a quick repair, while corroded spindle assemblies, stripped splines, or discontinued parts usually point toward replacement.
Repairs are cheaper and quicker; replacement adds parts cost and installation time but guarantees long-term reliability.
Signs you should replace the whole cartridge or valve
Consider replacing the entire cartridge or valve if persistent leaks, rough or restricted operation, inconsistent water temperature, or visible corrosion and mineral buildup remain after basic maintenance.
Replacement is warranted when seals or ports are eroded, intermittent flow persists despite cleaning, or internal components fracture.
Recurring repairs, poor responsiveness, and evidence of internal wear indicate replacement yields better reliability and long-term cost savings.
How to choose a compatible replacement handle
Many homeowners will find replacement preferable when a handle shows persistent wear, broken fastening features, or an incompatible design that prevents a secure fit.
Select a replacement by matching manufacturer, model, spline count or D-shaft dimensions, and mounting type. Confirm finish and clearance for operation.
Verify compatibility with existing trim and cartridge, and prefer OEM or reputable aftermarket parts to guarantee fit, function, and durability.
Preventing Future Problems
Routine maintenance helps prevent corrosion and seized handles by addressing mineral buildup and wear before problems start.
Appropriate cleaning agents used at regular intervals, combined with light lubrication of moving parts, greatly reduce the chance of future difficulty.
Simple protective measures—such as descaling, using nonabrasive cleaners, and applying plumber’s grease to fittings—extend service life and ease future removal.
Routine maintenance to prevent corrosion and stuck handles
Preventive maintenance keeps faucet handles turning freely and minimizes the chance of corrosion that leads to stuck parts.
Regular inspection, gentle lubrication of moving joints with plumber-approved grease, and prompt replacement of worn O-rings or seals reduce metal-on-metal wear.
Draining outdoor fixtures before freeze, avoiding harsh tools during adjustments, and documenting service dates extend lifespan and prevent emergency removals.
Best cleaning agents and frequency
After regular inspections and lubrication, selecting the right cleaners and an appropriate schedule keeps faucets functional and prevents buildup that leads to stuck handles.
Mild dish soap and diluted white vinegar remove grime and mineral deposits; nonabrasive cleaners protect finishes.
Clean high-use faucets weekly, sink fixtures monthly, and heavily mineralized areas every two weeks.
Rinse thoroughly and dry to prevent residue and spotting.
Lubrication and protective measures
Apply a light, water-resistant lubricant to moving parts and protective coatings to exposed metal to reduce friction and shield finishes from mineral buildup and corrosion. Regularly inspect seals and reapply lubricant after cleaning. Use compatible products to avoid damage and wipe excess to prevent attracting grit.
| Item | Action |
|---|---|
| Seals | Inspect, lubricate |
| Finish | Coat, wipe excess |
Troubleshooting Common Problems and Mistakes
The following common errors and quick fixes help salvaged jobs and prevent repeat issues.
- Using excessive force — consequences and recovery steps.
- Wrong tool choice — identification and correction.
- Lost small parts and damaged finish — replacement options and cosmetic fixes.
Mistake: Using excessive force consequences and how to recover
Forcing a stuck faucet handle can strip components, crack cartridges, or damage the valve seat, turning a minor removal into a costly repair. Recovery involves stopping, evaluating damage, using penetrating lubricant, and applying heat or gentle leverage. If seals or cartridges are harmed, replace them or call a professional.
| Damage | Immediate Fix | When to Call |
|---|---|---|
| Stripped splines | Lubricate, use extraction tool | Persistent play or leaks |
| Cracked cartridge | Replace cartridge | Visible cracks, leaking |
Mistake: Wrong tool choice identification and correction
After stopping and evaluating damage from excessive force, attention should turn to selecting the correct tool—using the wrong one often causes stripped screws, marred finishes, or rounded fasteners that complicate removal.
Identify the fastener type and size, switch to properly sized screwdrivers, hex keys, or specialty extractors, protect surfaces with tape or cloth, and progress gently to prevent further damage and ease removal.
Problem: Lost small parts (clips, screws) replacement options
When small retaining clips, set screws, or decorative caps go missing during faucet disassembly, reassembly stalls unless suitable replacements are found; luckily, a range of straightforward options exists.
The homeowner can source OEM parts by model, use universal repair kits with various clips and screws, visit hardware stores for matching fasteners, or salvage compatible pieces from inexpensive replacement cartridges to restore function securely.
Problem: Damaged finish quick cosmetic fixes
Missing hardware isn’t the only setback during faucet work; scraped, tarnished, or chipped finishes are a common cosmetic issue that can occur while handles are off or during attempts to force-fit parts.
Quick fixes include gentle buffing with nonabrasive pads, applying touch-up paint or repair pens matched to the finish, and using metal polish for minor tarnish.
Seal repairs with clear lacquer for durability.
Checklist and Quick Reference for Removing a No-Screw Faucet Handle
A concise checklist and quick-reference sheet help guarantee a smooth removal of a no-screw faucet handle.
Follow this compact numeric guide for preparation and field use:
- Pre-removal checklist: tools, shut-off, protective cloth.
- Quick cheat-sheet: release, lift, test for movement.
- Safety and reassembly notes: parts order, torque reminders.
Pre-removal checklist
Before starting, gather essential tools and clear the work area so the task proceeds efficiently and safely.
Confirm water supply is shut off, depressurize lines, and protect surfaces with towels.
Identify handle type and inspect for hidden caps or set screws.
Prepare soft-jaw pliers, rubber strap wrench, flashlight, and lubricant.
Keep a container for small parts and a phone for reference photos.
Step-by-step quick cheat-sheet for field use
Begin with a concise checklist on hand: water shut off and bled, area protected, tools ready (soft-jaw pliers, rubber strap wrench, flashlight, lubricant), parts container and phone for photos.
Inspect handle type. Apply lubricant, try twist-pull. Use rubber strap wrench for grip; soft-jaw pliers for stubborn parts.
Pry gently at cap seam. Photograph and store removed parts.
Test operation; reassemble or replace.
When to Call a Professional and What to Expect
If handle removal becomes obstructed by corroded parts, visible leaks, or unfamiliar internal damage, a licensed plumber should be contacted.
A pro will typically inspect the faucet, remove and replace damaged components or the cartridge, and provide a cost estimate that can range from a modest service call fee to higher charges for parts and extensive repairs.
Before hiring, one should ask about licensing, an estimated total price, warranty on work, and an expected timeline.
Signs the job requires a plumber
Recognize when a faucet handle removal goes beyond a homeowner’s tools and experience: persistent leaks after attempted fixes, seized or corroded components that resist removal, visible damage to valve stems or supply lines, or unknown or complex faucet types that conceal fasteners.
Call a licensed plumber if water supply issues, internal cartridge damage, hidden mounting hardware, or risk of worsening damage exists; prioritize safety and avoiding costly mistakes.
Typical service steps and estimated costs
When a homeowner opts to call a professional for a faucet handle that lacks visible screws, the technician typically follows a concise sequence: shut off the water, isolate and remove any decorative caps or trim, apply penetrating lubricant and heat to free seized components, extract the hidden retaining clip or set screw using specialty tools, inspect the cartridge or valve stem for damage, replace worn parts or the entire cartridge as needed, reassemble the handle, and test for proper operation and leaks.
Typical service visits range from $75–$200 for labor plus parts; cartridge replacement often totals $100–$300 depending on model and complexity.
Questions to ask a plumber before hiring
Why hire a plumber, and what should a homeowner ask before scheduling service?
A homeowner should verify license, insurance, and written estimates.
Ask about diagnosis fees, hourly versus flat rates, parts guarantees, repair warranties, expected timeline, and whether replacements match existing fixtures.
Request references or reviews and clarify payment methods.
Clear communication prevents surprises and guarantees professional, documented work.
Conclusion
Calmly conclude: careful consideration clears confusion. Before beginning, the homeowner identifies faucet family, gathers gadgets, and grinds through gentle guidance. With steady sight and subtle strength, stubborn stems surrender — clips click, collars coax, cartridges come clean. Preventive polish preserves performance, patience prevents panic. If problems persist, professionals proficiently proceed. Ultimately, smart steps save stress, supplying smooth, satisfying service and sustaining seamless stream, season after season.