How to Soundproof Plumbing Pipes: Simple DIY Fixes to Stop Noisy Pipes
To effectively soundproof noisy plumbing pipes, start by identifying common causes such as water hammer, loose straps, turbulent flow, and thermal expansion. A straightforward DIY solution involves shutting off the water supply, tightening loose hangers, and applying foam or rubber padding at contact points. Installing foam insulation sleeves and using vibration-damping tape or cushioned clamps can further reduce noise. For persistent hammering, consider adding arrestors or adjusting water pressure. Enclosed runs can benefit from mineral wool and isolation clips. If noise continues, explore targeted fixes and advanced options outlined in the guide below for more stubborn issues.
Why Plumbing Pipes Make Noise and When to Worry
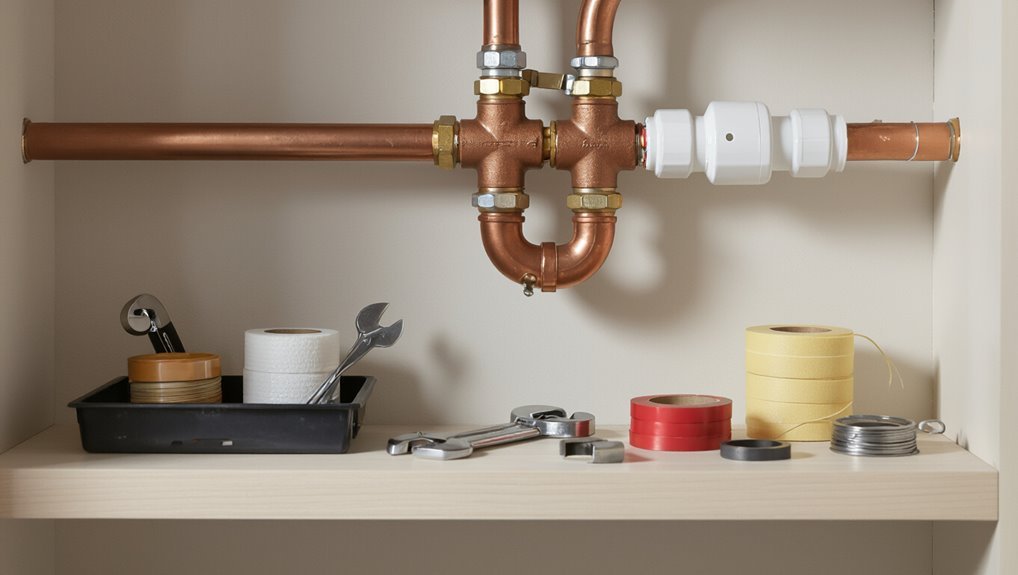
Plumbing pipes produce a range of sounds—knocking, banging, rattling, and humming—each often pointing to a different source.
Typical causes include water hammer, loose mounting straps, turbulent flow, and thermal expansion of materials.
Persistent, worsening, or vibration-transmitting noises that coincide with leaks, visible movement, or structural damage suggest a plumbing or building concern requiring inspection.
Common pipe noises explained (knocking, banging, rattling, humming)
Household pipes produce distinct sounds—knocking, banging, rattling, and humming—that each point to different causes and levels of urgency.
Knocking often signals intermittent impact; banging is more forceful and sudden; rattling implies loose components; humming suggests vibration at steady flow.
Understanding these helps prioritize repairs and informs how to soundproof plumbing pipes effectively, reducing disturbance without unnecessary expense.
Causes of noisy pipes (water hammer, loose straps, flow turbulence, thermal expansion)
Noise arises from a few predictable mechanical causes: water hammer (sudden pressure surges when flow stops), loose straps or supports that allow pipes to strike framing, turbulent flow through partially closed valves or narrowed sections, and thermal expansion of hot pipes rubbing against building materials.
Each mechanism transmits vibration into structure or air; identifying the source guides targeted fixes like arrestors, tightened supports, smoothing flow, or cushioning contact.
Signs a noise indicates a plumbing or structural problem
After identifying common causes—water hammer, loose supports, turbulent flow, and thermal expansion—the next question is whether a given sound signals a mechanical issue that requires repair.
Persistent pounding, rhythmic knocking after valves close, grinding or metallic screeches, sudden loud bangs, or new noises following renovations usually indicate malfunction.
Accompanying leaks, visible movement, reduced water pressure, or wall vibrations warrant prompt inspection and professional repair.
Quick Fixes You Can Do Right Now to Reduce Pipe Noise
Before starting any work, the water should be shut off and basic safety checks completed to prevent accidents.
Simple steps such as tightening loose straps and hangers, adding foam or rubber padding at contact points, and securing valves and fixtures can immediately reduce rattles and vibration.
After making these adjustments, testing and, if needed, adjusting the water pressure will confirm whether the noise has been resolved.
Turn off water and basic safety checks
Shut off the main water supply and perform a quick safety check before touching any pipework: confirm all fixtures are closed, drain residual water by opening taps, and locate the shutoff valves for affected sections.
Inspect visible pipes for corrosion, leaks, or pressure relief devices. Wear gloves and eye protection. Keep electrical switches dry.
Note valve positions and appliance isolation points for safe reactivation.
Tighten loose pipe straps and hangers
Tightening loose pipe straps and hangers is a fast, effective way to reduce rattling and vibration transmitted through a building.
Inspect visible supports, then use a screwdriver or wrench to snug screws and bolts without over-tightening. Replace corroded or broken straps.
Verify hangers are spaced per pipe size to limit movement. Recheck after running water to confirm noise reduction and secure fit.
Add padding to contact points with foam or rubber
One simple, immediate step is to cushion any spot where a pipe rubs against framing, clamps, or other surfaces using foam or rubber pads.
Cut strips or adhesive-backed pads to fit, wrap around pipes at contact points, and secure with zip ties or tape.
Padding dampens vibration, prevents metal-on-wood noise, and is inexpensive and reversible for quick, effective noise reduction.
Adjust water pressure and test results
After cushioning contact points, attention can turn to water pressure, a common and adjustable source of pipe noise.
Reduce pressure at the main regulator in small increments, then run faucets to listen for change. Note pressure with a gauge before and after adjustments.
Lowering pressure often stops hammering and vibration; document results to find the lowest acceptable setting without compromising flow.
Secure valves and fixtures to eliminate vibration
Check valves, shutoffs, faucets, and exposed fixture mounts for looseness and secure any that move to reduce transmitted vibration.
Tightening packing nuts, mounting screws, and bracket bolts stops rattles.
Add foam tape or rubber washers between metal contacts, replace worn hangers, and use pipe straps with rubber inserts.
Recheck after use; addressing small loose fittings often eliminates persistent humming and knocking.
Step-by-Step How to Soundproof Exposed Pipes
The section outlines a concise, practical workflow for soundproofing exposed plumbing, beginning with a tools and materials checklist and surface preparation with accurate measurements for insulation.
It then covers installing foam pipe sleeves, wrapping with acoustic pipe wrap or mass-loaded vinyl, and finishing with vibration-damping tape and secure clamps.
Each step emphasizes correct fit and secure fastening to maximize noise reduction.
Tools and materials checklist
A compact list of essential tools and materials helps guarantee the soundproofing job proceeds efficiently and safely.
Required items include pipe insulation (foam or rubber), acoustic sealant, and mounting tape or clamps.
Recommended tools: utility knife, measuring tape, and caulk gun.
Safety gear like gloves and eye protection is advised. Proper selection minimizes noise and prevents damage during installation.
- Pipe insulation
- Acoustic sealant
- Mounting tape/clamps
Preparing pipe surface and measuring for insulation
Begin by shutting off water to the section being worked on and allowing pipes to cool before touching them; this prevents injury and guarantees measurement accuracy.
Wipe pipes clean of dirt, oil, and corrosion with a rag and mild cleaner. Remove loose paint or scale with a scraper.
Measure pipe length and diameter precisely, noting bends and valves, and record measurements for insulation ordering.
Installing foam pipe insulation sleeves
Slide pre-cut foam sleeves over the cleaned, measured pipe runs, aligning their factory seams toward the floor to minimize seam exposure to room air.
Butt sleeve ends tightly at joints and valves, cutting pieces for bends. Secure with foil tape or plastic zip ties spaced every foot.
Inspect for gaps, compress foam slightly around fittings, and trim excess for a snug, continuous thermal and noise-dampening layer.
Wrapping pipes with acoustic pipe wrap or mass-loaded vinyl
Wrap exposed pipes with acoustic pipe wrap or mass-loaded vinyl (MLV) to add dense, flexible mass that reduces structure-borne and airborne noise transmission.
Measure length, cut to fit, then wrap tightly with overlap. Secure edges with acoustic tape or zip ties, ensuring joints are continuous.
For bends, conform material smoothly to avoid gaps. Trim excess and seal seams for best performance.
Applying vibration-damping tape and clamps
After covering pipes with acoustic wrap or MLV to add mass, the next step is to address vibration at the source by applying damping tape and installing cushioned clamps.
Apply self-adhesive viscoelastic tape along straight runs and elbows, smoothing bubbles.
Replace metal clamps with rubber-lined or neoprene cushioned clamps, spacing supports every 3–4 feet.
Tighten gently to prevent squeeze-induced noise and allow thermal expansion.
Re-testing and troubleshooting after installation
Once the insulation, damping tape, and cushioned clamps are in place, the installer begins systematic re-testing to confirm noise reduction and pinpoint remaining issues.
They run water at varied pressures, listen for residual knocks, and use a simple smartphone decibel app to compare before-and-after levels.
Any persistent vibrations are traced to anchors, unsupported runs, or valve rattles and addressed with added padding or tightening.
Soundproofing Pipes Behind Walls or Ceilings
When pipes run inside walls or ceilings, careful planning is required to locate runs and safe access points before any work begins.
Options for access include installing removable access panels or selectively opening drywall to reach enclosed sections for insulation with mineral wool or fiberglass.
Effective isolation combines decoupling methods such as resilient channels or isolation clips with properly sealed penetrations using acoustic sealant and gaskets.
Identifying pipe runs and access points safely
Locate pipe runs and access points methodically before any opening is made in a wall or ceiling: tracing fixtures, listening for water movement, and consulting building plans reveal likely routes and junctions.
Use noninvasive tools—stud finders, pipe locators, and moisture meters—to confirm positions.
Mark access points, note nearby wiring or vents, and plan cuts to minimize damage while preserving structural members and firestops.
Using access panels versus opening drywall
After mapping pipe runs and marking safe access points, the next decision is whether to install removable access panels or cut drywall for direct work.
Access panels preserve finishes, allow repeated inspection, and simplify future repairs but require precise placement.
Cutting drywall grants full workspace for clamps, saddles, and sealants yet increases patching.
Choose based on frequency of access, skill with repairs, and budget.
Insulating enclosed pipes with mineral wool or fiberglass
Insulating enclosed plumbing with mineral wool or fiberglass reduces airborne and structure-borne noise by adding mass and decoupling pipe vibrations from surrounding framing.
Install snug batt or loose-fill material around pipes inside wall cavities, ensuring full coverage without compressing insulation.
Seal gaps with acoustic caulk at penetrations.
Maintain access to valves.
Use fire-rated products where required and follow local building codes for safe installation.
Decoupling techniques: resilient channels and isolation clips
Decouple noisy pipes from surrounding drywall or ceiling assemblies by installing resilient channels or isolation clips, which interrupt the direct vibration path and greatly reduce structure-borne sound transfer.
Resilient channels mount perpendicular to framing; drywall screws attach to channels, not studs.
Isolation clips pair with hat channels for stronger decoupling.
Both methods require proper spacing and secure pipe supports to prevent contact that would bypass the isolation.
Sealing penetrations: acoustic sealant and gaskets
Seal openings around pipes with acoustic sealant and purpose-made gaskets to block airborne sound and prevent flanking paths through gaps in walls or ceilings.
Apply a continuous bead where pipe meets framing, box, or drywall; compress foam gaskets for a tight fit.
Use fire‑rated sealant where required and avoid rigid fillers that transmit vibration.
Inspect and reapply as settling occurs to maintain performance.
Solutions for Specific Noise Problems
Specific noise problems call for targeted fixes: water hammer is addressed with air chambers, hammer arrestors, or pressure-reducing valves.
Flow noise in narrow or corroded pipes often requires pipe replacement or flow-smoothing fittings.
Thermal expansion and contraction in hot water lines can be reduced with expansion loops, insulating sleeves, or flexible connectors.
Garbage disposal and appliance plumbing are quieted by anti-vibration mounts, soundproofing wraps, and properly sized trap and drain fittings.
Eliminating water hammer (air chambers, hammer arrestors, pressure-reducing valve)
Addressing water hammer focuses on stopping the sudden pressure surge and banging that occur when valves or faucets close quickly.
Install or recharge air chambers where accessible, fit mechanical hammer arrestors for reliable cushion, and consider a pressure-reducing valve to lower system pressure and reduce shock.
Guarantee secure pipe supports and test after changes to confirm elimination of knocking and prolonged vibrations.
Reducing flow noise in narrow or corroded pipes
Many common flow noises stem from constricted or degraded pipe interiors that increase turbulence and vibration.
Addressing this, inspect for corrosion, mineral buildup, or narrowed sections. Where feasible, flush lines, use descaling agents, or replace severely corroded segments with smoother materials (PEX or copper).
Install flow restrictor adjustments sparingly and consider professional reaming or relining for persistent noise and flow issues.
Stopping expansion/contraction noises in hot water lines
Several common thumps, creaks, and ticking in hot water lines result from thermal expansion and contraction as pipes heat and cool.
Addressing this involves adding pipe insulation to damp vibration, installing cushioned pipe clips or rubber-lined brackets at supports, and creating expansion loops or flexible connectors where space permits.
Confirm secure, evenly spaced supports and replace worn hangers to prevent metal-on-metal noise and movement.
Quieting garbage disposal and appliance plumbing
After treating thermal expansion in hot water lines, attention shifts to noise originating at fixtures and appliances, where different causes and fixes apply.
Garbage disposals vibrate—tighten mounting bolts, replace worn anti-vibration mounts, and insulate surrounding cabinet surfaces.
Dishwashers and washing machines benefit from flexible braided hoses, secure clamps, isolated mounting pads, and adding rubber or foam between appliances and cabinetry to reduce transmitted noise.
Materials and Products Comparison for Pipe Soundproofing
A brief comparison highlights which materials and products best address airborne and structure-borne pipe noise. Foam insulation, mineral wool, and acoustic wrap offer varying levels of absorption and ease of installation, while vibration pads, isolation clamps, and anti-vibration tape reduce mechanical transfer. Soundproofing sealants and gaskets close gaps to prevent flanking paths.
| Product Type | Typical Use |
|---|---|
| Foam vs. Mineral Wool vs. Acoustic Wrap | Absorption vs. thermal properties and fit |
| Vibration Pads / Clamps / Anti-vibration Tape | Mechanical isolation and dampening |
| Sealants & Gaskets | Sealing joints and preventing flanking noise |
Foam insulation vs. mineral wool vs. acoustic wrap
When choosing between foam insulation, mineral wool, and specialized acoustic wrap for pipe soundproofing, the decision hinges on balancing noise reduction, moisture resistance, fire performance, and ease of installation.
Foam is lightweight, moisture-resistant, and easy to fit but offers limited acoustic damping.
Mineral wool provides superior sound absorption and fire resistance but can retain moisture.
Acoustic wrap combines dense damping and flexibility for targeted noise control.
Vibration pads, clamps, and anti-vibration tape
Isolate mechanical vibration at its source by using vibration pads, resilient clamps, and anti-vibration tape, each of which interrupts energy transfer from pipes to structural elements in distinct ways.
Vibration pads cushion mounts under pumps or fixtures; resilient clamps decouple piping at support points; anti-vibration tape dampens pipe surface resonances and reduces metal-on-bracket noise.
Choose materials rated for load, temperature, and moisture.
Soundproofing sealants and gaskets
Compare sealants and gaskets by function and material to determine which best blocks airborne and structure-borne noise at pipe penetrations, joints, and hanger interfaces.
Sealants: acoustic caulk and polyurethane fill gaps, remain flexible, and dampen vibration.
Gaskets: neoprene, EPDM, and rubber isolators cushion hangers and joints, preventing metal-to-metal contact.
Choose based on temperature, chemical exposure, and expected movement.
When to Call a Professional Plumber or Contractor
When sound issues involve safety, building-code concerns, or complex repairs such as leaks, corrosion, or access to concealed piping, a licensed plumber or contractor should be engaged.
Persistent structural noises or problems that resist standard DIY treatments also warrant professional assessment.
Homeowners should ask about diagnostic steps, proposed remedies, timelines, and written cost estimates including permits and labor.
Safety or code issues and complex repairs
Although many DIY soundproofing measures are straightforward, certain situations raise safety, code, or liability concerns that require a licensed professional; examples include working on pressurized water lines, gas pipes, sewer vents, structural penetrations, or systems within fire-rated assemblies.
A qualified plumber or contractor guarantees code compliance, proper permits, tested repairs, and safe material selection, preventing hazards, insurance issues, and costly rework.
Structural or persistent noise that DIY won’t fix
If noise persists despite standard soundproofing—or if vibrations seem tied to the building’s structure—professional assessment is warranted.
A plumber or contractor can identify issues beyond DIY scope: loose main lines, water hammering within concealed stacks, improper pipe support, or structural resonance.
They diagnose routing, mounting, and pressure problems, recommend engineered fixes, and prevent collateral damage that amateur attempts might worsen.
What to ask a pro and expected costs
Where should inquiries begin and which issues justify a service call?
A homeowner should describe symptoms, location, and prior DIY attempts, then request an inspection and written estimate. Expected costs vary by complexity.
- Inspection and diagnosis: $100–$300
- Pipe isolation or rerouting: $400–$1,500
- Soundproofing or structural repairs: $200–$2,500
Maintenance and Prevention to Keep Pipes Quiet
Regular inspections and prompt tightening or replacement of loose fittings help prevent rattles and water hammer before they escalate.
Seasonal checks should target expansion noise and inspect insulation for wear or displacement.
During new installations, proper mounting, adequate pipe spacing, and quality insulation minimize future noise issues.
Regular inspections and fast fixes for loose fittings
Because even small shifts can amplify into noticeable rattles, routine inspections for loose fittings are essential to keep plumbing quiet and reliable.
Technicians or homeowners should check clamps, hangers, and connections for movement, tightening screws or replacing degraded clips.
Quick fixes—adding rubber pads, re-securing straps, or swapping worn mounts—prevent vibration transfer and avert more extensive repairs by stopping noise sources early.
Seasonal checks for expansion noise and insulation wear
After tightening loose fittings and replacing worn mounts, attention should shift to seasonal factors that cause pipes to expand, contract, and wear through insulation.
Inspect insulation for compression, gaps, or moisture after temperature swings.
Check clearance where pipes pass joists and walls for rubbing.
Replace degraded foam or wrap with weather-resistant insulation and add cushioning sleeves at contact points to reduce recurring expansion noise.
Tips for new installations to minimize future noise
Plan new plumbing runs with noise control in mind: choose pipe materials and layouts that minimize water hammer and expansion movement, maintain generous clearances where pipes cross framing, and specify resilient hangers, cushioned sleeves, and durable insulation so the system remains quiet with minimal future maintenance.
Include accessible isolation valves, proper slope to prevent trapped air, and label lines for easy inspection; prioritize acoustic-rated assemblies.
Cost Estimates and DIY vs Professional Trade-offs
Typical material costs for common soundproofing methods such as insulation, acoustic foam, and pipe wraps are outlined to help compare options.
Time and labor differences between DIY installation and hiring a professional are summarized with rough cost ranges and task durations.
Long-term value is considered by weighing durability, maintenance needs, and when professional workmanship may justify higher upfront expense.
Typical material costs for common soundproofing methods
Cost estimates for common pipe soundproofing methods vary by material choice, project scale, and whether the work is done DIY or by a professional.
Typical costs:
- pipe wrap foam $1–3 per foot;
- mass-loaded vinyl $2–6 per square foot;
- rubber isolation mounts $5–15 each;
- acoustic sealant $6–12 per tube;
- fiberglass or mineral wool $0.50–2 per square foot.
Small DIY kits run $20–100.
Labor costs and time estimates for DIY projects versus hiring out
Weighing time and labor is essential when deciding between a DIY approach and hiring a professional for pipe soundproofing.
DIY saves labor charges but requires evenings or weekends, basic tools, and 2–8 hours depending on scope.
Professionals charge hourly or flat rates—typically higher—but finish faster and guarantee work.
Homeowner skill, project complexity, and urgency determine the most cost-effective choice.
Long-term value and durability considerations
Longevity is often the decisive factor when comparing DIY pipe soundproofing to professional work: materials, installation quality, and workmanship together determine whether savings now become expenses later.
Professionals typically use higher-grade insulation, resilient mounts, and sealed joints that resist moisture and settling, reducing recurrence.
DIY can suffice for temporary fixes but may require sooner replacement, raising lifecycle cost and reliability concerns.
Step-by-Step Troubleshooting Flowchart for Noisy Pipes
The article presents a concise troubleshooting flowchart to address noisy pipes, beginning with listening carefully to localize the sound.
It recommends quick checks to rule out common causes such as loose straps, water hammer, or debris.
If those steps fail, the flowchart guides the reader through an escalation path from DIY fixes to in-wall solutions and, if needed, professional help.
Listen and localize the noise
Begin by quietly isolating the area and listening at several likely access points—near shutoff valves, under sinks, at exposed supply and drain runs, and in utility spaces—while noting whether the sound is continuous, intermittent, or tied to specific fixtures.
Move systematically along the line, marking loudest spots, distinguishing vibrational rattles from water flow or hammering, and record times and conditions for later diagnosis.
Quick checks to rule out common causes
Once obvious sources have been identified by listening and tracing, proceed with a short, systematic checklist to rule out the most common causes of noisy pipes.
Check fixtures for loose parts, verify shutoff valves are fully open, inspect visible pipe straps and hangers for wear or gaps, feel for vibration during flow, test water pressure at a hose bib, and listen again while isolating sections.
Escalation path: DIY fixes → in-wall solutions → professional help
One clear escalation path helps prioritize interventions: start with simple, low-cost DIY fixes, move to targeted in-wall solutions if external measures fail, and call a licensed professional for complex or high-risk issues.
The flowchart guides decision-making and risk assessment:
- Seal, insulate, and clamp exposed pipes.
- Open walls for foam/insulation and pipe relocation.
- Hire plumber or contractor for repair, replacement, or code issues.
Conclusion
In the end, the guide leaves the reader with practical tools to quiet noisy pipes, showing that many problems yield to simple fixes while others require professional hands. Like a careful gardener pruning to restore calm, homeowners can tend exposed lines, insulate behind walls, and perform routine maintenance to prevent future racket. Armed with cost estimates and a troubleshooting path, they can decide when to act themselves and when to call an expert to guarantee lasting silence.