How to Insulate Sump Pump Discharge Pipe to Prevent Freezing and Reduce Noise
To prevent freezing and reduce noise in your sump pump discharge pipe, insulate exposed PVC or polyethylene lines with closed-cell foam sleeves and apply waterproof heat tape designed for wet locations. Ensure the pipe has a slight downhill slope and secure it with neoprene isolation clamps to minimize vibration. Carefully wrap joints and valves, and protect the insulation with weatherproof cladding. Conduct monthly pre-winter checks to avoid failures. For detailed guidance, including materials, step-by-step installation, noise reduction methods, and costs, further resources are available.
Why sump pump discharge pipes freeze and why it matters
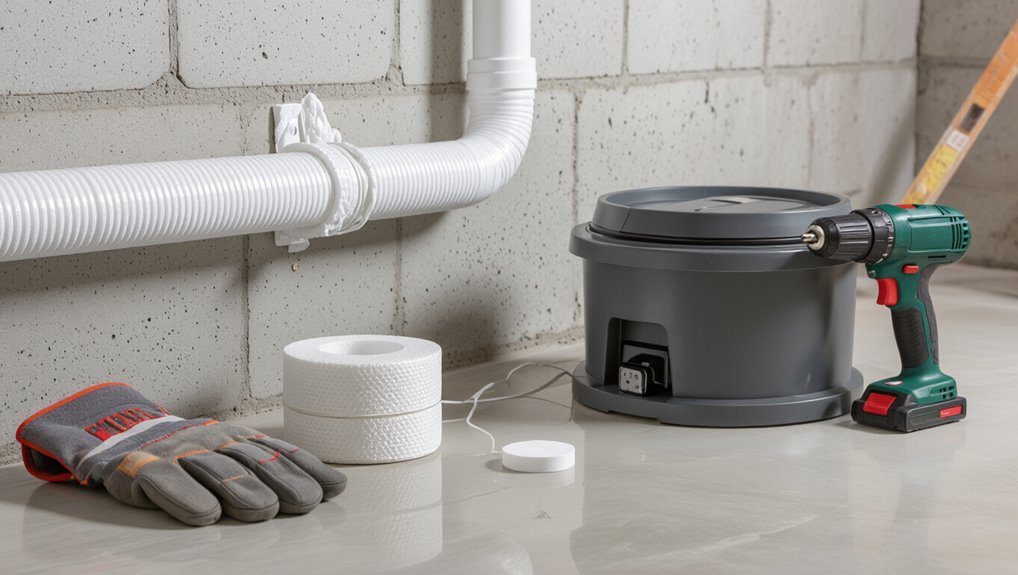
Freezing occurs when standing or slow-moving water in a discharge line is exposed to subfreezing temperatures, especially in uninsulated or poorly sloped sections.
A blocked or frozen pipe can cause basement flooding, strain or burn out the pump, and increase energy use as the system runs against a restriction.
Early warning signs include reduced or intermittent flow, ice buildup on outdoor piping, and unusually frequent pump cycling.
How freezing occurs in discharge lines
Often in cold weather, water inside a sump pump discharge line freezes because the moving water cools below 32°F as heat is lost to the surrounding air and ground.
Ice forms at low points, in vertical runs, or where flow slows.
Thermal bridging and stagnant pockets accelerate freezing.
Understanding these mechanisms informs choices about how to insulate sump pump discharge pipe effectively.
Risks of a frozen discharge pipe (basement flooding, pump damage, energy loss)
When discharge lines ice up, the consequences extend beyond a blocked pipe: a frozen sump pump discharge can lead to basement flooding, premature pump failure, and increased energy use.
Backed-up water raises flood risk and property damage. Pumps strain, overheat, or burn out attempting to force ice, shortening service life.
Continuous cycling and inefficiency raise electricity costs and can trigger costly emergency repairs.
Signs your discharge pipe is at risk of freezing
Any discharge pipe exposed to prolonged subfreezing temperatures shows warning signs before it jams solid. Ice crystals on fittings, reduced flow, intermittent pump cycling, or visible frost along the run indicate freezing onset.
Unusual vibration, higher motor load, or water backing up in the pit also warn of restriction. Prompt insulation, heat tracing, or rerouting prevents blockage, damage, and basement flooding.
Quick solutions to prevent freezing and reduce noise (direct actionable summary)
The article lists fast, practical fixes homeowners can apply immediately—wrap exposed pipe with foam insulation, add heat tape where allowed, and route water away from frozen ground.
It also notes simple noise-reduction steps such as adding rubber clamps or padding under the pipe.
Clear criteria indicate when the situation requires a professional plumber or electrician, especially for persistent freezing, complex routing, or electrical work.
Fast fixes you can apply today
Seal exposed joints, wrap the pipe, and add simple heat—each step reduces freezing risk and cuts vibration noise immediately.
Apply foam pipe insulation, secure joints with waterproof tape, and install rubber sleeves at contact points.
Run an approved inline heating cable on exposed sections and tuck insulation over it.
Tighten loose clamps and add rubber pads under brackets to dampen vibration and prevent future chafing.
When to call a professional
If quick fixes—insulation, taped joints, rubber pads, and inline heat—don’t stop freezing or noise, a professional should be consulted.
A plumber or HVAC technician can assess pipe routing, verify proper slope, inspect check valves and pump mounting, and recommend heated discharge lines or rerouting.
Hire licensed, insured contractors; request references, written estimates, and warranty details before authorizing work.
Choosing the right materials for the discharge pipe
Selecting the right discharge pipe material affects freeze resistance, noise levels, durability, and compatibility with insulation.
Common options include PVC, ABS, metal, and polyethylene, each offering different thermal performance and vulnerability to cracking or corrosion.
A concise comparison of pros and cons helps determine which material best balances longevity, sound dampening, and ease of insulating.
Common pipe materials and their freeze-resistance (PVC, ABS, metal, polyethylene)
Material choice has a major impact on a discharge line’s vulnerability to freezing; PVC, ABS, metal, and polyethylene each behave differently under cold conditions due to wall thickness, thermal conductivity, and joint types. PVC and ABS are stiff with moderate freeze risk; metal conducts cold rapidly; polyethylene is flexible and more freeze-tolerant.
| Material | Conductivity | Freeze Resistance |
|---|---|---|
| PVC | Low | Moderate |
| Metal | High | Low |
Pros and cons for durability, noise, and insulation compatibility
Having compared freeze behavior across common pipe types, attention shifts to how those same materials perform in durability, noise, and compatibility with insulation systems.
PVC offers rigidity and low noise but can crack under impact and resists some foam adhesives.
ABS is tougher, slightly louder.
Metal is durable, transmits vibration unless decoupled.
Polyethylene resists impact, is quiet, but may require special wraps for effective insulation.
Insulation options for discharge pipes
A review of practical insulation options highlights foam pipe sleeves, fiberglass or mineral wool wraps, closed-cell spray foams, and heat tape or electric cable systems.
Each choice carries specific installation steps, performance characteristics, and safety precautions that influence suitability for exterior discharge lines.
Guidance on combining thermal insulation with active heat sources helps balance freeze protection, durability, and code compliance.
Foam pipe insulation sleeves types and installation
Although often overlooked, foam pipe insulation sleeves provide a simple, effective barrier against freezing and heat loss for sump pump discharge lines.
They come in several types—neoprene, polyethylene, and closed-cell rubber—each with distinct properties for durability, R-value, and moisture resistance.
Install by selecting the correct diameter, slit and fit snugly, seal seams with waterproof tape or adhesive, and secure with corrosion-resistant clamps at regular intervals.
Fiberglass and mineral wool wraps use cases and precautions
Several installers opt for fiberglass or mineral wool wraps when insulating sump pump discharge pipes because these materials offer high-temperature tolerance and excellent thermal resistance in constrained spaces.
They suit retrofit and irregular runs, resist compression, and dampen vibration.
Installers must seal joints with appropriate tape, protect wraps from moisture and abrasion, and avoid contact with bare skin; vapor barriers help prevent condensation damage.
Closed-cell spray foam and spray-on insulators benefits and cautions
When applied to sump pump discharge lines, closed-cell spray foam and spray-on insulators provide a seamless, rigid barrier that combines high R-value per inch with strong moisture resistance and structural support, reducing heat transfer and preventing condensation on cold-water runs.
They adhere to irregular shapes, lower vibration and noise, and resist water intrusion; caution: allow proper curing, avoid covering access points, and follow ventilation and fire-code requirements.
Heat tape and electric cable options selection and safe installation
Closed-cell spray foam provides a durable, passive thermal barrier, but some situations call for active heating to prevent freezing along exposed sump pump discharge lines.
In those cases, heat tape and electric heat cables offer controllable, localized warmth.
Choose self-regulating cables for variable temperatures, match cable type to pipe material, follow manufacturer spacing and power limits, secure with proper tape, and protect connections from moisture and mechanical damage.
Combining insulation and heat sources for best results
A layered approach—combining thermal insulation with an appropriate heat source—yields the most reliable protection against freezing along sump pump discharge pipes.
Pair closed-cell foam or fiberglass wrap with thermostatically controlled heat tape or self-regulating cable.
Guarantee continuous coverage, seal joints and exterior openings, and route heat cable along low points.
Balance R-value, power source safety, and local code requirements for durable, efficient performance.
Step-by-step installation guide to insulate a sump pump discharge pipe
The following section outlines a concise, step-by-step procedure for insulating a sump pump discharge pipe, beginning with safety preparations and the necessary tools.
It covers inspecting the pipe and sealing any leaks, fitting foam sleeve insulation, wrapping with fiberglass and weatherproof cladding, and adding heat tape.
Each step includes brief guidance on installation and testing to guarantee reliable, freeze-resistant operation.
Safety preparations and tools required
Before any work begins, personnel should confirm power to the sump pump is disconnected and that the discharge line is depressurized and dry to prevent electrical shock and water escape.
Required PPE includes gloves, safety glasses, and hearing protection.
Essential tools: utility knife, tape measure, pipe cutter or saw, insulation material, weatherproof tape, zip ties, sealant gun, and a ladder if access is elevated.
Inspecting the pipe and sealing leaks before insulating
With power confirmed off and tools staged, inspection of the discharge pipe begins by visually and manually checking for cracks, loose joints, corrosion, and standing water along the run.
Any leaks are marked, fittings tightened, and corroded sections replaced or supported.
Joints are dried, cleaned, and sealed with appropriate plumber’s tape or epoxy; allow cures per manufacturer before proceeding to insulation.
Installing foam sleeve insulation (detailed steps)
Begin by measuring the exposed length and diameter of the discharge pipe to select properly sized foam sleeves and calculate material needed; accurate measurements guarantee snug fits at bends and fittings and minimize gaps that could admit cold air or moisture.
Cut sleeves to length, slit along seam, fit over pipe, secure seams and joints with waterproof tape or zip ties, and trim excess for neat, continuous coverage.
Applying fiberglass wrap and weatherproof cladding
Wrap the foam-sleeved discharge pipe with fiberglass insulation to add thermal resistance, then cover it with a weatherproof cladding to protect the insulation from moisture and physical damage.
Secure fiberglass with overlapping seams and foil tape, compressing slightly for full contact.
Slide cladding sections over the wrapped pipe, seal joints with silicone or tape, and fasten end caps and straps to prevent displacement and water entry.
Installing heat tape and testing functionality
Install heat tape along the foam-sleeved discharge pipe to prevent freezing and guarantee reliable flow during cold weather.
The installer secures UL-listed self-regulating tape along pipe length, following manufacturer spacing and avoiding overlaps.
Tape is wired to a GFCI-protected circuit, routed to a controlled outlet or thermostat.
Finally, the system is tested: power on, verify warmth along pipe, and confirm pump cycles normally.
Sealing joints, fittings, and outdoor exit points
Secure each connection and penetration to prevent heat loss, water intrusion, and ice formation at joints, fittings, and outdoor exit points.
Apply weatherproof silicone or polyurethane sealant around joints, wrap fittings with self-amalgamating tape, and insulate with closed-cell foam or pre-slit pipe insulation.
Seal exterior wall penetrations with expanding foam and a waterproof flashing.
Inspect and re-seal annually, especially before freezing season.
Methods to reduce noise from the discharge pipe
Noise from a sump pump discharge pipe typically stems from vibration, water hammer, and turbulent flow, each requiring different solutions.
Effective measures include vibration-dampening mounts and clamps, strategic routing and supports to limit transmission, and acoustic insulation placed around the pipe.
Additional fixes such as air chambers and properly installed check valves can reduce water hammer and further quiet the system.
Identifying noise sources (vibration, water hammer, flow turbulence)
Determine the specific cause before choosing a remedy: discharge-pipe sound usually stems from three distinct mechanisms—mechanical vibration of pipe or mounts, water hammer from rapid pump shutoff, and turbulent flow or aeration within the line.
Inspect for rhythmic rattling, sharp hammering shocks, or broadband rushing noise.
Correlate sounds with pump cycles, valve operation, and visible air pockets to pinpoint whether vibration, transient pressure spikes, or turbulent flow dominates.
Vibration-dampening mounts and clamps
Add isolation between the discharge pipe and its supports to cut structure-borne vibration at the source.
Use rubber or neoprene-lined clamps, anti-vibration mounts, and cushioned hangers sized to the pipe. Secure fittings snugly without overtightening to preserve damping.
Position mounts at regular intervals and near bends or pump connections to interrupt vibration transmission and reduce rattling and resonance.
Acoustic insulation materials and placement
Drawing on materials designed to absorb and block sound, effective acoustic insulation for sump pump discharge pipes combines mass, damping, and isolation to cut airborne and structure-borne noise.
Recommended materials include mass-loaded vinyl, neoprene or rubber wraps, closed-cell foam, and acoustic mineral wool in ventilated enclosures.
Place layers around bends, joints, and near wall penetrations, maintaining access points and avoiding compression that reduces performance.
Installing air chambers and check valves to reduce water hammer
Several simple mechanical measures can substantially reduce the loud, sharp shocks known as water hammer in sump pump discharge lines.
Installation of a properly sized in-line check valve prevents reverse flow and rapid stoppage.
Adding an air chamber or water hammer arrestor absorbs pressure spikes.
Both devices should be placed near the pump, compatible with pipe size and rated for system pressure, and inspected periodically for performance.
Routing and support strategies to minimize noise transmission
When routed and supported with attention to alignment and isolation, discharge piping transmits far less vibration and splash noise into a building.
Use continuous slopes for smooth flow, avoid tight bends, and separate pipe runs from structural members.
Install rubber or neoprene saddle supports, vibration isolators, and flexible connectors at junctions.
Secure supports at regular intervals to prevent sagging and resonance.
Protecting the outdoor portion of the discharge line
Attention to the outdoor section of the discharge line reduces freeze risk and mechanical damage.
Recommended measures include burying the pipe at a safe depth with a consistent slope, installing insulated or frost‑proof housings where the pipe exits the ground, and choosing between temporary winter covers and permanent, weatherproof enclosures based on local climate and maintenance preferences.
The tradeoffs between short‑term covers and long‑term solutions should guide selection.
Trench burial depth and slope recommendations
For outdoor sections of a sump pump discharge line, burying the pipe to a frost-safe depth prevents freezing and reduces damage from lawn equipment.
Local frost depth determines the minimum bury depth, which typically ranges from 12 to 36 inches depending on climate.
Trenches should slope gently away from the house, 1/8″ to 1/4″ per foot, ensuring gravity drainage and preventing pooled water that can freeze.
Insulated enclosures and frost-proof housings for exterior pipes
Install insulated enclosures or frost-proof housings around exterior discharge pipes to prevent freeze-related blockages and physical damage.
Durable, weather-rated housings with rigid foam or closed-cell insulation minimize heat loss and condensation.
Secure fittings and sealed access panels allow maintenance without compromising insulation.
Guarantee proper slope and anchoring to resist wind and ice; venting and drainage prevent water accumulation and corrosion.
Temporary winter covers vs. permanent solutions
When temperatures drop, homeowners must weigh short-term winter covers against permanent protective measures for the outdoor discharge line, balancing immediate frost prevention with long-term durability and maintenance needs.
Temporary covers are inexpensive and easy to remove but require frequent attention and risk moisture buildup.
Permanent solutions—insulated housings, heat-traced piping, buried runs—cost more upfront yet offer reliable freeze protection and lower ongoing labor.
Maintenance, testing, and seasonal checks
A concise maintenance routine keeps an insulated discharge pipe reliable through changing seasons.
Monthly and pre-winter checks should cover insulation integrity, correct heat tape function, and basic pump operation with a simple float test.
If problems appear—frozen sections, heat tape failure, or abnormal pump cycling—clear troubleshooting steps and prompt repairs prevent larger failures.
Routine inspection checklist (monthly and pre-winter)
Monthly and pre-winter inspections focus on the sump pump discharge pipe and its fittings to guarantee reliable operation during freeze-prone periods.
Inspect for visible damage, loose clamps, and proper slope.
Verify insulation coverage, sealed joints, and secured heat tape routing (without testing).
Check outdoor discharge path for debris, ice buildup risk, and clear drainage.
Document findings and schedule repairs promptly.
How to test heat tape, insulation integrity, and pump operation
Several straightforward tests confirm that heat tape, insulation, and the sump pump itself will perform through freezing conditions.
Verify heat tape continuity and thermostat function with a multimeter and powered warm-up check.
Inspect insulation for gaps, compression, and moisture; probe for cold spots along the run.
Run the pump under load, observe float switch action, discharge flow, and listen for abnormal noise or vibration.
Troubleshooting common problems after insulation
Following tests of heat tape, insulation integrity, and pump operation, routine maintenance and seasonal checks help catch problems that can arise after insulating the discharge pipe.
Inspect for crushed or wet insulation, loose clamps, exposed heat tape, and cracked fittings.
Verify discharge slope and clear blockages.
Test pump cycling under load and monitor for unusual noises or reduced flow, repairing or replacing components promptly.
Cost considerations and DIY vs. professional installation
Typical material costs for insulating a sump pump discharge pipe range from a few dollars for foam wrap to $50–$150 for higher-grade insulation and heat tape.
Professional installation labor can add $100–$300 depending on complexity.
Professional help is recommended for buried runs, complex routing, electrical heat-trace installation, or where local codes apply.
Investing in proper insulation and timely professional repairs can reduce the risk of freeze-related pipe bursts and the higher long-term costs of water damage and emergency repairs.
Typical material and labor cost ranges
A basic breakdown of costs for insulating a sump pump discharge pipe depends on materials, pipe length, insulation type, and whether labor is hired. Typical DIY materials range $10–$60; basic professional jobs $100–$300; complex installs higher. Homeowners should weigh time, tools, and local rates when choosing between DIY and hiring a contractor.
| Item | DIY cost | Pro cost |
|---|---|---|
| Foam sleeves | $10–$30 | $30–$80 |
| Heat tape | $15–$60 | $40–$150 |
When professional help is recommended
When pipe runs are exposed to freezing temperatures, buried under landscaping, routed through tight or inaccessible spaces, or involve multiple fittings and long outdoor stretches, hiring a professional is often advisable; trained installers can assess freeze risk, recommend appropriate insulation and heat-trace systems, and guarantee watertight seals where the discharge exits the foundation.
Professionals suit complex layouts, warranty needs, permit requirements, or limited DIY skill.
Long-term savings from preventing freeze-related damage
Cost savings from preventing freeze-related damage accrue over time as avoided repairs, emergency service calls, and property losses add up.
A one-time investment in proper insulation—DIY materials or professional installation—reduces risk of pipe bursts, basement flooding, and motor failure.
DIY lowers upfront cost but may miss best techniques; professional work increases reliability and warranty coverage, often yielding greater long-term value.
Common mistakes to avoid when insulating discharge pipes
When insulating a sump pump discharge pipe, several common errors can compromise effectiveness and safety. Attention to joints, material choices around heat sources, and proper support prevents leaks, fire hazards, and noisy sagging.
The most frequent pitfalls include:
- Overlooking joints and fittings
- Using combustible products near heat tape
- Insufficient support leading to sagging and noise
- Ignoring insulation continuity at valves and unions
- Relying on inadequate or damaged insulation materials
Overlooking joints and fittings
A surprisingly common error is ignoring the joints and fittings on a sump pump discharge line, since insulation that covers only the straight runs leaves seams exposed where heat loss and condensation concentrate.
Uninsulated couplings, elbows, and unions become cold spots and noise sources. Proper practice seals each fitting with appropriately sized insulation, tape, and weatherproofing to maintain thermal continuity and reduce vibration transmission.
Using combustible products near heat tape
After sealing joints and fittings, attention must turn to heat tape and nearby materials: heat tape generates enough surface temperature that combustible insulation, tape, or foams placed against it can ignite or degrade over time.
Inspect product ratings and use only heat‑tape‑approved, noncombustible coverings. Maintain manufacturer‑specified clearances, avoid wrapping tape directly with flammable adhesives, and replace damaged or aging components promptly.
Insufficient support leading to sagging and noise
Make certain the discharge pipe is securely supported along its run to prevent sagging, stress at joints, and the vibration that causes rattling or humming.
Inadequate hangers or wide spacing lets insulated sections shift, creating noise and joint leaks.
Use rigid straps, vibration-damping clamps, and spaced supports per manufacturer guidance.
Check alignment after insulating and fasten securely to stable structural members.
Example scenarios and recommended solutions
The article presents three common situations with tailored insulation approaches: a short exposed run from pump to exterior, a long underground run in cold climates, and a noisy pipe inside a finished basement.
For each scenario, it outlines materials and installation steps to prevent freezing, reduce condensation, and minimize noise.
Practical recommendations prioritize durability, code compliance, and ease of maintenance.
Short exposed run from pump to exterior
A short exposed run from the sump pump to the exterior—commonly found where the discharge exits through a basement wall a few feet from the pit—poses a high risk of freezing and backflow during cold weather if left uninsulated or poorly routed.
Recommended solutions: install closed-cell foam pipe insulation, add heat tape rated for wet locations, slope slightly toward exterior, and protect the line within a small insulated chase.
Long underground run in cold climates
When a sump pump must discharge water through an extended underground run in cold climates, the piping faces prolonged exposure to subfreezing temperatures and deeper frost lines that can cause blockage, pipe rupture, or backflow into the basement.
Recommended solutions include deeper burial below frost depth, heat-traced cable with thermostat, insulated conduit, proper slope and cleanouts, and sealed joints to prevent infiltration and ice formation.
Noisy pipe inside finished basement
Following measures for underground runs, attention shifts to noise issues inside finished basements where sump pump discharge and vent pipes can transmit vibration, water hammer, and flow roar through floors and walls.
Example scenarios: pipes clamped to joists, rigid connections to fixtures, or long straight runs amplifying resonance.
Recommended solutions: add neoprene isolation clamps, install water hammer arrestors, add flexible connectors, wrap pipes with acoustic foam, or reroute to minimize contact.
Resources and product recommendations
A concise list of reliable brands and product types for pipe insulation and self-regulating heat tape can help readers choose materials suited to sump pump discharge lines.
The discussion should highlight commonly recommended insulation materials (closed-cell foam, pre-slit pipe wrap) and reputable heat-tape manufacturers known for freeze protection and durability.
It should also point readers to relevant building codes and safety standards to verify installation requirements and electrical compliance.
Reliable brands and product types for insulation and heat tape
Several reputable manufacturers produce insulation and heat-tape products well suited for sump pump discharge lines, each offering distinct features—closed-cell foam sleeves for simple thermal protection, self-sealing polyethylene wraps for irregular pipe runs, and thermostat-controlled heating cables for freeze prevention.
- Frost King foam pipe sleeves
- Arctic Fox self-sealing wrap
- Raychem/ nVent heat cable
- EasyHeat thermostat kits
- Owens Corning pipe insulation
Relevant building codes and safety standards to check
When planning sump pump discharge insulation, homeowners and contractors should verify local plumbing and electrical codes, manufacturer installation instructions, and applicable national standards (such as the International Residential Code, NEC Article 430 provisions for motors and wiring, and ASTM/UL listings for insulation and heat-trace products) to guarantee safe, code-compliant installations and maintain warranty coverage.
- Local plumbing code requirements
- NEC wiring and bonding rules
- Manufacturer installation and warranty terms
- ASTM/UL product certifications
- Municipal permits and inspection processes
Conclusion
In the hush after winter’s breath, the guarded pipe stands less vulnerable, its throat wrapped against cold and clatter. Smart choices—sturdy materials, thoughtful insulation, and careful installation—soften the house’s sighs and keep water moving where it must. Whether DIY hands or hired help tend the line, avoiding common slips preserves warmth and quiet. Attentive upkeep turns a fragile chore into a discreet, dependable boundary between home and winter’s moods.