How to Tell If Your Water Heater Is Leaking: 9 Signs, Causes, and Quick Fixes
If you suspect your water heater is leaking, look for these signs: puddles or dampness at the base, rust or corrosion on the tank, wet insulation, drips from fittings, or discharge from the temperature-and-pressure (T&P) valve. Additional indicators include reduced hot water, unusual noises, and increased water bills. Common causes of leaks are age, corrosion, faulty valves, high pressure, poor installation, and sediment buildup. To address the issue immediately, shut off the power or gas, isolate the water supply, and tighten or replace any loose fittings. Further troubleshooting may be necessary to resolve the problem.
How to Quickly Confirm a Water Heater Leak
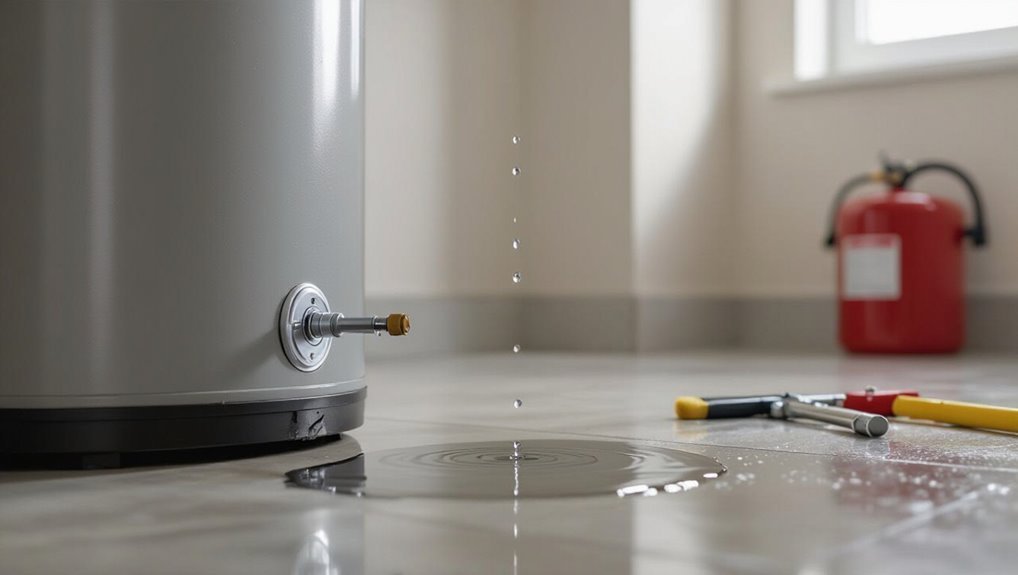
A quick confirmation begins with a visual checklist: look for puddles, corrosion at fittings, wet insulation, and active drips around the tank and valves.
Placing a towel or paper under suspected areas will reveal slow leaks by darkening or forming a wet line.
If water actively leaks or electrical components are wet, power and the cold-water supply should be shut off at once.
Visual inspection checklist for immediate signs
Quick visual checks can often confirm a water heater leak before tools or professionals are needed.
Inspect the tank base, fittings, valves, and visible piping for pooled water, corrosion, or mineral crusts.
Note damp insulation or water stains on surrounding flooring or walls.
Check the pressure relief valve area and electrical or gas connections.
This concise checklist helps determine how to know if water heater is leaking.
How to use a towel or paper to detect slow drips
If visual checks suggest moisture but no obvious puddles, using a towel or paper can confirm slow drips that are otherwise hard to detect.
Place absorbent material around joints, valves, drain pan edges and beneath fittings. Leave undisturbed for 30–60 minutes, then inspect for wet spots or darkening.
Mark wet areas and note frequency to guide repairs or professional assessment.
When to shut off power and water immediately
When water appears around the tank base, from fittings, or in steady drips that wet surrounding surfaces, power and water should be shut off immediately to prevent electrical hazards, flooding, or further tank damage.
The occupant should cut electricity at the breaker and close the cold-water supply valve.
After isolation, document leak location, dry the area, and call a licensed plumber for inspection and repair.
9 Common Signs Your Water Heater Is Leaking
A leaking water heater often announces itself through a few clear, observable signs that homeowners should watch for.
Common indicators include things like visible moisture, visible tank damage, and changes in performance:
- Pooled water or moisture around the base; rust or corrosion on the tank exterior
- Decreased hot water supply or temperature swings; unusual noises (hissing, popping, or rumbling)
- Higher water bills or unexplained water usage
These clues can help determine whether further inspection or professional service is needed.
Pooled water or moisture around the base
Though often subtle at first, pooled water or persistent moisture around the base of a water heater is a clear early indicator of a leak.
Standing water, damp flooring, or a wet pan beneath the unit suggest active drips from fittings, the drain valve, or internal seams.
Prompt inspection isolates the source; continued pooling risks structural damage, mold, and faster deterioration if unaddressed.
Rust or corrosion on the tank exterior
Pooled water at the base can accelerate metal deterioration, so attention should also turn to surface changes on the tank itself.
Rust streaks, flaky paint, or bubbling indicate oxidation where protective coatings failed.
Corrosion near seams, fittings, or the drain valve often signals slow leaks.
Visible decay reduces structural integrity and predicts eventual penetrative leakage, warranting inspection and prompt repair or replacement.
Decreased hot water supply or temperature swings
Decline in performance often appears as reduced hot water volume or sudden temperature swings, a symptom that can point to leaking within the system.
Persistent loss of capacity, frequent thermostat cycling, or intermittent cold bursts during use suggest water escaping from tank seams, inlet/outlet fittings, or relief valves.
Monitoring flow rates and temperature stability helps identify leaks requiring repair or component replacement.
Unusual noises (hissing, popping, or rumbling)
Why is the water heater suddenly hissing, popping, or rumbling?
Sediment buildup, trapped steam, or a failing heating element can produce those sounds.
Hissing suggests a leak contacting hot surfaces; popping or rumbling often indicates mineral deposits causing uneven heating and localized boiling.
Persistent noise warrants inspection for internal corrosion, sediment removal, or component replacement to prevent worsening leaks or tank damage.
Higher water bills or unexplained water usage
A sudden rise in monthly water bills or unexplained increases in usage can signal a hidden leak from the water heater.
Persistent phantom consumption without visible puddles suggests internal tank corrosion, failed valves, or slow pipe weeps.
Tracking meter readings with all fixtures off helps confirm suspicion.
Prompt inspection prevents waste, higher bills, and potential larger failures; consider a professional leak detection if readings remain abnormal.
Wet or damaged insulation or floor staining
Visible wet insulation or discoloration on the floor near a water heater often indicates an active leak.
Saturated insulation loses thermal value and may harbor mold; crumbled or darkened material signals prolonged moisture.
Floor staining, warping, or a persistent damp odor beneath or around the unit points to slow seepage.
Prompt inspection and containment prevent structural damage and mildew growth.
Pressure relief valve discharge or dripping
Beyond signs on insulation and flooring, leaks can also manifest at the water heater’s temperature and pressure relief (T&P) valve.
A dripping or periodic discharge indicates overpressure, excessive temperature, or a failing valve. Continuous flow, rusty discharge, or frequent trips require prompt assessment; flushing, pressure checks, or valve replacement may be needed to prevent tank damage or unsafe pressure buildup.
Visible leaks from fittings, valves, or connections
Leaks at fittings, valves, or pipe connections are often the most straightforward indicators of a failing water heater. Corroded threads, loose compression joints, or degraded gaskets produce visible drips or steady streams.
Inspect supply lines, shutoff valves, and union fittings for wetness, mineral buildup, or rust. Small leaks worsen quickly; tighten connections or replace damaged components to prevent larger failures and water damage.
Dampness near the T&P valve or drain pan overflow
Problems at fittings and valves can extend to other outlet points, so attention should also focus on the temperature-and-pressure (T&P) relief valve and the drain pan.
Dampness under the T&P discharge line or standing water in the pan indicates relief valve activation, slow seepage, or drain clogging.
Prompt inspection can prevent corrosion, floor damage, and mold; replace faulty valves or clear pan drains.
Causes Behind Water Heater Leaks
Water heater leaks usually stem from predictable mechanical and material failures.
Common causes include age-related tank corrosion and internal wear, faulty valves or fittings, excessive pressure or thermal expansion, loose or poorly installed plumbing connections, and sediment buildup that damages the tank.
Identifying the specific cause guides whether repair, part replacement, or full tank replacement is required.
Age-related tank corrosion and internal wear
Over time a water heater’s tank deteriorates from constant exposure to heat, moisture, and dissolved minerals, which gradually thin the steel and attack internal components.
Corrosion forms pits and weak spots that eventually allow water to seep through the tank wall.
Sediment buildup accelerates wear by trapping heat and promoting localized deterioration.
Aging tanks consequently become prone to fractures and slow leaks requiring replacement.
Faulty or worn-out valves and fittings
Valves and fittings—small, often overlooked components—are common leak sources when seals fail, threads loosen, or parts corrode.
Dripping at inlet/outlet connections, relief valves, or drain valves often indicates worn washers, cracked bodies, or loose fittings.
Regular inspections reveal mineral buildup, rust, or hand-tightened connections needing torque.
Promptly replacing defective valves or resealing joints prevents gradual water damage and system inefficiency.
Excessive pressure or thermal expansion issues
Leaks from fittings and worn components can signal other underlying problems, including pressure-related stress on the tank and plumbing.
Excessive incoming water pressure or thermal expansion raises internal tank pressure, engaging the temperature and pressure relief valve repeatedly or causing seam and weld fatigue.
Persistent overpressure shortens component life and promotes slow leaks; diagnosing with a pressure gauge and expansion tank assessment helps pinpoint the issue.
Loose plumbing connections and poor installation
Inspecting the water heater’s external connections often reveals that loose fittings or improper installation are the root cause of drips and seepage.
Loose supply lines, poorly soldered joints, unsecured valves, and misaligned flanges allow slow leaks. Incorrect pipe supports or wrong thread sealing worsen stress on connections.
Professional tightening, reassembly, or reinstalling components typically resolves these preventable leaks efficiently.
Sediment buildup leading to tank damage
Beyond external fittings, internal factors like mineral and sediment accumulation can silently undermine a tank’s integrity.
Sediment settles on the tank bottom, reducing heat transfer, causing overheating, and accelerating corrosion. Pitting weakens the steel, producing leaks and shortening service life.
Regular flushing and water softening mitigate buildup; neglected tanks eventually develop stress points and pinhole leaks that require repair or replacement.
Physical damage and freezing during winter
Physical impacts and winter freezing pose distinct threats to a water heater’s integrity. Dents, punctures, or stressed welds from accidental hits compromise seals and create leak points.
In cold climates, trapped water can freeze, expand, and crack tanks, valves, or fittings. Prompt inspection after impacts and proper winterization—draining, insulating, or maintaining heat—reduces risk and prevents costly leaks.
How to Locate the Exact Leak Source
A systematic inspection begins with the tank exterior, fittings, and all connected pipes to note obvious corrosion, drips, or pooling.
Next, testing the temperature and pressure relief valve, checking the drain valve and nearby plumbing joints, and using food coloring or dye can reveal intermittent or slow leaks.
If the source remains unclear or the leak is significant, a professional leak detection service should be called.
Inspecting the tank, fittings, and connected pipes
Start by visually scanning the entire water heater assembly to narrow the search: inspect the tank surface, inlet and outlet fittings, pressure relief valve, drain valve, and all connected pipes and joints.
Note wet spots, corrosion, mineral buildup, or active drips. Trace pipe runs for seepage at fittings, unions, and soldered joints.
Mark suspected areas for repair or replacement.
Testing the temperature and pressure relief valve
Having inspected the tank, fittings, and pipe runs, attention next turns to the temperature and pressure (T&P) relief valve, a common leak source that releases water when pressure or temperature exceed safe limits.
The valve should be manually lifted to confirm proper seating and drainage; persistent dripping after reset, corrosion, or leakage from the discharge pipe indicates valve failure and warrants replacement.
Checking the drain valve and nearby plumbing joints
Inspect the drain valve and the nearby plumbing joints for signs of moisture, corrosion, or mineral buildup, since small weeps at these points often reveal the true source of a leak.
Examine fittings, compression nuts, and pipe threads for dampness or crusted deposits.
Tighten loose connections, replace degraded washers or valves, and document any persistent seepage that may necessitate professional repair or component replacement.
Using food coloring or dye for slow leak detection
How can a simple dye reveal a slow water heater leak? A few drops of food coloring in the tank or on suspect joints help trace seepage: colored water will appear at the leak point or in nearby puddles.
Inspect seams, connections, pressure relief valve, and fittings after allowing time for flow. Rinse dye afterward to prevent staining.
When to call a professional leak detection service
When should a homeowner call a professional leak detection service? A professional is warranted when the leak’s origin is unclear, water damage is visible, leaks persist despite basic fixes, or they involve gas, high-pressure lines, or electrical components.
Experts use cameras, moisture meters, and thermal imaging to pinpoint sources, prevent further damage, and provide safe, code-compliant repairs and documentation for insurance.
Quick Fixes You Can Try Right Away
After locating the leak source, a few immediate actions can reduce water loss and prevent further damage.
These include tightening loose fittings, temporarily sealing small pinholes with epoxy or waterproof tape, and replacing a dripping drain valve.
If pressure or sediment buildup is suspected, flushing the tank and checking or resetting/replacing the expansion tank may also help until professional repair is arranged.
Tightening loose connections and fittings
Tightening loose connections and fittings is a fast, low-cost step to stop small leaks before they worsen.
Inspect visible pipe joints, valve nuts, and hose clamps for dampness or corrosion. Use appropriate wrenches, turn fittings snugly—avoid overtightening—and retighten compression fittings incrementally.
After adjustment, dry the area and monitor for new seepage. If leaking persists, consult a professional.
Temporarily sealing small pinhole leaks with epoxy or tape
Apply a temporary seal to small pinhole leaks with epoxy putty or specialized repair tape to stop immediate dripping and buy time for a proper repair.
The surface should be cleaned, dried, and cooled before application. Follow product instructions, press firmly, and allow curing.
These fixes are temporary emergency measures; arrange professional inspection or permanent replacement promptly to avoid corrosion, pressure loss, or expanded damage.
Replacing a leaking drain valve
Replace the faulty drain valve to stop a steady leak and restore reliable tank drainage.
A homeowner should shut power/gas and water, drain the tank below the valve, remove the old valve, apply plumber’s tape or sealant to threads, and install a correctly sized replacement.
Tighten securely, refill, and check for leaks.
If corrosion is extensive, consult a professional.
Clearing and flushing sediment to reduce pressure
After addressing a leaking drain valve, the homeowner can also check for sediment buildup, which raises tank pressure and can cause intermittent leaks.
Flushing the tank removes grit that traps heat and lifts the thermostat, reducing pressure cycles.
Shut power or gas, attach a hose to the drain, open a hot-water tap, drain until clear, then refill and restore power following manufacturer guidelines.
Resetting or replacing an expansion tank
An expansion tank can quickly relieve pressure fluctuations that cause small, intermittent leaks, so a homeowner should inspect its air charge and mounting before more invasive repairs.
Check the Schrader valve for proper PSI with a gauge; add air if low.
If the tank is waterlogged, corroded, or leaking at fittings, replace it and guarantee correct orientation and secure mounting to prevent future stress.
Safely draining and drying the area
Shut off the water supply and power to the heater before starting to drain so the job proceeds safely and without causing electrical hazards or overpressurizing the system.
Attach a hose to the drain valve, direct water to a floor drain or bucket, and open a hot tap to relieve pressure.
Mop, towels, and a fan thoroughly dry the area; inspect for persistent moisture or damage.
Repairs and Replacements: What to Expect
A leaking water heater may be fixed by replacing individual components such as valves, the anode rod, or the drain valve, while widespread corrosion or a compromised tank usually calls for full replacement.
Costs vary considerably—minor parts and DIY labor are relatively inexpensive, professional repairs run higher, and a full unit replacement can be several times the price.
Simple DIY fixes often take under an hour, whereas complex repairs or a professional replacement typically require several hours to a day.
When a part replacement is sufficient (valves, anode rod, drain valve)
Determine whether a full water heater replacement is necessary by first evaluating if the leak originates from replaceable components such as valves, the sacrificial anode rod, or the drain valve.
If corrosion, loose fittings, or worn seals are isolated to these parts, replacing them often stops leaking and extends service life.
Match replacements to model specs and test for tightness and proper operation afterward.
Signs the tank itself needs replacement
If replacing valves, the anode rod, or the drain valve does not stop leaks or if corrosion is widespread, the problem may lie with the tank itself.
Indicators include persistent pooling at the tank base, visible rust through the jacket, multiple leak points, reduced hot water capacity, and waterlogged insulation.
These signs suggest internal corrosion and structural failure requiring tank replacement rather than isolated repairs.
Cost ranges for common repairs versus full replacement
Because repair costs vary with the component and labor rates, homeowners should weigh typical price ranges for common fixes against the expense of a full tank replacement. Common repairs (valves, heating elements, minor leaks) often cost less upfront; major tank failure usually prompts replacement for long-term value.
| Issue | Repair Range | Replacement Cost |
|---|---|---|
| Valve/pipe | $50–$200 | $800–$2,500 |
| Heating element | $100–$300 | $800–$2,500 |
Typical timeframes for DIY repairs vs professional service
Between quick DIY fixes and full professional interventions, the time required can vary widely depending on the task complexity and the homeowner’s experience.
Minor repairs—tightening fittings, replacing a temperature-pressure valve, patching small tank leaks—often take 30–90 minutes.
Sediment flushing or element replacement may need 1–3 hours.
Full tank replacement or complex diagnostics typically require 3–6 hours and professional scheduling.
Preventive Maintenance to Avoid Future Leaks
A regular preventive maintenance routine can greatly reduce the risk of future water heater leaks by addressing common failure points.
Recommended steps include scheduled inspections and annual tank flushing, periodic anode rod checks and replacement, and installing or servicing expansion tanks and pressure regulators.
Additional measures such as insulating pipes, protecting the unit from freezing, and hiring a professional for yearly tune-ups help extend service life and catch problems early.
Recommended inspection and flushing schedule
Regular inspections and annual flushing form the backbone of a preventive maintenance schedule to minimize water heater leaks and extend equipment life.
Inspect visually every 3–6 months for corrosion, loose fittings, and minor drips.
Flush sediment annually; increase to semiannually for hard water or heavy use.
Record dates, findings, and actions.
Prompt professional service for persistent issues or compromised components.
How to monitor and maintain the anode rod
Check the anode rod every 1–3 years, since it sacrificially corrodes to protect the tank and its condition directly affects leak risk.
Inspect for heavy pitting, thinning, or mineral coating; replace if more than half consumed or visibly degraded.
Use the correct rod type (magnesium, aluminum, or zinc) for water chemistry.
Tighten fittings, apply plumber’s tape, and document replacement dates.
Installing and maintaining an expansion tank and pressure regulator
Install an expansion tank and pressure regulator to control thermal expansion and incoming water pressure, reducing stress on the heater and plumbing that can cause leaks.
Proper sizing, correct mounting, and periodic air-charge checks guarantee the expansion tank functions.
The pressure regulator should be set to manufacturer-recommended psi, inspected for drift, and replaced if leaking or failing to maintain stable inlet pressure to prevent seal and tank damage.
Insulating pipes and protecting the unit from freezing
After addressing pressure control with an expansion tank and regulator, attention should turn to insulating exposed pipes and safeguarding the water heater against freezing to prevent burst fittings and ruptured tanks.
Install foam pipe sleeves, heat tape with thermostat control, and jacket the tank if in unheated spaces.
Maintain ambient temperatures, seal drafts around doors and vents, and drain/insulate outdoor lines before winter.
Best practices for professional annual tune-ups
A yearly professional tune-up is the most reliable way to detect small issues before they become leaks, combining visual inspection, component testing, and preventive service.
Technicians should flush the tank, inspect and test the pressure relief valve, check anode rod condition, tighten fittings, assess gas/electric connections, and verify thermostat operation.
Documented findings and recommended repairs prevent costly failures and extend system life.
Safety Precautions When Dealing with a Leaking Water Heater
When a water heater is leaking, immediate safety steps are essential: electric units should be disconnected at the breaker, and gas units require shutting off the supply and checking for odors or hissing.
Care must be taken to avoid burns from hot water and to control flow to prevent scalding. Protect flooring and nearby systems by containing leaks and removing valuables until repairs are made.
Electrical safety: disconnecting power to electric units
Some care is essential before any inspection or repair of an electric water heater: power must be cut to prevent shock or fire.
The unit should be switched off at its dedicated breaker or fused disconnect.
Confirm de-energized status with a noncontact voltage tester.
Lockout/tagout is recommended when available.
Only qualified personnel should restore power after repairs and leak verification.
Gas safety: shutting off gas and detecting leaks
Following electrical shutoff procedures, attention must turn to gas hazards associated with tank-type heaters.
The gas supply should be shut off at the appliance valve or main, using hand tools only if necessary.
Smell of rotten eggs, hissing, or dead vegetation indicates a leak; evacuate, avoid ignition sources, and call the gas provider or emergency services.
Ventilate if safe.
Proper handling of hot water and scald prevention
Because leaking water heaters can release scalding hot water unpredictably, anyone nearby should treat exposed flows as hazardous and avoid direct contact.
Wear heat-resistant gloves and closed shoes when evaluating leaks. Turn off water and power sources before approaching.
Warn others, keep children and pets away, and use long-handled tools or insulated containers to divert flow.
Seek professional help for repairs and burns.
Avoiding damage to flooring and nearby systems
When a water heater leaks, immediate steps to protect floors and adjacent systems can prevent costly structural damage and secondary failures; assess the leak source, contain the water, and isolate vulnerable materials such as hardwood, laminate, drywall, and electrical components.
Move rugs and furniture, lift baseboards where possible, place absorbent mats or buckets, shut off electricity to affected circuits, and dry thoroughly to inhibit mold and corrosion.
How to Decide Between Repair and Replacement
When deciding between repairing a leaking water heater and replacing it, factors such as unit age, warranty coverage, and visible tank condition should guide the initial assessment.
The homeowner should weigh long-term cost-effectiveness and improved energy efficiency of a new unit against repair costs, while also considering local disposal rules and installation codes.
If replacement is chosen, selecting the correct capacity and fuel type for household needs guarantees proper performance and efficiency.
Assessing age, warranty status, and tank condition
How old is the water heater, and does its warranty still apply—two facts that quickly narrow the repair-versus-replace decision.
Age determines expected life remaining; warranties may cover parts or full replacement.
Inspect the tank for corrosion, pitting, or leaks at seams and connections.
Significant rust, interior corrosion, or multiple failure points favor replacement, while isolated component failure may justify repair.
Calculating long-term cost-effectiveness and energy efficiency
Evaluate the long-term cost-effectiveness and energy efficiency by comparing immediate repair costs, projected future repairs, and the expected operating expenses of a replacement unit.
Include estimated annual energy consumption, fuel type efficiency differences, and potential savings from newer models.
Factor labor, parts, and downtime.
Calculate payback period and net present value over the expected remaining service life to inform repair-versus-replace decisions.
Environmental and code considerations for disposal and installation
Any decision to repair or replace a water heater must account for environmental regulations and local building codes governing disposal, installation, and fuel switching.
Compliance affects permitted salvage, hazardous waste handling (e.g., refrigerants, tanks with residue), and required permits or inspections.
Professionals should verify venting, seismic restraints, drain pans, and setback clearances.
Noncompliance risks fines, voided warranties, and unsafe installations; document all approvals.
Choosing the right replacement size and fuel type
When choosing a replacement water heater, the homeowner should balance household hot‑water demand, available fuel sources, and long‑term operating costs to determine the correct tank size and whether to stick with the existing fuel type or switch.
Accurate decisions hinge on peak simultaneous usage, recovery rate needs, and site constraints such as venting, fuel supply, and local code requirements.
The installer should evaluate efficiency, upfront cost, and lifecycle emissions.
Signs You Need an Emergency Plumber Now
Rapidly increasing water pooling, a major rupture, or signs of structural compromise such as ceiling leaks or exposed wiring indicate an immediate hazard requiring emergency service.
A persistent smell of gas or inability to shut off the gas or power are urgent red flags that demand evacuation and professional response.
When contacting a technician, the homeowner should clearly state the observed symptoms, location of the unit, and whether gas or electrical systems are involved.
Rapidly increasing water pooling or major rupture
If a water heater begins releasing large volumes of water or shows a visible rupture, it constitutes an emergency requiring immediate attention.
Rapidly increasing pooling or a burst tank risks structural damage, electrical hazards, and mold.
Occupants should evacuate the area, shut off the main water supply if safely accessible, avoid electrical contact, and call an emergency plumber immediately for containment and replacement.
Persistent gas smell or inability to shut off gas/power
Beyond flooding or a ruptured tank, another immediate hazard involves gas appliances and the ability to cut utilities: a persistent smell of gas or inability to shut off gas or power around a water heater signals a high-risk situation.
Immediate steps include evacuating the area, avoiding flames or switches, and calling emergency services or a licensed plumber; migration of gas or failed shutoffs require professional intervention.
Structural damage, ceiling leaks, or electrical hazards
Any visible structural damage—sagging ceilings, wet drywall, warped floorboards—or exposed wiring near a water heater warrants immediate attention.
Such signs indicate active leaks that compromise building integrity and create electrocution or fire risks.
Occupants should evacuate affected areas, cut power at the main if safe, and contact an emergency plumber and electrician.
Temporary containment (towels, buckets) may reduce water spread until help arrives.
How to communicate the problem to a service technician
After evacuating unsafe areas and securing power and water as advised, homeowners should prepare a concise, prioritized briefing for the on-call technician.
Include symptoms, onset time, visible leaks, odors, noises, and any actions taken.
Note model, age, maintenance history, and photos or videos.
State access constraints, safety concerns, and preferred arrival window.
Request estimate, warranty checks, and required permits.
Useful Tools and Materials to Keep on Hand
Keeping a small set of tools and supplies on hand can turn a leaking-water-heater emergency into a manageable short-term repair.
- Basic toolkit for temporary fixes (wrenches, plumber’s tape, sealant)
- Replacement parts to contemplate stocking (shutoff valves, anode rods)
- Leak detection supplies (dye, moisture meter, buckets)
These items help identify the source quickly and allow safe, temporary measures until a professional arrives.
Basic toolkit for temporary fixes (wrenches, plumbers tape, sealant)
Assembling a compact toolkit can make temporary water-heater repairs faster and safer.
Include adjustable and basin wrenches for fittings, a pipe wrench for stubborn joints, plumber’s tape (PTFE) for threaded seals, silicone or epoxy sealant for small pinhole leaks, rags, a drain bucket, and gloves.
Store tools in a labeled box near the heater for quick access during emergencies.
Replacement parts to consider stocking (valves, anode rods)
A small selection of replacement parts can turn a lengthy service call into a quick on-site fix; prioritize shutoff valves, temperature-pressure (T&P) relief valves, and sacrificial anode rods.
Also keep replacement drain valves, dielectric unions, and spare inlet/outlet connectors.
Stock common sizes and materials matching the heater. Label parts, store dry, and rotate older spares to guarantee readiness for immediate repairs.
Leak detection supplies (dye, moisture meter, buckets)
Several basic leak-detection supplies—dye tablets or liquid tracer, a handheld moisture meter, and a few sturdy buckets—greatly speed locating and isolating water heater leaks.
Dye reveals slow leaks around fittings and drains. A moisture meter detects damp spots behind insulation or on floors.
Buckets catch drips during inspection and prevent damage. Keep spare tracer, fresh batteries, and a clean bucket ready.
Typical Questions Homeowners Ask About Leaking Water Heaters
Homeowners commonly ask whether a small leak can wait for repair and how long that is safe.
They also raise questions about insurance coverage, documenting damage for claims and warranties, and whether replacement is a DIY task or requires a professional.
The answers affect urgency, costs, and the steps to protect property and future claims.
How long can I wait before repairing a small leak?
How soon to act depends on the leak’s source, size, and the tank’s condition: a tiny drip from a valve may be tolerable for days if monitored, but leaks from the tank body, fittings under pressure, or the relief valve warrant immediate repair or replacement.
Monitor drip rate, check for corrosion, isolate and drain if needed, and schedule professional service before minor issues worsen or structural failure occurs.
Will insurance cover water heater leaks and resulting damage?
Will a homeowner’s insurance policy respond to a water heater leak and the resulting damage depends on the cause, policy language, and timing: sudden, accidental bursts are often covered, while gradual leaks from neglected corrosion or wear typically are not.
Coverage may include water removal, structural repairs, and content replacement if timely reported; deductibles, exclusions, and proof of maintenance affect claim outcomes.
Can I replace the water heater myself or should I hire a pro?
Can a homeowner replace a water heater without professional help?
A competent DIYer might handle basic tank replacements if comfortable with plumbing, gas or electrical shutoffs, and local codes.
However, risks include gas leaks, improper venting, water damage, and voided warranties.
For complex installs, gas or electric hookups, or permit requirements, hiring a licensed plumber or HVAC professional is strongly recommended.
How to document damage for claims and warranty purposes
After deciding whether to hire a professional for replacement, the homeowner should promptly document any damage to support insurance claims or warranty requests.
Photograph affected areas, capture serial numbers and labels, note timestamps, and record visible corrosion or rupture points.
Save receipts, repair estimates, and professional assessments.
Keep organized, dated files and provide clear descriptions when filing claims or warranty submissions to expedite resolution.
Conclusion
Homeowners should heed even small water heater drips: studies show that 20 percent of household water damage stems from plumbing failures, often starting as minor leaks. The guide’s signs, causes and quick fixes give clear steps to confirm leaks, locate sources, and decide on repair versus replacement. When corrosion, tank failure, or sudden flooding appear, prompt professional help prevents larger loss. Keeping basic tools and swift action minimizes damage and expense.