How to Raise a Water Heater off the Floor Safely: Step-by-Step Guide and Code Tips
To safely raise a water heater off the floor, follow local codes that typically require gas units to be installed at least 18 inches above combustible floors. This height helps prevent ignition hazards and potential flood damage. Use a stable platform such as concrete, a prefabricated pedestal, or a metal stand, ensuring proper fasteners, seismic straps, and a drip pan directed to an approved drain are in place. Before starting, shut off the power, gas, and water supply, and reconnect using code-approved fittings. For detailed step-by-step instructions, code tips, and guidance on when to hire a professional, continue reading.
Why You Might Need to Raise a Water Heater Off the Floor
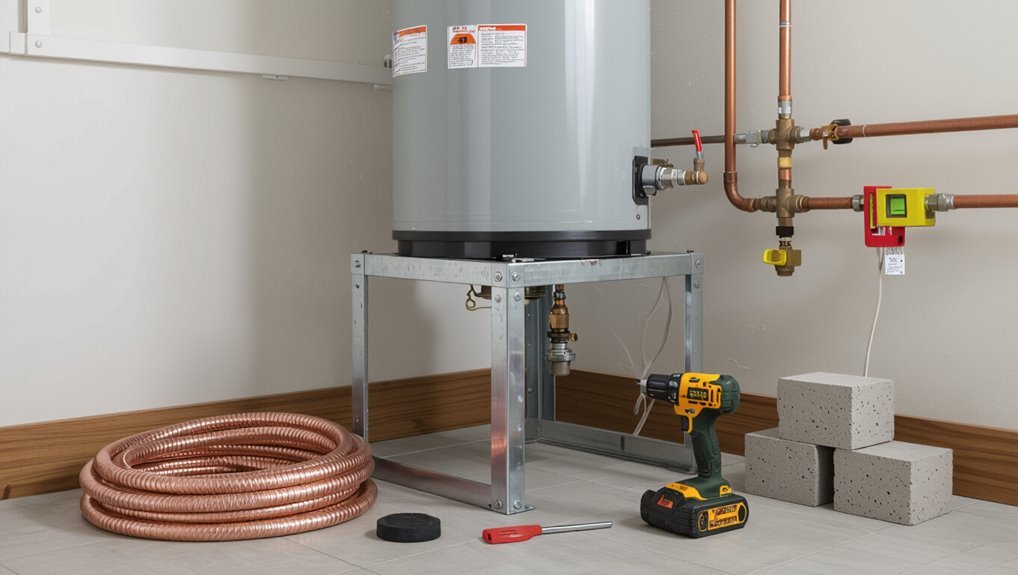
Local codes and safety concerns—such as combustible-clearance requirements, flood-zone elevation rules, and other jurisdictional standards—often dictate raising a water heater off the floor.
Practical benefits include reduced risk of floor damage from leaks, easier access for maintenance and draining, and improved drainage to a nearby drain or pan.
However, some manufacturers’ instructions or fuel-type considerations (for example, specific clearances for gas units versus electric) can make raising a unit inappropriate or require special methods.
Code and safety reasons (local codes, flood zones, combustible clearances)
Why must a water heater sometimes be elevated above the floor?
Local codes and safety standards often require elevation in flood-prone areas and to maintain combustible clearances.
Compliance dictates specific heights and platform construction; inspectors may reference model codes.
When planning how to raise a water heater off the floor, consult jurisdictional regulations, verify flood-zone requirements, and confirm clearances meet manufacturer and code specifications.
Practical benefits (prevent water damage, ease of maintenance, improve drainage)
Beyond meeting code and flood-zone mandates, elevating a water heater offers several practical advantages for homeowners and technicians.
Raised units reduce risk of floor-level water damage, simplify visual inspections and valve access, and make replacing components easier.
Elevation also improves drainage to nearby drains or floor sinks, minimizing standing water after leaks and facilitating quicker, safer maintenance and emergency shutoffs.
When not to raise a water heater (manufacturer restrictions, electric vs. gas considerations)
Although elevating a water heater can be beneficial, there are clear situations where it should be avoided or approached cautiously:
Manufacturer instructions may prohibit modifying installation height or void warranties.
Electric units lack required combustion clearances but still risk cord strain; gas units require specific venting, combustion air and seismic/relief valve alignment.
Local codes or structural limits can also bar raising—always verify documentation and consult a professional.
Quick Answer: Recommended Height and Code Requirements
Most codes require water heaters to be elevated at least 18 inches above combustible floors for gas units, while electric heaters often have no minimum clearance but still benefit from elevation for flood protection.
Seismic straps are typically mandated in quake-prone areas. Homeowners should check local building codes and the water heater manufacturer’s installation instructions for specific height and restraint requirements.
When in doubt, consult the local authority having jurisdiction or a licensed plumber to guarantee compliance.
Typical minimum height requirements (gas vs. electric, seismic straps)
One clear distinction in raising water heaters is that gas units usually require a higher setback above the floor than electric models due to combustion-air and ignition-source clearance rules; many local codes and the National Fuel Gas Code prescribe a 18-inch minimum for gas appliance ignition sources when installed in garages.
Whereas electric water heaters often have no such garage-height requirement.
Seismic straps are typically required regardless of fuel, positioned per code to restrain movement during earthquakes.
How to verify local code and manufacturer requirements
Having noted the difference in clearance requirements for gas versus electric water heaters and the need for seismic strapping, the next step is to confirm specific local code and manufacturer requirements before raising a unit.
Check municipal plumbing and fire codes, consult the water heater manual for platform height and venting, verify permit and inspection needs, and document compliance with photos and receipts.
Types of Water Heater Platforms and Supports
A range of platform and support options is available to raise a water heater, each with different load capacities and installation requirements.
Common choices include prefabricated pedestals, concrete blocks or poured concrete pads, and metal stands or steel frames.
Wooden platforms are sometimes used but require caution and are generally avoided in damp, fire-prone, or code-restricted installations.
Prefabricated water heater pedestals
Prefabricated water heater pedestals provide a ready-made solution for raising tank-style units to required heights, especially where code mandates elevation above flood-prone floors or where a uniform installation is desired.
Manufactured from steel, polymer, or composite, they offer consistent height, integrated mounting points, and corrosion resistance. Installation is typically faster than custom platforms, with manufacturer instructions guiding secure attachment and load capacity compliance.
Concrete block or poured concrete pad
Concrete block or poured concrete pads provide a durable, high-mass base for elevating tank-style water heaters to code-required heights or above potential flood levels. They resist tipping and distribute weight evenly.
Blocks must be mortared or a monolithic pad poured to proper thickness, level, and cured. Guarantee clearance for vents, drains, and seismic strapping; follow local codes for elevation and anchoring.
Metal stand or steel frame
Installers often choose metal stands or steel frames for elevating water heaters where compactness, strength, and seismic restraint are required.
Prefabricated steel stands provide adjustable heights, corrosion-resistant finishes, and integrated anchor points for straps or bolts. They minimize footprint, allow drainage and inspection access, and meet many local code requirements when properly sized and installed.
Welding or bolting must follow manufacturer and code specifications.
Wooden platform options and when to avoid wood
Several common wooden platform designs—solid framed platforms, plywood-topped joists, and pressure-treated sleepers—offer cost-effective, easy-to-build options for elevating water heaters in non-hazardous, dry locations.
Wood platforms must be properly sized, braced, and treated against moisture.
Avoid wood where code requires noncombustible bases, in flood-prone areas, or under tanks with leak pans; use metal, concrete, or engineered supports instead.
Tools and Materials Needed
The section lists the basic tools required—adjustable wrenches, a drill with masonry bits, a level, and a tape measure—to guarantee accurate and secure work.
It then covers fasteners and anchors, including masonry anchors, lag bolts, and seismic straps appropriate for different mounting surfaces.
Finally, it summarizes platform material options (prebuilt stands, treated lumber, concrete pavers, or metal frames) and notes which materials suit each support type.
Basic tools (wrenches, drill, level, tape measure)
Essential hand and power tools make a water heater raise efficient and safe: adjustable wrenches and pipe wrenches for plumbing fittings, a cordless drill with appropriate bits for fasteners, a bubble level to guarantee the tank sits plumb, and a tape measure for clearance and positioning.
Safety glasses, work gloves, and a flashlight assist precise work. Marking pencils and a utility knife complete the basic kit.
Fasteners and anchors (masonry anchors, lag bolts, seismic straps)
Choose appropriate fasteners and anchors based on wall material and tank weight to guarantee a secure, code-compliant installation.
Select masonry anchors (sleeve or wedge) for concrete or brick; use heavy-duty lag bolts into studs for wood framing.
Include seismic straps rated for water heaters, install per manufacturer spacing and anchoring requirements, and match fastener shear/tensile capacity to load and local code specifications.
Platform materials list by option
For a stable, code-compliant water heater platform, list materials grouped by option so installers can match site conditions and load requirements quickly.
Options include treated lumber framing with plywood top, galvanized steel or aluminum riser frames, and precast concrete or masonry pads.
Select fasteners, waterproofing, and vibration isolators to suit.
- Treated lumber + exterior plywood
- Galvanized metal frame
- Precast concrete pad
Step-by-Step: How to Safely Raise a Water Heater (Gas and Electric)
Before beginning, the technician shuts off power or gas, closes the water supply, and drains some water to reduce weight and pressure.
Next, exact clearances, venting requirements, and drip pan alignment are measured and the new location is planned.
The process then proceeds to install a suitable base or pedestal, secure the heater with straps or anchors, and carefully reconnect gas, electrical, and water lines.
Preliminary safety steps (shut off power/gas, turn off water, drain partial water)
Once the decision is made to raise a water heater, safety-critical preliminary steps must be completed: disconnect electrical power or shut off the gas supply, stop the incoming water, and relieve tank pressure by draining a controlled amount of water.
Confirm power/gas is off with appropriate testers, close the cold inlet valve, attach a hose to the drain, and open a hot faucet to vent air before partial draining.
Measure and plan placement (clearances, venting, drip pan alignment)
Several clear measurements and placement decisions must be made before lifting the water heater: verify required clearances to combustible materials and access panels, confirm proper venting alignment for gas units, and size the drip pan and its drain outlet to sit directly beneath the tank.
Mark centerline, check ceiling and door heights, measure vent pipe slope and clearance, and plan access for future service and condensate/drain routing.
Install base or pedestal (concrete pad, prefabricated pedestal, metal stand)
Set the base level and secure it to provide a stable, code-compliant support for the raised water heater.
Select a concrete pad, prefabricated pedestal, or metal stand sized for weight and clearances.
Level and anchor the base per manufacturer or local code, using proper fasteners and vibration pads as needed.
Guarantee drainage access and maintain required burner and vent clearances.
Secure the water heater to the raised platform (strapping, anchoring)
Secure the water heater to the raised platform using code-compliant straps or anchors to prevent tipping, movement, or seismic displacement.
Use manufacturer-recommended strap locations and approved materials; attach straps to structural framing or anchored plates, not just the platform surface.
Tighten to secure but avoid deforming the tank.
Verify clearances for vents and controls remain accessible after strapping.
Document anchor types and locations for inspection.
Reconnect utilities safely (gas line, electrical, water connections)
Reconnect utilities only after the water heater is firmly anchored and all clearances meet code.
A qualified plumber or licensed electrician should reconnect gas, electrical, and water lines. Use approved fittings, flexible connectors, and proper thread sealant or tape.
Verify gas piping slope and union access, confirm electrical connections follow breaker and grounding requirements, and install shutoffs and pressure relief piping per local regulations.
Test for leaks, proper venting, and operation
With utilities restored and connections confirmed by a qualified technician, the next step is to verify the system for leaks, correct venting, and proper operation before leaving the site.
Inspect all fittings and joints for drips, pressure-test water lines, check gas fittings with a leak solution, confirm vent termination and draft, pilot ignition, thermostat function, and temperature/pressure relief valve operation.
Specific Considerations for Gas Water Heaters
When raising a gas water heater, attention must be paid to combustible floor elevation rules and the situations that allow exceptions to the 18-inch clearance.
Changes in height can affect venting and draft behavior, so verification of flue alignment and draft performance after raising is crucial.
Gas line slope, the use of approved flex connectors, and code-compliant connections must also be checked to guarantee safe fuel delivery.
Combustible floor elevation rules and 18-inch requirement exceptions
Although gas water heaters normally must be elevated above combustible flooring to reduce ignition risk from pilot lights and burners, codes allow specific exceptions and alternative protections that affect actual clearance requirements.
Exceptions include listed appliances with sealed combustion, electric heaters, or units located in noncombustible pits.
Approved barriers, noncombustible platforms, and local code amendments can modify the 18-inch rule; verify jurisdictional requirements.
Venting and draft issues after raising the heater
Raise a gas water heater cautiously to avoid altering its venting performance and creating backdrafting hazards.
After elevating, confirm draft direction, clearances to vent terminations, and proper chimney or direct-vent alignment.
Check for increased condensation, sealed combustion integrity, and secure vent connections.
Perform combustion air and spillage tests per code.
If vent pressures change, consult a licensed technician for adjustments or relining.
Gas line slope, flex connectors, and code-compliant connections
Several key gas-line considerations guarantee safe, code-compliant connections for water heaters: proper slope to drain condensate or avoid pooling, use and orientation of approved flexible connectors, secure fittings and shutoffs sized for appliance demand, and clearances that meet local code.
Install rigid piping with a slight rise toward the appliance or trap where required. Use listed flex connectors without kinks, and test all joints for leaks.
Specific Considerations for Electric Water Heaters
For electric water heaters, attention must be paid to clear access to the electrical panel and maintained clearance around wiring.
The platform must support the often heavier tank and remain level to prevent strain on electrical connections.
Prior to and after raising, grounding and bonding should be inspected to guarantee safe, code-compliant electrical continuity.
Electrical access and panel clearance
When elevating an electric water heater, ensuring clear and safe electrical access is essential: the circuit breaker, disconnect switch, and conduit must remain reachable and compliant with clearances specified by the National Electrical Code and local regulations.
Maintain unobstructed workspace around panels, route wiring to avoid sharp bends or tension, secure conduit supports, and preserve required headroom and access for maintenance, testing, and emergency shutoff.
Platform stability for heavier tanks
A stable platform is critical for supporting heavier electric water heaters because increased mass amplifies risks from vibration, settling, and uneven loading.
Construct platforms with reinforced joists, cross-bracing, and load-rated plywood or steel decking. Guarantee uniform bearing on level surfaces, secure fastenings, and vibration-damping pads.
Verify platform capacity exceeds tank weight plus water and accessories, and allow inspection access without compromising stability.
Grounding and bonding checks
Inspect grounding and bonding connections before energizing an electric water heater to guarantee safe operation and code compliance.
The installer verifies that the grounding conductor is continuous, properly sized, and securely attached to the heater’s grounding terminal.
Bonding jumpers connect metal piping and structural components as required.
Any corrosion, loose connections, or missing bonds must be corrected; testing with a continuity meter confirms effectiveness.
Drainage, Drip Pans, and Flood Protection
When raising a water heater, attention must be given to selecting a suitably sized drip pan and placing it so all potential leaks are captured.
Condensate and pressure-relief overflow lines should be routed to an approved drain or to exterior discharge per code.
In high-risk locations, a dedicated floor drain or a battery-backed sump pump provides fail-safe flood protection.
Choosing and positioning a drip pan under a raised heater
Place a corrosion-resistant drip pan directly beneath a raised water heater to catch leaks and channel them to an approved drain or safe discharge point.
Select a pan sized to extend beyond the heater base, with adequate depth and load rating.
Position pan on a level, stable platform, align drain outlet toward accessible piping, and secure pan to prevent shifting while allowing inspection and easy removal.
Condensate and overflow drain routing requirements
Beyond fitting and securing a drip pan, proper routing of condensate and overflow drains determines whether leaked or drained water is safely carried away from the water heater and surrounding structure.
Drains must slope to approved discharge points, avoid backflow, use corrosion-resistant piping, terminate to visible, code-approved locations, and remain unobstructed.
Traps, air gaps, or secondary containment are required where codes mandate.
Sump pump and floor drain options for high-risk areas
In high-risk areas—such as basements, utility rooms, or buildings with history of flooding—installing a sump pump or directing drains to a floor drain provides active protection beyond a simple drip pan.
The water heater’s relief valve, pan drain, and condensate lines should route to a dedicated floor drain or sump basin with an alarm.
Confirm gravity or properly sized pump discharge and code-compliant backflow prevention.
Seismic Strapping and Anchoring Requirements
Seismic strapping and anchoring requirements specify exact strap placement, approved materials, and height limits to restrain a raised water heater during an earthquake.
Attention must be given to whether straps and anchors attach to the raised platform or directly into a concrete floor, as attachment method affects anchor type and load path.
For older installations, simple retrofit measures—upgrading straps, adding anchors, or reinforcing platforms—can bring units into compliance without full replacement.
Strap placement, materials, and height rules
When anchoring a water heater for earthquake resistance, straps must be positioned to secure the tank at two points—one within the upper third and one within the lower third of the tank’s vertical height—so that movement is restrained without compressing insulation or valves.
Use corrosion‑resistant steel or approved nylon straps, hardware rated to local code, and maintain minimum clearances above fittings; follow manufacturer and jurisdictional height requirements.
Anchoring to raised platforms vs. concrete floors
Although both raised platforms and concrete floors can provide stable bases, anchoring methods differ markedly because substrate strength, access, and vibration characteristics affect fastener selection and strap configuration.
On platforms, use structural framing anchors, through-bolts, or blocking to transfer loads to joists.
On concrete, use approved masonry anchors or epoxy-set bolts sized per load.
Confirm straps meet seismic code spacing and clearances.
Retrofit tips for older installations
Many older water heater installations require targeted retrofits to meet current seismic strapping and anchoring standards.
This is because original fittings often lack adequate strap strength, spacing, or anchor type.
Inspect straps, replace corroded or undersized bands with code-listed steel strapping, install upper and lower straps per local spacing, and upgrade anchors to approved sleeve or epoxy anchors in masonry.
Document compliance and permits.
Common Mistakes and How to Avoid Them
Common pitfalls include building a platform at the wrong height or on unstable supports, which can compromise safety and code compliance.
Faulty venting or improper gas connections pose serious risks and should be checked by a qualified installer.
Ignoring manufacturer warranty terms or conflicting local codes can void protections and create legal or safety issues.
Incorrect platform height or unstable support
Elevating a water heater on an improperly sized or unstable platform can compromise safety and performance, creating risks of tipping, uneven stress on connections, and accelerated wear.
Platforms must meet code height, load capacity, and use stable, level materials anchored to structural framing. Inspect for settling, rot, or vibration.
Replace or reinforce platforms showing deflection, soft spots, or inadequate clearances to prevent failure.
Improper venting or gas connection errors
Inspecting venting and gas connections is critical because errors in these systems can cause carbon monoxide buildup, gas leaks, reduced efficiency, and fire hazards.
Technicians should verify proper vent slope, clearances, and secure seals; use approved materials and fittings; test gas lines with a manometer or leak detector; and follow manufacturer and local code requirements.
Never reuse damaged components.
Overlooking manufacturer warranty and code conflicts
Failing to review manufacturer warranties and local code requirements before altering or relocating a water heater can void coverage and create compliance issues that are costly to correct.
Professionals note that unauthorized modifications, noncompliant materials, or improper installation heights frequently breach warranties and codes.
To avoid disputes and fines, verify warranty terms, consult local codes, and obtain permits or certified installers before raising or modifying the unit.
Inspection Checklist After Installation
Once the heater is raised, a systematic inspection guarantees stability, safety, and code compliance before finalizing the job.
The inspector should confirm the unit is level and securely supported, verify all utility connections and test for leaks, and review required code items such as clearances, seismic straps, and venting.
Any issues found must be corrected before considering the installation complete.
- Structural and leveling checks
- Utility connections and leak tests
- Code compliance items to verify before finishing
Structural and leveling checks
A careful structural and leveling check verifies that the water heater sits on a stable, level surface and that surrounding supports, platforms, or anchoring systems meet local code and manufacturer requirements.
Inspect platform framing, fasteners, and load distribution for deflection. Confirm level within manufacturer tolerance; shim or adjust as needed.
Verify clearance to combustible materials and that seismic straps anchor to solid structural members, not drywall alone.
Utility connections and leak tests
With the heater properly seated and anchored, attention turns to utility connections and leak testing to confirm safe operation.
Inspect gas or electrical hookups for secure, code‑approved fittings; tighten, seal, and verify venting.
Connect water lines with proper dielectric fittings and shutoffs.
Pressurize the system, check all joints and valves for leaks, monitor pressure, and correct any seepage before commissioning.
Code compliance items to verify before finishing
One concise checklist itemizes the code compliance points to verify before finishing: proper clearances around the heater, approved venting and combustion air, correct pressure‑relief valve orientation and discharge piping, properly sized and protected gas and electrical connections, dielectric unions on water lines, seismic or anchoring requirements, and accessible service shutoffs.
Inspect fittings for leaks, confirm labeling, verify insulation and drip pans, test shutdown devices, and document compliance for authorities.
Cost Estimates and Time Requirements
A concise cost and time overview compares DIY expenses by platform type (big-box, specialty suppliers, and online) with typical contractor quotes and guidance on when professional help is warranted.
It also outlines estimated hours for a homeowner to raise a unit versus the faster turnaround a licensed installer can usually provide.
This section prepares readers to budget for materials, labor, and scheduling before beginning the project.
DIY cost breakdown by platform type
Cost estimates and time requirements for replacing a water heater vary considerably by platform type—tank, tankless, hybrid heat pump, or point-of-use—due to differences in equipment, installation complexity, and required modifications.
DIY tank relocation: $50–300, 1–4 hours.
Tankless: $300–1,200, 4–12 hours.
Hybrid heat pump: $500–2,000, 6–16 hours.
Point-of-use: $30–400, 1–6 hours.
Typical contractor pricing and when to hire a pro
When projects involve fuel lines, electrical upgrades, structural changes, or permits, homeowners commonly hire licensed contractors whose bids typically account for labor, materials, disposal, and code compliance.
Typical quotes range widely—often $400–$2,500—depending on complexity, local rates, and required permits.
Hire a pro when work touches gas/electric, structural supports, or when permits and inspections are required to guarantee safety and code adherence.
Estimated time for DIY vs. professional installation
How long the job takes depends on experience, site conditions, and whether modifications are needed.
A competent DIYer typically completes a basic raise in 3–6 hours, including prep and cleanup. Complex sites, seismic straps, or venting changes add several hours or a day.
A licensed professional usually finishes in 2–4 hours with inspections scheduled separately; permits may extend total time.
When to Hire a Licensed Professional
A licensed professional should be consulted when work affects gas lines or venting, since improper handling creates fire and carbon monoxide risks.
Structural modifications or complex anchoring that alter load paths also warrant professional evaluation to guarantee safety and code compliance.
Finally, projects requiring local permits or inspections are best managed by someone familiar with the permit process and inspection standards.
Gas line or venting modifications
Although minor adjustments like tightening fittings or clearing simple blockages can be handled by a competent homeowner, any work that involves altering gas lines, reconfiguring vents, or changing appliance connections requires a licensed professional.
These systems pose immediate risks of fire, explosion, and carbon monoxide poisoning if improperly modified. A pro guarantees code compliance, proper clearances, correct jointing, leak testing, and safe termination to protect occupants.
Structural modifications or complex anchoring
When structural changes are needed—such as reinforcing a floor, cutting or modifying studs, or installing heavy-duty anchoring for an elevated or earthquake-strapped water heater—a licensed contractor or structural engineer should be engaged.
They assess load-bearing capacity, specify appropriate materials and anchors, guarantee compliance with structural codes, and provide stamped plans or documentation when required.
Proper expertise reduces risk of structural failure and liability.
Local permit and inspection processes
Before undertaking any work that affects plumbing, gas lines, electrical systems, or structural supports, homeowners should determine local permitting and inspection requirements and whether a licensed professional must be engaged.
Municipal codes often mandate permits for appliance relocation, fuel piping, or structural work. Inspectors verify compliance; licensed contractors streamline approvals, carry liability insurance, and guarantee work meets code.
Failure risks fines, failed inspections, and safety hazards.
Troubleshooting After Raising a Water Heater
After the water heater is raised, common post-install issues such as minor leaks, venting noises, and pilot light problems should be checked promptly.
Simple fixes—tightening connections, clearing obstructions, or relighting the pilot per manufacturer instructions—can resolve most problems.
If leaks persist, venting remains noisy, or the pilot will not stay lit, a licensed HVAC or plumbing specialist should be contacted.
Common post-install issues and fixes (leaks, venting noises, pilot light problems)
Though raising a water heater improves safety and access, a few predictable post-install issues can arise that require prompt attention: small leaks at fittings or the drain valve, unusual venting noises, and pilot light instability.
Inspect and tighten fittings, replace worn washers or the drain valve, clear vent obstructions, realign ducts, clean the pilot assembly and thermocouple, and confirm proper airflow and combustion settings.
When to call HVAC/plumbing specialists
When should a homeowner call an HVAC or plumbing specialist following a water heater raise?
A professional is advised if leaks persist, gas odors appear, venting drafts or combustion issues occur, pilot or ignition failures continue, electrical or thermostat faults surface, inadequate hot water supply remains, or local code compliance is unclear.
Complex repairs, structural concerns, or insurance questions also warrant specialist intervention.
Resources and References
Relevant local building codes and manufacturer manuals are identified as primary sources for compliance and installation specifics.
The section then lists online tools and calculators commonly used to determine platform dimensions, load capacity, and clearances.
Readers are directed to verify tool outputs against codes and manufacturer guidance.
Where to find local code information and manufacturer manuals
Where can homeowners and installers verify the rules that apply to raising a water heater?
Local building departments, municipal code offices, and state plumbing or mechanical codes provide enforceable requirements.
Manufacturer installation manuals, product datasheets, and certified installer guides specify clear elevation, anchoring, and venting instructions.
Consult AHJ (authority having jurisdiction) for interpretations and retain printed manuals for inspection and warranty compliance.
Useful online tools and calculators for platform sizing
Several online calculators and design tools simplify determining the correct platform dimensions, load capacity, and clearance requirements for raised water heaters.
They help translate local codes and manufacturer specs into practical platform plans, factoring material selection and anchoring. Users should verify inputs and cross‑check results with codes or professionals before construction.
- Structural load calculators (live, dead, seismic)
- Platform dimension templates
- Fastener and anchorage selectors
Conclusion
Raising a water heater off the floor enhances safety, code compliance, and longevity. Some may object that doing so is costly or unnecessary, but even modest platforms prevent combustible clearances, water damage, and inspection failures—small investment with outsized benefits. When performed to code or by a licensed professional, the elevation protects property and occupants while simplifying maintenance. Ultimately, the precaution pays back through reduced risks, fewer repairs, and smoother compliance with local regulations.