How to Tell If a Faucet Cartridge Is Bad: 7 Simple Tests to Diagnose and Fix It
If you’re experiencing issues with your faucet, such as persistent dripping, a stiff or loose handle, temperature fluctuations, sputtering flow, or weak hot/cold output, it may be a sign of a bad faucet cartridge. To diagnose the problem, check for visible cracks and debris, look for external and internal leaks, test the handle’s movement, ensure a consistent hot/cold mix, and measure the water flow to eliminate supply issues. Use basic tools, turn off the water supply, and replace any damaged seals or the cartridge itself. Follow our step-by-step guide for removal, repair, and troubleshooting to restore your faucet’s functionality.
How to Quickly Tell If a Faucet Cartridge Is Bad
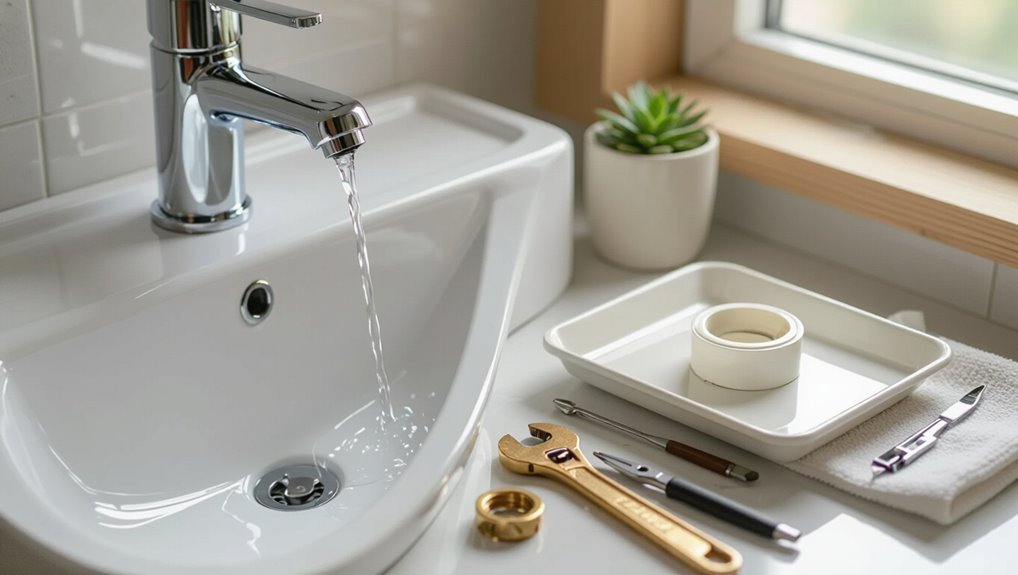
A concise checklist of common symptoms—persistent drips, stiff or loose handle operation, and sudden changes in temperature control—helps identify a failing cartridge.
The checklist can be used immediately at the faucet to narrow the problem to the cartridge.
If leaks occur at the base, spout, or mounting hardware, or if the issue is isolated to aerator flow, the fault may lie with other faucet components.
One-sentence symptom checklist for immediate diagnosis
When water behavior or handle response changes suddenly, use this quick symptom checklist to determine whether the faucet cartridge is likely failing:
- uneven flow
- sputtering
- weak hot or cold delivery
- constant dripping with handle off
- handle stiffness or looseness
- grinding or sticking during movement
- sudden temperature swings
- visible leaks around the spout
- reduced pressure despite clear aerator
These are clear indicators for how to tell if a faucet cartridge is bad.
When to suspect the cartridge vs. other faucet parts
After running the quick symptom checklist, the next step is to distinguish cartridge issues from other common faucet components like aerators, O-rings, seats, springs, and valves.
Cartridge suspicion rises when problems affect both hot and cold, sticky or stiff handle movement, uneven flow despite clean aerator, internal leaks when handle is off, or persistent dripping after replacing external seals—indicating internal wear or debris.
Tools and Safety Precautions Before You Start
Before beginning cartridge inspection, the technician gathers essential tools and materials such as an adjustable wrench, screwdriver set, replacement O-rings or cartridge, plumber’s grease, and a towel or small bucket.
Safety steps include wearing gloves and eye protection and ensuring the work area is dry. The water supply must be shut off at the shutoff valves (or main if necessary) and the faucet operated to relieve residual pressure before disassembly.
Tools and materials you’ll need
A compact set of tools and a few basic safety items will make diagnosing or replacing a faucet cartridge efficient and safe.
Essential items include a basin wrench, adjustable wrench, and cartridge puller; a silicone grease tube; replacement cartridge; plumber’s grease; towels; and a small flashlight.
Recommended PPE: gloves and safety glasses.
- Basin wrench
- Cartridge puller
- Replacement cartridge
Safety steps and shutting off water supply
With tools and PPE gathered, the next step is to guarantee safety and stop the water flow to prevent leaks or injury.
Turn off the shutoff valves under the sink or the house main if unavailable. Open faucet to relieve pressure.
Block drains, wear gloves and eye protection, and keep a bucket and towels ready.
Verify no residual flow before disassembly.
Basics: What a Faucet Cartridge Does and Common Failure Modes
A faucet cartridge controls water flow and temperature, operating differently in single-handle models (mixing hot and cold within one unit) and dual-handle setups (separate cartridges for each side).
Over time, cartridges can show signs of wear such as stiffness, leaks, or uneven temperature control.
Common failure modes include corrosion, mineral buildup that restricts movement, and deteriorated seals that allow dripping.
Cartridge function in single-handle and dual-handle faucets
Cartridge assemblies control water flow and temperature by aligning internal openings and seals when handles are moved; in single-handle faucets a single cartridge mixes hot and cold and varies volume with one motion, while dual-handle systems use separate cartridges or valve stems to regulate each supply independently.
Function relies on precise port alignment and seal integrity; misalignment or seal damage alters flow, mix, or allows leakage.
Signs of wear, corrosion, mineral buildup, and seal failure
Signs of wear, corrosion, mineral buildup, and seal failure manifest in predictable ways that indicate a faucet cartridge is nearing the end of its serviceable life.
Symptoms include persistent dripping, reduced or uneven water flow, stiffness or rough movement, visible pitting or mineral crust on cartridge surfaces, and water mixing issues (temperature instability).
Leaks around the handle or base and degraded rubber seals confirm deterioration.
7 Simple Diagnostic Tests
The following tests provide quick, practical checks to determine whether a faucet cartridge is failing.
They include a visual inspection for cracks, corrosion, and debris; checking for leaks with the faucet off both externally and under the sink; and evaluating handle movement and resistance.
Additional checks cover hot/cold mix consistency, temperature drift, and low flow or reduced water pressure.
Test 1 Visual inspection for cracks, corrosion, and debris
A careful visual inspection can quickly reveal obvious failures such as hairline cracks, mineral buildup, or lodged debris that interfere with sealing and movement.
The cartridge should be removed and examined under good light for warped surfaces, pitting, or rubber seat deterioration.
Calcium deposits and gritty particles indicate cleaning or replacement; any visible structural damage warrants cartridge replacement rather than repair.
Test 2 Check for leaks when faucet is off (external and under-sink)
How can one confirm a cartridge leak when the faucet appears off?
Inspect the spout and base for drips, stains, or mineral trails.
Place a dry paper towel beneath fittings, then check after several minutes.
Under the sink, examine supply lines, hose connections, and the cartridge body for moisture.
Note slow seepage versus active dripping to determine severity and need for repair.
Test 3 Handle movement and resistance test
Move the handle through its full range of motion to assess cartridge condition and feel for abnormal resistance or looseness.
Observe for sticking, grinding, or uneven tension suggesting worn seals, debris, or damaged splines. Note any side-to-side play indicating loose retaining hardware or a degraded cartridge.
Repeat several cycles; consistent irregularity warrants cartridge inspection or replacement to restore smooth, reliable operation.
Test 4 Hot/cold mix inconsistency and temperature drift
Why does the faucet fail to hold a steady temperature?
The technician checks for worn seals, internal cartridge wear, or debris preventing proper hot/cold valve seating.
With water running, incremental handle adjustments reveal temperature drift or sudden shifts.
Intermittent mixing indicates cartridge malfunction or partial blockage; replacing or cleaning the cartridge typically restores stable temperature control.
Test 5 Flow rate and low water pressure test
When does reduced flow indicate a cartridge problem rather than a supply issue?
The technician first checks building supply by testing other fixtures and verifying shutoff valves fully open.
If low pressure is isolated to one faucet, debris, worn seals, or internal passages in the cartridge likely restrict flow.
Removing and inspecting the cartridge or aerator confirms clogging versus broader plumbing or municipal supply problems.
Test 6 Swap or bench-test the cartridge (if spare available)
Swapping or bench-testing a cartridge isolates the part from the faucet so a technician can confirm whether the cartridge itself causes leaks, poor mixing, or restricted flow.
Remove the suspect cartridge, install a known-good spare or run the cartridge on a bench with controlled water supply.
Observe operation, check for internal leaks, sticking, or imbalance.
Replace if faults reproduce.
Test 7 Remove and inspect seals, O-rings, and seat for damage
Remove the cartridge and examine the seals, O-rings, and seat closely for nicks, flattening, mineral buildup, or tear damage that can cause leaks or poor sealing.
Inspect each component under good light, wiping away deposits with vinegar if needed.
Replace any compromised parts, lubricate new O-rings with plumber’s grease, and reassemble.
Proper seating prevents drips and restores smooth operation.
How to Remove and Inspect the Cartridge (Detailed How-To)
The section outlines a concise, step-by-step disassembly for common faucet types, from single-handle to two-handle and ball-style units.
It explains how to identify cartridge types, locate matching part numbers, and verify compatibility.
Clear visual and tactile inspection cues—wear, mineral buildup, cracks, and stiffness—are described to help determine cartridge condition.
Step-by-step disassembly for common faucet types
One clear, methodical approach helps guarantee safe, accurate inspection of faucet cartridges across common single-handle, two-handle, and ceramic-disk designs.
Steps summarize disassembly, inspection, and reassembly focused on safety and parts care:
- Shut water, remove handle, document screw/retainer locations.
- Extract cartridge with puller or pliers, inspect seals and stems.
- Clean bore, replace O-rings, lubricate, reassemble slowly and test.
Identifying cartridge types and matching part numbers
After disassembly and basic inspection, attention turns to identifying the specific cartridge type and locating the correct replacement part.
Measure dimensions, note stem style and mounting tabs, and photograph any markings. Reference manufacturer catalogs or hardware stores with photos.
Recommended steps:
- Record measurements and visible numbers.
- Compare photos to OEM diagrams.
- Confirm compatibility by model or part number before purchasing.
What to look for during inspection (visual and tactile cues)
Inspection begins with a systematic visual and tactile survey of the removed cartridge and surrounding valve body to identify wear, damage, and debris.
Check seals and O-rings for cracking, flattening, or missing pieces.
Inspect ceramic discs or spools for scoring, pitting, mineral buildup, or corrosion.
Feel for roughness, looseness, or play.
Note hardened deposits and foreign particles for cleaning or replacement.
Repair, Clean, or Replace: Decision Guide
After inspecting the cartridge, the next step is to decide whether cleaning and lubrication will restore function or if full replacement is necessary.
Simple issues like mineral buildup or dried grease often respond to cleaning, while worn seals, cracked housing, or persistent leaks usually require a new cartridge.
The choice should weigh the time and parts cost of repair against the price and reliability of replacement.
When cleaning or lubricating will fix the problem
Cleaning or lubricating a faucet cartridge can resolve many common issues—stiff handles, minor leaks, or uneven flow—when buildup or dried seals are the root cause.
The cartridge should be inspected for mineral deposits, torn O‑rings, or gritty movement.
Gentle cleaning with vinegar and a nonpetroleum silicone grease on seals often restores smooth operation; test function before reassembly.
When to replace the cartridge entirely
Even when cleaning and lubrication fail to restore smooth operation, there are clear signs that a cartridge should be replaced rather than repaired.
Persistent leaks, cracked or corroded housing, warped seals, or stripped splines indicate irreversible damage.
Repeated intermittent function after repairs, contamination embedded in ceramic discs, or obsolete parts that cannot be sourced also justify full replacement to guarantee reliable, long-term performance.
Cost and time comparison: repair vs. replacement
Cost-benefit analysis guides the choice between repairing and replacing a faucet cartridge by weighing parts and labor costs against expected longevity and downtime. Repair saves money for minor wear; replacement suits repeated failures or obsolete parts. Time estimates, warranty, and water efficiency factor into decisions. Compare scenarios quickly:
| Option | Typical outcome |
|---|---|
| Repair | Short term fix |
| Replace | Long term solution |
| DIY | Lowest cost |
| Pro install | Fast, higher cost |
How to Replace a Faulty Cartridge
Before beginning, the homeowner should gather the replacement cartridge and a parts checklist to verify compatibility and have necessary tools on hand.
The procedure should then cover clear installation steps for common cartridge styles—single-handle, double-handle, and ceramic disc—highlighting any model-specific tips.
Finally, post-installation checks must include reassembling the faucet, slowly restoring water pressure, and testing all connections for leaks.
Preparing the new cartridge and parts checklist
A concise checklist of parts and a brief pre-install inspection guarantee the replacement proceeds smoothly: confirm the new cartridge matches the make and model, gather O-rings, retaining clips, plumber’s grease, and any manufacturer-specified seals, and lay out basic tools—adjustable wrench, Allen keys, screwdrivers, and a basin wrench—on a clean surface near the work area.
- Verify compatibility
- Inspect seals and O-rings
- Organize tools and parts
Installation steps for common cartridge styles
Begin by identifying the cartridge style—ball, disc, or ceramic—since each requires slightly different handling and reassembly order.
Remove retaining clips or nuts, extract the old cartridge straight up, inspect seats and springs, and clean the bore.
Install the new cartridge oriented correctly, replace seals or O-rings, secure retaining hardware to manufacturer torque guidance, and reassemble handle and trim in reverse removal order.
Post-installation checks and how to test for leaks
Perform a systematic post-installation inspection to confirm the cartridge functions and the assembly is watertight.
Slowly restore water supply, cycle handle through hot and cold positions, and observe for immediate leaks.
Inspect connections, escutcheon, and spout for drips.
Check under-sink supply lines and shutoff valves.
Run water under pressure for several minutes; tighten fittings if seepage appears, then re-test.
Troubleshooting Persistent Problems After Replacement
If symptoms persist after installing a new cartridge, attention should turn to supply-line debris or malfunctioning shutoff valves that can restrict flow or introduce contaminants.
Remaining issues may stem from the valve body, worn seats, or damage within the faucet assembly that a cartridge swap cannot fix.
If cleaning and inspection do not resolve the problem, a professional plumber should be consulted to diagnose and repair internal valve or assembly defects.
Problems caused by supply-line debris and valves
Although a new cartridge often fixes dripping or poor flow, lingering issues can arise when debris in the supply lines or faulty shutoff valves obstruct water delivery or introduce sediment into the replacement part.
Particles can abrade seals, clog ports, or mimic cartridge failure. Inspect and flush supply lines, clean aerators, and verify shutoff valve operation; replace corroded valves to prevent recurrence.
When the problem is the valve body, seats, or faucet assembly
When persistent leaks, uneven flow, or difficulty seating continue after replacing the cartridge, attention must shift to the valve body, seats, and the faucet assembly itself.
Inspect for corrosion, pitting, warped or compressed seats, and mineral buildup preventing a proper seal.
Check mounting hardware, retainer clips, and alignment.
Replace damaged seats or valve bodies and clean assembly surfaces before reinstalling the cartridge.
When to call a professional plumber
Should problems persist after inspecting or replacing the valve body, seats, and assembly, it may be time to call a professional plumber.
A licensed plumber can diagnose hidden issues—supply line damage, corroded pipes, incorrect cartridge compatibility, or valve seat misalignment. They have specialized tools and parts, guarantee code compliance, and prevent further damage.
Seek quotes, credentials, and warranties before hiring.
Maintenance Tips to Extend Cartridge Life
Regular maintenance can greatly extend a faucet cartridge’s lifespan through a few targeted practices.
Establishing a routine for cleaning and descaling, addressing water quality to reduce mineral buildup, and using appropriate lubricants and sealants will prevent common wear.
The following guidance outlines practical steps for each of these areas.
Routine cleaning and descaling schedule
Although mineral buildup develops slowly, a consistent cleaning and descaling schedule prevents deposits from seizing the cartridge and preserves smooth valve action.
Recommended routine:
- Monthly wipe of exposed parts with mild detergent and a soft brush.
- Quarterly descaling soak of removable components in diluted solution per manufacturer instructions.
- Annual inspection and deep clean, replacing worn seals to maintain leak-free performance.
Water quality solutions to prevent mineral buildup
Because tap water chemistry varies widely, addressing mineral content at the source is the most effective way to prevent cartridge-clogging buildup.
Install whole-house or point-of-use water softeners, use sediment and scale-reduction filters, and consider reverse osmosis for high-mineral areas.
Regular water testing informs appropriate treatment.
These measures reduce limescale, extend cartridge life, and lower maintenance frequency.
Best lubricants and sealants for faucet cartridges
Reducing mineral buildup at the source helps, but selecting the right lubricants and sealants directly protects moving parts and prevents leaks that can shorten cartridge life.
Use silicone-based plumber’s grease for O-rings and ceramic cartridges; it resists water and won’t degrade rubber.
For thread sealant, choose PTFE tape or non-hardening pipe dope rated for potable water.
Avoid petroleum-based products that swell seals.
Common Mistakes to Avoid When Diagnosing or Replacing Cartridges
Common errors when diagnosing or replacing a faucet cartridge include using the wrong replacement part or forcing components, which can damage the valve.
Skipping the water shutoff risks flooding and complicates repairs.
Improper reassembly often causes leaks or poor function and should be avoided.
Incorrect part selection and forcing components
Selecting the wrong cartridge or forcing a mismatched part into place often turns a simple repair into a recurring problem, causing leaks, poor operation, or damage to the valve body.
Technicians should verify model numbers, compare seals and stem dimensions, and avoid hammering or forcing components.
Using correct parts and gentle alignment prevents stress, preserves sealing surfaces, and guarantees reliable faucet function.
Skipping the shutoff or improper reassembly
If the water supply is not shut off before removing a cartridge, sudden pressure can spray water, dislodge seals, or wash small parts into the drain, complicating diagnosis and increasing repair time.
Reassembly errors—misaligned O-rings, reversed components, or loose retaining nuts—cause leaks, poor handle function, or premature wear.
Follow diagrams, replace damaged seals, and torque fasteners to specifications.
Quick Reference: Symptom-to-Test Mapping
When a faucet shows a particular symptom, a short list of targeted tests can quickly confirm whether the cartridge is at fault; this section pairs common signs—drips, reduced flow, temperature inconsistency, stiffness, or noise—with the simplest diagnostic steps to isolate cartridge issues from supply, valve seat, or aerator problems.
| Symptom | Quick test | Likely cause |
|---|---|---|
| Drip | Remove cartridge, inspect seals | Cartridge or seat |
| Low flow | Remove aerator, check supply | Aerator or cartridge |
Conclusion
In short, when a cartridge begins to “take creative liberties” with flow or temperature, it’s usually a polite sign it needs attention. After the seven tests and a careful inspection, a clear replacement or cleaning often resolves the fuss. Proper tools, cautious handling, and routine upkeep quiet recurring irritation. If problems persist despite tidy efforts, a professional’s steady hand will discreetly restore order and prevent further domestic inconvenience.