How to Install a Grinder Pump: Step-by-Step Guide for DIY and Pros
How to Install a Grinder Pump: A Quick Overview
To install a grinder pump, you’ll need to follow several key steps. First, assess your site and obtain necessary permits. Next, choose the right pump size for your property. The installation involves excavating a basin, connecting plumbing, securing electrical wiring with a control panel and floats, and performing leak and electrical tests. While DIY enthusiasts can manage basic installations, it’s essential to adhere to local codes; complex tasks should be handled by professionals. For comprehensive procedures, troubleshooting, and maintenance tips, continue reading.
Overview of Grinder Pump Systems and When Installation Is Needed
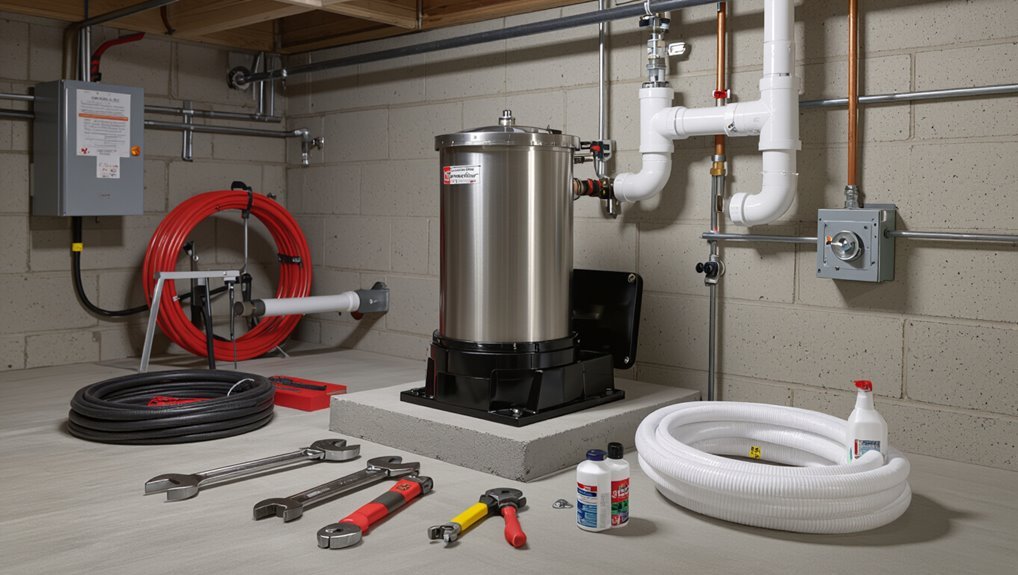
A grinder pump is a sealed unit that macerates sewage and pumps it under pressure to a sewer line or septic system, using a cutter assembly and centrifugal motor.
It is commonly used in low‑lying residential lots, remote homes, and some small commercial sites where gravity flow is impractical.
Indicators for new or replacement installation include frequent clogs, persistent alarms, unusual vibrations or noise, and repeated repair failures.
What a grinder pump is and how it works
Grinder pumps are sealed sewage-lift systems that macerate household waste into a fine slurry and then pump it through small-diameter force mains to a sewer main or septic system inlet.
They contain a cutting mechanism, impeller, motor, and level controls that activate automatic pumping.
Understanding these components and flow dynamics is essential for safe how to install a grinder pump and guarantee reliable operation.
Typical residential and commercial applications
Homes and businesses located below the elevation of a municipal sewer main, distant from gravity sewers, or served by small-lot developments often require a grinder pump system to move wastewater reliably.
Typical residential uses include basements, remote cottages, and new subdivisions.
Commercial applications cover restaurants, motels, strip centers, and light industrial sites where elevation, distance, or low-flow sewers prevent gravity drainage.
Signs you need a new grinder pump or replacement installation
Properties situated below sewer mains or served by distant gravity lines may eventually face issues that indicate a grinder pump needs replacement or a new installation.
Persistent sewage backups, frequent alarms or cycling, reduced flow, loud or irregular motor noise, oil or hydraulic leaks, and repeated repairs signal failure.
Upgrading when pump capacity mismatches demand or system age exceeds manufacturer lifespan prevents property damage and regulatory violations.
Quick Answer: Can You Install a Grinder Pump Yourself?
A competent homeowner can handle basic grinder pump installations in straightforward, permitted situations, provided local codes allow DIY work and required inspections are obtained.
Complex sites, electrical hookup beyond simple connections, or jurisdictions requiring licensed installers call for a professional.
When gravity lines, pump sizing, or sewage regulations are uncertain, hiring a licensed contractor minimizes risk and guarantees compliance.
Summary of DIY feasibility and legal/permitting considerations
Several factors determine whether a homeowner can install a grinder pump themselves: local codes and permits, the complexity of the plumbing and electrical work, required equipment and safety measures, and the individual’s skill level.
Homeowners should verify permit requirements, inspect site constraints, confirm electrical capacity, assess tool needs, and consider liability and inspection obligations before attempting installation to guarantee compliance and safety.
When to hire a licensed pro instead of DIY
When local codes require a licensed electrician or plumber, or when the installation involves complex sewer routing, deep excavation, or upgrading a home’s electrical service, homeowners should hire a licensed pro rather than attempt a DIY grinder pump installation.
Professionals are recommended for unfamiliar electrical work, confined spaces, permit coordination, warranty compliance, and troubleshooting.
Hire licensed contractors for safety, code compliance, and reliable system performance.
Pre-Installation Planning and Requirements
Before beginning work, the installer must confirm local codes, obtain any required permits, and schedule inspections to guarantee compliance.
The selection of a grinder pump should match flow and head requirements, while tools, materials, and personal protective equipment are identified and gathered.
A site assessment that measures distance to sewer or septic, elevation changes, and access constraints determines routing and installation feasibility.
Local codes, permits, and inspections checklist
A concise checklist of local codes, permits, and inspection requirements is essential before proceeding with a grinder pump installation; it guarantees legal compliance, prevents costly rework, and clarifies responsibilities among property owners, contractors, and inspectors.
Include permit types, required documentation, setback and burial depth rules, electrical and plumbing code references, approved contractor credentials, inspection stages and fees, required testing, and timeline expectations.
Selecting the correct grinder pump model and capacity
Several factors determine the correct grinder pump model and capacity, including expected sewage flow, peak demand, pipe run and elevation (head), solids handling requirements, and local utility constraints.
Selection requires calculating average and peak GPM, total dynamic head, and grinder grit/solids tolerance.
Consider motor size, horsepower, control options, and backup needs.
Verify manufacturer curves and utility-approved models before purchase and installation.
Required tools, materials, and safety equipment
When planning a grinder pump installation, the installer should assemble a concise list of specialized tools, plumbing and electrical materials, and PPE to guarantee safe, code-compliant work.
Essential items include the following:
- Heavy-duty grinder pump, control panel, and floats — confidence
- PVC/HDPE piping, fittings, and check valve — security
- Conduit, wiring, breakers, and connectors — assurance
- Concrete/adapters, anchors, sealing materials — stability
- Gloves, eye protection, respirator, and lockout-tagout — safety
Site assessment: distance to sewer/septic, elevation, and access
Site assessment evaluates the distance to the municipal sewer or existing septic system, relative elevations, and site access to determine pump capacity, discharge routing, and installation feasibility.
Measurements confirm required head, pipe length, and slope; identify obstacles, rights-of-way, and safe dig zones. Access for equipment, vehicle turnaround, and future maintenance informs placement.
Regulatory connections and setback requirements must be verified before procurement.
Preparing the Site and Existing Plumbing
The installer identifies and clearly marks the precise location for the pump basin and plans pipe routes before work begins.
All power to existing equipment is shut off and any fixtures tied to the system are drained to prevent spills.
Excavation and compacted bedding are prepared to grade while inlet and discharge plumbing are cut, fitted, and preassembled for final connection.
Locating and marking the installation point
Before marking the grinder pump location, the installer should confirm the planned path of incoming sewer discharge and accessible power conduits, ensuring the chosen spot aligns with existing plumbing elevations and local code setbacks.
Next, measure clearance for access panels and maintenance, locate a stable, level base, mark inlet/outlet and conduit entries, and verify distances to property lines, utilities, and other fixtures.
Shutting off power and draining connected fixtures
Power to the area should be shut off at the circuit breaker or fused disconnect to guarantee all electrical feeds to the grinder pump and any connected fixtures are dead before work begins.
Then isolate plumbing by closing nearby valves and capping lines.
Open lowest drains and faucets to relieve trapped water and pressure.
Collect discharge into buckets or hoses and verify dry, depressurized connections before proceeding.
Excavation, bedding, and base preparation for the pump basin
Excavate a level pit sized to the manufacturer’s basin plus working clearance, keeping soil piled well away from edges to prevent collapse.
Verify depth for correct inlet elevation. Compact subgrade, remove organic matter, and place 4–6 inches of crushed stone or concrete pad per instructions.
Check basin sits plumb and level, with access hatch oriented for maintenance.
Backfill in layers with controlled compaction.
Preparing inlet and discharge plumbing connections
Lay out and inspect the existing plumbing and site approach to confirm pipe sizes, invert elevations, and the planned routing for both the inlet and discharge lines.
Verify slope, access points, and nearby utilities. Select compatible fittings and connector couplings.
Mark penetration locations on the basin. Install restraint and support points, plan for air/vacuum relief and check valves, and pre-fit assemblies before final connections.
Step-by-Step Grinder Pump Installation
The following steps outline the practical installation of the grinder pump, beginning with assembling the pump and accessory components.
They cover correctly placing and anchoring the unit in the basin, connecting the inlet with a check valve, and installing the pressure-rated discharge line.
The sequence concludes with the electrical hookup, including the control panel, float switches, and conduit.
Assembling the pump and accessory components
Begin by organizing all pump, piping, and accessory components on a clean, level work surface to confirm parts and hardware before assembly.
Inspect seals, gaskets, and electrical fittings for defects.
Assemble discharge elbow, check valve, and mounting bracket per manufacturer torque specs.
Install cord grips and conduit entries, apply thread sealant where required, and pre-seat fasteners hand-tight for final adjustment.
Placing and anchoring the pump in the basin
With the assembled discharge elbow, check valve, and electrical fittings verified, attention shifts to positioning the grinder pump in the basin.
The unit is lowered vertically onto the prepared pedestal or baseplate, centered and level. Fasteners or anchor bolts secure the pump per manufacturer torque specs.
Vibration-isolating pads may be installed. Final checks guarantee stable, plumb placement before backfilling or covering the basin.
Connecting the inlet piping and check valve
Attach the inlet piping and check valve next, ensuring all components align with the pump’s inlet flange and the system’s flow direction.
Use proper gasket material, flanges, or adapters rated for wastewater.
Tighten bolts evenly and torque to manufacturer specifications.
Position the check valve vertically or as specified to prevent backflow.
Verify seals, supports, and slight slope for drainage before testing connections.
Installing the discharge line and pressure-rated fittings
After confirming the inlet piping and check valve are properly aligned, sealed, and supported, attention turns to routing the discharge line and installing pressure-rated fittings.
The discharge line is run with proper slope and support, minimizing bends. Use fittings and pipe rated for expected pressure, install threaded or flanged connections with compatible gaskets, and torque to manufacturer specifications.
Test for leaks and secure anchors.
Electrical hookup: control panel, float switches, and conduit
Begin the electrical hookup by verifying power requirements and local code before any wiring is started: confirm voltage, phase, and ampacity for the grinder pump and control panel, and obtain any required permits.
Mount the control panel near the pump, route conduit from panel to basin, install float switches per manufacturer orientation and setback, secure wiring with proper connectors, and label circuits and floats clearly.
Grounding, circuit protection, and GFCI requirements
When preparing the electrical system for a grinder pump, the installer must guarantee a reliable grounding path, appropriate overcurrent protection, and any required ground-fault protection are in place to protect equipment and reduce shock risk.
Equipment grounding conductor sizing follows NEC; circuit breakers or fuses match motor full-load and locked-rotor current per nameplate.
GFCIs are used where code mandates, typically in wet locations.
Initial fill, priming (if required), and startup procedure
Fill the wet well to the manufacturer’s recommended level and, if applicable, prime the pump according to the installation manual before energizing the motor.
Verify valves and check valves are correctly positioned, open discharge slowly to avoid water hammer, and confirm float switches move freely.
Energize briefly to observe correct rotation and sealing, monitor for leaks, abnormal noise, and expected pressure, then document start-up readings.
Testing and Commissioning
The installer conducts systematic leak checks of all plumbing and fittings before energizing the system.
Electrical tests and startup verification follow, then performance checks of cycle times, run durations, and alarm response are recorded.
A final inspection completes the process and secures permit sign-off.
Leak checks for plumbing and fittings
Begin pressurizing the system slowly to detect leaks without stressing joints or seals.
Inspect all pipe connections, fittings, union joints, and valve interfaces visually and by touch for moisture.
Monitor pressure gauges and look for drops indicating seepage.
Tighten fittings incrementally; replace damaged seals or fittings.
Perform a dye or soapy-water test at suspect areas, then re-pressurize and confirm stability before backfilling.
Electrical tests and startup verification
Power up the control system only after mechanical and leak checks are complete and all safety interlocks are verified.
The electrician inspects wiring continuity, correct phase rotation, voltage levels, and grounding. Control logic and float switch responses are monitored during initial energization.
- Relief at visible correct voltages
- Confidence from proper grounding
- Tension during first start
- Relief when interlocks engage
- Satisfaction at steady operation
Performance checks: cycle times, run duration, and alarms
Start by recording baseline cycle times, individual run durations, and alarm responses under controlled load conditions to establish expected operating parameters.
Compare observed cycles to manufacturer specifications, noting variations from normal.
Verify pump rest intervals, cumulative runtime, and alarm thresholds trigger correctly under simulated faults.
Log results, adjust float settings or control relays if needed, and retest until performance remains consistent and stable.
Inspection and permit sign-off process
A thorough inspection and formal testing protocol are required before requesting permit sign-off to confirm the grinder pump system meets all code, safety, and manufacturer requirements.
Inspectors verify electrical connections, alarms, tank integrity, float operation, and check valves.
Document test results, observed deficiencies, corrective actions, and as-built drawings.
Submit paperwork and schedule final inspection; obtain written permit closure only after approval.
Routine Maintenance and Troubleshooting
Routine maintenance should follow a clear schedule featuring inspections, lubrication, and seal checks to prevent failures.
Common performance issues—such as reduced flow, humming motors, or frequent alarms—can be diagnosed by checking power, float switches, and impellers.
Guidance on clearing clogs, resetting alarms, replacing seals or impellers, and criteria for full pump replacement will be provided.
Regular maintenance schedule and tasks
Regular inspections and scheduled servicing keep a grinder pump operating reliably and prevent costly failures.
A concise maintenance calendar includes monthly visual checks, quarterly odor and seal inspections, biannual control panel tests, annual professional servicing, and prompt replacement of worn parts.
Emotional reassurance comes from predictable care and minimized downtime.
- Confidence in routine
- Relief from surprises
- Pride in upkeep
- Reduced anxiety
- Trust in performance
Common performance problems and diagnostics
After outlining a maintenance calendar, attention shifts to recognizing common performance problems and diagnosing their causes. Symptoms include unusual noise, reduced flow, frequent cycling, odors, and alarms.
Diagnosis relies on systematic inspection, electrical testing, and flow measurements. Emotional cues remind users to act promptly:
- Frustration at repeated alarms
- Anxiety over foul odors
- Relief when noise stops
- Urgency with low flow
- Confidence after diagnosis
How to clear clogs, reset alarms, and replace seals or impellers
Begin by isolating power and securing the work area before addressing clogs, alarms, or worn components; this guarantees safety and prevents further damage.
Inspect intake and discharge for blockages, remove obstructions, and flush lines.
Silence alarm by resetting per manufacturer instructions after verifying normal operation.
Replace worn seals or impellers with OEM parts, lubricate shafts, torque fasteners to spec, and test pump function under load.
When to replace the entire pump
Once clogs, alarms, and worn components have been addressed and the pump continues to show diminished performance, recurring faults, or evidence of internal deterioration, it is time to evaluate full replacement.
Replacement is warranted when repairs are frequent, parts are obsolete, efficiency falls, or noise and vibration indicate bearing or shaft failure.
Consider lifecycle age, cost versus repair, and warranty before replacing the unit.
Safety Considerations and Best Practices
Before beginning work on a grinder pump, the installer should verify electrical isolation and follow lockout/tagout procedures to prevent accidental energization.
Work in excavations or pump stations requires confined‑space awareness, appropriate shoring, and atmospheric testing to protect personnel.
All handling of sewage and waste must use spill containment, disinfecting measures, and proper disposal to minimize environmental contamination.
Electrical safety and lockout/tagout steps
Isolate the grinder pump’s electrical supply and verify de-energization using a properly rated voltage tester before any wiring or internal access occurs.
Implement lockout/tagout procedures per local code: lock breakers, attach durable tags with date and responsible person, and secure controls.
Confirm zero energy state, bleed residual capacitive or stored energy, and maintain records.
Only qualified personnel should restore power following inspection.
Confined-space and excavation safety tips
Address confined-space and excavation hazards methodically by treating every pit, wet well, or trench as a potential permit-required space until assessed otherwise.
Inspect atmosphere, use continuous gas monitoring, and guarantee ventilation before entry.
Establish positive barriers, shoring, or trench boxes to prevent collapse.
Require trained attendants, communication protocols, and rescue plans.
Prohibit unauthorized entry and enforce PPE, lighting, and fall protection.
Environmental precautions for sewage handling
Following confined-space and excavation safeguards, attention must turn to minimizing environmental impact when handling sewage and grinder pump waste.
Personnel should contain spills, use absorbents, and prevent runoff to storm drains.
Sewage and contaminated materials require proper disposal per local regulations.
Decontaminate tools and PPE, document incidents, and notify authorities for large releases.
Prioritize source control to protect soil and waterways.
Cost Breakdown and Time Estimates
A concise cost and time outline helps prepare for grinder pump installation by listing typical material and equipment prices, comparing DIY labor to professional rates, and estimating duration for each stage.
Material costs commonly include the pump, piping, fittings, and electrical components, while labor can vary widely between homeowner effort and licensed contractors.
Expected timeframes cover site preparation, excavation and piping, electrical hookup, and testing, with each stage given a realistic range.
Typical material and equipment costs
Budgeting for a grinder pump installation requires a clear breakdown of materials, equipment rental or purchase, and labor hours to produce realistic cost and time estimates. Typical material costs include pump, piping, fittings, electrical, and sealants; equipment rentals cover trenchers or pumps. Expect variability by model and site conditions; contingency of 10–20% is prudent.
| Item | Typical Cost |
|---|---|
| Grinder pump | $800–$2,500 |
| Piping & fittings | $100–$500 |
| Electrical & controls | $200–$800 |
| Equipment rental | $50–$300/day |
Labor cost estimates for DIY vs. hiring a pro
After outlining material and equipment costs, attention shifts to labor, where choices between DIY and hiring a professional have the largest impact on total expense and schedule.
DIY labor reduces cash outlay but carries opportunity cost, learning curve and potential permit penalties.
Professional rates vary regionally; expect flat fees or hourly charges, plus diagnostics and warranty value that can offset higher upfront costs.
Expected time to complete each installation stage
One can generally expect the grinder pump installation to unfold across several distinct stages—site preparation, excavation and pit construction, pump and piping placement, electrical hookups and testing, and final backfill/restoration—each with its own typical time window based on complexity and crew experience.
Typical estimates: site prep 1–3 hours, excavation 4–12 hours, placement 2–4 hours, electrical 3–6 hours, testing/backfill 2–6 hours.
Comparison of Popular Grinder Pump Brands and Models
A concise comparison of popular grinder pump brands and models focuses on capacity, horsepower, and warranty terms to help homeowners match equipment to household needs.
Attention is given to models commonly recommended for typical residential setups, highlighting performance and reliability differences.
Clear side-by-side criteria enable practical selection based on expected flow rates, motor strength, and warranty coverage.
Key features to compare: capacity, horsepower, warranty
When evaluating grinder pump brands and models, capacity, horsepower, and warranty are the chief criteria that determine suitability and long-term cost. Capacity dictates volume handled; horsepower affects grinding efficiency and longevity; warranty influences total ownership risk. Compare rated GPM, motor HP, and warranty length/coverage before selection.
| Feature | What to check |
|---|---|
| Capacity | GPM, peak flow |
| Horsepower | Start/continuous HP, duty cycle |
Recommended models for typical residential setups
Although residential needs vary by household size and site constraints, several grinder pump models consistently suit typical home sewage applications.
Recommended reliable options balance capacity, horsepower, and warranty while fitting common basins and budgets:
- Zoeller 53: compact, dependable, reassuring
- Liberty Pumps PR5: efficient, confident choice
- Franklin Electric 460: robust, reassuring power
- Barnes VC: quiet, comforting operation
- Flotec FLO: budget-friendly, comforting value
Troubleshooting Scenarios and Decision Flowcharts
The troubleshooting section presents clear, step-by-step checks for a grinder pump that has no power or refuses to start, beginning with electrical supply and control panel inspections.
It then outlines causes and remedies for frequent cycling or short runs, including float switch adjustments and pressure settings.
Finally, diagnostic steps for loud noise or excessive vibration are provided to identify bearing, impeller, or mounting issues.
No power or pump not starting step-by-step checks
Begin troubleshooting power and startup issues by confirming safety and isolating the problem: verify electrical supply to the grinder pump is de-energized before inspection.
Check breaker, fuses, and disconnect switch for continuity.
Inspect wiring, connections, and control panel for corrosion or damage.
Test float switches, level sensors, and overload reset.
If electrical integrity is confirmed but motor won’t start, consult a licensed electrician or service technician.
Frequent cycling or short runs causes and fixes
After verifying power integrity and confirming the motor is able to start, attention should shift to frequent cycling or short-run behavior, which often indicates issues with level sensing, pump sizing, or system hydraulics.
Inspect float or pressure switches, adjust or replace faulty sensors, verify control relay timing, and confirm switch hysteresis.
Check for undersized pump, excessive inflow, or bypass leaks; correct as indicated.
Loud noise or vibration diagnosis steps
Listen for patterns and isolate sources when diagnosing loud noise or vibration from a grinder pump: distinguish between mechanical clatter, bearing growl, hydraulic pulsation, and motor electrical noise by observing when the sound occurs (startup, steady run, or shutdown), whether it varies with load or flow, and whether it transmits through the mounting, piping, or tank.
Check fasteners, couplings, impeller clearance, motor mounts, discharge valves, and air pockets; log findings and test after each corrective step.
Practical Tips to Extend Pump Life and Avoid Problems
Practical measures during installation—correct anchoring, proper electrical connections, and appropriate check valves—significantly reduce future maintenance needs.
Consistent operational habits, such as avoiding grease, wipes, and fibrous materials, help prevent clogs and impeller damage.
Seasonal care, including freezing protection and scheduled inspections, preserves performance and prevents winter-related failures.
Installation tips that reduce future maintenance
Plan installations with long-term serviceability in mind: position the grinder pump and access points to allow clear, unobstructed access for inspections, maintenance, and replacement of components.
Guarantee solid, level mounting, proper anchoring, and vibration isolation. Provide adequate ventilation and frost protection.
Install accessible shutoffs, labeled wiring, and a corrosion-resistant conduit. Include a removable lid or access panel and easy-to-reach alarm connections.
Operational habits to prevent clogs and damage
Adopt consistent operational habits to minimize clogs and mechanical wear: restrict disposal of fibrous, greasy, or non-biodegradable materials; run the pump periodically to prevent sediment settling in low-use systems; avoid rapid on/off cycling by grouping wastewater-generating activities when possible; flush with ample water after heavy use; and monitor alarms and unusual noises promptly to address small issues before they escalate.
- Relief: fewer emergency calls
- Confidence: reliable daily use
- Pride: well-maintained system
- Calm: predictable operation
- Safety: reduced sanitary risk
Seasonal care and winterization advice
When temperatures drop or usage patterns change with the seasons, specific care and winterization steps help protect a grinder pump from freeze damage, corrosion, and sediment buildup.
Inspect seals, vents, and discharge lines; insulate exposed piping and the control panel; make certain the basin remains submerged or heat traced; flush accumulation with clean water; test alarms and schedule professional servicing to verify impeller and float integrity.
Resources, Tools, and Reference Materials
A list of regional permit and code resources should be consulted early to guarantee legal compliance.
Manufacturer manuals and wiring diagrams provide the specific installation and electrical details required for safe operation.
A selection of recommended tools and trusted suppliers for parts and service helps streamline the job and reduce delays.
Permit and code resources by region
Where can one find the local codes and permit requirements for grinder pump installation?
Local municipal building departments, county environmental health offices, and utility districts publish permit procedures and code excerpts online.
State plumbing boards and public works agencies provide statewide regulations.
Regional water authorities may add connection standards.
Contacting jurisdiction planning staff verifies applicable inspections, fees, timelines, and any special local ordinances before beginning work.
Manufacturer manuals and wiring diagrams
Because manufacturer manuals and wiring diagrams condense model-specific installation, electrical, and maintenance requirements, they serve as the primary technical reference for proper grinder pump setup.
Technicians consult them for torque, conduit, and control logic details. When available, follow diagrams and revision notes strictly to avoid hazards and warranty voidance.
- Confidence
- Relief
- Caution
- Clarity
- Assurance
Recommended tools and suppliers for parts and service
Several essential hand and power tools, along with trusted parts suppliers and service contacts, are required to install a grinder pump correctly.
Recommended tools include adjustable wrenches, pipe cutters, conduit tools, torque wrench, multimeter, wet/dry vacuum, and cordless drill.
Source parts from authorized manufacturer dealers, plumbing suppliers, and electrical distributors.
Maintain contacts for certified pump technicians and emergency repair services.
Conclusion
The final steps glint like twilight tools laid out: careful checks, sealed connections, a quiet moment before power. Beneath the surface, gears and blades wait, poised to swallow waste and deliver order. If the lines hold and the float rises, relief comes slowly—an ordinary hum that means success. If not, shadows flicker at the access lid, prompting one last, steady decision: troubleshoot, replace, or call for help before silence breaks.