
How to Fix a Double Flushing Toilet: Quick DIY Repairs to Stop Continuous Flushing
To fix a double-flushing toilet, first shut off the water supply. The issue is often caused by a worn flapper, misadjusted chain, or a faulty fill valve. Inspect the flapper and chain for damage or slack, clean any debris around the flush valve, and adjust or replace the flapper or float as needed. After making adjustments, test multiple flushes and monitor the water level. Simple replacement parts are inexpensive and often come in DIY kits. For detailed guidance, follow the step-by-step instructions provided.
Why Your Toilet Keeps Double Flushing and Why It Matters
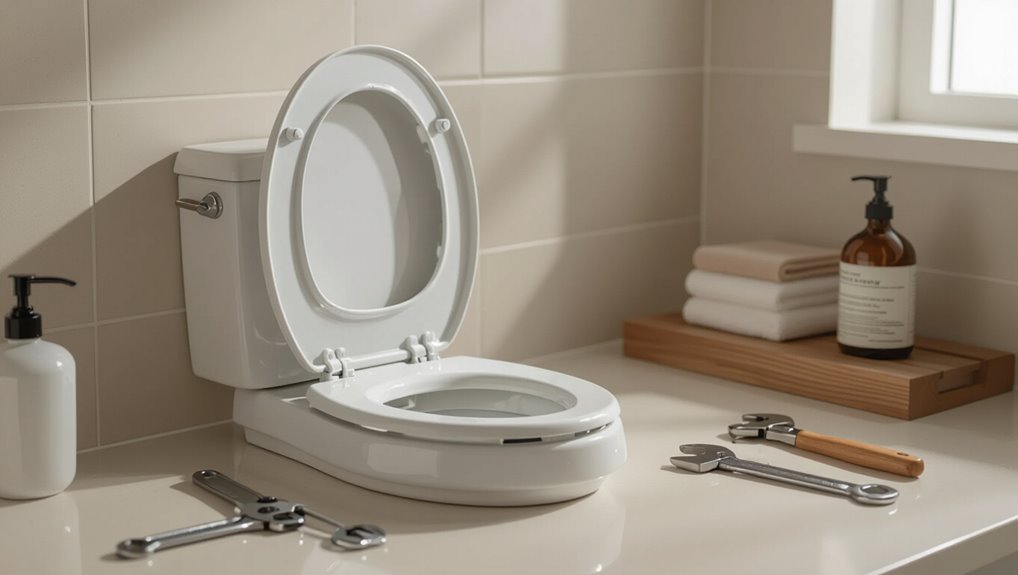
Persistent double flushing often stems from worn flappers, misadjusted fill valves, or siphoning caused by improper venting.
This behavior wastes significant water and raises utility bills while potentially masking further damage to the tank or bowl.
Simple fixes like replacing a flapper or adjusting the float can be attempted by a homeowner, but repeated issues or suspected leak and vent problems warrant a professional plumber.
Common causes of continuous or double flushing
When a toilet continues to flush or briefly refills repeatedly after a single use, the problem usually stems from a few common mechanical or seal-related failures; understanding these causes helps prioritize inspection and repair.
Common causes include a worn flapper or seal, a misaligned or short chain, faulty fill valve, or debris in the flush valve.
Learning how to fix double flushing toilet guides targeted fixes.
How a double flush wastes water and increases bills
After identifying common mechanical causes like a worn flapper or faulty fill valve, attention turns to the practical consequences: double flushing wastes water and raises utility bills. Repeated extra flushes add liters per day, increasing meter readings and costs. Conserving water reduces expenses and environmental impact. Simple fixes often restore efficiency and stop needless water loss.
| Issue | Extra liters/day | Cost impact |
|---|---|---|
| Single leak | 5 | Low |
| Multiple leaks | 20 | Moderate |
| Continuous flush | 50 | High |
When to call a professional vs. DIY
How can a homeowner tell whether a double-flushing toilet is a straightforward DIY fix or requires a professional?
Assess severity: simple issues—worn flapper, misaligned chain, or float adjustment—are suitable for DIY with basic tools.
Persistent leaks, corroded components, cracked tank, or complex valve replacements warrant a licensed plumber to prevent damage, guarantee code compliance, and avoid repeated repairs.
Quick Diagnostic Checklist Identify the Problem in 5 Minutes
A quick diagnostic checklist equips the reader with the basic tools and materials to have on hand, a simple method for observing tank and bowl behavior during a flush, and a concise symptom-to-component mapping.
It guides a swift visual inspection—watching refill flow, flapper seating, and bowl siphon action—so faulty parts can be suspected within minutes.
The checklist then lists common symptoms (continuous running, delayed refill, weak flush) paired with likely components at fault (flapper, fill valve, overflow tube, or siphon/jet).
Tools and materials to have on hand
Preparation matters: gather a small, specific kit before diagnosing a double-flushing toilet. The technician should have basic tools and spare parts to confirm causes quickly and make simple fixes without delay.
| Tool | Purpose | Notes |
|---|---|---|
| Adjustable wrench | Remove nuts | Protect finish |
| Screwdriver set | Adjust/move parts | Phillips and flat |
| Replacement flapper | Test seal | Size matching required |
| Float/shim | Adjust water level | Plastic or foam |
How to observe the tank and bowl during a flush
With the kit assembled, the technician watches a full flush to pinpoint symptoms and timing: note whether the toilet double-flushes immediately, after a delay, or intermittently; observe water flow from bowl to drain and into the tank; listen for hisses or prolonged refilling; and check for swift changes in the water level.
Record sequence, duration, and any visible leaks or splashing during refill.
Checklist: Symptoms and likely components at fault
Checklist-style troubleshooting helps narrow causes quickly by matching observed symptoms to the most likely components.
Observe behavior and note sound, timing, and water level. Match symptoms below to probable faults and act accordingly:
- Persistent trickle or refill cycling — faulty flapper or flush valve.
- Partial double flush sensation — worn fill valve or improper float.
- Loud continuous flow — cracked refill tube or damaged overflow.
Step-by-Step Fixes for the Most Common Causes
The section outlines targeted, step-by-step repairs for the issues most likely causing a toilet to double flush.
It covers replacing a faulty flapper or adjusting a misaligned or tangled lift chain, repairing a worn or warped flush valve seat, and addressing fill valve or overflow tube problems.
Where present, guidance for troubleshooting and calibrating dual‑flush mechanisms is also provided.
Faulty flapper or flapper chain
A common cause of double flushing is a worn or misaligned flapper or an improperly adjusted chain.
The article explains how to inspect the flapper for wear, warping, or debris and how to test chain tension and attachment points.
It then outlines precise steps to adjust or replace the flapper and reset chain length to restore a proper seal.
How to inspect the flapper
Begin by shutting off the water supply and flushing to lower the tank level.
Inspect the flapper visually for cracks, warping, mineral buildup, or softening.
Verify it seats evenly over the flush valve and that the chain has slight slack without tangles or catching on the overflow tube.
Note any irregularities and record the model or measurements before proceeding to adjustment or replacement.
How to adjust or replace a flapper
Loosen the chain or swap the flapper to restore a secure seal and stop phantom flushes.
Turn off water, drain tank, inspect chain length and flapper seat.
Shorten or lengthen chain so flapper closes fully; replace cracked or warped flapper with matching type.
Refill, test several flushes, and fine-tune chain or install new flapper washers if leaks persist.
Misaligned or tangled lift chain
Misaligned or tangled lift chains are a frequent cause of double flushing and usually require adjusting the chain length or replacing worn components.
The correct chain length allows the flapper to seal fully while permitting a full lift on each flush. Temporary fixes like rehooking or adding a small paperclip can work until a proper replacement is installed.
The discussion will contrast quick, interim solutions with durable replacements and show how to set the chain for reliable operation.
How to correctly set chain length
Adjusting the lift chain to the correct length guarantees the flapper lifts fully without staying open, which is a common cause of double flushing.
Measure slack so the flapper rests sealed but lifts when the trip lever is used. Remove excess links or reattach to a nearer hole.
Confirm the chain runs straight, not tangled, and test several flushes for consistent closure.
Temporary fixes vs. permanent replacements
When a tangled or improperly routed lift chain causes a toilet to double flush, homeowners can choose quick, temporary workarounds or opt for permanent repairs; temporary fixes—untangling the chain, adding a twist to shorten slack, or using a binder clip as a stop—restore function immediately.
Permanent replacements—installing a new chain, correct clip, or compatible flapper—ensure reliable long‑term operation and prevent recurrence.
Worn or warped flush valve seat
The flush valve seat should be inspected visually and by feeling for pits, grooves, or warping where the flapper seals.
If minor damage is present, resurfacing with light sanding or using a rubber repair kit can restore a watertight seal; severe wear requires replacing the valve seat or the entire flush valve assembly.
Instructions for both repair and replacement focus on shutting off water, draining the tank, and following manufacturer guidance for materials and torque.
How to check the valve seat
Inspect the flush valve seat visually and by touch to determine whether wear, corrosion, or warping is causing a poor seal.
Drain the tank, remove the flapper, and use a flashlight to examine the entire sealing surface for pits, grooves, or unevenness.
Run a finger gently around the rim to feel irregularities.
Note locations and severity for accurate assessment and next steps.
Repair and replacement options
Begin repairs by matching the problem to the simplest effective solution: minor surface damage can often be smoothed or sealed, while significant wear or warping requires seat replacement.
For small pits, sand lightly and apply rubber sealer or plumber’s epoxy.
For warped or eroded seats, remove the old seat, check flange alignment, install a compatible replacement, and test for a watertight seal.
Problems with the fill valve or overflow tube
Problems with the fill valve or overflow tube often cause rapid or repeated flushing when the tank does not fill to the correct level.
The first corrective steps usually involve adjusting the float height to stop overfilling or replace the fill valve assembly if it leaks or malfunctions.
Clear, targeted adjustments or a straightforward replacement typically resolve these issues without replacing other tank components.
Adjusting the float height
Adjusting the float height corrects most instances where the fill valve allows water to reach the overflow tube, causing repeated or continuous flushing.
Inspect the float type (ball or cup).
Turn the adjustment screw or pinch the clip and slide the float to lower the shutoff level below the overflow tube.
Test by flushing; fine-tune until filling stops about one inch below the tube.
Replacing the fill valve assembly
Replacing the fill valve assembly restores reliable shutoff and prevents water from overflowing into the tank or running into the bowl.
To replace it, shut off water, drain the tank, disconnect the supply line, and remove the old valve nut.
Install a compatible replacement, align the refill tube to the overflow, secure the nut, reconnect supply, turn water on, and test for proper fill level and silence.
Dual-flush mechanism issues (if applicable)
The dual-flush assembly should be inspected next to determine whether misaligned buttons or worn seals are causing partial or continuous flushing.
Technicians first test button function and examine seals for cracks, mineral buildup, or improper seating.
If faults are found, they recommend replacing faulty seals or recalibrating the mechanism according to the manufacturer’s instructions.
Diagnosing dual-flush buttons and seals
Inspect the dual‑flush actuator and seals to pinpoint leaks or sticking buttons: issues often stem from misaligned buttons, worn rubber gaskets, or mineral buildup preventing valves from seating. The technician observes button travel, checks gasket integrity, and tests for slow close or persistent flow; cleaning and minor adjustments often reveal the fault without part replacement.
| Symptom | Feeling |
|---|---|
| Stickiness | Frustration |
| Leak | Worry |
| Intermittent | Annoyance |
| Silent drip | Unease |
| Smooth | Relief |
Replacing or recalibrating dual-flush parts
Begin by shutting off the water supply and draining the cistern to create a dry, safe workspace before any adjustments or part swaps.
Inspect the dual‑flush assembly: buttons, rods, seals, and the diverter. Replace worn seals and corroded rods with manufacturer‑matched parts.
Recalibrate stroke lengths and float positions per instructions.
Reassemble, restore water, and test both flush modes for proper shutoff and seal.
Testing and Verifying the Repair
After repairs, several controlled test flushes should be performed to confirm the valve and seal behave normally and to check for leaks.
Clear signs the issue is resolved include a single complete flush, no siphoning or delayed refills, and stable water levels in the bowl.
If double flushing continues, reinspect the replaced parts, check for overlooked causes, and consider contacting a plumber for further diagnosis.
How to perform multiple test flushes safely
Run a series of controlled flushes to confirm the fix while monitoring for leaks, unusual noises, or incomplete tank refills.
Allow full refill between cycles, observing flapper seating and valve operation.
Use gloves and eye protection when checking inside the tank.
Pause after three to five flushes to inspect connections and the bowl.
Record any recurring symptoms for further adjustment or replacement.
Signs the issue is resolved
Several clear indicators show the double-flush problem is resolved: the tank refills to the proper level without water continuing to run, the flapper seats securely with each cycle, the bowl does not siphon extra water after a flush, and no leaks, hissing, or unusual noises occur during multiple consecutive flushes.
| Indicator | Result |
|---|---|
| Tank level | Stable |
| Flapper | Seated |
| Bowl action | Single flush |
| Sounds | Quiet |
| Leaks | None |
What to do if the problem persists
If the double flushing continues despite initial adjustments, the repairer should perform systematic testing to isolate the cause and verify any fixes.
Observe cycles, listen for refill valve activity, and time intervals between flushes.
Recheck seal integrity, chain length, and float settings.
Swap suspected components with known-good parts or temporarily block the overflow to confirm source.
If unresolved, contact a licensed plumber.
Parts, Costs, and Where to Buy Replacements
Common replacement parts for a double flushing toilet include flappers, fill valves, dual-action flush mechanisms, and tank-to-bowl gaskets, typically ranging from $5 to $40 depending on quality.
Buyers should match parts to the toilet’s make and model by checking the manufacturer stamp or measuring components to verify compatibility.
Parts are available from major online retailers and specialty plumbing suppliers, as well as local hardware stores and big-box home improvement centers.
Common replacement parts and typical price range
A malfunctioning dual-flush toilet typically requires replacement of a few discrete components—flush valve assemblies, fill valves, flappers or seals, and actuator buttons or paddles—each available across a range of materials and price points.
Common parts cost roughly: flush valve $15–$60, fill valve $10–$40, actuator kits $10–$50.
Buyers: big-box stores, plumbing suppliers, online retailers.
- Relief
- Confidence
- Savings
Matching parts to your toilet model
When matching replacement parts to a dual-flush toilet, the model number and flush mechanism type determine compatibility more than brand alone.
Inspect the tank interior for stamped model codes and identify siphon, piston, or valve-refill systems. Cross-reference OEM part numbers or universal kits sized for that mechanism.
Note measurements, inlet styles, and seat/lever orientation to guarantee proper fit and function.
Recommended online and local retailers
Because parts availability and prices vary by region and toilet type, shoppers should consult both specialty plumbing suppliers and mainstream retailers to compare stock and costs.
Recommended sources include manufacturer websites, local plumbing supply houses, Home Depot, Lowe’s, and online marketplaces like Amazon and SupplyHouse.
Compare OEM versus compatible parts, read reviews, check return policies, and factor shipping or curbside pickup into total cost.
Preventive Maintenance to Avoid Future Double Flushing
A simple preventive plan reduces the chance of double flushing before it starts.
The article recommends a quarterly inspection checklist—checking the flapper, fill valve, and lift chain—and notes a few quick adjustments homeowners can make themselves.
It also explains criteria for replacing aging components to prevent recurrence.
Routine inspection schedule
Regular inspections—performed monthly for high-use bathrooms and quarterly for others—catch wear and misalignment before they cause a double flush. Inspect flappers, fill valves, seals, and chain tension; log findings and dates. Replace parts showing degradation. Use the table below for a concise checklist.
| Item inspected | Action |
|---|---|
| Flapper | Check seal |
| Fill valve | Test refill rate |
| Chain/tension | Adjust/replace |
Simple adjustments homeowners can do quarterly
Several straightforward quarterly checks and minor adjustments can prevent future double flushing by keeping tank components aligned and functioning.
Homeowners should verify flapper seating, adjust chain slack for proper lift, confirm float height and refill valve position, tighten loose tank-to-bowl bolts, and clean mineral buildup from valve seats.
Small corrections save water and delay more extensive repairs.
When to upgrade older toilet components
After performing the quarterly checks and minor adjustments, homeowners should consider when older components warrant replacement to prevent recurring double flushing.
Signs include persistent leaks, slow refills, warped flappers, corroded fill valves, or repeated chain failures.
Replacing worn parts proactively—especially if over five to seven years old—reduces emergencies, improves efficiency, and often resolves chronic double flushing more reliably than repeated tweaks.
Troubleshooting Scenarios and Solutions
Common patterns help isolate causes: an intermittent double flush that occurs only at night often points to slow tank fill or thermal contraction, while a toilet that runs continuously plus double flush typically indicates a failing flapper or misadjusted fill valve.
If a recent repair made the problem worse, reversing the change and restoring original parts or settings can quickly identify the culprit.
The following scenarios and targeted fixes will guide diagnosis and corrective steps.
Intermittent double flush only at night
Why does a toilet sometimes double flush only at night?
Nighttime double flushing often results from slow tank refill, partial seal leaks, or temperature-related contraction affecting flapper seating.
Reduced household water use changes pressure and refill timing, revealing marginal faults.
Inspect flapper, fill valve float, and refill tube; adjust or replace components, and test after simulated low-flow conditions to confirm resolution.
Continuous running plus double flush
When intermittent double flushing at night points to marginal seals and refill timing, a persistent running toilet combined with repeated double flushes indicates a more pronounced failure in the tank’s sealing and fill controls.
Inspection should focus on a warped flapper, deteriorated seat, misaligned fill valve, and improper float height.
Replace or adjust seals and valve components; test for leak paths and consistent shutoff.
New repair made it worse rollback steps
If a recent repair makes the double-flushing worse, the technician should immediately isolate the change and reverse it step by step to restore the previous working state.
Then document and test after each reversal. Follow this calm rollback:
- Undo the last part swapped and observe reaction.
- Reinstall original component if available; retest.
- Call for backup or specialist if instability persists.
Safety Tips and Best Practices for DIY Toilet Repairs
Before beginning repairs, the water supply should be shut off and nearby flooring protected to prevent water damage.
Appropriate tools and correctly sized replacement seals must be used to guarantee a reliable fix and avoid overtightening or damage.
Old parts and any contaminated materials should be disposed of responsibly, following local recycling and hazardous-waste guidelines.
Turning off water and protecting flooring
Shut off the toilet’s water supply and secure the work area to prevent damage and slips. The shutoff valve should be turned clockwise until snug; confirm water stops by flushing.
Place absorbent towels or a waterproof mat around the base and on the floor nearby. Remove rugs, protect adjacent cabinets, and keep a bucket and sponge ready to catch residual water or drips during servicing.
Proper use of tools and replacement seals
Gather appropriate tools and replacement seals, and handle each with care to avoid damage or injury.
Use noncorrosive wrenches, pliers with grip, and a soft cloth to protect porcelain.
Match seal sizes and materials to the tank model, lubricate rubber parts lightly with silicone grease, tighten fittings evenly to avoid warping, and test operation before restoring normal use.
Environmental considerations for disposing old parts
When removing worn seals, corroded metal parts, or broken plastic components, they should be sorted and disposed of according to local waste and recycling regulations to minimize environmental harm.
Contaminated components may require hazardous waste handling; rinse uncontaminated parts and recycle metals and plastics where accepted.
Retain receipts for proper disposal, use designated drop-off sites, and avoid flushing debris or dumping residues into drains to protect water systems.
Conclusion
To sum up, the homeowner learns that patience and attention prevent small leaks from becoming big expenses. As the adage says, “a stitch in time saves nine,” underscoring the value of prompt diagnostics and timely fixes. By following the checklist, using the correct replacement parts, and testing thoroughly, recurring double flushing can usually be resolved quickly. Regular maintenance and cautious DIY practices keep the toilet functioning reliably and reduce the need for costly professional intervention.
