How to Fix a Leaking Shower Pan: Step-by-Step Repair Guide for DIYers
To fix a leaking shower pan, start by identifying the source of the leak, which may be due to cracked pans, failed sealant, damaged membranes, or loose drain fittings. Begin by drying the area and performing dye tests to locate the leak. Inspect the grout, drain, and substrate for damage. Small cracks in fiberglass or acrylic can be repaired with epoxy, while tile-over pans may require re-bedding. For metal pans, address any rust and patch as needed. After completing repairs, conduct a water test and monitor for moisture. Continue reading for detailed step-by-step methods, essential tools, and guidance on when to hire a professional.
What Causes a Shower Pan to Leak
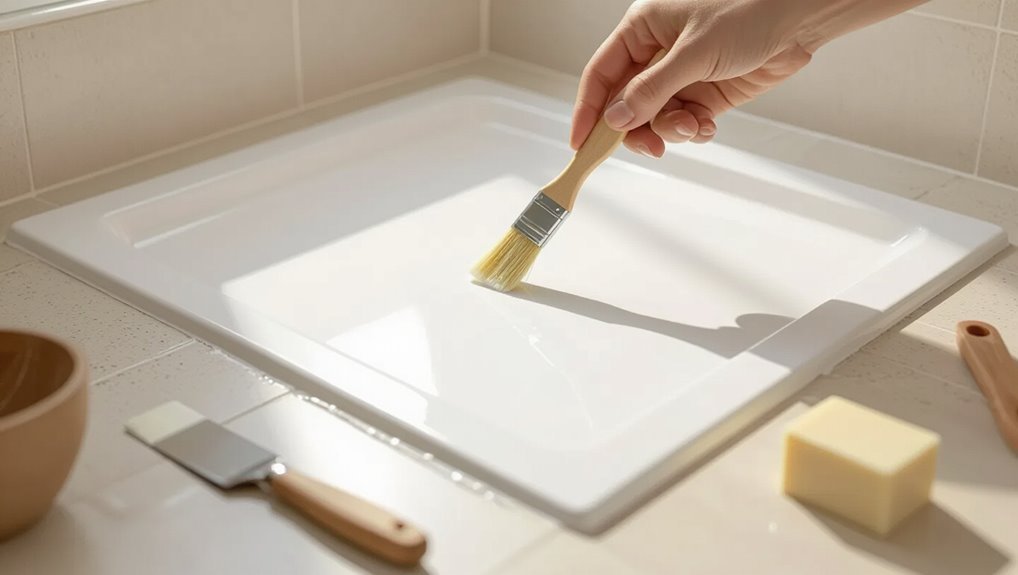
Common failure points in shower pans include cracked or separated pans, failed sealant at the drain or perimeter, and damaged waterproof membranes.
Typical symptoms are persistent moisture, staining or mold below the shower, and a musty odor after use.
Simple tests—isolating the shower, running water in specific areas, and inspecting adjacent fixtures—help confirm the leak source versus other bathroom leaks.
Common failure points in shower pans
A shower pan can fail in several predictable locations where water, materials, and movement interact: the drain connection, seams in the liner or pan, at the threshold or curb, and where the pan meets the surrounding subfloor or wall studs.
Common failure points include corroded or loose drain fittings, torn liners, cracked mortar beds, degraded sealant at joints, and rot from persistent moisture—essential for how to fix a leaking shower pan.
Symptoms that indicate a leaking shower pan
How can one tell if a shower pan is leaking?
Water stains on ceilings or walls below the shower, musty odors, soft or sagging subflooring near the stall, and persistent dampness in adjacent cabinetry suggest a pan leak.
Mold or mildew concentrated around the shower base, slow draining with pooled water, and unexplained increases in water bills also indicate possible pan failure.
How to confirm the leak source vs. other bathroom leaks
Where exactly is the water coming from? A systematic test isolates the source: dry all surfaces, run water in sections (shower head, floor, faucet) while observing adjacent areas.
Inspect grout, tile, drain, and fixture seals. Check ceilings and walls below for staining.
Use dye or food coloring to trace flow. If uncertainty remains, consult a plumber for pressure and camera inspection.
Quick assessment: Is the pan repairable or must it be replaced?
A quick assessment weighs the pan material, the extent and location of damage, and the unit’s age to judge whether patching will hold.
If cracks, soft spots, or widespread deterioration are present, replacement is often safer and more cost-effective than repeated repairs.
The decision also depends on available tools and skills—small fixes may suit a competent DIYer, while major work usually requires a professional.
Factors that determine repairability (material, extent of damage, age)
Because repairability hinges on several concrete factors, a quick assessment should weigh the pan’s material, the size and location of damage, and the unit’s age to decide if repair is feasible or replacement is required.
Inspect for cracks in acrylic or fiberglass, localized chips in tile or mortar, and rust or corrosion in metal pans.
Older, extensively damaged, or delaminated pans are less likely salvageable.
When replacement is safer or more cost-effective
Consider replacement when inspection shows widespread structural failure, persistent leaks despite prior repairs, or when repair costs approach or exceed replacement.
Replacement is preferable if the liner is delaminated, mortar beds crumble, substrate rots, or multiple penetrations exist.
For older pans with recurrent problems or unknown damage extent, replacement reduces future risk and often proves more economical than repeated patching and short-term fixes.
Tools and skills needed for DIY vs. professional help
When evaluating whether a shower pan can be repaired or requires replacement, the decision hinges on the extent of damage and the skillset available: minor cracks, loose tiles, or isolated leaks from fittings can often be addressed by a competent DIYer equipped with basic plumbing and tiling tools.
Whereas extensive substrate rot, a delaminated liner, or pervasive mortar collapse demands professional intervention and specialized equipment.
Assessment requires inspection, moisture meters, pry bars, sealants, replacement liner materials, wet saws, plumbing knowledge, and time; choose replacement when structural integrity is compromised.
Step-by-step preparation before repairing a leaking shower pan
Before any repairs begin, the technician reviews essential safety precautions, dons protective gear, and prepares a clear workspace to protect surrounding areas and fixtures.
Water is shut off and the drain capped or isolated while tiles, the drain assembly, and the subfloor are inspected for damage or moisture.
A concise materials and tool checklist is assembled so the repair proceeds efficiently without unexpected interruptions.
Safety precautions and protective gear
Start by establishing a safe work area and don appropriate protective gear to minimize exposure to sharp edges, chemical sealants, and mold spores.
Wear cut-resistant gloves, safety goggles, a NIOSH-approved respirator for dust and fumes, and waterproof footwear.
Use knee pads and long sleeves to prevent abrasions.
Guarantee adequate lighting and a clear exit path before beginning repairs.
How to shut off water and protect surrounding areas
After donning protective gear and securing the work area, attention turns to isolating the water supply and shielding adjacent surfaces.
Shut off the bathroom’s local shutoff valves or the main water line, then open nearby faucets to drain residual water.
Cover fixtures, cabinets, and flooring with plastic sheeting and absorbent towels. Use painter’s tape to seal edges and prevent debris or moisture migration.
Inspecting the shower drain, tiles, and subfloor
Begin by systematically examining the visible components—drain assembly, tile field, grout lines, and any accessible subfloor edges—to locate signs of moisture intrusion, structural damage, or failed seals.
Note soft or discolored tiles, cracked grout, loose or corroded drain fittings, and mold or mildew patterns.
Probe suspicious areas gently to identify delamination, sagging, or rot before planning targeted repairs.
Materials and tool checklist
A concise checklist of materials and tools guarantees the repair proceeds efficiently and safely: essential supplies typically include replacement drain components, waterproof membrane or pan liner, mortar or deck mud, appropriate sealants (silicone and polyurethane), grout, and rust‑resistant fasteners.
While tools should cover a utility knife, pry bar, hammer, trowel, drill with bits, screwdrivers, adjustable wrench, caulk gun, level, tape measure, wet/dry vacuum, and personal protective equipment (gloves, eye protection, dust mask).
- Materials: drain parts, membrane, mortar, sealants, grout, fasteners.
- Tools: cutting, demolition, measuring, fastening, and cleaning tools.
- PPE: gloves, goggles, dust mask; guarantee ventilation and disposal supplies.
How to locate the exact leak: diagnostic techniques
To locate the exact leak, technicians begin with controlled water tests that isolate sections of the pan and observe where moisture appears.
If tests are inconclusive, tiles or access panels may be removed for direct visual inspection of the pan and drain assembly.
Complementary tools—colored dyes, moisture meters, and borescopes or camera inspection—are used to confirm leak paths and pinpoint damaged areas.
Water test methods for pinpointing leaks
Several straightforward water-test methods can reliably reveal where a shower pan is leaking by isolating sections and observing seepage under controlled conditions.
Common approaches include the flood test—plugging the drain, filling the pan, and checking below for drips—and sectional testing using waterproof tape or a basin to concentrate water over suspect areas.
Document leak locations and retest after repairs.
Removing tile or access panels to inspect the pan
Begin by exposing the shower pan and surrounding substrate through the least invasive access possible—remove an existing service panel or carefully lift tiles only where tests have pinpointed moisture—so the exact breach can be inspected directly.
Inspect flange, membrane seams, drain connection, and mortar bed for cracks, voids, or staining. Document findings, photograph damage, and expand access only as needed for safe, targeted repair.
Using dyes, moisture meters, and camera inspection
With the pan exposed and suspected breach located, diagnostic tools narrow the exact path water takes through the assembly. A few drops of colored dye reveal active leaks during a controlled water test.
Moisture meters map dampness gradients in substrate and framing. A borescope or sewer camera inspects voids, seals, and drain connections.
Combine results to pinpoint repair location before interventions.
Repair methods by shower pan type
Repair approaches vary with the shower pan material and construction.
Fiberglass or acrylic pans often require gelcoat or patch kits, while tile-over-pans need mortar or waterproofing repairs and possible tile replacement.
Metal or pre-formed steel pans, and membrane (PVC/EPDM) liners, each have specific sealing and patching techniques that will be discussed.
Repairing a fiberglass or acrylic shower pan
For fiberglass or acrylic pans, repairs range from simple patch kits for small cracks and chips to more extensive reinforcement for larger structural damage.
The section will outline step-by-step patching procedures and materials for minor surface repairs.
It will also explain reinforcement options and indicators for when full replacement is the safer choice.
Small cracks and chips: repair kits and patching steps
Identify the material and damage extent before selecting a repair kit, since fiberglass and acrylic pans require different products and prep.
For small cracks or chips, clean, sand, and degrease the area. Apply a compatible two-part epoxy or polyester filler, press in any backing fabric for fiberglass, smooth, cure, then sand and polish.
Seal with matching gelcoat or paint for watertight finish.
Larger structural damage: reinforcement and when to replace
Small surface fixes work for hairline cracks and chips, but when damage extends through the shell or the pan flexes and sags, a different approach is required.
Reinforce fiberglass or acrylic pans with marine-grade epoxy and fiberglass mat where feasible, ensuring proper backing and leveling.
Replace pans if core delamination, widespread cracking, or persistent leaks exist; replacement prevents recurring structural failure and mold risk.
Repairing a tile-over-pan (mortar/fiberglass) shower
When addressing a leaking tile-over-pan shower, the choice between re-bedding a mortar pan and working on the underlying liner depends on the source and extent of damage.
Small leaks or deteriorated seams may be resolved by resealing or spot-replacing the pan liner, while widespread movement, cracked mortar, or chronic water intrusion typically requires removing and replacing the mortar bed.
The following section explains how to assess which approach applies and outlines basic steps for resealing, re-bedding, or replacing the liner.
Replacing or re-bedding mortar pans
Replacing or re-bedding a mortar shower pan requires removing the tile and old bed to expose the subfloor and original pan beneath.
Then, rebuild a new, properly sloped mortar bed or install a preformed liner before resetting tile. The process includes verifying subfloor integrity, replacing damaged framing or waterproofing backer, forming a correct slope to the drain, compacting mortar in layers, and allowing full cure before tiling.
Resealing or replacing pan liner: when and how
After removing tile and evaluating the mortar bed, attention turns to the pan liner—its condition determines whether resealing or full replacement is required.
Small tears or loose seams can be patched with approved waterproof patches and sealant; persistent corrosion, multiple punctures, or improper slope necessitate replacing the liner.
Replacement involves removing old liner, installing new flange-to-drain liner, testing for leaks, then rebuilding the mortar bed and tile.
Repairing a metal or pre-formed steel shower pan
For metal or pre-formed steel pans, repair focuses first on stopping small leaks from pinholes and surface corrosion with appropriate cleaners, rust inhibitors, and metal-compatible sealants or epoxy patches.
Larger integrity issues such as warping or damaged flanges require straightening, reinforcement, or replacement of the pan or flange to restore proper drainage and watertight connections.
The following steps outline inspection, sealing techniques, and options for addressing warped pans and flange repairs.
Sealing pinholes and corrosion spots
When small pinholes or localized corrosion appear in a metal or pre-formed steel shower pan, targeted patching can stop leaks without removing the entire unit.
Clean and dry the area, grind back rust to bare metal, apply a rust inhibitor, then use an epoxy metal patch or marine-grade putty.
Smooth, cure fully, and test with water. Monitor periodically for recurrence.
Addressing warped pans and flange issues
Small localized repairs can stop many leaks, but warped pans and damaged flanges require different techniques because they compromise the pan’s slope and seal with surrounding walls.
For metal or pre-formed steel pans, assess extent: minor warping may be eased with targeted shimming and reinforcing brackets; severe deformation or bent flanges usually necessitate flange replacement or full pan swap to restore proper drainage and watertight joints.
Repairing a membrane (PVC/EPDM) pan liner leak
For membrane pans with PVC or EPDM liners, the first step is pinpointing the leak by inspecting seams, corners, and low spots and using water testing or visual cues to confirm the source.
Once located, repairs typically involve cleaning the area, applying manufacturer‑approved patch materials or solvent welds, and reinforcing seams as needed.
If damage is widespread or the liner is aged, replacement is often the more reliable option, and proper installation—correct slope, secure flange connections, and thorough waterproofing—reduces future failures.
Locating liner damage and patching procedures
Begin by isolating the leak through a systematic inspection of the shower pan liner: run water in sections, observe for seepage beneath the surrounding ceiling or floor, and mark any wet spots.
Dry the area, clean with isopropyl alcohol, and inspect for punctures or seam failures.
Cut a patch from matching PVC/EPDM, apply compatible adhesive or solvent weld, press firmly, and seal edges.
Rethinking liner replacement and installation tips
Reconsidering liner replacement, the homeowner should weigh repair versus full replacement based on the extent of damage, age of the membrane, and access beneath the pan.
For minor punctures, patching with compatible adhesive and reinforcement may suffice.
For multiple seams, heavy wear, or difficult access, replace the liner, ensuring proper slope, continuous waterproofing up walls, secure flange connections, and correct clamping at the drain.
Detailed step-by-step repair procedure (typical DIY sequence)
The typical DIY sequence begins with removing trim and the drain flange to access the shower pan and locate the leak.
Once exposed, the damaged area is cleaned and prepped before applying patches, epoxy, or a membrane repair.
After the repair cures, the drain is reinstalled and tested for leaks, then tile, grout, and waterproof finishes are restored.
Removing trim, drain flange, and accessing the pan
To access a leaking shower pan, remove surrounding trim, the drain flange, and any obstructing fixtures in a logical order that preserves materials and limits damage.
Begin by scoring caulk, unscrewing trim, and gently prying pieces free. Disconnect the drain flange by removing screws and lifting the ring.
Clear access panels or adjacent wallboard as needed to expose the pan rim and drain connection.
Cleaning and prepping the damaged area
Begin by clearing loose debris, old caulk, and standing water so the damaged area is dry and visible.
Scrape flaking material with a putty knife, vacuum or brush away dust, and wipe surfaces with a mild solvent to remove oils and residues.
Inspect for soft spots, mold, or delamination.
Mark perimeter of the repair and sand edges for proper adhesion.
Applying patches, epoxy, or membrane repairs
Start by evaluating the size and nature of the damage to determine whether a patch, epoxy fill, or membrane replacement is appropriate.
For small cracks, apply epoxy or polyester filler per manufacturer instructions, sand smooth, and seal.
For larger tears, bond a waterproof patch or install a new membrane section with adhesive and pressure roll.
Cure fully before proceeding to adjacent tile or grout work.
Reinstalling the drain and testing for leaks
Reinstalling the drain and conducting a leak test are the final, essential steps to confirm the shower pan repair is watertight and correctly pitched.
Fit the flange, apply appropriate sealant or gasket, tighten evenly, and reconnect the trap.
Fill the pan to drain level and inspect underneath for at least 30 minutes.
Repair any seepage, retest, then proceed only when dry and secure.
Restoring tile, grout, and waterproofing finishes
With the pan confirmed watertight, attention shifts to restoring the tile, grout, and waterproofing finishes to guarantee durability and a seamless appearance.
Clean surfaces, replace damaged backerboard if needed, and apply waterproof membrane overlaps per manufacturer instructions.
Set tiles with thinset, maintain consistent spacing, cure fully, then grout and seal joints.
Reinspect seals and test for moisture before reinstalling fixtures.
Testing and validating the repair
After repairs are complete, the recommended wait time is to allow any sealants or adhesives to cure fully, typically 24–48 hours per the product instructions, before introducing water.
Testing should proceed in steps—start with a shallow puddle, then a small shower run, and finally a full-duration soak—while inspecting below for any signs of moisture, staining, or dripping.
If leaks persist, the next actions are to recheck seals and fittings, repeat targeted repairs, or consult a professional plumber for further diagnosis.
How long to wait before testing
Before starting any water tests, allow the repair materials to cure fully according to the manufacturer’s specified minimum drying time—typically 24 to 72 hours for most sealants and mortars.
Additionally, ambient temperature and humidity can extend curing; cooler or more humid conditions often require longer waits.
Verify visual curing and follow any manufacturer post-cure recommendations before proceeding with pressure or immersion tests.
Stepwise water tests and signs of success
Once the repair materials have fully cured, proceed to controlled, stepwise water tests to confirm the shower pan is watertight.
Begin with a shallow puddle near the drain for 30–60 minutes, inspect below for moisture, then increase depth gradually to full shower depth.
No dampness, staining, or odors indicate success; document results and allow additional curing time if minor seepage appears.
What to do if the leak persists
If a leak persists despite proper curing and stepwise testing, reassess systematically to isolate the source and determine next steps.
Inspect fittings, drain assembly, flange seals, and adjacent tiles for hidden pathways.
Repeat targeted water tests while observing below-level access points.
If uncertainty remains, consult a licensed plumber or contractor for camera inspection or structural evaluation.
Document findings and schedule professional repairs as needed.
Preventive measures to avoid future shower pan leaks
Preventive measures center on correct waterproofing and a consistent slope toward the drain to prevent standing water.
Proper drain installation with accurate flashing and sealed connections further reduces leak risk.
A simple routine maintenance checklist—inspecting grout and seals, clearing drains, and monitoring for soft spots—helps catch problems early.
Best practices for waterproofing and slope
Establishing proper waterproofing and slope is essential to preventing future shower pan leaks.
The guide recommends continuous membrane installation from walls to pan, sealed seams, and corrosion-resistant fasteners.
Guarantee a uniform 1/4″ per foot slope toward the drain using pre-sloped mortar or manufacturer-specified underlayment.
Test for drainage and correct low spots before tile installation to minimize standing water and membrane stress.
Proper drain installation and flashing tips
Begin by securing the drain assembly and flashing as a continuous waterproof connection between the pan and the wall to channel water directly into the waste line.
Guarantee a snug, watertight seal with the membrane clamped under the drain flange, use compatible sealants, and extend flashing up the curb and wall.
Test for leaks before finishing, and slope drains toward the outlet for reliable drainage.
Routine maintenance checklist
With the drain and flashing secured and the pan tested for watertight performance, attention shifts to routine maintenance that keeps the system functioning and prevents future failures.
Recommended checks include:
- Inspect grout, tile, and sealant monthly; repair cracks immediately.
- Clear drain of hair and debris weekly; run hot water to flush.
- Verify slope and look for soft spots annually; address substrate issues promptly.
Cost comparison and time estimates
A brief comparison of expenses highlights that DIY patching and sealant replacements typically cost a few dozen to a few hundred dollars, while full professional shower pan replacement can run into the thousands.
Time estimates vary accordingly: simple fixes may take a few hours, partial repairs a day, and complete replacements often require several days including demolition, drying, and reinstall.
Readers should weigh upfront costs against long-term durability when choosing between a quick repair and a professional overhaul.
Typical DIY repair costs vs. professional replacement
Although small leaks can sometimes be patched by a homeowner over a weekend, DIY fixes and full professional replacements differ sharply in cost, scope, and time. DIY: materials $20–$200, limited warranty. Pro replacement: $1,000–$5,000, full warranty. Choose based on skill and damage extent.
| Option | Typical Cost | Notes |
|---|---|---|
| DIY patch | $20–$200 | Short term |
| Pro replace | $1,000–$5,000 | Long term |
| Hybrid | $200–$800 | Partial pros |
Time required for common repair scenarios
Several common shower-pan repair scenarios have predictable timeframes that help homeowners weigh cost versus disruption.
Minor grout and sealant fixes typically take 1–3 hours.
Patch repairs to liners or localized mortar require half a day to a full day.
Full liner replacement or professional pan rebuilds often span 1–3 days, excluding drying and curing times that may add 24–72 hours.
Common mistakes to avoid during shower pan repair
Common errors in shower pan repair often start with misdiagnosing the leak source, which leads to unnecessary or ineffective fixes.
Using incompatible materials or sealants can compromise the repair and cause premature failure.
Skipping proper slope and waterproofing steps creates recurring leaks and structural damage.
Misdiagnosing the leak source
Why look elsewhere when the visible damage is often a red herring?
Technicians may assume obvious stains or cracked tile indicate the leak, overlooking plumbing joints, drain fittings, or waterproof membrane failures. Misdiagnosis leads to unnecessary tile removal and wasted time.
Systematic testing—isolating sections, water tests, and inspecting beneath the pan—prevents incorrect repairs and recurring moisture damage.
Using incompatible materials or sealants
Misdiagnosing the leak often leads technicians to apply quick fixes that introduce incompatible materials or sealants, compounding the problem.
Mixing silicone, acrylic, or oil-based products with existing mortar, membranes, or epoxy can prevent proper adhesion and void warranties. Incompatible materials accelerate deterioration, trap moisture, and hide underlying defects, forcing repeat repairs.
Always match sealant chemistry to substrate and manufacturer specifications.
Skipping proper slope or waterproofing steps
Skipping proper slope or waterproofing steps often turns a repair into a recurring failure: without the correct fall toward the drain and a continuous waterproof barrier, water pools, migrates beneath finishes, and degrades the substrate.
Neglecting slope, thin-set build-up, or membrane laps causes leaks despite visible repairs. Proper tapering, verified drain alignment, and continuous membrane installation are essential to durable, watertight results.
When to call a professional plumber or contractor
If persistent leaks, extensive water damage, mold, or structural concerns are present, the issue is likely beyond typical DIY repair and warrants professional assessment.
Homeowners should ask contractors about licensing, experience with shower pans, a detailed scope of work, expected timeline, and whether the quote includes materials, permits, and cleanup.
Clear answers and a written, itemized estimate help set realistic expectations and avoid surprise costs.
Signs the problem is beyond DIY
When visible water damage extends beyond the shower enclosure—stained ceilings, softened subflooring, or mold growth in adjacent rooms—it signals the issue may exceed typical DIY repairs.
Additional signs include persistent odors, recurring leaks after attempted fixes, visible structural movement, compromised support joists, or inaccessible piping within walls or slabs.
These indicators warrant professional assessment to prevent escalation and guarantee safe, code-compliant remediation.
Questions to ask contractors and what to expect in a quote
Once signs point beyond simple DIY—widespread water damage, structural compromise, or persistent leaks—the next step is to consult a qualified plumber or contractor and know what to ask and expect from their estimate.
Ask about licensing, insurance, references, diagnostic methods, timeline, materials, warranty, and permit needs.
Expect itemized costs, labor hours, contingency allowances, cleanup, and written guarantees before work begins.
Additional resources and product recommendations
The article lists recommended repair kits, sealants, and waterproofing membranes suited for common shower pan failures.
It also points readers to authoritative installation guides and local code resources for proper procedures and compliance.
These resources help homeowners choose products and confirm that repairs meet safety and warranty requirements.
Recommended repair kits, sealants, and membranes
Consulting reputable repair kits, sealants, and waterproof membranes helps guarantee a durable shower pan fix by matching product capabilities to the failure mode—cracked pans, porous grout, or faulty liners—and the material of the existing installation.
- Schluter-KERDI or similar bonded membrane kits for full waterproofing.
- Marine-grade polyurethane sealants for seams and corners.
- Pan repair epoxy kits for localized cracks, matching substrate type.
Links to authoritative installation guides and code considerations
Following product selections and repair methods, authoritative installation guides and code references provide the procedural and legal framework needed to guarantee repairs meet safety and longevity standards.
Recommended links and considerations include:
- International Plumbing Code and local amendments for drainage, waterproofing, and inspection.
- Manufacturer installation manuals for membranes, pans, and sealants.
- Tile Council of North America and ANSI standards for tile assemblies and testing.
Conclusion
Like a weathered roof finally mended, the repaired shower pan becomes a small harbor against further storms. The DIYer’s careful hands, tools, and patience act as steady lighthouses, guiding water back into safe channels. Whether patched, relined, or replaced, the renewed pan restores quiet confidence to the bathroom’s daily rituals. If doubts persist, calling a skilled professional is the compass that guarantees lasting safety and peace of mind.