How to Vent a Gas Furnace Safely: Step-by-Step Guide for Homeowners
To safely vent a gas furnace, ensure that combustion gases are directed outdoors using a suitable venting system, such as a chimney, power vent, direct vent, or PVC for high-efficiency units. Regularly inspect for corrosion, leaks, and blockages, and check that the venting has the correct slope. Always turn off the power and gas before starting any work. Use manufacturer-approved materials and follow local codes for installations. Keep carbon monoxide detectors active, and schedule routine checks and professional servicing to minimize risks. This guide provides a detailed, step-by-step approach to inspection and repair.
What Venting a Gas Furnace Means and Why It Matters
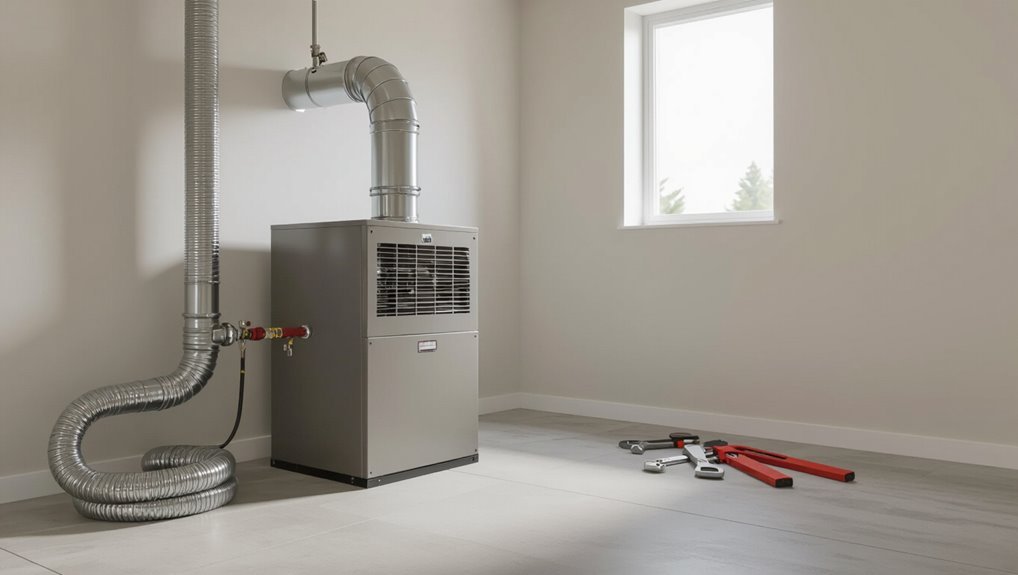
Venting in gas heating systems channels combustion byproducts—including water vapor and potentially deadly carbon monoxide—safely out of the home.
Improper venting can lead to carbon monoxide buildup, increased fire risk, and reduced furnace efficiency. Homeowners should schedule inspections or consider replacing vents when there are signs of corrosion, blockages, persistent odors, or after major furnace work.
How furnace venting works in gas heating systems
A gas furnace expels combustion byproducts—primarily carbon dioxide, water vapor, and small amounts of nitrogen oxides and carbon monoxide—through a dedicated venting system that prevents these gases from entering living spaces.
The system uses heat exchangers, draft controls, and proper flue sizing to channel exhaust outdoors.
Homeowners learning how to vent a gas furnace must follow manufacturer guidelines, local codes, and guarantee correct material and slope.
Risks of improper venting (carbon monoxide, fire, efficiency loss)
Because combustion gases must be carried completely outdoors, improper furnace venting creates multiple serious hazards: deadly carbon monoxide infiltration, increased fire risk from hot or leaking flue gases contacting combustible materials, and reduced system efficiency that raises energy use and wear.
Leaks, blockages, corrosion, or poor draft compromise indoor air safety, accelerate component failure, and elevate utility costs, warranting prompt professional assessment.
When you should consider inspecting or replacing vents
When should a homeowner schedule an inspection or plan for vent replacement?
A homeowner should inspect vents annually and after appliance changes, chimney work, severe storms, or persistent odors, soot, or pilot light issues.
Replace vents if corrosion, cracks, misalignment, blockages, or excessive condensation appear, or when upgrading to a higher-efficiency furnace that requires different vent materials or clearances for safe operation.
Types of Gas Furnace Venting Systems
The section outlines common venting approaches—natural draft chimneys, fan-assisted power vents, sealed-combustion direct vent systems, and PVC/CPVC runs used with high-efficiency units.
Each type varies in efficiency, safety characteristics, and installation complexity. A brief comparison will help determine which system suits a given furnace and home.
Natural draft (chimney) venting
Natural draft, commonly called chimney venting, relies on the buoyancy of hot combustion gases to rise through a vertical flue and exit outdoors.
It suits older furnaces and requires sufficient chimney height, proper flue sizing, and regular inspection for blockages, creosote, or deterioration.
Draft control, termination above roofline, and masonry or lined flues guarantee safe removal of combustion byproducts.
Power venting (fan-assisted)
Although relying on a fan rather than buoyancy, power venting uses an induced-draft or power exhaust blower to actively move combustion gases from the furnace through plastic, PVC, or metal venting to an exterior termination.
This allows flexible placement of equipment, lower flue temperatures, and use of nonvertical runs.
Installation requires proper vent sizing, condensate management, electrical supply, and adherence to manufacturer and code specifications for safe operation.
Direct vent (sealed combustion) systems
Switching from fan-assisted exhaust arrangements, direct vent systems use a sealed combustion chamber that draws outdoor air through an intake pipe and expels combustion products via a separate exhaust pipe, keeping indoor air completely isolated from the burner.
They offer improved safety, reduced backdraft risk, and consistent combustion.
Installation requires proper exterior penetrations and manufacturer-specified clearances; inspections verify seal integrity and correct pipe routing.
Category PVC/CPVC high-efficiency venting
PVC and CPVC venting systems use plastic pipes to carry combustion gases from high-efficiency furnaces, taking advantage of the cooler flue temperatures produced by condensing burners.
These materials resist corrosion and simplify routing through walls or attics. Proper sizing, solvent-welded joints, and slope for condensate drainage are essential.
Local codes dictate approved plastics, termination locations, and clearances for safe installation.
Comparison of vent types by efficiency, safety, and installation complexity
After outlining PVC/CPVC systems and their advantages for condensing furnaces, a broader comparison of venting options helps determine the best choice for a given installation. The table below summarizes efficiency, safety, and installation complexity across common vent types.
| Vent Type | Notes |
|---|---|
| PVC/CPVC | High efficiency, low heat, moderate safety, easy install |
| Stainless | Durable, safe at higher temps, complex install |
| B-Vent | Simpler, lower efficiency, moderate safety |
| Power Vent | Efficient for longer runs, requires electrical, moderate complexity |
Tools, Materials, and Safety Equipment You’ll Need
Before beginning any furnace vent work, a concise checklist of required tools, materials, and replacement parts should be prepared to guarantee the job proceeds efficiently.
The author will also outline necessary safety gear, carbon monoxide precautions, and clear indicators for when to call a licensed HVAC technician.
This preparation minimizes risks and helps determine whether the task is suitable for a DIY approach or requires professional service.
Tools checklist
A concise kit of the right tools, materials, and safety equipment makes safe furnace venting practical and predictable.
A homeowner or technician should gather durable, calibrated tools and basic safety gear before starting. Proper selection reduces mistakes and speeds work.
- Drill with metal bits
- Adjustable wrench set
- Tape measure and level
- Gas leak detector or soapy solution
- Safety glasses and gloves
Materials and replacement parts checklist
Proper selection of materials and replacement parts guarantees a venting job is durable, code-compliant, and safe.
Recommended items include manufacturer-approved vent pipe, high‑temperature sealant, code-rated chimney adapter, corrosion‑resistant screws and straps, and a vent cap with bird screen.
Verify sizes and ratings match furnace specifications and local codes before purchase; keep spare gaskets and fasteners for timely repairs.
- Manufacturer-approved vent pipe
- High-temperature sealant
- Code-rated chimney adapter
- Corrosion-resistant screws and straps
- Vent cap with bird screen
Required safety gear and carbon monoxide precautions
With materials and replacement parts confirmed, attention shifts to the personal protective equipment and carbon monoxide (CO) precautions required for safe venting work.
Protective gear minimizes injury; CO detection and ventilation prevent poisoning. Follow manufacturer guidance and local codes.
- Safety glasses and work gloves
- NIOSH-approved respirator (if needed)
- CO detector near furnace and sleeping areas
- Portable fan for ventilation
- Flashlight and cell phone for emergencies
When to call a licensed HVAC technician
When should a homeowner stop and call a licensed HVAC technician?
A professional is required for persistent pilot or ignition failure, gas odor, suspected carbon monoxide, damaged or corroded venting, complex chimney or roof penetrations, improper draft, or after flue blockage.
Technicians should also handle permit-required alterations, code compliance inspections, and any situation where the homeowner lacks tools, knowledge, or confidence.
Step-by-Step Guide to Inspecting Furnace Venting
Before beginning, the technician guarantees the furnace is shut off, power disconnected, and fuel supply secured to create a safe workspace.
A systematic visual inspection follows, checking vent pipe condition, connections, and signs of corrosion, leaks, or soot.
The process includes clearing blockages or animal intrusions and testing draft and vent pressure to confirm proper operation.
Preparing the furnace and workspace (shutoff, power, fuel)
Prior to any inspection, the technician secures the furnace and surrounding workspace by shutting off the gas supply, disconnecting electrical power at the breaker, and isolating any secondary fuel sources; this establishes a safe, de-energized baseline for further work and prevents accidental ignition or equipment damage.
The area is cleared, ventilation provided, and lockout/tagout applied. Fuel valves and electrical status are verified before proceeding.
Visual inspection of vent pipe condition and connections
Begin the visual inspection at the furnace venting system by tracing the entire run of pipe from the draft hood or flue collar to its termination point, examining each section and joint for corrosion, cracks, loose connections, soot staining, and proper slope;
note any signs of backdrafting or moisture that could indicate leaks or blocked flow and record their locations for repair.
Inspect supports, seals, gasketing, and changes.
Checking for blockages, bird nests, and animal intrusions
A systematic sweep of the vent termination and surrounding ductwork should be performed to identify blockages, bird nests, and signs of animal intrusion, because even small obstructions can restrict airflow and cause dangerous combustion byproducts to accumulate.
The inspector should remove visible debris, document nesting material, check screens and caps, and secure or replace damaged components to prevent recurrence and maintain unobstructed exhaust pathways.
Testing for proper draft and vent pressure
When verifying safe operation, the inspector measures draft and vent pressure to confirm that combustion gases are being expelled effectively and that the furnace is drawing combustion air as designed.
Using a manometer and draft gauge, readings are taken at proper ports with the system operating. Results are compared to manufacturer specifications; deviations prompt adjustment of venting, combustion air sources, or further diagnostic testing.
Detecting signs of corrosion, leaks, or soot buildup
Several visual and tactile checks reveal early signs of corrosion, leaks, or soot that compromise venting integrity and safety.
Inspect joints, seams, and supports for rust, pitting, or flaking metal. Smell for exhaust odors near connections.
Look for soot streaks, discoloration, or moisture stains on vent surfaces and adjacent materials.
Note loose or damaged seals, gaps, and signs of animal nesting or blockage.
Step-by-Step Guide to Repairing and Replacing Vent Components
The following section outlines practical steps for repairing and replacing vent components, beginning with safely removing and replacing damaged vent pipe sections.
It covers proper resealing of joints with approved sealants and fasteners, installing or replacing draft hoods or flue adapters, and converting venting when upgrading to high-efficiency furnaces.
The guidance concludes with procedures for correctly reinstalling vent terminators and caps to restore safe operation.
Replacing damaged vent pipe sections safely
Begin by isolating the furnace and confirming the gas is off and power is disconnected; this guarantees a safe baseline before any vent work begins.
Inspect pipe for corrosion, holes, or separations. Measure and remove damaged sections, supporting adjacent piping.
Install matching, appropriately rated replacement pieces with correct overlaps and alignment.
Verify clearances, slope for condensate, and proper termination before restoring power and gas.
Resealing joints and using proper vent sealants/fasteners
After replacing damaged sections and confirming proper alignment, attention shifts to sealing the joints and selecting the correct sealants and fasteners to guarantee a gas-tight, weather-resistant vent system.
Apply high-temperature, silicone or furnace-rated sealant to seams, tighten with corrosion-resistant sheet-metal screws or rivets, and use foil tape rated for HVAC.
Inspect for gaps, retorque fasteners, and test for leaks before finishing.
Installing or replacing a draft hood or flue adapter
Install or replace a draft hood or flue adapter with careful attention to fit, orientation, and sealing to confirm proper draft and safe venting.
Ensure components match furnace outlet size and material, align to allow rising flue gases, and secure with approved fasteners.
Check clearances, replace corroded parts, and test for leaks and proper draft before restoring normal operation; follow manufacturer specifications.
Converting venting for high-efficiency furnace upgrades
When converting venting for a high-efficiency furnace upgrade, the technician must reassess the entire vent system to accommodate lower flue gas temperatures and condensate production.
This includes selecting appropriate PVC or other corrosion-resistant piping, verifying slope and trap locations for condensate drainage, and ensuring termination points and combustion air provisions meet code.
They must also check support, clearances, joint sealing, and pressure/vent sizing per manufacturer and local regulations.
Reinstalling vent terminators and caps
Begin by inspecting the existing terminator and cap locations to confirm they match the furnace’s venting configuration and local code requirements; note any corrosion, damage, or misalignment that could compromise sealing or clearances.
Remove old hardware, clean mating surfaces, and fit new or serviced terminators. Secure with appropriate fasteners and sealant, verify clearances, test for drafts, and document compliance with manufacturer and code specifications.
Proper Outdoor Vent Termination and Clearance Requirements
Proper outdoor vent termination requires specific clearance distances from windows, doors, and air intake vents to prevent exhaust re-entry and guarantee occupant safety.
Different vent types have defined height and placement rules that affect rooftop, sidewall, and through-wall installations.
Installers must follow local codes and manufacturer specifications, as those requirements set the minimums and may supersede general guidance.
Clearance distances from windows, doors, and intake vents
Clearance distances around windows, doors, and intake vents are critical to prevent exhaust gases—especially carbon monoxide—from re-entering occupied spaces and to guarantee appliance combustion air is not contaminated.
Codes require minimum separations from operable openings, fresh-air intakes, and property lines; manufacturers specify distances for specific models.
Maintain unobstructed zones, avoid downwind placement, and consult local code or a qualified technician for precise measurements.
Height and placement rules for common vent types
When siting common vent terminations—such as sidewall, roof, and direct-vent configurations—height and lateral placement must meet both manufacturer specifications and local code to guarantee safe dispersion of combustion products and adequate combustion air.
Sidewall vents typically require minimum horizontal and vertical offsets from openings and property lines, while roof-penetrating vents demand specified clearances above the roofline and from ridge or other penetrations.
Vent terminations should avoid downspouts, balconies, and air intakes, and be positioned to minimize recirculation and maintenance access while preventing exhaust pooling near adjacent structures.
Local code considerations and manufacturer specifications
Because venting requirements vary by jurisdiction and appliance model, installers must consult both local codes and the furnace manufacturer’s installation instructions before selecting an outdoor termination location.
Codes stipulate clearances from openings, property lines, and combustible materials; manufacturers add specific distances, termination types, and cap requirements.
Compliance guarantees safe exhaust dispersion, prevents reentry, and maintains warranty and inspection acceptance; document approvals.
Testing, Commissioning, and Confirming Safe Operation
After vent work is completed, the technician follows manufacturer restart procedures and runs the furnace through a full commissioning sequence.
Combustion gases are checked with a CO detector and analyzer while exhaust temperature and draft performance are verified to confirm safe operation.
All findings, adjustments, and component labels are documented and left with the owner.
Re-start procedures after vent work
Begin the restart process methodically: technicians should verify that all vent components, seals, and clearances restored during repair meet manufacturer and code requirements before energizing the furnace.
After power and gas are reconnected, initiate a controlled startup, observe ignition cycles, check for proper draft, monitor for abnormal noises or leaks, confirm vent fasteners and condensate drains function, and document results and corrective actions.
Checking combustion gases with a CO detector and analyzer
Once startup observations confirm stable ignition and proper draft, technicians must verify combustion products using both a portable CO detector and a combustion analyzer.
They should scan living spaces and flue termini for CO, record stack gases (CO, O2, CO2, and draft pressure), compare readings to manufacturer and code limits, document results, and correct any combustion irregularities before leaving the job.
Verifying exhaust temperature and draft performance
Several objective measurements are required to verify exhaust temperature and draft performance during testing and commissioning.
Technicians measure flue gas temperature at the draft hood, compare to manufacturer specifications, and record differential pressure across the venting system.
They confirm positive draft toward outdoors under various operating conditions, inspect for fluctuations or backdrafting, and adjust venting or combustion air to restore proper flow and safe temperatures.
Documenting work and labeling components
Documenting work and labeling components guarantees traceability and facilitates safe future service by recording final test results, adjustments made, and component identifications.
Technicians should log vent configuration, draft readings, temperature measurements, gas pressure, and any corrective actions.
Affix durable labels to vents, dampers, and access panels showing function and date.
Retain a clear service record for compliance, warranty, and safe ongoing maintenance.
Common Problems, Causes, and How to Fix Them
Common venting problems include backdrafting from negative pressure, corroded or rusted flue pipes, blocked or improperly pitched vent runs, and incompatible materials or loose connections.
Each issue presents specific safety risks—carbon monoxide intrusion, leaks, poor draft, and premature failure—that require targeted diagnosis.
The following section explains typical causes and concise corrective actions for each problem.
Backdrafting and negative pressure issues
Backdrafting occurs when combustion gases are drawn back into the dwelling instead of exiting through the flue, creating a risk of carbon monoxide buildup and inefficient furnace operation.
Causes include blocked vents, improper chimney height, and negative house pressure from exhaust fans or tight sealing.
Fixes: clear obstructions, increase vent termination height, balance ventilation, install a carbon monoxide detector, and consult a qualified technician.
Corroded or rusted flue pipes
After addressing backdrafting and negative pressure, attention should turn to the physical condition of the flue: corroded or rusted flue pipes compromise draft, allow leaks of combustion byproducts, and shorten system life.
Causes include moisture, condensation, age, and corrosive flue gases. Inspect for perforations, seams failure, and active rust; replace damaged sections with code-compliant stainless or coated venting and seal joints properly.
Blocked or improperly pitched vent runs
Blocked or improperly pitched vent runs frequently undermine furnace performance by restricting flue gas flow or allowing condensate to pool, which can lead to increased drafting resistance, corrosion, and unsafe spillage.
Common causes include debris, bird nests, sagging sections, or incorrect slope.
Inspect for blockages and proper downward pitch toward the condensate trap; clear obstructions, re‑support or re‑angle runs, and reseal joints to restore safe venting.
Incompatible materials and improper connections
When vent components are made from incompatible materials or joined with improper fittings, the result can be leaks, accelerated corrosion, or restricted flow that compromises combustion safety and venting performance.
Common issues include galvanic corrosion between dissimilar metals, plastic joined to metal without proper adapters, and loose clamp or screw joints.
Fixes: replace with code-approved materials, use correct adapters, seal joints with high-temperature sealant, and retest.
Maintenance Schedule and Preventive Measures
A clear maintenance schedule helps guarantee safe and efficient furnace venting by outlining a seasonal inspection checklist that targets flue integrity, vent terminations, and combustion air pathways.
Routine homeowner tasks—such as replacing filters, clearing debris around vents, and visually checking for rust or soot—reduce risk between professional visits.
Professional maintenance should be scheduled annually or whenever inspections reveal corrosion, persistent leaks, or abnormal combustion signs.
Seasonal inspection checklist
Seasonal inspections should occur at least twice yearly—before the heating season begins and again mid-season—to confirm safe combustion, intact venting, and reliable controls.
A qualified technician verifies flame quality, carbon monoxide levels, and draft performance, checks for corrosion or blockages, and tests safety switches.
Recommended checklist items include:
- Inspect flue and vent connections
- Measure combustion gases
- Check for corrosion or leaks
- Test pressure switches and limit controls
- Verify draft and termination clearances
Simple homeowner maintenance tasks
Following the seasonal inspection checklist, homeowners can perform a handful of routine tasks to help maintain safe furnace venting between professional visits.
Regularly replace or clean filters monthly during peak use, clear debris from outdoor vent terminations, check and tighten visible vent connections, guarantee attic or crawlspace vents remain unobstructed, and test carbon monoxide detectors monthly to confirm proper function and early warning.
When to schedule professional maintenance
When should a homeowner arrange professional maintenance for a gas furnace and its venting system?
Homeowners should schedule annual inspections before cold season, immediate service if unusual odors, soot, carbon monoxide alarms, pilot or ignition issues, irregular cycling, or visible vent damage.
Technicians should clean, test combustion, check seals and draft, and recommend repairs to guarantee safe, efficient operation and code compliance.
Safety Tips and Local Code Compliance
The text next addresses practical safety measures and legal requirements for furnace venting.
It covers proper carbon monoxide alarm placement and routine testing, when permits and inspections are required for vent modifications, and the importance of hiring qualified technicians and verifying their credentials.
Readers are reminded that compliance with local codes and certified professionals reduces risk and guarantees system integrity.
Carbon monoxide alarm placement and testing
Proper placement and regular testing of carbon monoxide (CO) alarms are essential to detect leaks from a gas furnace before they become life-threatening.
Install alarms on every level, outside sleeping areas, and near the furnace per manufacturer and local code.
Test monthly, replace batteries yearly or as indicated, and replace units per expiry date.
Record tests and respond immediately to any alarm.
Permits and inspections for vent modifications
Before altering a furnace vent, verify local permit requirements and schedule required inspections to guarantee work meets safety codes and prevents hazardous exhaust leaks.
Document approvals and retain receipts.
Inspections confirm proper vent sizing, clearances, and termination placement per code.
Failure to obtain permits can void warranties and insurance.
Follow inspector corrections promptly and obtain final sign-off before concealment or operation.
Hiring qualified technicians and verifying credentials
Choose technicians who hold current licenses, factory certifications, and relevant trade memberships to secure competence with gas furnace venting standards.
Homeowners should confirm insurance, request references, verify code knowledge, and obtain written estimates. Proper credentials reduce risk and assure compliance with permits and inspections.
- Verify state or local license numbers
- Check factory training certificates
- Confirm liability insurance
- Request three references
- Get a written, itemized estimate
Quick Troubleshooting Flowchart for Urgent Venting Issues
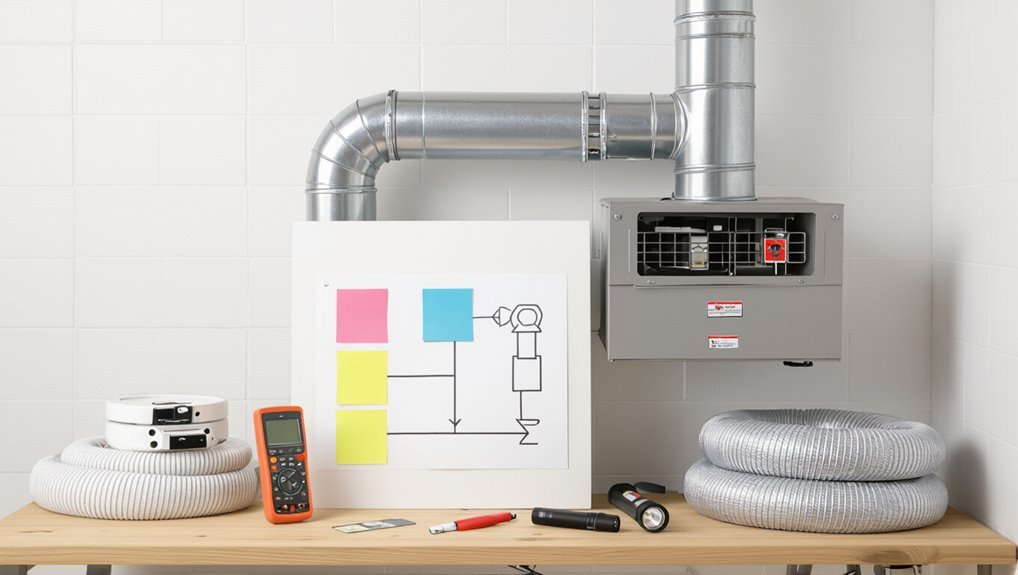
A concise flowchart guides users through immediate checks and actions when a gas furnace venting problem poses a safety risk, prioritizing symptom identification, rapid isolation of the fuel supply, and when to evacuate and call professionals.
It directs verifying CO detector alarms, checking visible vent blockages, shutting off gas at the appliance or meter, ventilating the area, evacuating if odor or symptoms persist, and contacting emergency services and certified HVAC technicians.
Conclusion
The guide concludes that proper venting is essential to home safety and furnace efficiency. Investigating the long-held theory that simple visual checks suffice reveals they often miss hidden corrosion, loose joints, or subtle backdrafting. A combination of routine professional inspections, carbon monoxide testing, and homeowner vigilance offers the most reliable protection. Following the outlined steps and codes reduces risks, prolongs equipment life, and guarantees combustion gases are safely expelled from living spaces.