How to Dig a Trench for a Water Line: Step-by-Step Guide for DIY and Pros
To dig a trench for a water line, start by confirming necessary permits and utility locates, and assess if the task is suitable for DIY or requires a professional. Mark the planned route, clear any vegetation, and set up safety barriers. Excavate to the required depth and slope, using hand tools for shorter runs or a trencher/mini-excavator for longer distances. Once excavated, bed the trench with sand or screened gravel, lay the pipe with proper couplings, pressure-test the system, and then backfill in controlled lifts, compacting as you go. For more detailed steps, tips, and safety specifics, continue reading.
What You Need to Know Before You Start a Water Line Trench
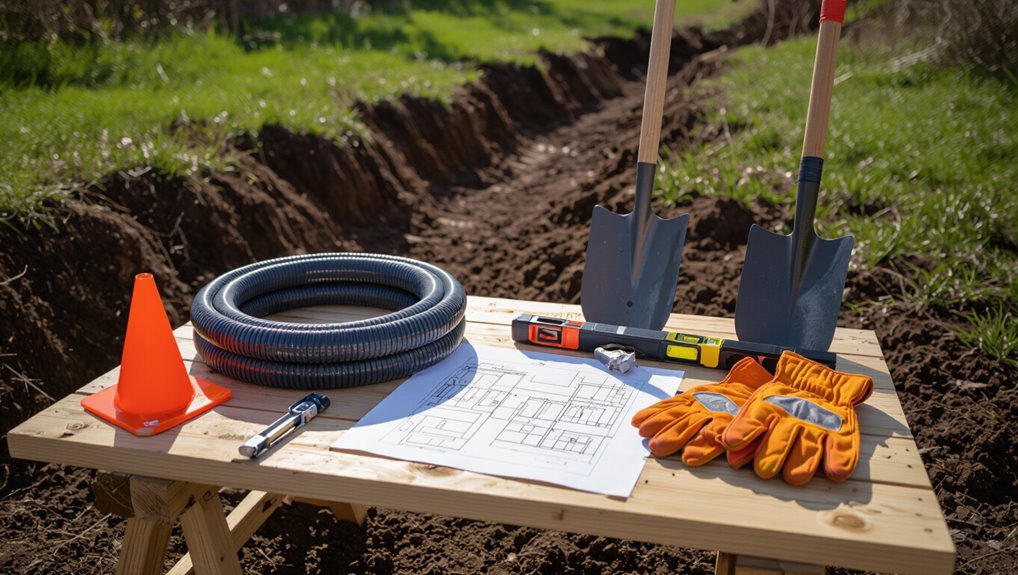
Before breaking ground, a clear assessment should determine whether the project is within a homeowner’s skills or requires a licensed professional.
Essential pre-work includes checking local codes and permits, arranging utility locates, and confirming required trench depth, slope, and frost-line clearance.
A site and soil evaluation plus identification of safety hazards and necessary protective equipment complete the checklist.
When to Dig a Trench vs. Hire a Pro
While a homeowner with basic digging experience and a straightforward, short-run water line might handle the trenching, more complex situations—rocky soil, deep frost lines, long distances, nearby utilities, or local code requirements—usually warrant hiring a licensed professional.
The decision hinges on skill, equipment, time, and risk tolerance.
For DIYers learning how to dig a trench for a water line, low-risk, shallow runs suit DIY.
Local codes, permits, and utility locates
Permits, local building codes, and utility locates are non-negotiable steps in planning a water line trench: they define required depths, materials, setbacks, inspection schedules, and the obligation to call for underground utility locates so existing lines are not damaged.
Applicants must obtain permits, follow inspection timelines, coordinate with one-call services, document approvals, and comply with municipal or utility-specific conditions before excavation begins.
Depth, slope, and frost line requirements explained
Once permits and utility locates are secured, attention shifts to the physical requirements that confirm a water line functions reliably and withstands local conditions: trench depth, slope, and protection from frost.
Trench depth must meet local frost‑depth codes; slope guarantees drainage and prevents stagnation.
Pipes require bedding, insulation, or burial below frost line; allow extra depth where crossings or future grading occur.
Soil types and site assessment checklist
How does the ground behave where the trench will run? Assess soil texture — sand, silt, clay, or loam — and note compaction, drainage, and organic layers.
Identify rock, roots, high water table, and previously disturbed zones. Map utilities and surface slopes.
Record findings: soil type, stability, moisture, obstacles, and excavation difficulty to inform equipment, bedding material, and trench design.
Safety risks and required protective equipment
Several clear hazards accompany trenching for a water line, including cave-ins, striking underground utilities, hazardous atmospheres, falling loads, and equipment collisions.
Identifying and controlling these risks before excavation begins is essential.
Workers must use protective gear: hard hats, steel-toe boots, high-visibility vests, gloves, eye protection, and respiratory protection when required.
Implement shoring, sloping, utility locates, and competent-person oversight.
Tools, Materials, and Equipment Checklist
A clear checklist helps determine whether hand tools or mechanical trenchers are more appropriate by weighing speed, cost, and site constraints.
It should list required pipe types, fittings, bedding materials, and protective systems such as shoring or trench boxes, along with personal protective equipment.
Include consumables, marking supplies, and measurement tools to guarantee accurate layout and safe, code-compliant installation.
Hand tools vs. mechanical trenchers: pros and cons
Choosing between hand tools and mechanical trenchers requires weighing labor, speed, cost, and site conditions: hand tools offer low upfront expense and fine control for tight or delicate locations, while mechanical trenchers deliver rapid, uniform cuts for longer runs but demand higher rental or purchase costs and skilled operation.
- Hand tools: precise, quiet, low cost, physically demanding.
- Mechanical: fast, consistent, needs clearance and fuel/logistics.
- Decision factors: soil type, trench length, budget, time.
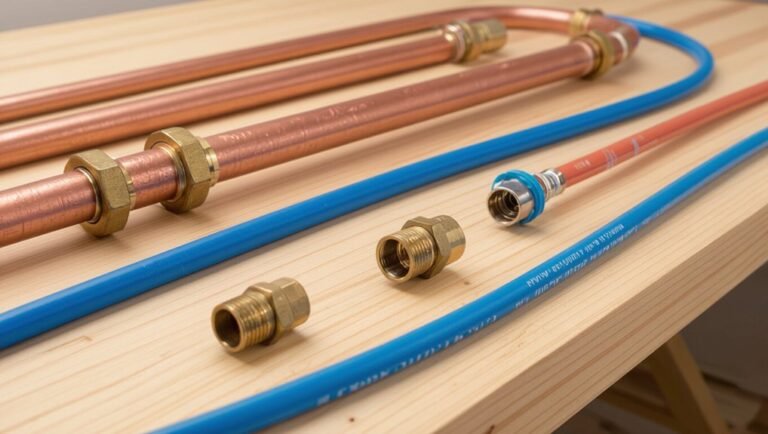
Pipe types, fittings, and bedding materials
Once the trenching method is selected, attention turns to the pipe, fittings, and bedding materials that determine longevity and performance.
Choices hinge on soil, pressure, temperature, and code. Common options include PVC, HDPE, and copper, with compatible joints and corrosion protection.
Proper bedding cushions and compaction prevent movement and damage.
- Select pipe rated for buried potable water use
- Use approved fittings and restraint systems
- Bedding: sand or pea gravel compacted to spec
Shoring, trench boxes, and protective gear
Install appropriate protective systems and personal protective equipment before entering or excavating a trench to prevent cave-ins, struck-by incidents, and suffocation hazards.
Use shoring or benching for unstable soil, and deploy trench boxes for deeper excavations. Inspect supports daily and after rain.
Provide ladders for safe egress within 25 feet, hard hats, steel-toe boots, high-visibility vests, gloves, and eye protection.
Consumables, marking supplies, and measurement tools
A concise set of consumables, marking supplies, and measurement tools guarantees accurate layout and minimizes delays during trenching for a water line.
Essential consumables include spray paint, flags, stakes, string, marker tape, and spare conduit fittings.
Measurement tools: tape measure, laser distance meter, line level, and marking chalk.
Carry extra batteries, gloves, utility knife, and permanent markers for durable, precise stakeouts.
Preparing the Route and Marking Utilities
Before excavation begins, the crew reviews utility locate results to identify buried lines and notes required clearances.
They mark the trench path with paint and flags, set lateral offsets, and clear vegetation or obstacles along the route.
Planned access points, shutoff valves, and cleanouts are positioned for maintenance and coordinated with the marked layout.
How to read utility locate results
How should the marks left by a utility locator be interpreted to guarantee a safe and accurate trench route? The locator’s colored flags and spray paint indicate utility type, approximate horizontal alignment, and sometimes depth.
Read the legend, note multiple overlapping utilities, and respect clearance distances. Treat marks as approximate: confirm critical crossings with potholing or hand‑digging and consult utility owners for discrepancies before excavating.
Marking the trench path and setting offsets
Once the planned route is sketched from the locate marks, the trench line is permanently marked and offsets set to keep excavation clear of known utilities and meet code clearances.
Stakes, flags, or spray paint denote centerline; measurements from utility marks establish horizontal offsets. Flags indicate depth or restriction zones.
Records of offsets and reference points are kept for crew use and inspection.
Clearing obstacles, vegetation, and surface prep
With offsets and centerline set, the crew clears the route of obstacles and prepares the surface to provide safe, unobstructed access for excavation.
They remove vegetation, roots, and loose debris, trim low branches, and temporarily relocate movable items.
Surfaces are graded where needed, erosion risks addressed, and wheelpaths established for equipment.
Utility markers remain visible and undisturbed during preparation.
Designing access points, valves, and cleanouts
A clear plan for access points, valves, and cleanouts is established before digging begins, aligning functional needs—service access, isolation, and maintenance—with the chosen centerline and site constraints.
Placement considers frost depth, grade, and future landscaping. Valve boxes and cleanouts are sited for unobstructed access, coordinated with utility markings, and detailed on the route map.
Required spacings and materials are specified.
Step-by-Step Trenching and Pipe Installation
The crew establishes a safe work area with barriers, erosion controls, and clear staging before any soil is moved.
Stake lines are measured and marked to guide either hand digging or machine trenching, with attention to achieving the required depth, slope, and a properly graded bottom.
Trenching proceeds by the chosen method—shovel and trenching bar for manual cuts or a trencher/mini-excavator for faster work—while periodic checks confirm alignment, depth, and grade.
Site setup, safety perimeter, and erosion control
Before any excavation begins, the worksite must be evaluated and prepared to guarantee clear access, defined boundaries, and measures that prevent soil loss or runoff. This includes marking utilities, establishing a controlled safety perimeter, and installing temporary erosion controls such as silt fences or straw wattles.
Signage, barrier tape, and ground protection for equipment should be placed. Sediment traps and regular inspections minimize downstream impacts during trenching.
Measuring and staking the trench line
With the worksite secured and erosion controls in place, attention shifts to laying out the trench line for accurate excavation and pipe routing.
A surveyor’s line or string follows planned alignment; stakes mark start, end, depth changes, and utility offsets. Measurements use tape, laser level, or transit to confirm slope and invert elevation.
Flags indicate known utilities and clearance zones.
Digging the trench: methods for hand digging
Once stakes and grade are verified, hand digging begins using systematic, ergonomic techniques to create a uniform trench that matches planned depth, width, and slope.
Workers employ spades, trenching hoes, and mattocks, excavating soil in manageable lifts, placing spoil neatly, and checking grade frequently with a level or string.
Safety includes proper posture, gloves, eye protection, and marking utilities before digging.
Digging the trench: using a trencher or mini-excavator
Start the trench with mechanized equipment when project scale, soil conditions, or time constraints make hand digging impractical.
Operators select a trencher for narrow, consistent cuts or a mini-excavator for wider, irregular trenches and obstacle management.
They inspect utilities, choose appropriate cutting teeth or bucket, control depth and alignment, remove spoil efficiently, and maintain safety with clear controls, stabilizers, and personal protective equipment.
Achieving correct depth, slope, and bottom grading
Achieving the correct trench depth, slope, and bottom grading guarantees reliable water flow, prevents freezing, and protects the pipe from settlement or damage.
Install pipe below frost line where required; maintain consistent fall (typically 1/8–1/4 inch per foot) toward drainage or meter.
Excavate a uniform, stable bottom, removing loose soil and rocks.
Verify grade with a level or laser before laying pipe.
Preparing and compacting the bedding layer
Prepare a uniform bedding layer of fine, compactable material to cradle the pipe, prevent point loads, and promote proper grade.
Spread 2–4 inches of sand or screened gravel, level to design slope, then compact in thin lifts using a plate compactor or hand tamper.
Confirm uniform support along the trench bottom, remove debris, and maintain proper elevation before backfilling to avoid pipe deformation.
Laying pipe, making connections, and securing fittings
Lay the pipe carefully along the prepared bedding, aligning sections to the planned slope and orientation while keeping joints clean and dry.
Use approved couplings, solvent cement or compression fittings per pipe material.
Seat joints fully, torque fittings to manufacturer specs, and back supports with padded clamps or engineered straps.
Protect exposed connections with wrap or heat-shrink sleeves before final backfill and compaction.
Testing the water line for leaks and pressure
Begin testing the assembled water line for leaks and correct pressure by isolating the new section, filling it slowly to expel air, and bringing it up to the required test pressure while monitoring gauges and fittings for leaks or drop-offs.
Hold pressure for the specified duration, inspect all joints visually and with soapy solution, record readings, and repair or tighten any deficiencies before depressurizing and restoring service.
Backfilling in lifts and final compaction
Compact the trench in controlled lifts to protect the pipe and achieve required density.
Backfill using specified bedding material in 6–12 inch layers, tamping each lift with hand or mechanical compactors.
Maintain uniform moisture, avoid large rocks near the pipe, and keep compaction equipment off the pipe zone.
Final surface grading should restore original contours and meet local compaction and inspection requirements.
Special Situations and Installation Variations
The guide now considers special situations that alter trenching technique and equipment needs.
It covers crossing driveways, sidewalks, and roads; working around trees, roots, and rocky ground; and installing troughs in frozen or high groundwater conditions.
Methods for handling long runs and directional changes are also outlined.
Crossing driveways, sidewalks, and roads
When a water line must cross a driveway, sidewalk, or road, additional protection and planning are required to prevent damage from traffic loads and surface repairs.
Install conduit or sleeving, bed the pipe in compacted crushed stone, and provide concrete encasement or steel sleeves where vehicles cross.
Verify local permits, mark utilities, and restore surfaces per code to guarantee longevity and safe load distribution.
Working around trees, roots, and rocky ground
After addressing crossings on paved surfaces, attention shifts to natural obstacles such as trees, roots, and rocky soil that complicate trenching.
Plan routes to avoid major roots and preserve trees; consult arborists if necessary.
Use manual digging or pneumatic tools near roots, and rock-breaking tools or air hammers for boulders.
Protect pipe with foam or root barriers and backfill with compacted sand or screened soil.
Installing troughs in frozen or high groundwater conditions
Installers faced with frozen ground or high groundwater must adapt trenching and trough placement techniques to maintain proper bedding, drainage, and pipe protection.
They use insulated or prefabricated troughs, elevate pipe above standing water, and incorporate gravel drainage layers and perimeter drains.
Temporary dewatering, frost shields, and sealed joints prevent freeze damage and contamination.
Backfill compaction and surface grading restore frost-free, stable conditions.
Methods for long runs and directional changes
Moving from techniques for frozen or waterlogged sites, attention shifts to handling long pipe runs and changes in direction, where line integrity and hydraulic performance depend on careful planning.
Use gradual bends, factory elbows, or sweep fittings to minimize friction and stress.
Install expansion loops or anchors for thermal movement.
Segment runs with access valves and inspection points to simplify maintenance and isolate leaks.
Common Problems and How to Avoid Them
Common issues during water line trenching include pipe damage from improper handling, post-installation settling or sinkholes from poor compaction, and freeze-related breaks if slope and burial depth are inadequate.
Practical precautions—protective bedding and sleeving, methodical compaction and testing, proper slope and frost depth, and routine pressure and contamination checks—address these risks.
The following sections explain how to recognize each problem and apply straightforward fixes.
Pipe damage during installation and protection strategies
Preventing pipe damage during trenching requires anticipating hazards and applying simple protective measures from the outset.
Workers should avoid sharp rocks, roots, and heavy equipment contact by bedding pipes in sand or fine gravel and using protective sleeves or conduit where crossing driveways.
Support joints, maintain proper slope, and inspect for nicks before backfilling.
Test pressure after installation and correct leaks immediately.
Settling, sinkholes, and inadequate compaction fixes
Addressing settling, sinkholes, and poor compaction begins with recognizing that loose or improperly replaced soil can cause depressions, voids, and sudden collapses above new trenches.
Remediation requires sequential tamping in lifts, using appropriate backfill (granular material or crushed rock), moisture conditioning, and avoiding large uncompacted fills.
Monitor for early signs of settlement, recompact affected areas, and reroute or reinforce where persistent voids occur.
Preventing freeze damage and maintaining slope
When temperatures fall and ground heaves, water lines are vulnerable to freezing and misalignment unless trenches are properly designed and maintained; keeping consistent slope and adequate cover, using frost-resistant bedding, and ensuring proper drainage minimize ice-related displacement and blockages.
Regular inspection, insulating exposed sections, maintaining positive grade toward drains, and backfilling with well-compacted, non-frost-susceptible material prevent heave, ponding, and loss of slope.
Troubleshooting leaks, low pressure, and contamination
Diagnose common water line issues by isolating symptoms—visible wet spots, unexplained pressure drops, discolored water, or unusual odors—and then follow systematic checks of joints, fittings, valves, and backfill conditions to locate leaks, identify obstructions, or detect contamination sources.
Document pressure readings, perform dye or pressure tests, inspect for root intrusion, repair or replace damaged sections, disinfect after repairs, and retest to confirm resolution.
Post-Installation Tasks and Maintenance
After the line is set and the trench backfilled, attention turns to restoring the surface, replanting or reseeding disturbed areas, and installing erosion control to protect the work.
Clear documentation of pipe locations, depths, materials, and any permits should be kept for future reference and handed to the property owner.
A simple routine maintenance checklist with seasonal tips and criteria for when to call a professional inspection or repair will help guarantee long-term reliability.
Restoring surface, landscaping, and erosion control
Several key steps secure the trench area is restored and stabilized to prevent erosion and blend the repair into the surrounding landscape.
Topsoil is replaced, compacted lightly, and graded for proper drainage.
Native seed or sod is applied, mulch or erosion control fabric installed on slopes, and temporary watering guarantees establishment.
Hardscape repairs are completed and debris removed to restore aesthetics and function.
How to document the installation for future reference
Once the surface is restored and landscaping is in place, documenting the installation preserves details needed for future repairs, maintenance, or upgrades.
Record pipe depth, material, fittings, valves, nearby utilities, and GPS coordinates or a scaled sketch. Photograph trenches before backfill and label images.
Save permits, inspection reports, and contractor contacts. Store records digitally and as a physical file for easy access.
Routine maintenance checklist and seasonal tips
A concise routine maintenance checklist helps confirm a water line remains reliable and damage-free throughout the year.
Inspect visible pipe runs, fittings, and valve operation monthly; check for leaks, corrosion, and ground settling.
Flush lines seasonally, clear nearby vegetation, verify insulation before cold weather, and guarantee proper drainage after heavy rain.
Record actions and dates for ongoing reference and warranty support.
When to schedule professional inspection or repairs
If signs of persistent leakage, unusual pressure changes, visible corrosion, or repeated clogging appear, schedule a professional inspection promptly to prevent worsening damage.
A licensed plumber evaluates fittings, joints, frost heave effects, and trench integrity, using pressure tests and camera inspections as needed.
Arrange repairs for compromised pipes, backfill settling, or anchoring failures. Document findings and follow recommended remediation timelines to protect the system.
Cost Estimates and Timeframes
A concise cost overview lists typical DIY expenses for pipe, fittings, bedding, and tool rental or purchase.
Estimated labor times are provided for common trench lengths and soil conditions to help plan workdays.
Guidance also notes scenarios where hiring a contractor is likely more cost-effective than a DIY approach.
Typical DIY cost breakdown by material and equipment
Typical DIY trenching costs break down into a few predictable categories: materials (pipe, fittings, connectors, backfill), rental equipment (trenchers, mini-excavators, compactors), and consumables (sand, warning tape, gravel).
Typical material totals range from modest PVC lengths and fittings to thicker insulated pipe for freeze protection.
Equipment rental can dominate short projects; small backfill and bedding supplies add predictable per-foot expenses.
Labor time estimates for common trench lengths and conditions
Several factors determine crew hours for trenching a water line, including trench length, soil type, depth, and whether utilities must be avoided or shored.
Typical estimates: hand-digging 50–100 ft often requires 8–16 hours for one person; small excavator reduces to 2–6 hours.
Rocky or wet soils double time.
Adding bedding, backfill, and compaction adds 25–50% to total labor.
When hiring contractors is more cost-effective
Consider hiring a contractor when project complexity, time constraints, or site conditions make DIY digging inefficient or risky. Professionals offer accurate cost estimates, faster timelines, permits handling, and reduced liability. For small, simple runs DIY may suffice; for long, rocky, or regulated jobs, contractors can be more economical overall.
| Factor | Impact |
|---|---|
| Length | Increases cost/time |
| Soil | Affects equipment need |
| Permits | Affects schedule/cost |
Safety Reminders and Legal Considerations
The section outlines essential safety obligations, including adherence to OSHA trenching standards and basic compliance measures.
It also addresses liability, required permits, and recordkeeping practices that protect both contractors and property owners.
Finally, it reviews emergency procedures for trench collapses and utility strikes, emphasizing prompt response and reporting.
OSHA trenching regulations and basic compliance
One key obligation when digging a trench for a water line is compliance with OSHA’s excavation and trenching standards, which set minimum requirements for protective systems, access and egress, inspections, and soil classification.
Employers must implement protective systems (sloping, benching, shields), provide safe entry/exit, conduct daily competent person inspections, and classify soils accurately to prevent cave-ins and guarantee worker safety.
Liability, permits, and recordkeeping requirements
Any party involved in trenching for a water line bears legal and financial responsibility for meeting permit, safety, and recordkeeping obligations.
Contractors and homeowners must obtain required local permits, verify utility locates, document inspections and training, and maintain records of permits, plans, and incident logs.
Failure to comply can incur fines, stop-work orders, liability for damages, and increased insurance exposure.
Emergency procedures for trench collapses or utility strikes
Respond immediately and calmly when a trench collapse or utility strike occurs, prioritizing human safety, securing the site, and notifying emergency services and utility companies.
Evacuate the area, administer first aid without exposing rescuers to hazards, and cordon off the trench.
Preserve evidence for investigators, document the incident, and cooperate with authorities.
Follow utility firm instructions before resuming work; review procedures to prevent recurrence.
Quick Reference: Step-by-Step Checklist for DIYers
A concise checklist helps a DIYer move through the trenching project with fewer mistakes and safety risks.
The following quick-reference lists cover actions to take before starting, while trenching, and after the water line is installed. Each item prioritizes compliance, safety, and inspection.
- Pre-dig checklist: permits, utility locates, site marking, required tools and PPE
- During-dig checklist: excavation depth and slope checks, shoring/edge safety, pipe bedding and alignment
- Post-installation checklist: pressure test, backfill compaction, final inspections and records
Pre-dig checklist
Checklist items gathered before digging guarantee the trenching project proceeds safely, legally, and efficiently.
The preparatory list includes utility location confirmations, permits, site markings, soil assessment, required tools and PPE, slope and depth plans, pipe type and bedding materials, access for machinery, erosion controls, and emergency contacts.
Verify local code specifics and notify neighbors before excavation begins.
During-dig checklist
With preparations confirmed and the site marked, the during-dig checklist guides each action while excavation proceeds.
Monitor depth and slope consistently, expose utilities carefully, and remove spoil safely.
Stabilize trench walls, maintain safe egress, and pause for unstable soil or water.
Measure frequently for correct bedding, protect exposed pipe, and document progress.
Stop if unknown hazards appear.
Post-installation checklist
Completion of the trench and placement of the water line shifts focus to verification, protection, and restoration. The post-installation checklist guides the DIYer through immediate tests, backfill and compaction steps, surface restoration, and final documentation to guarantee long-term performance and compliance.
Inspect pressure and leak tests, secure fittings, properly backfill in layers with compaction, restore surface grading and sod, record as-built notes, and file permits and warranties.
Conclusion
Sunlight slices the freshly turned soil where the trench ends; a blue pipe lies parallel to a row of pegs, as if two lines had agreed to meet. The guide’s steps—planning, marking, digging, bedding, joining, testing—converge here, each action dovetailing with the next like matching footprints. Whether amateur or pro, the careful sequence yields a reliable waterway beneath the lawn, and coincidence makes visible the order born from deliberate preparation.