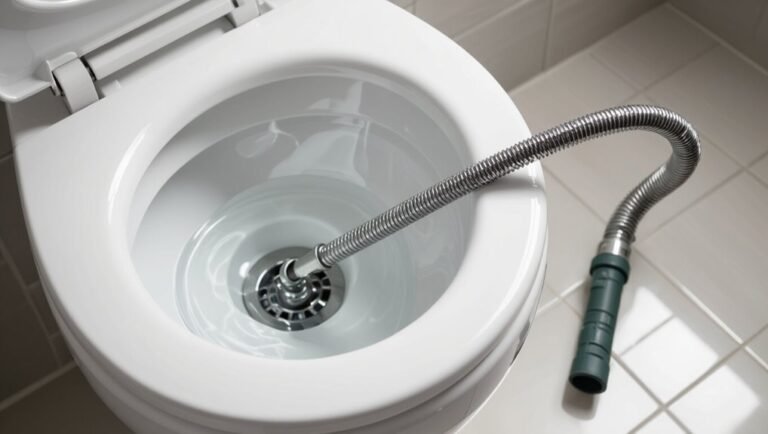
How to Winterize Pressure Washer Pump: Step-by-Step Guide to Prevent Freezing Damage
To winterize your pressure washer pump and prevent freeze damage, follow these essential steps: First, shut down the machine and relieve system pressure. Next, flush the pump with clear water to eliminate any detergent or debris. Drain all accessible fittings, then add a pump-safe antifreeze or pump saver through the inlet, cycling the unloader to ensure it reaches the seals and pistons. If necessary, change the oil, store the unit in a frost-free location, and inspect the seals for any wear. Detailed steps for various pump types and troubleshooting tips are provided below.
Why Winterizing a Pressure Washer Pump Is Essential
Freezing temperatures can expand residual water inside a pressure washer pump, cracking housings and degrading seals.
Leaving water in the system over winter increases the likelihood of such internal damage and compromises pump performance.
Repairing or replacing a frozen pump often means significant expense and downtime for users.
How freezing damages pumps and seals
Even modest drops below 32°F can spell trouble for a pressure washer pump: water trapped in valves, passages, or around seals expands as it freezes, generating enough force to crack housings, warp components, and deform mating surfaces.
Corrosion accelerates when moisture remains, seals lose flexibility, and tolerances shift. Learning how to winterize pressure washer pump prevents mechanical failure and costly repairs.
Risks of leaving water inside during cold months
Neglecting to remove water from a pressure washer pump during cold months invites costly damage: trapped water expands when it freezes, cracking housings, distorting valves, and compromising seal integrity.
Remaining moisture promotes corrosion, mineral buildup, and piston or plunger pitting.
Upon thaw, leaks, reduced pressure, and premature part failure occur, increasing repair complexity and shortening pump service life if preventive winterization is omitted.
Cost and downtime implications of freeze damage
Beyond the mechanical failures and corrosion that occur when water is left inside a pump, freeze damage carries clear financial and operational consequences.
Repairs or full pump replacement can cost hundreds to thousands, depending on model and labor. Unexpected downtime stalls projects, incurs rental or contractor fees, and harms deadlines.
Preventive winterizing is typically far cheaper and minimizes lost productivity.
Quick Overview: Winterizing a Pressure Washer Pump in Minutes
A concise checklist lists the immediate steps: flush and drain the system, add pump saver or antifreeze, and store the unit in a dry, sheltered spot.
Timing depends on local freeze risk—winterize before sustained temperatures approach freezing or when storing for more than a few days in cold climates.
In mild regions with short storage, a brief drain and protected indoor storage may suffice.
Summary checklist for immediate action
Checklist in hand, the operator moves through a compact sequence to protect the pump before freezing weather: drain water, relieve pressure, add antifreeze, and secure storage.
Quick verification guarantees no residue or trapped liquid remains. Follow this brief set of steps to minimize freeze damage risk and facilitate fast reactivation in spring.
- Drain all water
- Relieve system pressure
- Introduce pump-safe antifreeze
- Store in dry, sheltered location
When to winterize based on climate and storage duration
When should the operator winterize a pressure washer pump?
The operator should winterize before temperatures consistently approach freezing, or immediately if storage exceeds several days in cold climates.
In mild regions, winterize if unused for weeks or when forecasts predict frost.
For long-term indoor storage, winterize regardless of climate to remove moisture and protect seals, valves, and metal components from corrosion.
Tools and Materials You Need
A concise list of tools and materials helps guarantee the winterization process is efficient and complete.
Essential items include basic wrenches, a siphon or pump saver attachment, and recommended antifreeze or commercial pump saver products.
Appropriate safety gear and proper disposal supplies for used fluids should also be on hand.
Required tools (wrenches, siphon pump, etc.)
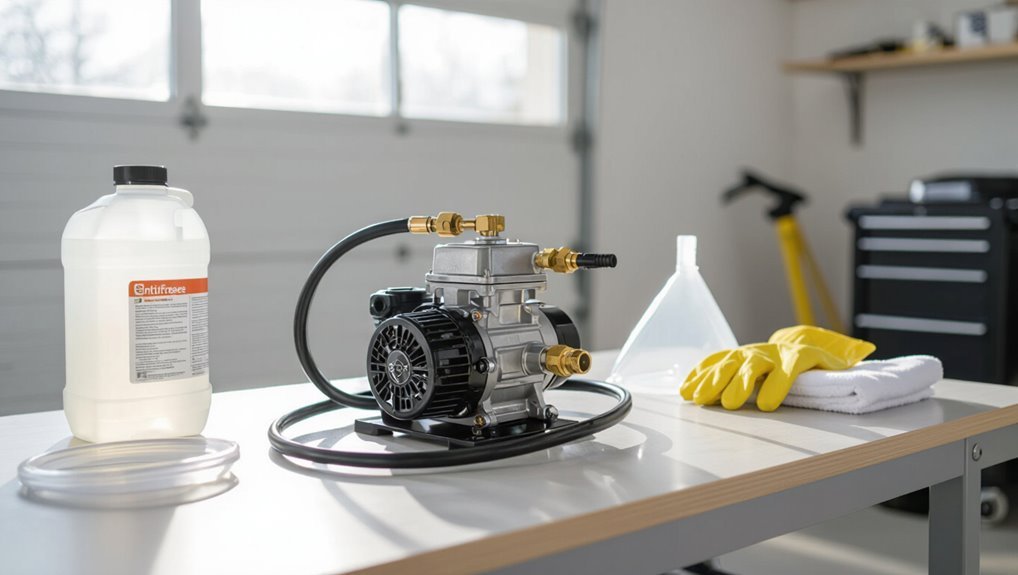
Essential tools for winterizing a pressure washer pump include a set of open-end or adjustable wrenches for loosening fittings, a siphon or hand pump for extracting fluids, and a spray gun adapter or pump saver to introduce antifreeze or pump-preserving solution.
Also recommended are clean rags, a small funnel, and protective gloves to keep the process efficient and mess-free.
- Open-end or adjustable wrenches
- Siphon or hand pump
- Spray gun adapter/pump saver
- Clean rags, funnel, gloves
Recommended antifreeze and pump saver products
Several reliable pump-protecting fluids and commercial pump savers are recommended for winterizing pressure washer pumps, chosen for freeze protection, corrosion inhibition, and compatibility with pump seals.
Common choices include propylene glycol-based antifreeze, RV/marine non-toxic antifreeze, and manufacturer-branded pump saver aerosols or flush concentrates.
Select products labeled safe for brass/plastic seals and follow dilution and flushing instructions to avoid residue or seal damage.
Safety gear and disposal supplies
After selecting the proper antifreeze or pump saver, attention should turn to personal protection and responsible disposal when handling these chemicals.
Gloves, eye protection, and a respirator are recommended for concentrated products. Use chemical-resistant funnels and sealed containers for storage and transport.
Keep absorbent pads and a labeled waste bin for spills. Follow local hazardous waste guidelines for disposal and recycling.
Preparing the Pressure Washer for Winter Storage
Before any winter-specific treatments, the operator should shut down the engine and allow it to cool completely to prevent burns and fire risk.
All external accessories—hoses, spray gun, and wand—must be disconnected and drained to remove trapped water.
The water inlet screen and any filters should be removed and emptied to prevent freeze damage and blockages.
Shutting down and cooling the engine safely
Allow the engine to run at idle until it reaches normal operating temperature, then shut it off and let it cool completely in a well-ventilated area.
Inspect for leaks, loose fittings, or unusual smells while cooling.
Close fuel valve if present and prevent accidental restart by removing key or disabling ignition.
Once cool, move unit to storage location and proceed with winterizing steps.
Disconnecting and draining accessories (hoses, spray gun, wand)
Disconnect and depressurize all lines and accessories before storage to prevent trapped water from freezing and damaging fittings.
Detach hoses, spray gun, and wand; drain remaining water by holding them downhill and operating the trigger briefly until dry.
Coil hoses loosely, cap quick-connects, and store components indoors protected from sunlight and cold.
Inspect O-rings and lubricate or replace as needed before reassembly.
Removing and draining the water inlet screen and filters
Remove and inspect the water inlet screen and any inline filters as part of winterizing to prevent trapped water from freezing and clogging the pump.
Remove screens and filters, rinse debris, and shake out excess water. If clogged or damaged, replace them.
Allow components to air dry or use compressed air.
Reinstall dry parts or store spares indoors with other winterized components.
Step-by-Step Winterization Process
The winterization procedure begins with safely depressurizing the system and flushing clear water through the hoses and pump until all lines run clean.
Next, the technician introduces a pump saver or appropriate antifreeze—using a siphon or garden-hose adapter to circulate the correct volumes—so internal passages, the unloader valve, and pistons are fully protected.
Final checks confirm no fluid remains that could freeze and that all components are secured for storage.
Depressurize the system safely
Begin by relieving all pressure from the system to prevent accidental discharge or injury: the operator should turn off the engine, close the water supply, and squeeze the trigger on the wand until no pressure remains.
Open the pump’s unloader or pressure relief valve slowly to verify zero PSI.
Wear safety glasses and gloves, and guarantee hoses and fittings remain pointed away from people.
Flush with clear water until lines are clear
With pressure verified at zero and fittings pointed safely away, proceed to flush the system with clear water to purge detergent and debris.
Run water through the inlet and trigger until output is transparent, watching hoses, wand, and nozzle.
Inspect for trapped foam or discoloration.
Continue until flow is consistent and residue-free, then shut off supply and drain remaining water from accessible fittings.
Add pump saver or antifreeze methods and volumes
Next, protect internal seals and valves by filling the pump with an appropriate pump saver or non-toxic RV/marine antifreeze following the manufacturer’s directions.
Measure and pour recommended volumes: typically 4–8 ounces for small triplex pumps, 8–16 ounces for larger units, or as specified by the pump maker.
Operate briefly to distribute additive, then cap and store per instructions.
Using a siphon or garden hose adapter to circulate antifreeze
To circulate antifreeze through the pump and downstream plumbing, attach a siphon tube or garden-hose adapter to the water inlet and place the other end into a container of non-toxic RV/marine antifreeze.
Then run the pressure washer briefly on low pressure so the pump draws the antifreeze through seals, valves, and hose lines.
Monitor flow, stop when antifreeze appears, close inlet, disconnect, and cap fittings.
Protecting the unloader valve and pistons
Begin by relieving internal pressure and removing water from the pump assembly so the unloader valve and pistons are exposed to antifreeze rather than frozen water.
Apply manufacturer-recommended antifreeze through the inlet until clear fluid reaches the unloader.
Cycle the unloader slowly to distribute fluid around seals and pistons.
Wipe external components, cap openings, and store the pump in a dry, frost-free location.
Final drainage and reassembly
Drain remaining antifreeze and any trapped water from the pump and connected hoses, then reassemble all fittings and covers to prevent contamination and air ingress during storage.
Inspect seals, O-rings and quick-connects for wear; replace damaged parts.
Tighten connections to manufacturer torque where specified.
Coil hoses without kinks, store upright in a dry, frost-free location.
Label the unit and note next maintenance date.
Winterizing Different Types of Pressure Washer Pumps
Different pump designs require tailored winterization steps and precautions.
Axial cam pumps need careful antifreeze flushing and attention to seal and valve wear, while triplex plunger pumps demand thorough lubrication and inspection of packing and plungers.
Electric and gas models differ mainly in priming, siphoning procedures, and motor-specific care, so methods should be chosen accordingly.
Axial cam pumps: specific steps and cautions
Because axial cam pumps use a complex internal valve assembly and a lubricated crankcase, winterizing them requires careful, pump-specific steps to prevent freeze damage and corrosion.
Drain external water, remove inlet filter, and purge fluid from head and valves.
Change or inspect crankcase oil, add non-toxic antifreeze into pump through inlet, run briefly, then store upright in a dry, temperature-controlled area.
Triplex plunger pumps: special considerations
Triplex plunger pumps require distinct winterizing steps due to their exposed plungers, packing seals, and high-pressure valves that are vulnerable to freeze damage and corrosion.
Drain water, remove unloader and fittings, and flush with low-toxicity antifreeze through inlet and discharge.
Inspect and replace worn packing seals, coat plungers with corrosion inhibitor, and store the pump in a dry, temperature-controlled area.
Electric vs. gas pressure washers: procedural differences
Many pressure washer owners must adjust winterizing procedures based on whether the unit is electric or gas-powered, since each design presents unique vulnerabilities and service points.
Electric units require draining, antifreeze pump treatment, and moisture-free storage to protect seals and motors.
Gas units also need fuel stabilization, oil change, spark plug removal or fogging, and thorough draining to prevent carburetor and pump freeze damage.
Storing the Unit Properly After Winterization
After winterization, the unit should be stored indoors or under a weatherproof cover in a well-ventilated, frost-free space to prevent temperature and moisture damage.
It should sit on a raised, level surface with vibration isolation pads or blocks to avoid vibration-related wear and keep sensitive components elevated above any potential floor moisture.
External parts such as fuel tanks, batteries, and quick-connect fittings should be capped, secured, and placed under additional protection to prevent corrosion and contamination.
Best indoor and covered outdoor storage options
A few practical storage choices will keep a winterized pressure washer safe and functional: climate-controlled indoor spaces, insulated garages, and covered outdoor enclosures each offer distinct protection levels.
Indoor climate control prevents freeze/thaw cycles and humidity damage.
Insulated garages moderate temperature swings.
Covered outdoor enclosures shield from precipitation and debris but require tarping and elevated placement to avoid ground moisture and pests.
Positioning, vibration isolation, and elevation tips
Once placed in its chosen storage spot, correct positioning and support keep a winterized pressure washer from sustaining damage or creating maintenance headaches.
Level the unit to prevent oil or antifreeze pooling. Use vibration-isolating pads or rubber feet to reduce motor stress.
Elevate off concrete with a pallet or shelf to avoid moisture wicking and allow airflow for corrosion prevention and easier inspection.
Protecting external components (fuel, battery, fittings)
Secure external components to prevent fuel degradation, battery failure, and corrosion of fittings during storage.
Drain or stabilize fuel; run treated fuel through the carburetor, then shut off and drain the line.
Remove battery, charge fully, and store indoors on a maintenance charger.
Coat metal fittings with anti-corrosion spray or dielectric grease, cap exposed connections, and inspect seals before reassembly.
How to Winterize If You Can’t Move the Unit Indoors
If the pressure washer cannot be moved indoors, temporary outdoor protection such as weatherproof covers and elevated platforms helps shield it from moisture and freezing.
Adding insulation, a portable heated enclosure, or thermostatically controlled heating pads around vulnerable components reduces freeze risk.
Regular monitoring and periodic checks guarantee seals remain intact and heating measures are functioning throughout cold spells.
Temporary outdoor protection methods
When relocating a pressure washer indoors is impossible, temporary outdoor protection methods can prevent freeze damage by blocking moisture, insulating vulnerable components, and limiting exposure to wind-driven cold.
These measures are stopgaps rather than long-term solutions and should be implemented carefully to avoid trapping condensation or creating mold-prone conditions.
Use breathable covers, elevated pallets, tarps secured against wind, and desiccant packs; inspect frequently for moisture buildup.
Insulation, heated enclosures, and heating pads
Moving beyond temporary coverings, more robust strategies—insulation, purpose-built heated enclosures, and electric heating pads—offer active protection for pressure washer pumps that must remain outdoors.
Insulate lines and the pump with closed-cell foam or removable jackets.
Use a weatherproof heated enclosure with thermostat control to maintain safe temperatures.
Apply UL-listed heating pads where moisture won’t contact electrical connections; follow manufacturer installation and power guidelines.
Monitoring and periodic checks
Although robust insulation and heating reduce risk, regular monitoring is essential for units left outdoors. Scheduled visual inspections, temperature checks, and brief operational tests catch problems early and prevent freeze damage.
Inspect seals, hoses, and fittings for leaks or ice buildup weekly. Record ambient and pump temperatures, run the pump briefly to circulate antifreeze, and document findings for timely maintenance or emergency intervention.
Troubleshooting Common Winterization Problems
If the pump freezes despite precautions, the guide outlines immediate steps to minimize damage and assess ice-related cracks.
It also explains how to detect and repair leaks that may appear after thawing.
Finally, it covers spring restoration: flushing antifreeze, performing controlled test runs, and confirming normal operation.
What to do if pump freezes despite precautions
Discovering a frozen pump despite taking winterization steps requires prompt, measured action to prevent further damage.
Assess visually for cracks without applying heat directly. Move the unit to a sheltered, temperate area.
Thaw slowly using ambient warm air or low-output space heaters; avoid open flames and high heat.
After thawing, inspect seals, fittings, and internals; replace damaged components before reuse.
Detecting and fixing leaks after thaw
Several signs can indicate a leak after thawing, and prompt detection is essential to prevent further pump damage.
Inspect seals, fittings, hoses, and manifold for dampness or antifreeze residue. Tighten loose connections, replace cracked hoses, and swap damaged O-rings or seals.
Use a clean cloth to pinpoint seepage and a flashlight for hairline cracks. Test at low pressure to confirm repair.
Restoring pump function in spring (purging antifreeze, test runs)
After confirming there are no leaks or damaged components, attention turns to restoring the pump for spring use by purging antifreeze and conducting controlled test runs.
Drain antifreeze into a container, flush with clean water until clear, then reconnect supply.
Run brief low-pressure cycles, checking for abnormal noises, vibration, leaks, or pressure loss.
Escalate to service if issues persist.
Preventive Maintenance and Seasonal Checklist
Before cold weather arrives, the operator should complete routine maintenance tasks such as changing oil, flushing the pump, and inspecting seals and hoses.
When returning the unit to service, a concise inspection checklist guarantees valves, fittings, and the unloader operate correctly and that no freeze damage occurred.
Following long-term care tips—proper storage, scheduled fluid changes, and periodic run-ups—will extend pump life and reduce future repairs.
Routine maintenance tasks to perform before winter
Prepare the pressure washer for winter by completing a focused set of preventive tasks that protect the pump, hoses, and fittings from freeze damage and corrosion.
Drain water from pump, wand, and hoses; remove and store nozzles; flush pump with antifreeze or pump saver; change engine oil and fuel stabilize; lubricate O-rings and fittings; tighten clamps; secure unit in dry, sheltered storage.
Inspection checklist to follow when bringing unit back into service
When the pressure washer is returned to service, a systematic inspection guarantees safe, reliable operation and catches winter-related issues early.
The technician checks seals, hoses, fittings, and pump for cracks or leaks; verifies oil level and condition; tests unloader and safety valves; runs the unit briefly to confirm pressure and temperature are normal.
- Inspect hoses and fittings
- Check pump seals and oil
- Test valves and unloader
- Run and verify pressure
Long-term care tips to extend pump life
Establishing a consistent preventive maintenance and seasonal checklist preserves pump performance and prevents costly failures over time.
The operator schedules oil changes, inspects seals and hoses, replaces worn fittings, and uses manufacturer-approved lubricants.
Winter draining and antifreeze procedures are documented. Storage occurs in a dry, temperature-controlled area.
Periodic test runs and prompt repairs extend service life and guarantee reliable startup each season.
Cost and Product Comparison for Pump Protection
A concise cost and product comparison helps determine the best protection strategy for a pressure washer pump based on price, protection level, and ease of use. Below is a quick reference table comparing top-rated pump savers and antifreeze options to guide selection. The following factors will be weighed to recommend practical, cost-effective solutions.
| Product | Key feature |
|---|---|
| Pump saver (brand A) | High protection, moderate price |
| Pump saver (brand B) | Easy to use, higher price |
| Antifreeze (propylene glycol) | Low cost, good freeze protection |
| Antifreeze (ethylene glycol) | Very effective, toxic—handle with care |
| Trade-off summary | Balance of cost vs. protection and ease of use |
Comparison criteria: price, protection level, ease of use
Several key criteria guide selection of pump-protection strategies: price, protection level, and ease of use.
Cost considerations balance upfront expense versus long-term pump savings.
Protection level assesses freeze resistance, material compatibility, and duration of effectiveness.
Ease of use covers installation time, required tools, and maintenance frequency.
Buyers prioritize a solution that fits budget, reliably prevents freezing, and minimizes seasonal effort.
Top-rated pump savers and antifreeze products
Compare leading pump savers and antifreeze products by focusing on cost, protection level, and user-friendliness to determine which options deliver the best value for winterizing pressure washer pumps.
Objective testing rates corrosion inhibitors and ethylene/propylene glycol blends for freeze point, residue, and compatibility.
Recommendations favor pump savers designed for sealed systems and non-toxic antifreeze where appropriate.
- Pump saver with lubricant and corrosion inhibitor
- Propylene glycol antifreeze
- Ethylene glycol commercial-grade
- DIY RV-formula alternative
Common Mistakes to Avoid When Winterizing
Common errors during winterization often involve neglecting small fittings and hose connections, which can trap water and cause freeze damage.
Using the wrong type or an insufficient amount of antifreeze is another frequent issue that undermines protection.
Skipping engine and fuel system preparation increases the risk of corrosion and starting problems in spring.
Overlooking small fittings and hose connections
Although small fittings and hose connections may seem insignificant, neglecting them during winterization can lead to leaks, frozen damage, and costly repairs.
Corrosion, trapped water, and loose clamps create vulnerable points; ice expansion cracks seals and threads. Inspect, drain, tighten, and replace worn O-rings and fittings.
Cap open ends and store hoses drained and elevated to prevent residual moisture from freezing.
Using incorrect antifreeze or too little product
After checking fittings and hose connections, attention must turn to the antifreeze itself: using the wrong type or an insufficient amount can render all prior precautions useless.
Select pump-safe, non-toxic RV or marine antifreeze rated for low temperatures. Flush the system until antifreeze appears at outlets, then add manufacturer-recommended volume.
Underfilling or using automotive coolant risks ice damage and voided warranties.
Skipping engine and fuel system preparation
Neglecting the engine and fuel system when preparing a pressure washer for winter invites fuel degradation, corrosion, and starting failures in spring.
Failure to drain or stabilize fuel, remove carburetor deposits, and fog the engine accelerates varnish and rust.
Small preventive steps—adding stabilizer, running the engine briefly, draining tanks, and storing with a clean fuel system—reduce costly repairs and guarantee reliable startup.
End-of-Season Timeline and Recommended Schedule
Timing for winterization should follow regional temperature patterns, beginning when sustained nightly lows approach freezing in colder climates or before the first hard freeze in milder areas.
Once stored, the pump should be inspected at regular intervals—monthly in harsh winters, and every 6–8 weeks in milder conditions—to confirm antifreeze presence and absence of moisture or corrosion.
A concise, written schedule tailored to local conditions helps guarantee checks are not missed.
When to start winterization based on regional temps
When should winterization begin?
Guidance ties start to local freeze risk: in cold climates, begin when nighttime lows approach 32°F (0°C) consistently—often late autumn.
In moderate regions, start when occasional freezes are forecast.
In mild climates without freezes, winterize before prolonged inactivity or if temperatures are expected below freezing briefly.
Adjust timing for elevation and microclimates.
Recommended frequency for checks during winter storage
After determining the appropriate moment to winterize based on local freeze risk, establish a regular inspection schedule to catch issues before they worsen.
The pump should be checked at set intervals to verify antifreeze presence, seals, fittings, storage conditions, and absence of leaks or condensation.
- Weekly visual check
- Monthly functional test
- Midseason detailed inspection
- Pre-thaw final review
Conclusion
Winterizing a pressure washer pump protects equipment and wallets: studies show freeze damage can double repair costs, with homeowners spending up to 50% more on replacements than yearly maintenance would have cost. Following a clear checklist and using antifreeze or pump saver reduces that risk. With basic tools and a short routine, owners can prevent costly corrosion and freezing, ensuring reliable spring startup and extending pump life through cold months.