How to Adjust an Anti-Scald Valve on a Bathtub: Step-by-Step Fix for Safe Water Temperatures
To adjust an anti-scald valve on your bathtub for safe water temperatures, follow these steps: Locate the valve behind an access panel, shut off the water supply, and relieve any pressure. Make small adjustments to the thermostat (1/8–1/4 turn), then run the water until it stabilizes. Measure the outlet temperature with a thermometer and repeat the adjustment until you achieve a safe range of 100–120°F. Once done, reassemble the trim, check for leaks, and document your settings for future reference. Further troubleshooting tips are provided below.
Why Adjusting an Anti-Scald Valve Matters for Bathtub Safety
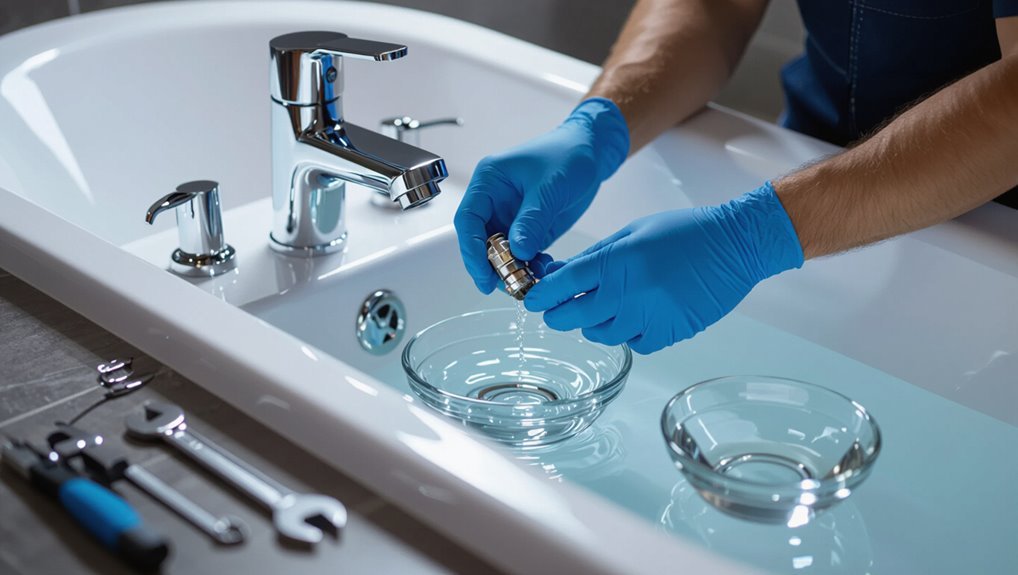
Anti-scald valves reduce the risk of burns by limiting the maximum hot water delivered to a bathtub.
Adjustments are commonly needed after new installations, when temperature settings drift, or following household changes such as water heater adjustments or plumbing work.
Keeping the valve set to recommended bathtub limits (typically around 100–120°F or 37–49°C) guarantees consistent, safe temperatures.
How anti-scald valves protect against burns
A properly set anti-scald valve acts as a temperature regulator between a home’s hot water supply and the bathtub, limiting the maximum outlet temperature to prevent sudden spikes that can cause burns.
By blending hot and cold water and responding to pressure or temperature changes, it reduces scald risk for vulnerable users.
Instructions on how to adjust anti-scald valve bathtub guarantee predictable, safe bath temperatures.
Common scenarios that require adjustment (new installation, temperature drift, household changes)
When first installed, after months of use, or following changes in household plumbing or occupants, anti-scald valves may need adjustment to maintain safe bathtub temperatures.
New installations often require calibration.
Mineral buildup, wear, or gradual temperature drift can alter performance.
Household changes—different water heater settings, new fixtures, or resident sensitivity—also prompt rechecking and fine-tuning to guarantee consistent, safe delivery.
Temperature standards and recommended safe limits for bathtubs
Following recalibration or routine checks prompted by installation, wear, or household changes, verifying that bathtub temperatures meet safety standards confirms adjustments actually protect users.
Regulatory guidance typically limits domestic hot water to 120°F (49°C) to reduce scald risk; pediatric or elderly care may target 100–110°F (38–43°C).
Thermostatic mixing valves and frequent testing guarantee compliance and consistent, safe delivery.
Identify Your Anti-Scald Valve Type and Location
The technician first distinguishes among common anti-scald valves—pressure‑balancing, thermostatic, and integrated cartridge designs—since each adjusts differently.
They then locate the valve, typically behind the bathtub access panel, within an adjacent wall, or under a built-in apron.
Finally, they confirm the model and manufacturer by inspecting the valve body for stamped markings or removing the trim to read labels and part numbers.
Typical valve types (pressure-balancing, thermostatic, integrated cartridge)
Identifying the anti-scald valve begins with recognizing the three common designs: pressure-balancing, thermostatic, and integrated cartridge valves.
Pressure-balancing valves react to pressure shifts to limit temperature swings.
Thermostatic valves maintain a set temperature regardless of supply changes.
Integrated cartridge valves combine control and anti-scald features in a single replaceable unit, common in modern single-handle fixtures.
Where the valve is located in common bathtub setups
After noting the common valve designs—pressure-balancing, thermostatic, and integrated cartridge—attention turns to where those valves are typically housed in bathtub installations.
Valves usually sit behind the tub wall, accessed via an adjacent access panel or removable wallboard in a closet or hallway.
Some installations hide cartridges within the faucet assembly or under the overflow plate; accessibility varies by plumbing layout.
How to confirm the valve model and manufacturer
How can one verify the exact model and manufacturer of an anti-scald valve before attempting adjustments?
Inspect visible markings on the valve body or trim. Remove the access plate to view stamped numbers, and photograph labels.
Cross-reference numbers with manufacturer catalogs or websites.
If markings are missing, note cartridge shape and screw pattern and consult plumbing supply or a professional for identification.
Tools and Materials You’ll Need
The section lists the essential tools required for safe and accurate anti-scald valve adjustment, such as adjustable wrenches, screwdrivers, pliers, and a thermometer.
It also notes common replacement parts—cartridges, O-rings, and springs—and explains when to have spares on hand.
Clear preparation minimizes interruptions and reduces the risk of damage during the adjustment.
Essential tools checklist
A few basic tools and a couple of specialized items are required to safely access and adjust an anti-scald valve.
The technician gathers compact, reliable tools to open panels, loosen fittings, and make precise adjustments without damaging trim or plumbing seals.
- Adjustable wrench with padded jaws
- Phillips and flat screwdrivers
- Hex/Allen key set
- Small flashlight or headlamp
Replacement parts and when to have spares on hand
After gathering the wrench, screwdrivers, and hex keys, the technician should also prepare commonly needed replacement parts to avoid work delays.
Carry cartridge kits, O-rings, balancing springs, thermostatic elements, and inlet filters matching the valve model.
Keep plumber’s grease, replacement screws, and a backup trim kit.
Stock spares when servicing multiple units or when valves show corrosion, wear, or frequent temperature drift.
Prepare the Tub and Plumbing Safely
Before any adjustments begin, the water supply should be shut off at the appropriate valves and verified by running nearby fixtures.
Surfaces and fixtures are covered and the area cleared to prevent scratches and allow unobstructed access.
The person working should test water temperature slowly and wear protective gloves to minimize the risk of accidental scalding.
Shut-off procedures for water supply
Locate and close the water supply valves serving the tub—typically the hot and cold shutoffs behind the access panel or the main house valve if local shutoffs are absent.
Then relieve residual pressure by opening the tub faucet and letting water drain until flow stops.
Verify valves are fully closed, shut off nearby fixtures to prevent backflow, and keep towels ready for minor drips during valve access.
Protecting finishes and clearing the workspace
A clean, organized workspace reduces the risk of scratching fixtures and losing small parts, so cover the tub surface and surrounding trim with a soft, non-abrasive protective layer—such as a thick towel, felt pads, or a rubber mat—and tape down edges to prevent shifting.
Remove rugs and obstacles, gather tools in a tray, place removed trim and screws in labeled containers, and guarantee clear access to the valve.
Safety precautions to avoid accidental scalding
When performing work on tub plumbing, wear heat-resistant gloves and safety glasses, shut off hot and cold supply valves, and open a faucet downstream to relieve pressure and drain residual hot water.
Confirm temperature with a thermometer before touching components, keep children away, label shutoff valves, and allow fittings to cool.
Test adjusted settings gradually to verify maximum safe outlet temperature.
Step-by-Step: How to Adjust a Thermostatic Anti-Scald Valve
The technician first removes the trim to access the thermostatic valve and exposes the temperature adjustment mechanism.
Small, incremental adjustments are made while testing the outlet water temperature after each change to reach the desired setting.
Once stable and consistent temperatures are confirmed, the trim is reassembled and a final verification is performed.
Accessing the valve and removing trim
Begin by shutting off the water supply to the fixture and confirming the lines are depressurized before removing any trim.
Remove escutcheon screws, handle set screw, and decorative plates with appropriate tools.
Carefully pry trim away to expose the valve body, keeping fasteners and cartridges organized.
If access requires an access panel, open it safely.
Avoid forcing components to prevent damage.
Locating the temperature adjustment mechanism
Locate the temperature adjustment mechanism by visually inspecting the exposed valve body for a control knob, screw, or dial typically marked with hot/cold indicators or a temperature scale.
Identify accessible components: safety stops, limiter clips, or recessed adjustment screws often behind decorative caps.
Note model-specific markings or stamped numbers and consult any visible manufacturer labels to determine correct adjustment points before proceeding.
Making incremental adjustments and testing water temperature
Proceed cautiously when making incremental adjustments to a thermostatic anti-scald valve: turn the adjustment control in small, measured increments—typically 1/8 to 1/4 turn at a time—then run the hot water long enough to reach steady temperature before testing.
After each adjustment, measure at the tub spout with a reliable thermometer, note change, and repeat until desired maximum safe temperature is achieved.
Reassembling trim and verifying consistent results
Once the valve adjustments produce the desired temperature, the trim assembly should be carefully reinstalled to prevent leaks and preserve the calibrated setting.
Reattach escutcheon, handle, and decorative caps, tightening screws evenly.
Restore water supply, cycle hot and cold several times, and check for leaks.
Measure outlet temperature at intervals and under flow variations to confirm consistent results before finishing.
Step-by-Step: How to Adjust a Pressure-Balancing Valve or Cartridge
The technician first gains access to the cartridge-type valve and inspects the body and seals for wear or mineral buildup.
Next, they follow the manufacturer’s adjustment procedure for the pressure-balancing mechanism, making incremental changes to restore proper intermittent pressure response.
Finally, hot/cold balance is calibrated and the shower is tested under varying flow conditions to confirm stable temperature control.
Access and inspection of cartridge-type valves
Before disassembling the trim, the technician should shut off the water supply and relieve pressure by opening nearby faucets. Then, confirm the valve type and orientation by comparing the exposed assembly to the manufacturer’s diagram.
Access requires removing escutcheon and retaining components to reveal the cartridge. Inspect seals, O-rings, and housing for wear, mineral deposits, cracks, or corrosion.
Document parts needing replacement and photograph orientations for reassembly.
Adjustment procedures for pressure-balanced systems
Begin adjustments by verifying inlet pressures and establishing a safe test environment: isolate the fixture, restore supply briefly to note baseline hot/cold balance, then shut the supply and drain residual pressure.
Remove handle and trim, access the pressure-balancing cartridge, inspect for debris or damage.
Adjust the cartridge per manufacturer torque or index markings, reassemble, then perform controlled supply restoration for further calibration.
Calibrating hot/cold balance and final testing
Proceed to calibrate the hot/cold balance by restoring water supplies at controlled flow and iteratively adjusting the cartridge until outlet temperature remains stable under simulated pressure fluctuations.
This involves setting a baseline temperature with both hot and cold fully open, recording that reading, then purposefully inducing a cold or hot pressure drop (by briefly closing an adjacent supply or activating another fixture) and turning the cartridge incrementally to compensate until temperature deviation stays within the manufacturer’s tolerance.
Verify stability with multiple rapid tests, lock the adjustment, reassemble trim, and document final temperature and settings.
Testing and Verifying Safe Water Temperatures
Accurate verification begins with measuring bathtub water temperature using a calibrated thermometer held at the water stream for several seconds until the reading stabilizes.
Temperatures should be checked at multiple outlets—spout, tub fill, and hand shower—to confirm consistent delivery.
Success is indicated by readings within the safe range and stable temperatures during use, and re-checks should occur after any valve adjustment, plumbing work, or if occupants report temperature issues.
How to measure bathtub water temperature accurately
Measuring bathtub water temperature accurately requires reliable tools and a consistent method: a calibrated digital thermometer (or a high-quality analog one) should be placed at water level in the center of the tub after the hot and cold faucets have been set to their typical positions and the water has run for at least one minute to stabilize.
Readings should be recorded and averaged.
- thermometer probe immersed at center
- steady faucet positions
- one-minute stabilization
- note ambient and mixing changes
Recommended testing points (spout, tub fill, hand shower)
When verifying safe bathtub temperatures, testing at multiple delivery points—spout, tub fill, and hand shower—ensures the readings reflect actual user exposures rather than a single source.
Each outlet can differ due to diverter position, hose length, or mixing valve flow. Measure steady-state temperature at each point, record results, and compare to target maximums to identify inconsistent outputs needing adjustment.
Signs your adjustment succeeded and when to re-check
Successful adjustment is indicated by consistent, steady temperatures at each delivery point within the target safe range, minimal lag when switching outlets, and absence of sudden spikes during steady flow.
Verification includes timed checks at spout, tub fill, and hand shower, recording temps immediately and after two minutes.
Re-check after household plumbing work, seasonal temperature shifts, or if occupants report discomfort or scalds.
Troubleshooting Common Problems
If the valve refuses to move, remains set to produce water that is too hot or too cold, or begins to leak or make noise after adjustment, these symptoms indicate common failures or installation issues.
The article outlines straightforward checks for stuck stems, cartridge obstructions, improper calibration, and loose fittings.
It also suggests basic steps to restore proper flow and when to call a professional.
Valve won’t adjust or is stuck
A stuck anti-scald valve usually signals mechanical obstruction, mineral buildup, or seized internal components that prevent the adjustment mechanism from moving.
Inspect access plates, remove trim, and visually check for corrosion or debris.
Gently operate the cartridge with penetrating lubricant; avoid excessive force.
If seizure persists, remove and soak the cartridge in vinegar or replacement-grade descaler.
Replace damaged parts and reassemble per manufacturer instructions.
Water remains too hot or too cold after adjustment
Confirming correct temperature after adjusting an anti-scald valve can still yield unexpectedly hot or cold water when underlying issues persist.
Causes include mineral buildup restricting hot or cold flow, incorrect mixing cartridge orientation, or supply pressure imbalance between hot and cold lines.
Inspect and clean the cartridge, verify cartridge seating and orientation, and check household water pressure.
Replace faulty parts if imbalance or damage is found.
Leaks, noise, or irregular water flow after work
After addressing temperature issues, attention should turn to physical symptoms that can appear after servicing an anti-scald valve: leaks, unusual noises, or irregular flow.
Inspect connections and seals for drips, tighten or replace faulty fittings, and check the cartridge for debris causing vibration or sputtering.
Persistent problems suggest damaged components or incorrect assembly; replace parts or consult a plumber to prevent water damage and restore reliable flow.
When to Replace the Valve or Call a Professional
If repeated adjustments fail to restore stable temperature or leaks and corrosion are present, replacement should be considered.
Decisions hinge on part availability, labor complexity, and the projected cost versus replacement.
When professional help is needed, a licensed plumber or HVAC/fixture specialist with relevant valve experience and verifiable references is the preferred choice.
Indicators that adjustment isn’t enough
When repeated adjustments fail to restore stable outlet temperatures or the valve shows visible damage, replacement or professional service is warranted.
Other indicators include persistent temperature fluctuations, reduced flow despite clean screens, corrosion, leaks from the valve body, stripped adjustment components, or inconsistent anti-scald cutoff.
If diagnostics confirm internal cartridge wear or mineral-locked mechanisms, a qualified plumber should assess and replace the valve.
Cost and complexity considerations for replacement
Assess replacement decisions by weighing parts and labor costs against the valve’s age, failure mode, and the homeowner’s comfort with plumbing work.
Simple cartridge swaps and inexpensive parts favor DIY; complex diverter-integrated valves, corroded bodies, or inaccessible installations increase time, tools, and risk.
Include potential permit or inspection costs.
When projected expenses, safety concerns, or diagnostic uncertainty rise, professional replacement becomes prudent.
How to choose a plumber or HVAC/fixture specialist
After weighing parts, labor, and risks, the next step is selecting the right professional for repair or replacement.
The homeowner should seek licensed plumbers or HVAC/fixture specialists with experience in mixing valves, verifiable reviews, and warranty-backed work.
Request written estimates, confirm insurance and local licensing, and prefer technicians who test post-repair temperatures and provide clear documentation of parts and adjustments.
Preventive Maintenance and Long-Term Tips
Regular periodic checks are recommended to catch temperature drift before it becomes a safety issue.
Water quality and sediment buildup should be monitored because mineral deposits and debris can impair valve operation.
Rechecks are also advised after seasonal changes or household plumbing work that could alter flow or temperature.
Periodic checks to prevent temperature drift
Because even small deposits or wear can slowly alter outlet temperature, scheduled inspections of an anti-scald valve are essential to detect and correct drift before it becomes hazardous.
Technicians should verify setpoint accuracy quarterly, document readings, exercise the valve, and recalibrate when deviation exceeds safe thresholds.
Promptly replacing worn components and maintaining records prevents unnoticed gradual temperature shifts and enhances bath safety.
Water quality, sediment, and how it affects valves
When water contains high mineral content, suspended solids, or aggressive chemicals, anti-scald valves can suffer reduced performance and premature wear. Deposits and sediment abrade seals, obstruct flow paths, and impede temperature-sensing elements, leading to erratic outlet temperatures and more frequent maintenance.
Regular filtration, softening, and periodic internal inspection prevent buildup. Flushing cartridges and replacing degraded seals restore calibration and extend valve lifespan.
Seasonal or household changes that warrant rechecking
How often should anti-scald valves be rechecked as seasons change or household conditions shift?
Inspect quarterly with seasonal shifts, and after noticeable temperature swings, plumbing work, water heater servicing, or changes in water supply (municipal updates, well maintenance).
Recheck following sediment disturbances, prolonged vacancies, or when occupants’ needs change (children, elderly).
Document settings and test outlet temperatures after each adjustment.
Comparison of Common Valve Types and Their Adjustment Complexity
Different anti-scald valve types vary in accessibility and risk, so readers can quickly see which are suitable for DIY and which merit professional help.
| Valve Type | Typical Adjustment Complexity |
|---|---|
| Single-handle cartridge | Generally DIY-friendly; moderate skill needed |
| Thermostatic mixing valve | Often requires professional calibration |
| Pressure-balancing valve | DIY possible but may need parts or plumber |
This comparison frames informed choices about safety and when to call a pro.
Which valve types are DIY-friendly and which require pro help
Because anti-scald valves vary in design and complexity, some types are suitable for DIY adjustment while others are best left to professionals.
Cartridge and single-handle pressure-balancing valves are often DIY-friendly with basic tools and clear adjustment screws.
Thermostatic and integrated multi-function valves typically require professional service due to calibration, plumbing access, and safety certifications.
Older corroded valves also warrant pro replacement.
Quick Checklist: Steps to Safely Adjust an Anti-Scald Valve
A concise checklist guides technicians through the safe adjustment of an anti-scald valve by outlining preparatory safety steps, required tools, and sequence of actions to verify and set outlet temperature precisely.
They confirm power/water isolation, gather a thermometer, wrench, and screwdriver, note current settings, and plan test points.
- Turn off water and relieve pressure
- Expose valve and read markings
- Adjust per manufacturer increments
- Test at tub spout and taps
Conclusion
The writer concludes that verifying and adjusting the bathtub anti-scald valve preserves safety without ritualistic complexity. Testing the theory that small, deliberate calibrations prevent burns reveals a steady rhythm: identify, prepare, adjust, test. Practical steps sustain flow—tools, cautious shutdowns, incremental turns—while knowing limits prompts replacement or professional help. This measured process confirms that thoughtful, routine attention to valves reliably maintains safe water temperatures and homeowner confidence.