How to Install a Hose Bib: Step-by-Step Guide for DIYers and Plumbers
To install a hose bib, start by shutting off and draining the water supply. Choose the appropriate fittings for copper or PEX, and select from sweat, compression, crimp, or push-fit connections as needed. For frost-free units, ensure they are installed inside insulated walls with a downward pitch, and for anti-siphon models, follow code requirements for backflow prevention. After installation, test for leaks, insulate any exposed piping, and adhere to local plumbing codes. Continue reading for detailed step-by-step instructions and helpful tips.
What a Hose Bib Is and When to Install One
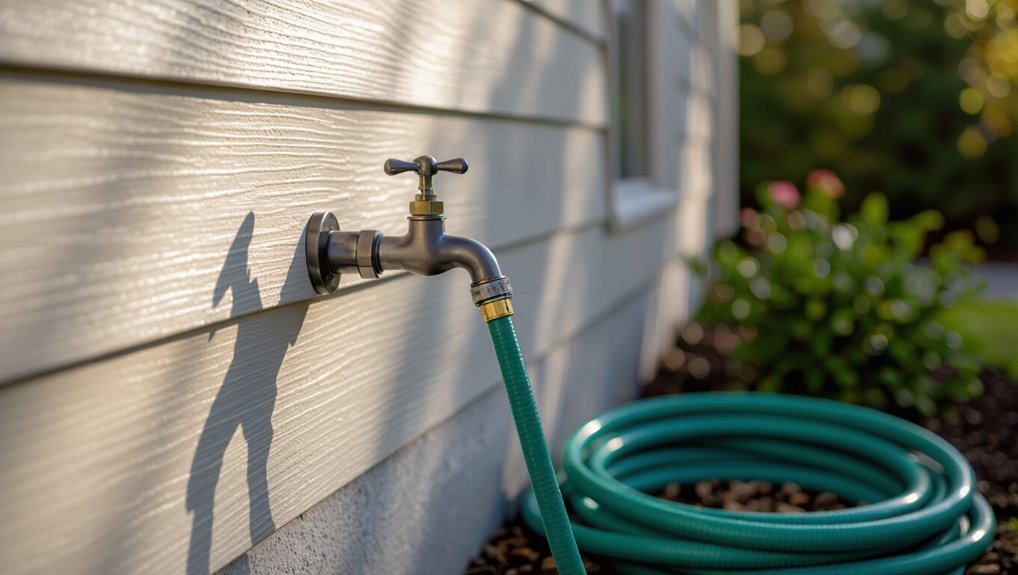
A hose bib is an outdoor faucet used for tasks like watering plants, washing vehicles, and filling pools, and its selection depends on planned use and climate.
Different types include standard valves for mild climates, frost-free models that prevent freezing, and anti-siphon units that stop backflow into the supply.
Replacement is advised when a bib leaks, fails to shut off, shows corrosion, or no longer meets local code or seasonal needs.
Definition and common uses for hose bibs
Hose bibs are outdoor threaded valves that connect a home’s water supply to hoses, offering a convenient shutoff and attachment point for watering, washing, or filling tasks.
They regulate flow for gardens, car washing, pressure cleaning, and outdoor irrigation.
Selection and placement depend on access and plumbing.
Guides on how to install hose bib explain tools, fittings, and basic connections for effective operation.
Differences between standard, frost-free, and anti-siphon hose bibs
Having covered what hose bibs are and common uses, the next consideration is how different types meet specific needs: standard, frost-free, and anti-siphon models each address distinct functional and environmental concerns.
Standard bibs are simple, economical for mild climates.
Frost-free units place the valve inside the heated wall to prevent freezing.
Anti-siphon bibs incorporate backflow prevention to protect potable water.
Signs you need a new hose bib or replacement
Visible leaks, reduced water flow, or difficulty turning the handle are clear signals that a hose bib may need replacement rather than repair.
Corrosion, persistent dripping despite washer or cartridge changes, loose mounting, and frozen-cracked spouts indicate end-of-life.
Recurrent backflow concerns, unreliable shutoff, or outdated anti-siphon protection also justify replacement to restore safety, reliability, and code compliance.
Overview of Installation Options and Required Skills
The homeowner should assess whether the job is a simple replacement or a more complex installation that requires a licensed plumber.
A clear checklist of required tools and materials—pipe types, fittings, valves, sealants and basic hand tools—helps plan the work and estimate costs.
Local plumbing codes and permit requirements must be checked before starting, since failure to comply can require costly rework.
When DIY is appropriate vs. when to hire a plumber
Assess which tasks a homeowner can safely tackle and which require a licensed plumber by comparing scope, tools, and local code requirements.
Simple replacements, tightening supply lines, and basic drilling often suit competent DIYers.
Complex work—moving water lines, installing backflow prevention, working on pressurized mains, or where permits are needed—warrants a licensed plumber to guarantee safety, compliance, and warranty protection.
Tools and materials checklist
Before beginning a hose bib installation, homeowners should review available installation options and match them to the skills and tools required so the job is planned correctly.
Essential checklist includes common hand tools, fittings and sealants, safety gear, and plumbing-specific items.
- Adjustable wrench, pipe cutter, drill
- Hose bib, compression or sweat fittings, Teflon tape
- Safety glasses, gloves
- Pipe primer, solder or thread sealant
Common local code and permit considerations
Many municipalities require permits and set specific installation standards for hose bibs, so homeowners should verify local plumbing codes and inspection requirements before purchasing materials or starting work.
Compliance may dictate freeze‑proof models, backflow prevention, shutoff placement, and approved materials.
Licensed plumbers often must perform or sign off on work.
Failure to comply can void warranties, cause fines, or require costly corrections.
Preparing for Installation
Before any cutting or fitting begins, the installer locates and shuts off the appropriate water supply and confirms the valve fully stops flow.
Next, remaining water is drained and system pressure relieved to prevent leaks or spray during work.
Finally, measurements are taken and the correct valve size and connection type are chosen to match the existing piping.
How to locate and shut off the water supply
Locate the main shutoff and any localized valves to isolate the hose bib area before beginning work.
Identify the home’s main valve—usually near the water meter, basement, or exterior—and any branch valves serving that wall.
Confirm valve types (gate, ball, or stop) and operation direction.
Notify occupants, close valves fully, and verify flow has ceased at nearby fixtures before proceeding.
How to drain pipes and relieve pressure safely
Open the nearest outdoor faucet or a low indoor valve to begin relieving residual pressure and allow water to drain from the section being worked on.
After shutting main supply, open all downstream faucets and hose bibs, then flush toilets if connected.
Inspect for trapped water in low points and drain lines into a bucket or floor drain.
Wear gloves and eye protection during draining.
Measuring and selecting the correct valve size and connection type
With the water drained and pressure relieved, attention shifts to measuring and selecting the correct valve size and connection type for the new hose bib.
Measure pipe outer diameter and identify material (copper, CPVC, PVC, galvanized).
Match valve thread type: NPT, BSP, or sweat.
Confirm valve bore equals supply flow.
Choose compatible adapter or union.
Verify pressure and temperature ratings before purchase.
Step-by-Step Installation: Installing a New Hose Bib on Copper or PEX Supply
The procedure begins with safely removing the existing hose bib and preparing the supply pipe by cleaning, cutting square, and deburring the end.
Installation differs by material: copper connections are made with sweat or compression fittings, while PEX uses crimp rings or push-fit fittings.
Finally, the new hose bib is fastened to the exterior wall and the penetration is properly sealed to prevent leaks and drafts.
Removing the old hose bib safely
Before disconnecting anything, shut off the water supply and relieve pressure by opening a nearby faucet; this prevents unexpected sprays and reduces the risk of water damage.
Wear gloves and eye protection.
Loosen mounting screws or nuts, then break the connection with a wrench or tubing cutter as appropriate.
Cap or plug the exposed pipe immediately to prevent contamination and residual leakage.
Preparing the pipe (cleaning, cutting, deburring)
After the old hose bib has been removed and the supply capped, attention turns to preparing the exposed copper or PEX pipe for the new fitting.
The technician cleans corrosion and debris, measures and marks a square cut, then uses an appropriate cutter.
Burrs are removed with a deburring tool or file, and the pipe end is inspected for true square, cleanliness, and correct length before proceeding.
Installing on copper with sweat or compression fittings
Begin by choosing between sweat (soldered) and compression fittings based on tool availability, skill level, and local code; sweat offers a permanent, leak‑proof joint when done correctly, while compression is faster and requires only a wrench.
For sweat, flux, properly heated fittings, and clean copper are essential.
For compression, seat the ferrule and tighten nut to manufacturer torque, then pressure‑test for leaks.
Installing on PEX with crimp or push-fit fittings
Install the hose bib onto PEX supply lines using either crimp (or cinch) fittings for a permanent connection or push-fit fittings for the quickest, tool-light option; both require clean-cut PEX, proper fitting selection, and a pressure test after installation to confirm a watertight seal.
For crimp, slide ring, insert barb, and crimp to manufacturer spec.
For push-fit, fully seat tubing and verify by pull test before pressurizing.
Securing the hose bib to the exterior wall and sealing around penetration
Secure the hose bib firmly to the exterior wall and properly seal the penetration to prevent movement, water intrusion, and heat loss.
A mounting flange or bracket should be anchored into studs or solid backing using corrosion-resistant screws.
Apply closed-cell foam or pipe insulation around the pipe, then exterior-grade silicone or polyurethane caulk at the wall interface.
Finish with a protective escutcheon and test for stability and leaks.
Installing a Frost-Free Hose Bib
Frost-free hose bibs are recommended in cold climates because their extended stem keeps the valve seat inside the insulated wall, reducing freeze and burst risk.
Proper installation requires setting the spout at the correct mounting depth and with a slight downward slope toward the outside to drain residual water.
A clear step-by-step procedure—measuring and cutting the supply line, inserting and securing the frost-free unit, and pressure-testing the connection—ensures reliable operation.
Why frost-free models are recommended in cold climates
Because water expands when it freezes and can rupture ordinary outdoor spigots and the pipes behind them, homeowners in cold climates are advised to choose frost-free hose bibs that locate the shutoff valve farther inside the heated wall cavity.
These units reduce freeze damage risk, minimize repair costs, preserve water supply integrity, and offer reliable winter operation, making them a prudent, long-term preventive choice for exterior plumbing.
Correct mounting depth and slope for frost-free installation
Having chosen a frost-free model to protect against freeze damage, attention must turn to correct mounting depth and slight downward slope so the valve and stem sit inside the heated wall and any residual water drains away from the house.
The spout should terminate flush with exterior siding; the stem’s seating must be several inches inside conditioned space.
A 1–2° downward pitch prevents trapped water without stressing connections.
Step-by-step frost-free hose bib installation
When installing a frost-free hose bib, the technician first confirms the chosen location, marks the wall penetration point and the interior seat depth, then shuts off and drains the water supply before cutting into the exterior sheathing.
This sequence minimizes leaks, guarantees the valve’s stem will sit several inches inside heated space, and prepares the rough opening for a slight 1–2° downward slope toward the exterior.
Install valve body, secure flange, connect supply with appropriate fittings and insulation, verify slope, seal exterior penetration, pressure-test system, and restore water.
Installing an Anti-Siphon (Backflow Preventer) Hose Bib
When local codes or irrigation systems require backflow protection, an anti-siphon hose bib prevents contaminated water from being drawn back into the supply.
The installer must observe wiring and spacing requirements for the anti-siphon unit relative to the shutoff, valve boxes, and any electrical components.
Installation proceeds by mounting the unit per manufacturer instructions, connecting piping, and performing prescribed pressure and vacuum tests to verify proper operation.
When anti-siphon is required
Where is an anti-siphon device required? Codes typically mandate anti-siphon hose bibs where hose connections can create backflow risk—outdoor spigots, irrigation ties, pools, or chemical-exposed areas.
Municipal regulations, local plumbing codes, and water utility policies determine specifics. Required units prevent contamination by stopping reverse flow; installers must verify jurisdictional requirements and choose approved backflow-prevention devices accordingly.
Wiring and spacing considerations for anti-siphon units
Proper installation of an anti-siphon (backflow preventer) hose bib requires careful attention to wiring and physical spacing to guarantee reliable operation and code compliance.
Wiring must follow local electrical and grounding requirements if the unit includes electronic components.
Maintain specified clearance from walls, irrigation lines, and heat sources to allow service access, prevent freeze damage, and avoid interference with valve operation or airflow.
Installation steps and testing for proper operation
After confirming correct wiring and clearances around the anti-siphon unit, the installer proceeds with the mechanical installation and functional testing.
The unit is mounted, sealed with plumber’s tape or compatible sealant, and tightened to manufacturer torque. Supply valves are opened slowly, system pressure observed, and the anti-siphon check valves verified by inducing and recovering pressure.
Leaks and proper drainage are confirmed before commissioning.
Connecting to Different Supply Lines
When connecting a hose bib to existing plumbing, the installer must address the specific requirements of each material.
For copper, proper soldering and changeover fittings guarantee a reliable joint.
PEX typically uses compression or crimped adapters designed for outdoor spigots.
CPVC and PVC require solvent-weld or threaded adapter methods appropriate to the pipe type and local code.
Copper to hose bib transitions and soldering tips
Modifying a copper supply to a hose bib requires choosing the right adapter and preparing clean, oxidation-free pipe ends for a reliable seal.
Use a threaded copper-to-male iron adapter or sweat-on adapter sized to the bib.
Flux sparingly, heat evenly, and avoid overheating fittings.
Test for leaks after cooling.
Consider dielectric unions if dissimilar metals join to prevent corrosion.
PEX to hose bib transitions and recommended fittings
Moving from copper supplies to PEX requires different fittings and techniques to confirm a secure hose bib connection.
Use PEX-specific adapters: crimp, clamp (cinch), or push-fit to join PEX to a threaded hose bib adapter.
Verify correct PEX size, deburr and insert fully, and use compatible rings or sleeves.
Support the line and test for leaks at normal pressure.
CPVC and PVC connection methods
Connect CPVC and PVC supply lines to a hose bib using solvent-weld fittings for PVC and CPVC-rated cement for CPVC, or use threaded adapters where solvent welding is impractical.
Cut squarely, chamfer, and clean sockets before applying primer and cement.
For female-threaded hose bibs, install full-length male adapters with PTFE tape.
Test joints under pressure and recheck for leaks after curing.
Testing, Leak Checking, and Final Adjustments
Once the hose bib is installed, the installer performs pressure testing to confirm the supply holds steady at the desired pressure without drops.
They inspect all joints and valves with visual checks and a soapy water solution, tightening fittings incrementally until bubbles stop.
Finally, the installer applies appropriate sealing materials and insulating measures to prevent leaks and protect the bib from freezing.
Pressure testing procedures
Begin pressure testing by isolating the newly installed hose bib and filling the supply line slowly to purge air.
Then pressurize to the system’s working pressure or manufacturer-recommended test pressure.
Monitor pressure gauge for a specified duration, watching for drops that indicate loss.
Inspect surrounding connections visually for seepage.
Record results, relieve pressure gradually, and document readings and any corrective actions taken.
How to check for leaks and tighten fittings correctly
After pressure testing confirms system integrity, attention shifts to checking for leaks and making final tightening adjustments.
Inspect all joints, packing nuts, and hose connections for visible drips. Use a dry paper towel or tissue to detect slow weeps.
If leakage appears, tighten fittings incrementally—quarter turns—avoiding overtightening.
Re-test under normal water pressure and verify zero seepage before finishing.
Sealing and insulating for freeze protection
Seal and insulate all exposed hose bib components to protect against freezing and water damage.
Apply pipe insulation sleeves, foam covers, or self-sealing wrap around the spout, valve body, and nearby piping.
Seal gaps at the wall with low-expansion spray foam or caulk.
For extreme climates, install an insulated protective box or use heat tape with thermostat control.
Recheck for leaks after insulation.
Troubleshooting Common Problems
Common post-install issues include persistent drips from the spout or packing nut, which often require tightening or replacing washers and packing.
Low flow or blockage can result from debris, mineral buildup, or valve seat damage and is addressed by flushing, cleaning, or replacing obstructed parts.
Severe corrosion or seized handles that cannot be freed indicate the need for full replacement of the hose bib.
Drips from the spout or packing nut and how to fix them
When a hose bib leaks from the spout or around the packing nut, it usually indicates worn internal parts or a loose stem packing; diagnosing which requires a quick visual check and simple tests.
Tightening the packing nut often stops stem leaks; replace the packing if persistent.
For spout drips, replace the washer or cartridge and inspect the valve seat.
Reassemble, test, and address corrosion.
Low flow or blocked hose bib causes and remedies
Inspect the hose bib for obstructions and reduced flow causes before assuming a major repair is needed.
Debris, mineral buildup, or a partially closed shutoff commonly restricts flow. Remove the aerator or screen, flush the line, and clean passages with vinegar or descaler.
Verify supply valve fully open and check upstream filters or pressure regulators.
If blockage persists, isolate and inspect the supply piping.
Corrosion, stuck handles, and when replacement is necessary
Corrosion and seized handles are frequent failure modes of outdoor hose bibs that signal deterioration beyond simple cleaning or lubrication.
Visible pitting, leaking at the stem, brittle threads, or inability to operate after penetrating oil indicate replacement rather than repair.
Replace when metal integrity is compromised, valves no longer seat, or repeated failures recur.
Choose frostproof, corrosion-resistant models and proper installation to prevent recurrence.
Maintenance and Winterization
A concise maintenance and winterization routine helps preserve hose bib function and prevent freeze damage.
The section lists a simple checklist for routine inspections, outlines proper shutoff and draining steps for above-ground bibs, and recommends long-term care practices to extend service life.
Homeowners are encouraged to follow these steps seasonally to avoid costly repairs.
Routine maintenance checklist
Develops a simple, regular checklist to keep the hose bib functioning year-round and to prevent winter damage.
Inspections and minor servicing extend life and avoid leaks. Recommended tasks include:
- Check for leaks and tighten connections.
- Lubricate the valve stem and operate fully.
- Replace worn washers or packing.
- Clear debris and guarantee proper drainage around the bib.
Proper winter shutoff and drain steps for above-ground hose bibs
After completing routine checks and minor servicing, attention should turn to shutting off and draining above-ground hose bibs before freezing weather arrives.
Close the interior shutoff valve, open the exterior bib fully, detach hoses and accessories, then open any intermediate petcocks.
Allow gravity to drain supply lines; if present, use compressed air at low pressure to clear residual water.
Verify dryness before sealing.
Long-term care to extend hose bib lifespan
Preserve functionality and prevent damage by instituting a simple regimen of inspections, lubrication, and seasonal protective measures for hose bibs.
Regularly check for leaks, corrosion, and loose fittings; replace worn washers and seals. Apply plumber’s grease to stems and operate valves periodically.
Before freezing weather, shut off, drain, and insulate. Promptly address minor issues to avoid costly repairs and extend service life.
Cost Estimates and Time Requirements
Typical DIY installations commonly list parts (hose bib, pipe, fittings, sealant) and basic tools, with total costs often under $50–$150 depending on materials and whether new tools are needed.
Professional installation frequently ranges from $100 to $400 or more, influenced by labor rates, access, pipe type, and any required repairs or permits.
Time estimates vary from about 30 minutes for a simple replacement to several hours for new runs or complicated repairs.
Typical DIY cost breakdown (parts and tools)
A basic DIY hose bib replacement generally requires a short list of common parts and a few affordable tools; most homeowners can expect to spend between $20 and $75 on materials and $0–$40 on tools if they must be purchased.
Typical parts: hose bib (brass or frost-free), pipe fittings, solder/flux or thread sealant, mounting screws.
Tools: wrench set, tubing cutter, plumber’s tape.
Professional installation cost range and what affects price
Cost for professional hose bib installation commonly ranges from $75 to $300, influenced by labor rates, part quality, and job complexity.
Additional factors include accessibility, required pipe repairs or replacements, permit needs, and seasonal demand.
Premium fixtures or backflow devices raise costs. Emergency or after-hours calls incur surcharges.
Regional market variations and contractor experience further adjust final estimates.
Estimated time for common installation scenarios
Following factors that affect price, time requirements for common hose bib installations vary by scenario and can help homeowners plan work and schedule contractors.
Simple replacement on existing piping: 30–60 minutes.
New exterior tap on accessible supply line: 1–3 hours.
Adding shutoff or frost-free upgrade with minor wall repair: 2–4 hours.
Complex relocations or winterization upgrades: half to full day including testing.
Safety Considerations and Code Compliance
The section outlines key safety and code considerations for installing a hose bib, including local backflow prevention requirements and permit pointers.
It also summarizes safe soldering practices and recommended personal protective equipment.
Guidance is provided on situations that warrant calling a licensed plumber.
Backflow prevention requirements and local code pointers
Because outdoor spigots connect potable water to garden hoses and irrigation systems that can introduce contaminants, most jurisdictions require backflow prevention devices or vacuum breakers on hose bibs to protect the public supply.
Install approved anti‑siphon vacuum breakers or integral backflow preventers per local plumbing codes.
Verify municipal requirements, permit needs, and inspection rules; document compliance and use certified devices to avoid fines and hazards.
Safe soldering and PPE recommendations
Begin soldering only after confirming water supply is shut off and fittings are dry, and guarantee the work area is well ventilated and free of combustible materials.
Use flame shields, heat-proof pads, and a proper propane or MAP gas torch.
Wear safety glasses, heat-resistant gloves, and long sleeves.
Keep a fire extinguisher nearby.
Follow local code for lead-free solder and temperature limits.
When to call a licensed plumber
When should a homeowner call a licensed plumber rather than proceeding alone? A licensed plumber is required for complex repairs, mains shutoff, backflow prevention, gas-adjacent work, or alterations impacting code compliance.
Call when permits are needed, soldering occurs near flammable materials, or water damage risk is high.
Professional intervention guarantees safety, correct pressure/connection, and adherence to local plumbing codes.
Quick Reference: Tools, Parts, and Measurements
Gather the essential tools, parts, and measurements before attempting a hose bib installation to guarantee a smooth, efficient job. The checklist lists basic tools, fittings, and common sizes so the installer can prepare accurately and avoid delays.
| Item | Typical Size/Type |
|---|---|
| Adjustable wrench | 8–12 in |
| Pipe wrench | 10–18 in |
| Hose bib valve | 1/2″ or 3/4″ |
| Solder/flux or PTFE tape | As required |
| Pipe material | Copper, CPVC, or galvanized |
Conclusion
To summarize, the guide leaves the reader equipped to install a hose bib with confidence, moving through options, preparation, and step-by-step techniques as methodically as a clockmaker assembling gears. Whether adding a standard or frost-free valve, the installer is reminded to follow codes, prioritize safety, and perform seasonal winterization. With correct tools, parts, and attention to soldering or PEX connections, the finished installation should deliver reliable outdoor water access for years to come.