How to Remove Old Insulation From Your Attic Safely: Step-By-Step Guide
To safely remove old attic insulation, follow these essential steps: First, assess the type of insulation and check for any contamination. Next, turn off your HVAC system and power supply. Equip yourself with proper personal protective equipment (PPE) and seal off the area. Use a scoop or HEPA vacuum to remove loose-fill insulation, and carefully pull out batts, bagging and labeling the waste for proper disposal. After removal, clean and inspect the joists, vents, and wiring for any damage. Make necessary repairs and ensure air-sealing before installing new insulation. Continue reading for detailed instructions, safety tips, and guidance on hiring a contractor.
What Removing Old Attic Insulation Involves and Why It Matters
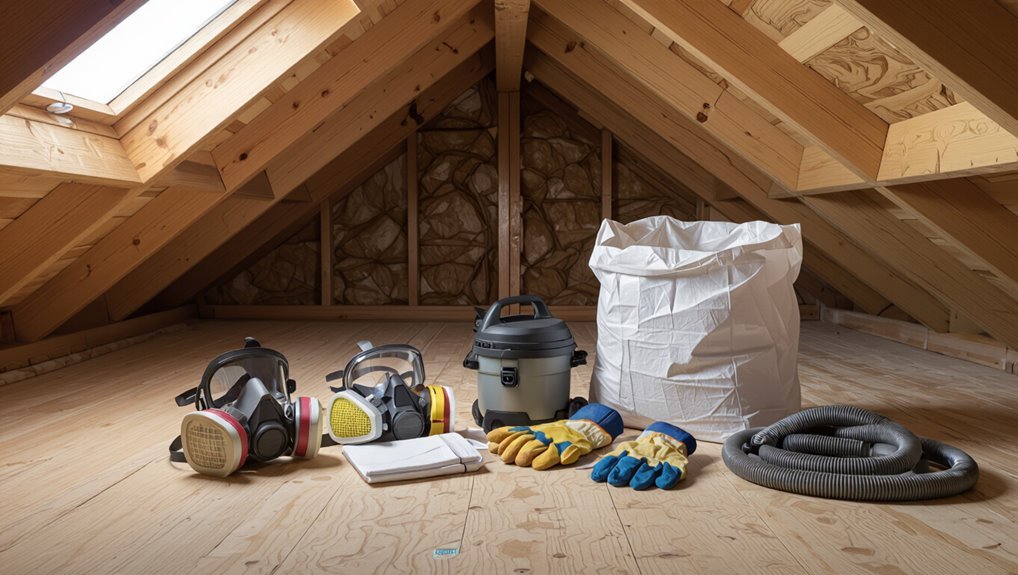
The process of removing old attic insulation typically begins with inspecting for indicators such as moisture damage, mold growth, pest droppings, compressed or settled material, and unusually high energy bills.
Replacing degraded insulation restores thermal performance, improves indoor air quality, and can lower heating and cooling costs.
Leaving contaminated or compacted insulation in place increases health risks, structural deterioration, and ongoing energy loss.
When to remove old insulation key indicators
When signs of deterioration, contamination, or performance loss appear, homeowners should consider removing attic insulation promptly. Common indicators include visible mold, persistent musty odors, rodent droppings, significant compression or sagging of batts, and noticeably higher heating or cooling bills despite unchanged usage.
Professionals assess moisture stains, air leaks, and insulation depth to determine how to remove old insulation from attic safely and efficiently.
Benefits of removing and replacing attic insulation
Removing and replacing attic insulation restores thermal performance, improves indoor air quality, and reduces energy costs by eliminating degraded, contaminated, or improperly installed material that compromises the building envelope.
It also enhances moisture control, reduces drafts, and prolongs HVAC lifespan by restoring proper R-value and airflow.
Updated insulation supports consistent indoor temperatures, increases comfort, and can raise property value through demonstrable energy-efficiency improvements.
Risks of leaving contaminated or degraded insulation in place
Neglect can allow contaminated or degraded attic insulation to undermine a home’s safety, comfort, and efficiency: mold, pest droppings, moisture damage, and settled or compressed batts reduce thermal performance, trigger respiratory and allergenic health risks, promote structural rot, and burden HVAC systems with higher energy use and premature wear.
Left unchecked, contamination spreads, odors persist, insurance claims complicate repairs, and remediation costs escalate.
Quick Safety Summary What to Prepare Before You Start
Before beginning attic insulation removal, the homeowner should assemble essential personal protective equipment—respirator, gloves, goggles, and durable clothing—and verify proper fit.
They should also gather necessary tools and materials such as a heavy-duty shop vacuum, utility knife, plastic bags, and a flashlight.
If insulation is contaminated with mold, pests, asbestos, or the job is large or structurally complex, a licensed professional should be contacted.
Personal protective equipment checklist
Assemble appropriate personal protective equipment (PPE) to minimize exposure to dust, fibers, and contaminants commonly found in old attic insulation: at minimum, a fitted N95 or P100 respirator, eye protection with side shields or goggles, disposable coveralls with a hood, work gloves, and sturdy footwear.
Recommended checklist:
- Respirator, eye protection, disposable coveralls
- Chemical-resistant or leather work gloves
- Closed-toe, non-slip boots or work shoes
Tools and materials needed
A concise set of tools and materials streamlines the removal process and reduces safety risks; essential items include a fitted respirator (N95 or P100), eye protection, disposable coveralls, heavy-duty gloves, and non-slip footwear, plus a flashlight, utility knife, trash bags, dustpan and brush, and a rigid cardboard or plastic scooping tool for handling insulation.
- Sturdy ladder and work lights
- Heavy-duty contractor bags and labels
- Replacement insulation and sealing caulk
When to call a professional instead of DIY
Facing damaged, contaminated, or inaccessible attic insulation warrants professional intervention rather than DIY.
A professional should be hired if mold, asbestos, rodent infestation, extensive water damage, or structural issues are present.
Also call a pro when the job requires attic ventilation or electrical work, when local codes apply, or when the homeowner lacks proper protective equipment, experience, or confidence to perform safe, compliant removal.
Step-by-Step Guide to Removing Old Attic Insulation Safely
The guide outlines a clear sequence for safe attic insulation removal, beginning with a thorough inspection to identify insulation types.
It then covers isolating the work area and shutting off HVAC systems, followed by PPE use and proper container preparation.
Finally, it describes removal techniques for loose-fill and for batt or roll insulation that protect the structure and minimize contamination.
Step 1 Inspecting the attic and identifying insulation types
Begin the attic inspection by visually surveying access points, structural conditions, and any obstructions that could interfere with safe work.
The inspector notes insulation types—batts, loose-fill, cellulose, or blown fiberglass—and documents depth, moisture, stains, pest activity, and mold.
Photographs and measurements record extent. Identifying suspect materials like vermiculite triggers professional testing before removal decisions are made.
Step 2 Shutting off HVAC, sealing vents, and isolating work area
Before any insulation is disturbed, power to HVAC systems should be switched off, vents sealed, and the attic isolated to prevent dust and fibers from spreading into living spaces.
The contractor or homeowner must turn off furnace/air handlers, close and tape supply and return registers, seal attic access, and use plastic sheeting at openings.
Confirm warning signs and restricted access are posted.
Step 3 Putting on PPE and preparing removal containers
Donning proper personal protective equipment and staging durable disposal containers are essential preparatory steps before removing attic insulation.
Individuals should equip NIOSH-rated respirators, disposable coveralls, gloves, goggles, and knee protection. Inspect suits for tears and verify respirator fit.
Position heavy-duty contractor bags, rigid bins, or labeled sealed containers near the attic access. Keep a taped rolling cart or bucket for safe material transfer.
Step 4 Removing loose-fill insulation (technique and tips)
With PPE in place and disposal containers staged, removal of loose-fill insulation proceeds methodically to minimize dust, damage, and recontamination.
Workers scoop or vacuum material in small sections, avoiding compression that spreads dust.
Use a HEPA-rated vacuum or hand tools, bag promptly, seal containers, and maintain gentle airflow to prevent airborne fibers.
Inspect for hidden debris before moving to adjacent areas.
Step 5 Removing batt or roll insulation without damaging structure
Begin by mapping the attic bays and locating joist lines and any obstructions so installers can remove batt or roll insulation without tearing vapor barriers, ripping sheathing, or compressing framing.
Cut insulation along joists, pull batts straight out without twisting, support edges to prevent sagging, and stack removed sections on protective sheeting.
Inspect cavities for fasteners, air barriers, and hidden wiring before proceeding.
Step 6 Handling and removing fiberglass, cellulose, and vermiculite safely
Proceed cautiously when handling fiberglass, cellulose, or vermiculite insulation, since each material requires different containment, protective measures, and disposal procedures to minimize health risks and avoid spreading contaminants.
Use PPE (respirator, gloves, eye protection, disposable coveralls). Wet cellulose lightly to reduce dust.
Bag fiberglass in heavy-duty contractor bags. Treat vermiculite as potentially asbestos-contaminated; avoid disturbance and consult professionals for testing and removal.
Step 7 Cleaning attic surfaces after insulation removal
After insulation removal, inspect and clean all attic surfaces to remove dust, debris, and any residual fibers that can compromise air quality or new insulation performance.
Use a high-efficiency vacuum with HEPA filtration, brush or wipe rafters and joists, and clear debris from around vents and penetrations.
Dispose of collected waste in sealed bags and ventilate the space before proceeding with insulation replacement.
Step 8 Inspecting and repairing attic vents, wiring, and framing before replacement
Inspect the attic systematically for damaged vents, exposed or frayed wiring, and compromised framing before installing new insulation.
Document issues, shut power when addressing electrical problems, and consult a licensed electrician for repairs.
Replace or seal venting to restore airflow.
Reinforce or sister weakened joists and rafters, using appropriate fasteners and building-code methods, ensuring surfaces are dry and structurally sound prior to insulation installation.
Step 9 Properly disposing of removed insulation materials
Carefully segregate and contain removed insulation to prevent contamination and simplify disposal: place loose-fill or batt materials into heavy-duty contractor bags.
Double-bag friable materials like old blown-in fiberglass or degraded cellulose, and label any bags containing suspected asbestos-containing material (ACM) for specialist handling.
Transport to approved disposal facilities, follow local hazardous waste rules, keep receipts, and document chain of custody for regulated materials.
How to Identify Specific Problem Materials
Identifying hazardous or degraded insulation begins with looking for telltale signs and knowing material characteristics.
Yellowed, friable batt or crumbly gray insulation, friable dust, or labeling from the era of installation can suggest asbestos and warrant professional testing and removal.
Dark staining, musty odor, or visible fungal growth indicate mold contamination, while texture and appearance—pink or white fluffy fiberglass, loose gray or brown cellulose, or coarse woolly mineral wool—help distinguish common nonhazardous types.
Signs of asbestos-containing insulation and what to do
How can a homeowner tell whether attic insulation may contain asbestos?
Visual cues include age (pre-1980s installations), friable white or gray fibrous material, and insulation resembling vermiculite or loose-fill.
If suspected, recommended actions:
- Avoid disturbing material; stop work immediately
- Seal area and limit access
- Contact a licensed asbestos professional for testing and removal
How to recognize mold-contaminated insulation
Mold-contaminated attic insulation often shows localized discoloration—dark stains, black or green spots, or powdery white patches—along with musty odors and dampness in the surrounding wood or framing.
Affected insulation may clump, crumble, or emit visible spores when disturbed.
Inspect for water stains, roof leaks, condensation, and persistent humidity; photograph areas and avoid disturbing suspected mold without protective gear.
Distinguishing between fiberglass, cellulose, and mineral wool
A careful visual and tactile assessment can quickly distinguish fiberglass, cellulose, and mineral wool insulation by their texture, color, and behavior when disturbed:
fiberglass appears as loose, pale pink or white fluffy fibers that itch;
cellulose is dense, grey-brown, paper-like and dusts easily;
mineral wool is grey or brown, firm, springy, and retains shape.
Note binder residues and odor.
Health, Environmental, and Legal Considerations
The section outlines key health risks from old insulation, noting common exposure symptoms such as respiratory irritation, skin rashes, and headaches.
It also summarizes local regulations and proper disposal requirements homeowners must follow to avoid fines or contamination.
Finally, it highlights environmental impacts and practical recycling or safe disposal options to minimize ecological harm.
Health hazards and exposure symptoms to watch for
How might occupants recognize health risks from old attic insulation? Symptoms include persistent coughing, throat or eye irritation, skin rashes, nasal congestion, headaches, dizziness, or worsening asthma.
Visible dust, musty odors, rodent droppings, or discolored insulation suggest contamination.
Serious concerns—prolonged respiratory distress, fevers, or unexplained allergic reactions—warrant immediate medical evaluation and stopping exposure.
Local regulations and disposal requirements
Because state and local rules vary widely, homeowners should verify applicable laws before removing or disposing of old attic insulation.
Compliance reduces fines and health risks. Key considerations include:
- Local waste facility acceptance and special handling rules
- Required permits or licensed contractor mandates
- Documentation or manifests for hazardous material disposal
Failure to follow regulations can result in penalties and cleanup orders.
Environmental impacts and recycling options
When evaluating attic insulation removal, homeowners should consider environmental impacts, potential health risks, and legal obligations together rather than separately.
Assess insulation type—fiberglass, cellulose, or asbestos—and follow proper handling to minimize contamination.
Recycle cellulose and uncontaminated fiberglass where accepted; asbestos requires licensed abatement and hazardous disposal.
Document compliance with local rules and choose contractors with certified waste-management practices to reduce ecological harm.
Choosing and Installing Replacement Insulation
After removal, the next step is selecting suitable replacement insulation by comparing common options such as fiberglass batts, blown cellulose, and spray foam for cost, performance, and suitability.
Understanding R-value requirements for the climate and calculating how much insulation the attic needs guarantees adequate thermal protection.
Proper installation—including air sealing and appropriate vapor control—reduces the chance of future removal and preserves system performance.
Comparing common replacement options
Although budget and attic layout influence the decision, homeowners typically choose among batt, blown-in, and rigid-board insulation for replacement; each type varies in R-value per inch, installation complexity, moisture resistance, and suitability for irregular spaces. Pros and cons guide selection: batt is simple for joist bays, blown-in fills gaps, rigid offers structural moisture control.
| Type | Ease | Best use |
|---|---|---|
| Batt | Easy | Open bays |
| Blown-in | Moderate | Irregular spaces |
| Rigid | Difficult | Moisture-prone areas |
R-Value basics and how much insulation your attic needs
Why does R-value matter for attic insulation? R-value measures thermal resistance; higher values reduce heat transfer.
Attic targets depend on climate zones and existing insulation. Typical recommendations range R-30 to R-60 in cold regions, R-19 to R-38 in milder areas.
Choose material with appropriate R-per-inch and calculate total thickness to meet local building codes and energy goals.
Installation tips to avoid future removal (air sealing, vapor barriers)
Plan the work so that insulation is installed with the building envelope sealed and moisture managed from the start: proper air sealing at penetrations and rim joists, continuous vapour control where required by climate, and correct detailing around vents, chimneys, and recessed lights prevents most future removal needs and preserves insulation performance.
Use compatible materials, maintain ventilation paths, install vapor barriers per code, and document locations for future inspections.
Common Mistakes to Avoid During Removal and Replacement
Common errors during attic insulation projects can undermine performance or create hazards.
These include failing to air-seal gaps before adding new insulation, using inadequate personal protective equipment or ventilation during removal, and disturbing materials that may contain asbestos without proper testing.
Highlighting these pitfalls helps prioritize safety and long-term effectiveness.
Mistake: neglecting air sealing before adding insulation
Before adding new insulation, failing to seal air leaks can undermine its effectiveness and lead to moisture, drafts, and higher energy bills.
Ignoring gaps around chimneys, vents, recessed lights, and attic hatches allows conditioned air to escape and moisture to enter.
Proper air sealing prior to insulation installation preserves thermal performance, reduces condensation risk, and maximizes energy savings.
Mistake: improper PPE or ventilation during removal
When removal proceeds without proper personal protective equipment and adequate ventilation, occupants and workers face elevated risks of respiratory irritation, skin and eye injuries, and prolonged exposure to airborne fibers and dust.
Failure to wear respirators, gloves, goggles, and disposable clothing or to establish exhaust ventilation increases contamination spread and cleanup difficulty.
Proper PPE and airflow control reduce health hazards and limit secondary contamination.
Mistake: disturbing suspected asbestos without testing
Why risk it: disturbing materials that might contain asbestos without testing can release microscopic fibers that lodge in lungs and increase cancer and respiratory disease risk.
Professionals recommend halting work, isolating the area, and obtaining certified testing. If asbestos is confirmed, hire licensed abatement contractors.
Improvised removal endangers occupants and neighbors, complicates cleanup, and may violate regulations.
Follow legal disposal procedures.
Troubleshooting and Aftercare
If mold, pests, or water damage are discovered, the next steps should include containment, professional remediation, and repair of the source before reinstalling insulation.
If energy bills remain high after replacement, a focused diagnostic checklist—air leaks, insulation gaps, ventilation problems, and HVAC performance—can pinpoint causes.
After work is completed, periodic inspections and simple monitoring (moisture checks, pest signs, and attic temperature trends) help guarantee long-term effectiveness.
What to do if you find mold, pests, or water damage
Discovering mold, pests, or water damage in an attic requires prompt, measured action to prevent health risks and structural deterioration.
Assess extent without disturbing contamination; seal the area and ventilate. Photograph damage, remove affected insulation wearing PPE, and bag for disposal.
Address moisture source, call licensed mold remediator or pest control if extensive, and repair roofing or flashing before reinstalling insulation.
When energy bills don’t drop after replacement diagnostic checklist
How can homeowners pinpoint why energy bills remain high after attic insulation replacement? A concise diagnostic checklist helps isolate causes:
- Verify sealing of air leaks at ceilings, chimneys, and ducts.
- Confirm correct insulation type, depth, and uninterrupted coverage.
- Inspect heating/cooling system efficiency, thermostat settings, and duct leakage.
If issues persist, recommend professional energy audit to identify hidden problems.
Monitoring attic conditions after work is completed
After insulation work is finished, homeowners should monitor attic conditions regularly to guarantee the installation performs as planned and no new problems emerge.
Inspect for moisture, pests, settled or displaced insulation, and proper ventilation at monthly intervals for the first season, then quarterly.
Record temperatures, humidity, and any odors.
Address issues promptly with targeted repairs or professional assessment to maintain efficiency and prevent damage.
Cost Estimates and When to Hire a Pro
A comparison of typical DIY versus professional removal costs helps homeowners weigh time, equipment, and safety trade-offs.
Guidance on vetting contractors and verifying licenses, insurance, and references prepares readers to choose a qualified insulation professional.
A concise list of questions to ask before signing—scope of work, cleanup, timeline, and warranty—reduces the risk of surprises.
Typical DIY vs professional cost breakdown
Costs for removing attic insulation vary widely depending on method, materials, and the extent of contamination. A DIY approach reduces labor costs but adds rental, disposal, and safety gear expenses; professionals charge higher rates but include cleanup, HEPA equipment, and warranties. Typical ranges:
| Option | Typical Cost |
|---|---|
| DIY (materials, rental) | $100–$600 |
| Professional | $500–$2,000 |
How to vet and hire a qualified insulation contractor
Many homeowners benefit from calling a qualified insulation contractor when the job involves large areas, suspected mold or pest contamination, asbestos-containing materials, or complex air-sealing and ventilation work.
A vetted contractor provides written estimates, itemized scope, timelines, and references. Verify licensing, insurance, and industry certifications.
Compare multiple bids, check reviews, and confirm disposal and cleanup practices before hiring to guarantee safety and value.
Questions to ask contractors before signing a contract
When should a homeowner sign a contract, and what price details should they demand first? A homeowner should hire a pro when scope, timeline, permits and safety measures are clear.
They must demand itemized estimates, labor and disposal fees, change-order policies, payment schedule, warranty terms, proof of insurance and licensing, and a written start/end date.
Verify references before signing.
Useful Checklists and Quick Reference Guides
A set of concise checklists helps guarantee each phase of attic insulation removal is completed safely and in order.
The pre-removal readiness checklist covers PPE, utilities shutoff, and hazard identification.
Separate disposal and documentation and post-installation inspection checklists guide proper waste handling, recordkeeping, and verification of work quality.
Pre-removal readiness checklist
Before removing attic insulation, the homeowner should confirm a concise readiness checklist is complete: Proper PPE is selected and fits; utilities are identified and secured; access and ventilation are planned.
- Verify respirator, gloves, goggles, and disposable coveralls
- Guarantee attic lighting, stable flooring, and clear pathways
- Confirm ventilation strategy and temporary weather protection
Disposal and documentation checklist
Collect and label all removed insulation and associated debris for proper disposal and recordkeeping. The checklist guarantees regulatory compliance, waste segregation, and clear owner records.
- Note material type, weight, and suspected contamination for disposal facility requirements.
- Photograph labeled bundles and work areas before transport.
- Retain receipts, manifests, and disposal confirmations for warranty and municipal reporting.
Post-installation inspection checklist
Several key items should be verified immediately after insulation installation to confirm performance, safety, and warranty eligibility.
A concise post-installation inspection guarantees thermal continuity, ventilation integrity, and absence of hazards. Inspectors should use a checklist to document findings, corrective actions, and sign-off.
- Verify insulation depth, coverage, and gaps
- Confirm vents, baffles, and air barriers are unobstructed
- Check for moisture, pests, and electrical clearance
Conclusion
Dust drifts like pale snow as the attic exhales its old history; the homeowner moves methodically, tools in hand, tracing beams where warmth once slept. Each careful scoop lifts years of neglect and opens the ceiling to fresh promise. With gloves and steady breath, the space shifts from burden to opportunity—lighter, clearer, and ready for new insulation to weave its quiet shelter, restoring comfort and peace above the rooms below.