
How to Flush a Kohler Automatic Toilet: Step-by-Step Troubleshooting and Fixes
How to Fix a Kohler Automatic Toilet That Won’t Flush: A Quick Guide
If your Kohler automatic toilet isn’t flushing, follow these troubleshooting steps to diagnose and resolve the issue. Start by turning off the power and water supply, and wear gloves for safety. Check for any error lights on the unit. Next, inspect the batteries and replace them if they’re weak. Clean and realign the sensor lens, and ensure the shutoff valve and supply line are functioning properly.
Try using the manual flush override and listen for any sounds from the fill or flush valve. Examine the flapper seals and wiring for signs of damage. If you find any issues, replace the necessary parts. For a comprehensive guide on diagnostics, fixes, and when to seek professional help, continue reading.
What to Do First When a Kohler Automatic Toilet Won’t Flush
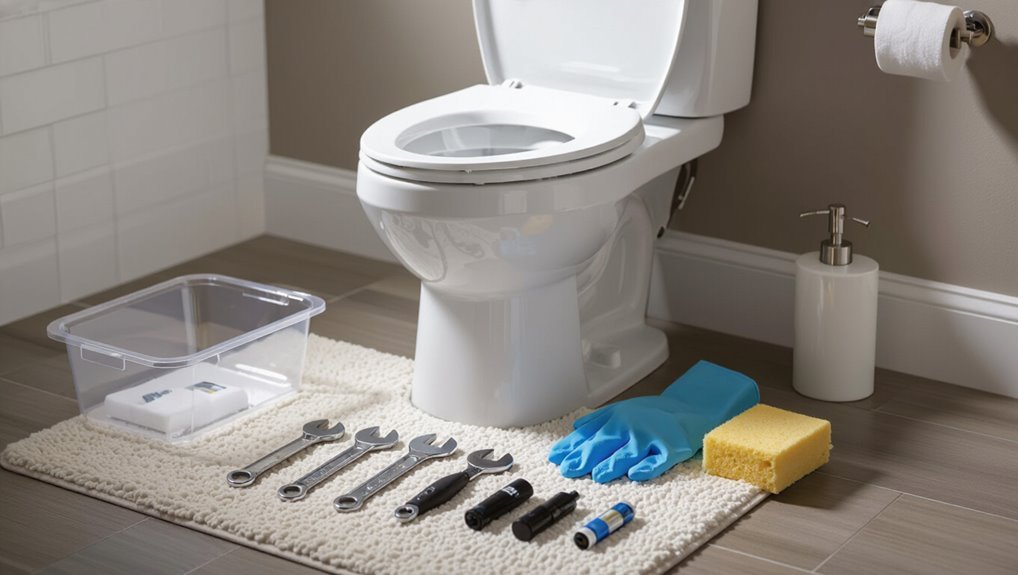
When a Kohler automatic toilet fails to flush, the first response is to guarantee safety by turning off the water supply and cutting power to any electrical components.
Next, a brief inspection should be done with basic protective gear—gloves and eye protection—to identify visible issues without forcing parts.
Gather essential tools and materials such as a screwdriver, adjustable wrench, replacement batteries, and a small flashlight before proceeding.
Quick safety and preparation steps
Before attempting any repair, verify power and water sources are safe: cut electricity to the toilet’s control or GFI circuit and shut off the fill-valve supply at the shutoff valve.
Next, wear gloves and eye protection, place absorbent towels around the bowl, and keep a bucket nearby for residual water.
Document error indicators or sensor behavior when diagnosing how to flush Kohler automatic toilet.
Tools and materials to have on hand
With power off and water isolated as noted above, gather the tools and materials needed to diagnose and restore a Kohler automatic toilet.
Essential items include common hand tools, replacement parts, and testing supplies.
Recommended list:
- Screwdrivers, adjustable wrench, pliers, flashlight
- Replacement batteries, solenoid, seals/gaskets
- Multimeter, towels, bucket for water containment
How Kohler Automatic Toilelets Work Basic Components to Know
A Kohler automatic toilet relies on a few core components that interact to detect users and trigger a flush.
The sensor and activation system sense presence, while the water supply, fill valve, and flapper/flush valve control the water flow.
A control module, power source, and wiring coordinate signals and provide the electrical power needed for operation.
Sensor and activation system
Detecting user presence and initiating a flush, the sensor and activation system is the toilet’s control center: it interprets signals from proximity or motion sensors, verifies appropriate conditions (such as seat occupancy or hand movement), and triggers the actuator that opens the flush valve or starts the flush pump.
It includes sensor modules, control logic, wiring, power/reset functions, and diagnostics for fault detection.
Water supply, fill valve, and flapper/flush valve
Water enters the toilet through the supply line and is regulated by the fill valve, which refills the tank to a preset level after each flush while preventing backflow.
The flush valve or flapper then controls the release of that stored water into the bowl to create the flush action.
Routine checks guarantee the supply line isn’t kinked, the fill valve seals properly, and the flapper seats to avoid leaks.
Control module, power source, and wiring
Having covered how the supply line, fill valve, and flapper manage the physical flow of water, attention moves to the electronics that coordinate automatic operation.
The control module interprets sensor input and signals the actuator. Power typically comes from AA batteries or a low-voltage transformer; weak power causes failures.
Wiring connects sensors, module, and actuator—inspect for corrosion, loose connectors, or rodent damage when troubleshooting intermittent or total loss of function.
Immediate Troubleshooting Steps (Quick Fixes)
Before further repair, the technician or homeowner should run a few quick checks to rule out simple causes.
They should confirm the sensor unit has power or fresh batteries, inspect and gently clean the sensor eye and activation area, and verify the water supply and shutoff valve are open.
If the automatic mechanism still fails, the manual flush override can be used to trigger a hand-operated flush while troubleshooting continues.
Check power and batteries for the sensor unit
Check the sensor unit’s power source and batteries first, as a depleted or disconnected supply is the most common cause of a nonresponsive Kohler automatic flush.
Remove the cover, verify batteries are seated correctly and not corroded, replace with fresh alkaline cells if uncertain.
If hardwired, confirm breaker and wiring connections.
Reassemble securely and test the flush function.
Inspect and clean the sensor eye and activation area
If batteries and wiring appear sound but the Kohler automatic still fails to respond, attention should turn to the sensor eye and surrounding activation area, since dirt, water spots, or obstructions commonly block the infrared beam.
Gently wipe the lens with a soft, lint-free cloth and mild detergent. Remove mineral deposits with vinegar, rinse, dry, and make certain no decorative trim or items obstruct line of sight.
Verify water supply and shutoff valve position
Confirm the toilet has an active water supply by visually inspecting the shutoff valve and inlet line for obvious issues: the valve handle should be fully open (parallel to the supply line for most ball valves) and the supply line free of kinks or leaks.
Make sure the hose connection at the tank is tight, look for corrosion or mineral buildup, and verify steady water flow to the tank without overflow.
Manual flush override: how to trigger a flush by hand
To trigger a Kohler automatic toilet manually, locate the tank access or the actuator arm/button and engage the override mechanism to initiate a flush cycle without power or sensor input.
If present, press and hold the manual flush button or gently pull the actuator arm until the valve opens. Release after the flush starts.
Confirm valve reseats and observe for proper refill and shutoff.
Step-by-Step Diagnostic Process for No-Flush Issues
The technician first determines whether the no-flush condition is intermittent or constant to narrow possible causes.
They then perform simple sensor checks and range tests, listen for fill-valve versus flush-valve sounds, and watch for mechanical movement during activation.
Finally, they inspect the control panel or module for electronic error indicators or fault codes to guide the next repair steps.
Confirm whether the problem is intermittent or constant
Is the no-flush issue happening sporadically or every time the handle is activated?
The technician notes frequency over multiple uses and times of day, logging each success or failure.
Distinguishing intermittent from constant guides diagnosis: intermittent suggests electrical, sensor, or wiring faults; constant points to mechanical blockage, valve failure, or persistent power loss.
Prioritize pattern recognition before component tests.
Test sensor function and range with simple checks
Begin by observing the sensor area and its response from several positions and distances, looking for consistent activation and obvious obstructions.
Next, use a hand or flat object to trigger the sensor at varying angles and heights, noting response time and range.
Record whether activation is reliable, delayed, intermittent, or absent to guide subsequent cleaning, alignment, or replacement steps.
Listen and observe: identifying fill valve vs. flush valve sounds
How can listening and watching pinpoint whether a problem lies with the fill valve or the flush valve?
The technician notes continuous hissing or water trickle after a flush—indicative of a leaking or stuck fill valve.
A solid click or no movement when the flush is triggered suggests flush valve or actuator failure.
Visual cues: rising water level versus stagnant tank components.
Check for electronic error indicators or fault codes
Consult the toilet’s control panel and any LED indicators immediately, since modern Kohler automatic toilets commonly display fault codes or blink patterns that narrow down electrical, sensor, or actuator issues.
Record displayed codes, consult the model-specific manual or Kohler support for meanings, then reset power.
If codes persist, log frequency and conditions before contacting qualified service — flashing patterns aid targeted repairs.
Common Causes and Specific Fixes
Common causes of Kohler automatic toilet failures range from simple power issues to mechanical wear and restricted water flow.
The following section outlines concise fixes: replace dead or weak batteries, clean or realign the sensor, reset or replace a faulty sensor or control module, clear clogged or slow-fill supply lines, and inspect or replace a worn flapper or flush valve seal.
Each remedy includes specific steps and precautions for safe, effective repair.
Dead or weak batteries replacement procedure
Replace the batteries promptly when the Kohler automatic toilet shows intermittent flushing, weak sensor response, or no power; these symptoms typically indicate depleted or failing cells rather than mechanical faults.
Power down, open the battery compartment per model instructions, remove old batteries, inspect for corrosion, install fresh recommended alkaline cells observing polarity, secure the compartment, restore power, and verify automatic flush operation.
Dirty or misaligned sensor cleaning and repositioning steps
Inspect the sensor assembly for dirt, smudges, or misalignment when the toilet fails to detect users reliably or triggers unexpected flushes.
Power off, gently clean lens and surrounding area with a lint-free cloth and isopropyl alcohol.
Realign sensor to factory angle, tighten mounting screws without overtightening, and restore power.
Test detection distance and repeat cleaning or微adjust until reliable operation is restored.
Faulty sensor or control module reset and replacement guidance
If cleaning and realignment do not restore reliable detection, the problem often lies within the sensor electronics or the control module.
Technicians should power-cycle the unit, check connectors for corrosion, and test voltages per manufacturer specs.
Replace the sensor assembly or control module with OEM parts if diagnostics indicate failure.
Recalibrate after replacement and verify flush cycles before completing the repair.
Clogged or slow-fill water supply clearing and restoring flow
Diagnose slow-fill or no-fill conditions by tracing the supply from the shutoff valve to the tank fill assembly, since mineral buildup, debris, or partially closed valves are the most common culprits.
Clear inline strainers, clean or replace the fill valve shank screen, and fully open or service the shutoff valve to restore proper flow.
Inspect supply hose and fittings for kinks, flush the line, and replace corroded parts.
Worn or damaged flapper/flush valve seal inspection and replacement
After ruling out supply-side restrictions, attention shifts to the tank’s seal between bowl and tank: a worn or warped flapper or deteriorated flush valve seat will allow slow leaks that mimic refill problems or cause phantom runs.
Inspect for cracks, warping, mineral buildup, or softening.
Replace the flapper or reseat/replace the valve, ensuring proper model fit and smooth sealing surface before testing for leaks.
Faulty fill valve or float assembly adjustment and swap-out
Examine the fill valve and float assembly next, since improper adjustment or wear commonly causes slow fills, continuous trickles, or noisy refills.
Inspect for mineral buildup, cracked components, or misaligned float. Adjust float height per manufacturer specs, clean or replace clogged valve screens, and swap the entire fill valve assembly if leaking or erratic.
Test multiple flush cycles to confirm proper refill and shutoff.
Wiring or connection issues safe testing and reconnection
Once mechanical causes like the fill valve and float assembly are ruled out, attention should turn to the toilet’s electrical connections.
Loose wires, corroded terminals, or damaged harnesses frequently produce intermittent flushing, sensor failures, or complete power loss.
Power should be disconnected, connectors inspected and cleaned with contact cleaner, damaged wires replaced, and secure, insulated reconnections made.
Test with power restored and confirm reliable cycles.
Detailed How-To Repairs
The section presents step‑by‑step guidance for routine repairs on Kohler automatic toilets, starting with battery pack replacement in common models.
It also covers cleaning and recalibrating the infrared sensor, accessing and replacing the flush valve seal, and swapping the fill valve assembly.
Procedures for resetting or replacing the control module are included to complete the repair set.
How to replace the battery pack in common Kohler models
Several Kohler automatic toilet models use removable battery packs that can be replaced with basic tools and a few minutes of careful work.
Power off the unit, remove access panel or seat per model instructions, unplug pack, and note orientation.
Replace with specified battery type (usually AA or D cells), reconnect, secure the pack and panel, then restore power and verify operation.
How to clean and recalibrate the infrared sensor
Begin by powering down the toilet and locating the infrared sensor assembly at the rim or tank lid, taking care to consult the model’s schematic so components are not disturbed.
Clean the lens with a lint-free cloth and isopropyl alcohol, dry thoroughly.
Reconnect power, enter sensor calibration mode per manual, adjust sensitivity and detection range, test with multiple approaches until reliable, then save settings.
How to access and replace the flush valve seal
Accessing and replacing the flush valve seal requires powering down the unit, isolating the water supply, and removing the tank lid or access panel to expose the valve assembly.
Inspect the seal for cracks or deformation, note orientation, then remove retaining clips or nut.
Replace with a compatible Kohler seal, seat evenly, reassemble components, restore water, and test multiple flushes for proper sealing and leak-free operation.
How to replace the fill valve assembly
Replacing the fill valve assembly on a Kohler automatic toilet requires isolating the water supply, draining the tank, and removing the existing valve before installing a compatible replacement and testing for proper operation.
Disconnect electrical components if present, loosen the locknut beneath the tank, lift out the old valve, seat the new valve with its gasket, tighten the nut, reconnect supply, restore water, and check for leaks and correct fill level.
How to reset or replace the control module
To reset or replace the control module on a Kohler automatic toilet, first power down the unit by disconnecting its electrical supply and, if applicable, removing batteries; this prevents damage and guarantees safety while working.
Then access the module behind the sensor panel, note wiring positions, unplug connectors, remove mounting screws, swap in the new module or press the reset button per manual, reconnect and test.
When to Call a Professional and What to Expect
If the sensor, flush mechanism, or electrical components show persistent failure, water leaks, or safety hazards, a licensed plumber or electrician should be contacted.
Homeowners can expedite service by noting the model number, describing symptoms, listing any recent repairs, and indicating whether the unit is hardwired or battery-powered.
Technicians typically quote common repairs ranging from minor part replacements (30–90 minutes, modest fees) to motor or electrical work (1–3 hours, higher labor and parts costs).
Signs that require professional plumbing or electrical help
Several clear signs indicate when a homeowner should call a professional rather than attempting further DIY fixes: persistent power failures, burning smells or sparking from the control module, repeated malfunctions after multiple repairs, internal leakages behind the wall, or complex electrical wiring issues.
Professionals can diagnose sealed electronics, safely test circuits, replace damaged components, and prevent warranty voiding or safety hazards.
Information to provide the technician for faster service
After identifying signs that require professional intervention—such as persistent power failures, burning smells, or concealed leaks—homeowners should gather specific information to speed diagnosis and repair.
Provide technician with:
- Model and serial number, purchase/installation date, and recent maintenance.
- Description of symptoms, frequency, and any error codes or indicator lights.
- Photos or short video of the unit, surrounding wiring, and plumbing connections.
Typical costs and time estimates for common repairs
Estimate typical costs and turnaround times to set clear expectations before hiring a technician. Common fixes vary: sensor recalibration, valve replacement, motor repair, and full flush assembly swaps. Labor and parts typically determine pricing; emergency visits cost more. Refer to the table for concise averages.
| Repair | Typical time/cost |
|---|---|
| Sensor recalibration | 30–60 min / $75–$150 |
| Fill valve replacement | 45–90 min / $100–$200 |
| Motor/mechanism repair | 60–120 min / $150–$350 |
| Full assembly swap | 90–180 min / $250–$600 |
Preventive Maintenance to Keep a Kohler Automatic Toilet Flushing Reliably
Routine preventive maintenance preserves reliable flushing and extends component life.
This includes scheduled cleaning of the sensor and bowl, following manufacturer guidelines for battery and part replacement intervals, and addressing water quality to minimize mineral buildup.
Clear, timed actions and simple water treatment or softening measures can prevent common failures before they occur.
Regular cleaning schedule for sensor and bowl
A consistent cleaning schedule for the sensor and bowl prevents common issues that disrupt a Kohler automatic toilet’s performance.
Clean the sensor weekly with a soft cloth and mild, non‑abrasive cleaner to remove grime and water spots.
Scrub the bowl and rim twice weekly, focusing on mineral deposits and biofilm.
Rinse thoroughly and inspect sensor alignment after cleaning.
Recommended battery and component replacement intervals
Most Kohler automatic toilets benefit from proactive replacement of batteries and wear parts on a predictable schedule to avoid interruptions.
Replace alkaline batteries every 12–18 months under normal use; choose fresh, quality cells.
Inspect and replace rubber seals, flappers, and fill valve diaphragms every 2–3 years or sooner if wear appears.
Keep a small parts kit and log replacement dates for reliable operation.
Water quality tips to reduce mineral buildup
Monitor and manage incoming water quality to minimize mineral buildup that can impair sensors, valves, and seals in Kohler automatic toilets.
Use a basic water test to detect hardness and pH. Install a water softener or point‑of‑use filter if hardness exceeds recommended levels.
Flush and inspect supply lines periodically, and use mild descalers on affected components following manufacturer guidance to prevent damage.
Troubleshooting Checklist You Can Print or Save
A concise, printable troubleshooting checklist guides the reader from quick inspections to repair actions and includes contact and parts references for Kohler models.
- Quick checks: power, sensor, and water supply.
- Intermediate steps: reset, clean sensor, inspect seals.
- Repairs & references: model-specific parts list and Kohler contact info.
Stepwise checklist from quick checks to repairs
This stepwise troubleshooting checklist guides users from quick visual and operational checks through targeted adjustments to full component repairs, organized so a technician or homeowner can follow escalating actions until the flush issue is resolved.
Inspect power and sensor, clean sensor and bowl rim, verify water supply and fill level, test manual flush, tighten or replace valves, inspect wiring and solenoid, replace worn seals or circuit board as needed.
Contact and spare-parts reference for Kohler models
Several reliable contact points and a concise spare-parts list help technicians and homeowners quickly source replacements and expert support for Kohler automatic-toilet models.
Recommended contacts: Kohler customer service, authorized dealers, certified plumbers, and local parts distributors.
Essential spare parts: sensor assemblies, control modules, solenoids, flappers, fill valves, gaskets, and mounting hardware.
Include model numbers, purchase links, warranty info, and part diagrams for fast ordering.
Model-Specific Notes for Popular Kohler Automatic Toilets
The article next compares model-specific features affecting automatic flushing performance, starting with common differences between the Kohler Veil and Karinga series.
It then notes special considerations for older Kohler sensor models, including altered sensor ranges and mounting variations.
Finally, it flags discontinued parts that may require cross-referencing or aftermarket substitutions.
Kohler Veil and Karinga series common differences
Although both are premium Kohler automatic-toilet lines, Veil and Karinga differ in bowl shape, actuator placement, and electronic control layouts, which affect sensor positioning, replacement parts compatibility, and installation clearances.
Technicians should note Veil’s sleeker profile and integrated actuator versus Karinga’s more modular assembly.
Service steps, mounting brackets, and wiring harness routes often vary, so verify model-specific diagrams before ordering parts.
Notes for older Kohler sensor models and discontinued parts
When servicing older Kohler sensor toilets, technicians should be aware that legacy modules, specific sensors, and bespoke mounting hardware have been phased out or revised. This requires careful model verification before ordering replacements.
Parts lists, serial numbers, and manufacturing dates help identify compatible substitutes or retrofit kits.
OEM cross-reference charts, supplier inventory checks, and cautious adaptation reduce installation errors and preserve warranty eligibility.
Additional Tips and Common Mistakes to Avoid
Common repeat failures often stem from skipped diagnostics, improper reassembly, or using incorrect replacement parts.
The article highlights simple checks that prevent recurrence and recommends when to stop and call a professional.
It also outlines safe DIY practices—power isolation, correct tools, and manufacturer-approved parts—to minimize injury and further damage.
Mistakes that cause repeat failures
Several recurring mistakes lead to repeat failures with Kohler automatic toilets, and recognizing them prevents wasted time and recurring service calls.
Common errors include using incorrect replacement parts, skipping diagnostic steps, neglecting sensor alignment, over-tightening fittings, and ignoring water supply contaminants.
DIYers often fail to update firmware or consult schematics. Addressing these prevents repeated malfunctions and unnecessary technician visits.
Best practices for safe DIY repairs
Building on an understanding of frequent pitfalls, adopting safe DIY practices minimizes risk to the fixture and the person performing repairs.
Technicians should turn off water and power, use correct replacement parts, consult manuals, and wear gloves and eye protection.
Test repairs incrementally, avoid overtightening fittings, document steps, and call a professional when unsure to prevent damage and recurring faults.
Conclusion
After consulting sensors, batteries, valves and manuals, the Kohler automatic toilet still refuses to perform on cue — as if plumbing has developed a flair for drama. Despite clear instructions and predictable fixes, the bowl sometimes prefers mystery over mechanics. Homeowners can sigh, tighten a few fittings, swap a battery, and watch function resume, proving that even modern convenience occasionally needs old-fashioned persistence — and a quiet appreciation for minor domestic theatrics.
